KVM
Overview
Morpheus KVM is a powerful, cheaper alternative to virtualization compared with other hypervisor offerings. It is also very capable of setting up complex shared storage and multiple networks across many hosts. This guide goes over the process for onboarding brownfield KVM clusters. When onboarded, KVM clusters are associated with the chosen Cloud and can then be selected as provisioning targets using existing Instance types and automation routines. In this example, baremetal KVM hosts are added to a Morpheus-type Cloud but similar combinations can be made with other Cloud types.
Requirements
When onboarding KVM clusters, the user must ensure the correct packages are installed. The required packages are listed below:
kvm
libvirt
virt-manager
virt-install
qemu-kvm-rhev
genisoimage
Additionally, Morpheus will attempt to add a new network switch called ‘morpheus’ and storage pool when onboarding a brownfield KVM cluster. Morpheus detects that virsh is installed and, when present, it will treat it as a brownfield KVM host. Brownfield KVM hosts must have:
libvirt and virsh installed
A pool called morpheus-images defined as an image cache and ideally separate from the main datastore
A pool called morpheus-cloud-init defined which stores small disk images for bootup (this pool can be small)
Note
Morpheus uses a “morpheus-images” pool which is separate from the main datastore. This is a host-local image cache which facilitates faster clone operations. The cache will automatically purge images once the allocation reaches 80% to avoid filling completely. Once it is 80% full, the oldest accessed volumes in the cache will be deleted first until the cache is under 50% full once again.
Creating the Cloud
Morpheus doesn’t include a KVM-specific Cloud type. Instead, other Cloud types (either pre-existing or newly created) are used and KVM clusters are associated with the Cloud when they are onboarded or created by Morpheus. For example, a generic Morpheus-type Cloud could be created to associate with baremetal KVM clusters. Similarly, brownfield VMware KVM hosts could be onboarded into an existing VMware vCenter Cloud. Other combinations are possible as well. In the example in this section, a Morpheus Cloud will be created and KVM hosts will be associated with it to become Morpheus provisioning targets.
A Morpheus-type cloud is a generic Cloud construct that isn’t designed to hook into a specific public or private cloud (such as VMware or Amazon AWS). Before onboarding an existing KVM host or creating one via Morpheus UI tools, create the Cloud:
Navigate to Infrastructure > Clouds
Click + ADD
Select the Morpheus Cloud type and click NEXT
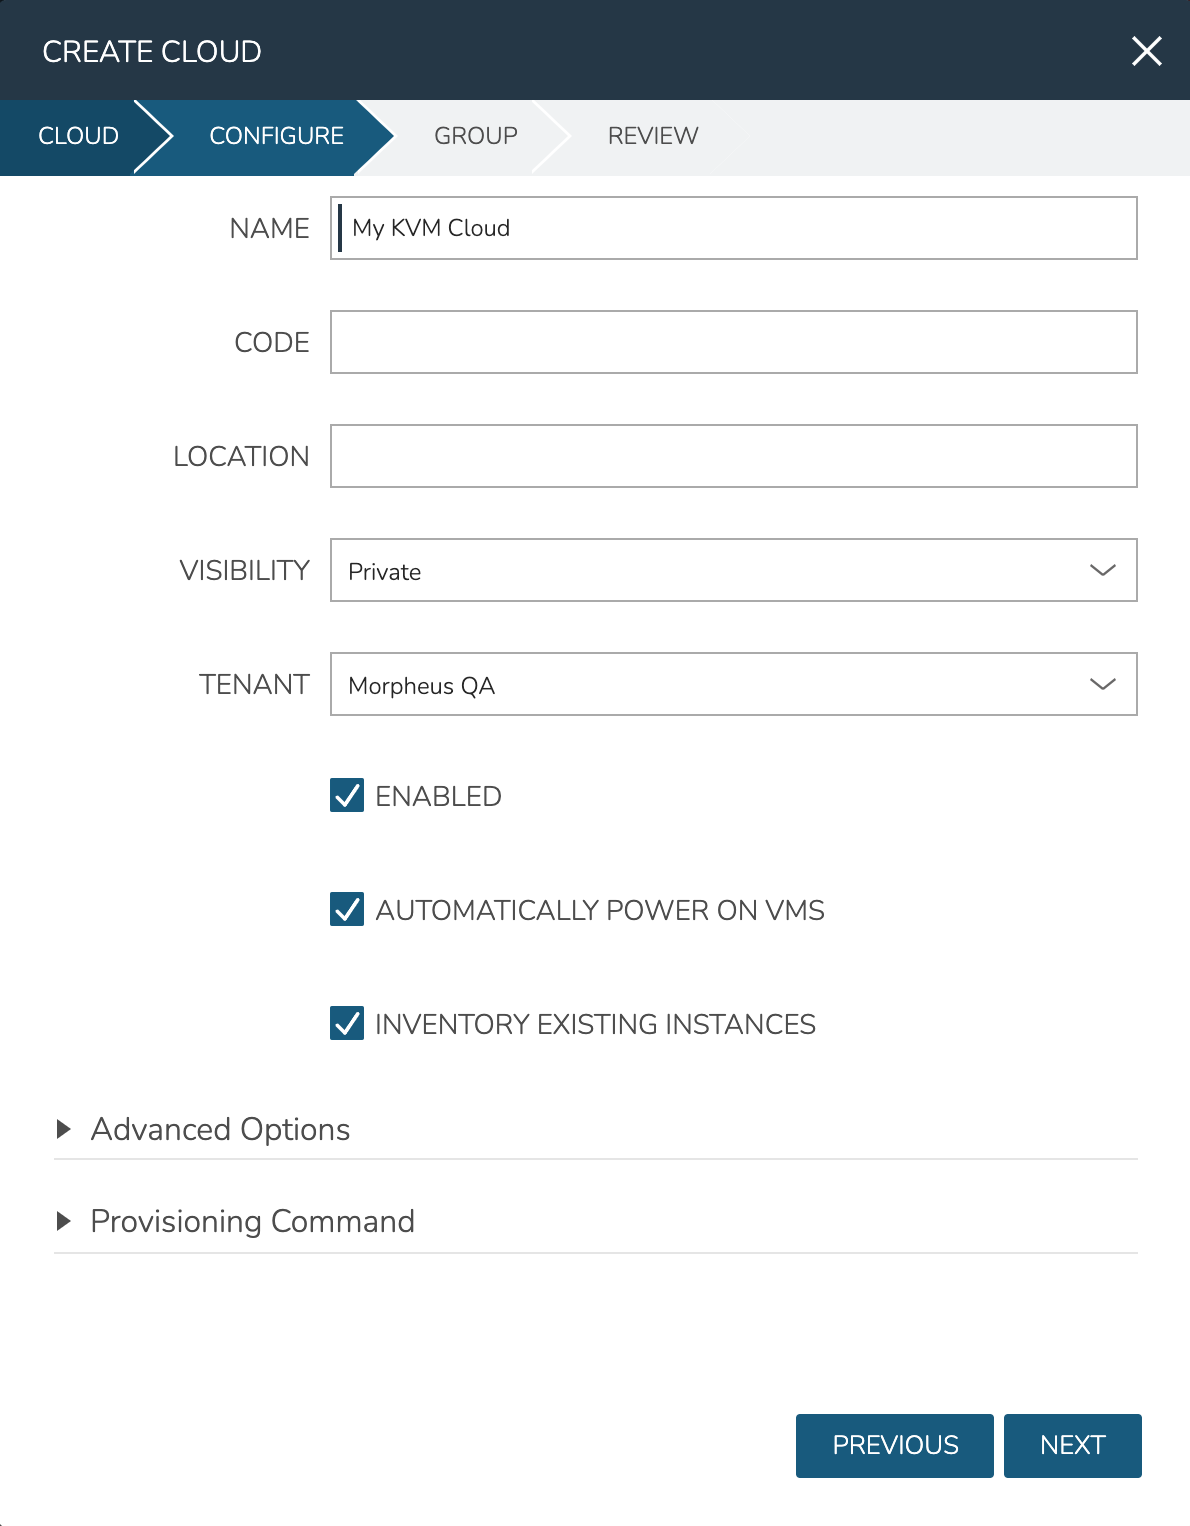
On the Configure tab, provide:
NAME: A name for the new Cloud
VISIBILITY: Clouds with Public visibility will be accessible in other Tenants (if your appliance is configured for multitenancy)
Automatically Power On VMs: Mark this box for Morpheus to handle the power state of VMs
Inventory Existing Instances: If marked, Morpheus will automatically onboard VMs from any KVM hosts associated with this Cloud
On the Group tab, create a new Group or associate this Cloud with an existing Group. Click NEXT
After reviewing your configuration, click COMPLETE
Onboard an Existing KVM Cluster
Begin onboarding your KVM cluster from the Clusters list page (Infrastructure > Clusters). Click + ADD CLUSTER and select the option for “KVM CLUSTER”. From the GROUP tab, select a Group containing the Cloud you wish to use, then click NEXT. From the NAME tab, select at least the Cloud and provide a name for the Cluster. The other options on this tab are optional and are for categorization and labeling purposes. After setting the name and Cloud, click NEXT
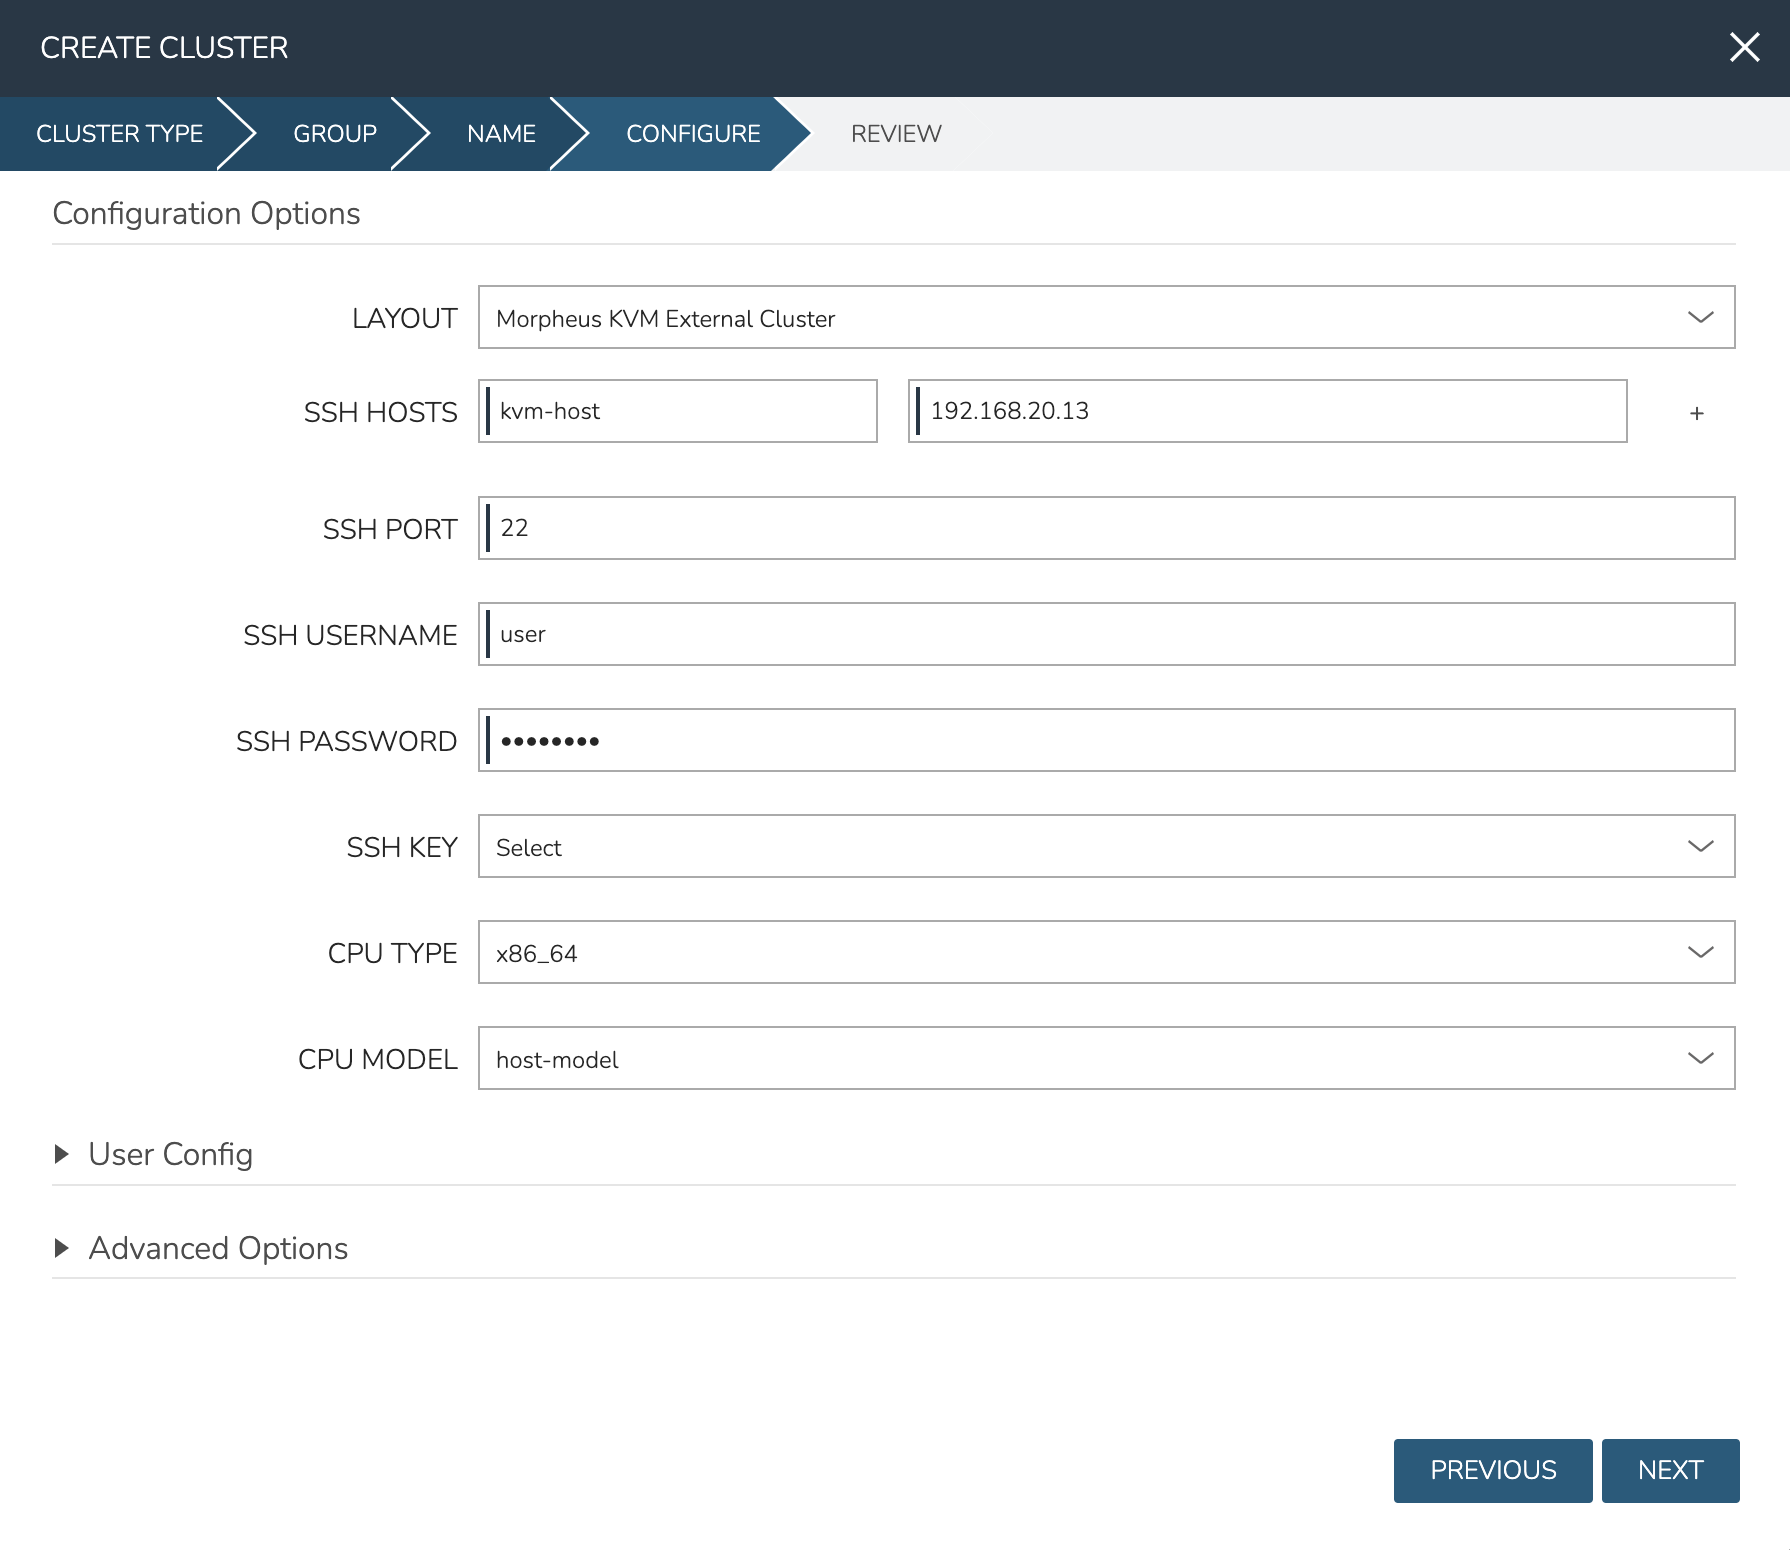
On the CONFIGURE tab, there is currently only one LAYOUT option, which is to bring in your brownfield external KVM Cluster. Provide a name and IP address for each host in the cluster. The name here is simply a friendly name for display in Morpheus but often the hostname works well here. Use the plus (+) button to add as many additional host fields as you need. Moving on, you can update the default SSH port from the default of 22 if needed in your environment. Next, provide an SSH username and password, use a regular user with sudo access. Then, select a pre-existing SSH key stored in Morpheus. For the CPU TYPE, currently only x86_64 is supported and is pre-selected by default. Finally, for CPU model, we surface the entire database of model configurations from libvirt. If unsure or if you don’t know of a specific reason to choose one or the other, select host-model which is the default option. When finished, click NEXT and COMPLETE.
The new KVM Cluster will join the list of Clusters that may already exist on your Clusters list page. From here you can drill into the Cluster detail page for monitoring and day-two actions. Continue on to the next section for details on provisioning new workloads to your KVM Cluster.
Provisioning to KVM
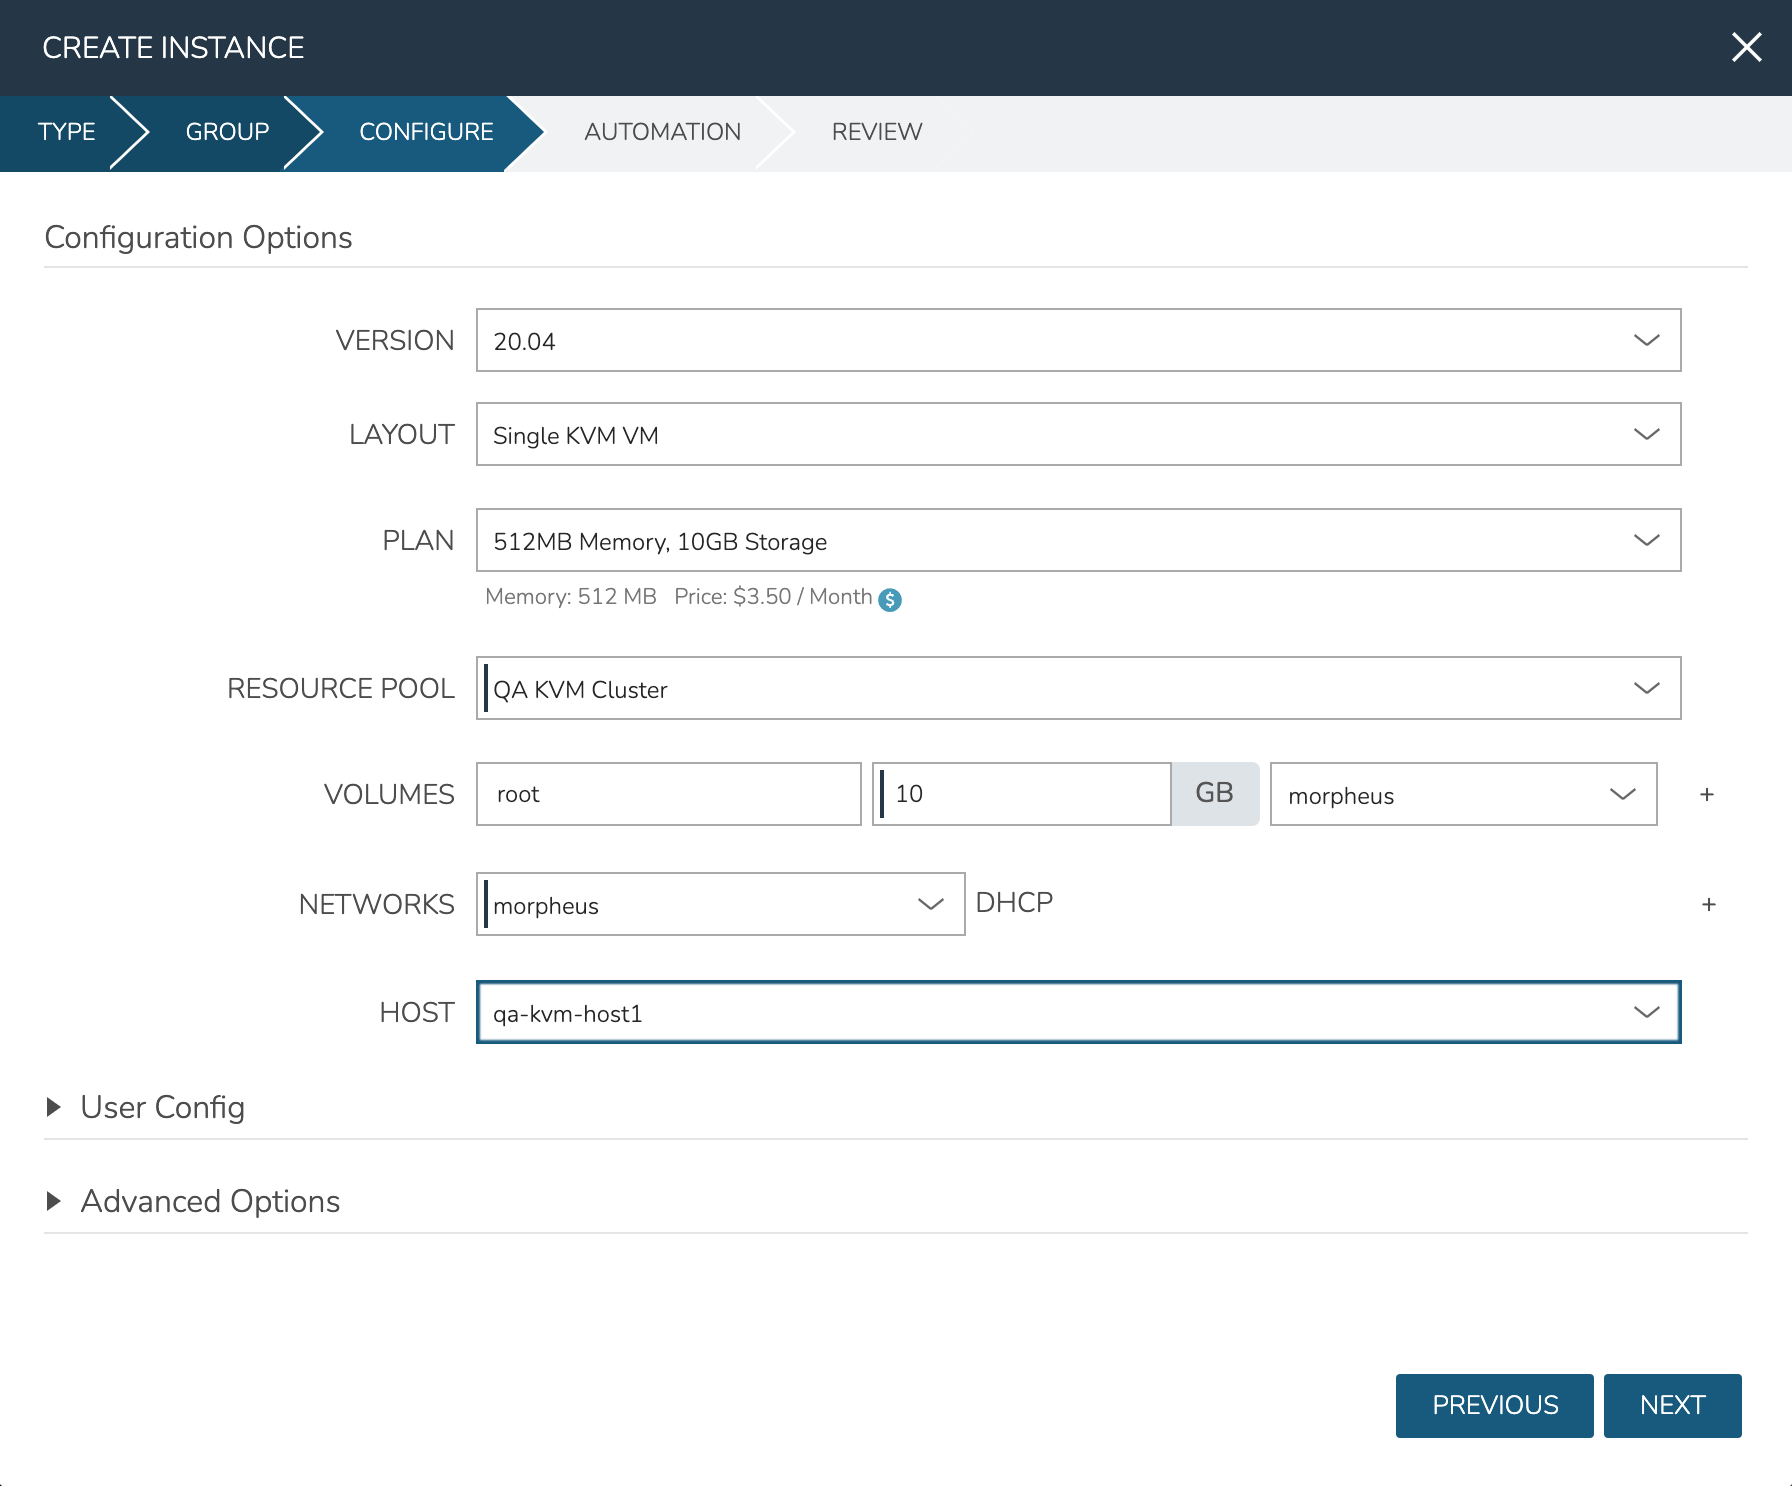
With the Cloud and hosts available, users can now provision to the KVM host using custom Instance Types and automation routines built in the Morpheus library. To provision a new Instance, navigate to Provisioning > Instances and click + ADD. Select the Instance Type to provision, and click NEXT. Choose a Group that the KVM Cloud lives in and select the Cloud. Provide a name for the new Instance if a naming policy doesn’t already give it a name under current configurations. Click NEXT to advance to the Configuration tab. The fields here will differ based on the Instance Type and Layout used but in the example case, selections have been made for:
Layout: Single KVM VM
Resource Pool: The selected KVM cluster
Volumes: Configure the needed volumes and the associated datastore for each
Networks: The KVM network the VM(s) should belong to
Host: The selected host the VM(s) should be provisioned onto
Complete the remaining steps to the provisioning wizard and the new KVM Instance will be created.
Adding VLANs to Morpheus KVM Hosts (CentOS)
Getting Started
This guide will go over how to configure VLANs on a Morpheus KVM Host. To get started, the first step is to go ahead and add the KVM host to morpheus and allow morpheus to configure it just like any other kvm host. When provisioning a manual kvm host be sure to enter the proper network interface name for the management network (not the trunk port). For example eno2 could be a management network while eno1 could be the trunk port network that the VLAN’s are going to be on as in this example.
Setting up a VLAN Interface
Before a VLAN can be used by KVM, an interface definition must first be configured for said vlan. In CentOS this is done by defining a network script in /etc/sysconfig/network-scripts.
Note
It is highly recommended that NM_CONTROLLED is set to NO or NetworkManager is disabled entirely as it tends to get in the way.
If our trunk network is called eno1 we need to make a new script for each VLAN ID we would like to bridge onto. In our example we are going to look at VLAN 211. To do this we need to make a new script called ifcfg-eno1.211 (note the VLAN Id is a suffix to the script name after a period as this is conventional and required).
TYPE=Ethernet
PROXY_METHOD=none
BROWSER_ONLY=no
BOOTPROTO=none
NAME=eno1.211
DEVICE=eno1.211
ONBOOT=yes
NM_CONTROLLED=no
VLAN=yes DEVICETYPE=ovs
OVS_BRIDGE=br211
There are a few important things to note about this script. Firstly there is a flag called VLAN=yes that enables the kernel tagging of the VLAN. Secondly we have defined an OVS_BRIDGE name. Morpheus utilizes openvswitch for its networking which is a very powerful tool used even by Openstack’s Neutron. It supports not just VLANs but VxLAN interfacing.
The OVS_BRIDGE name means we also need to define a bridge port script called br211 by making a script called ifcfg-br211:
DEVICE=br211
ONBOOT=yes
DEVICETYPE=ovs
TYPE=OVSBridge
NM_CONTROLLED=no
BOOTPROTO=none
HOTPLUG=no
These configurations will enable persistence on these interfaces so that a reboot of the host will retain connectivity to the bridges. Next up, the interfaces need to be brought online. This can be done by restarting all network services but if a typo is made networking could be stuck disabled and access over SSH could be broken. To do this by interface simply run:
ifup eno1.211
ifup br211
ovs-vsctl
add-br br211
Defining a LibVirt Network
Now that the bridge interface is defined properly for OVS, it must be defined in LibVirt so that Morpheus will detect the network and KVM can use it properly. By convention, these resource configurations are stored in /var/morpheus/kvm/config.
An XML definition must be created to properly define the network. In this case the network is named public 185.3.48.0.xml:
<network>
<name>public 185.3.48.0</name>
<forward mode="bridge"/>
<bridge name="br211"/>
<virtualport type="openvswitch"/>
</network>
This configuration defines the network name that will be synced into morpheus for selection as well as the type of interface being used (in this case a bridge to the br211 interface over openvswitch).
Now that this xml specification is defined it must be registered with libvirt via the virsh commands:
virsh net-define "public 185.3.48.0.xml"
virsh net-autostart "public 185.3.48.0"
virsh net-start "public 185.3.48.0"
Once this is completed, simply refresh the cloud in morpheus and wait for the network to sync into the networks list. Once the network is synced make sure the appropriate settings are applied to it within Morpheus. This includes setting the CIDR, Gateway, Nameservers and if using IP Address Management, the IPAM Pool.