Networks
Infrastructure > Network > Networks
Overview
The Networks section is for configuring networks across all clouds in Morpheus. Existing networks from Clouds added in Morpheus will auto-populate in the Networks section.
Networks can be configured for DHCP or Static IP assignment, assigned IP pools, and configured for visibility and account assignment for multi-tenancy usage. Inactive Networks are unavailable for provisioning use. In addition, Morpheus allows administrators to restrict management of Morpheus-created Networks through Role permissions.
Configuring Networks
DHCP
To configure a network for DHCP:
Navigate to Infrastructure > Network > Networks
Search for the target network
Edit the Network by either:
Select Actions > Edit
Select the Network, then select Edit
In the Network Config modal, set the DHCP flag as Active (default)
Save Changes
Important
The DHCP flag tells Morpheus this network has a DHCP server assigning IP Addresses to hosts. Morpheus does not act as the DHCP server, and provisioning to a network that has the DHCP server flag active in Morpheus , but no DHCP server actually on the network will in most cases cause the instance to not receive an IP address.
Note
When selecting a network with DHCP enabled during provisioning, “DHCP” will populate to the right of the selected network:
Static and IP Pools
To configure a network for Static IP Assignment:
Navigate to Infrastructure > Network > Networks
Search for the target network
Edit the Network by either:
Select Actions > Edit
Select the Network, then select Edit
In the Network Config modal, add the following:
Gateway
DNS Primary
DNS Secondary
CIDR ex 10.10.10.0/22
VLAN ID (if necessary)
Network Pool * Leave as “choose a pool” for entering a static IP while provisioning * Select a Pool to use a pre-configured Morpheus or IPAM Integration IP Pool
The Permissions settings are used for Multi-Tenant resource configuration
Leave settings as default if used in a single-tenant environment (only one Tenant in your Morpheus appliance)
To share this network across all accounts in a multi-tenant environment, select the Master Tenant and set the Visibility to Public
To assign this network to be used by only one account in a multi-tenant environment, select the account and set visibility to Private
Active
Leave as enabled to use this network
Disable the active flag to remove this network from available network options
Save Changes
Note
When selecting a network with DHCP disabled and no IP Pool assigned during provisioning, an IP entry field will populate to the right of the selected network(s):
Note
When selecting a network with an IP Pool assigned during provisioning, the name of the IP pool will populate to the right of the selected network(s). IP Pools override DHCP.
Advanced Options (Scan Network)
When adding or editing a network there is an option to scan network. If checked scan network will ping the IP’s in the network range, and if ping is successful Morpheus will quickly check for listening ports on the IP.
Important
Network scanning may cause network monitoring or other alerts
Advanced Options (Search Domains)
Search domains are appended to DNS searches when a non fully qualified domain name (short name) is queried. Search domains can be entered as comma separated values, which will be added to DNS configurations, such as /etc/resolv.conf These domains are injected via cloud-init or other method chosen for the virtual image.
Guest Console SSH Tunnel
In some scenarios, instances that are segregated from the Morpheus appliance by port restrictions, or other mechanisms, can cause difficulties to access the guest console via the Morpheus web UI. Guest Console SSH Tunnel settings allow the administrator to configure a jump host’s settings that is dual-homed, accessible by Morpheus but also resides on the segregated network. When the guest console is configured with the SSH protocol, the traffic will be routed to the jump host, which will then relay to the target instance.
- GUEST CONSOLE JUMP HOST
DNS hostname or IP of the jump host to relay the traffic
- GUEST CONSOLE JUMP PORT
Port override, if different than 22 for SSH
- GUEST CONSOLE JUMP USERNAME
Username used to authenticate to the jump host
- GUEST CONSOLE JUMP PASSWORD
Password that is used with the username to autenticate to the jump host
- GUEST CONSOLE KEYPAIR
Keypair saved in Morpheus to be used in lieu of, or in addition to, the password to the jump host, which is associated with the configured username Keypairs can be imported at: Infrastructure > Trust > Key Pairs
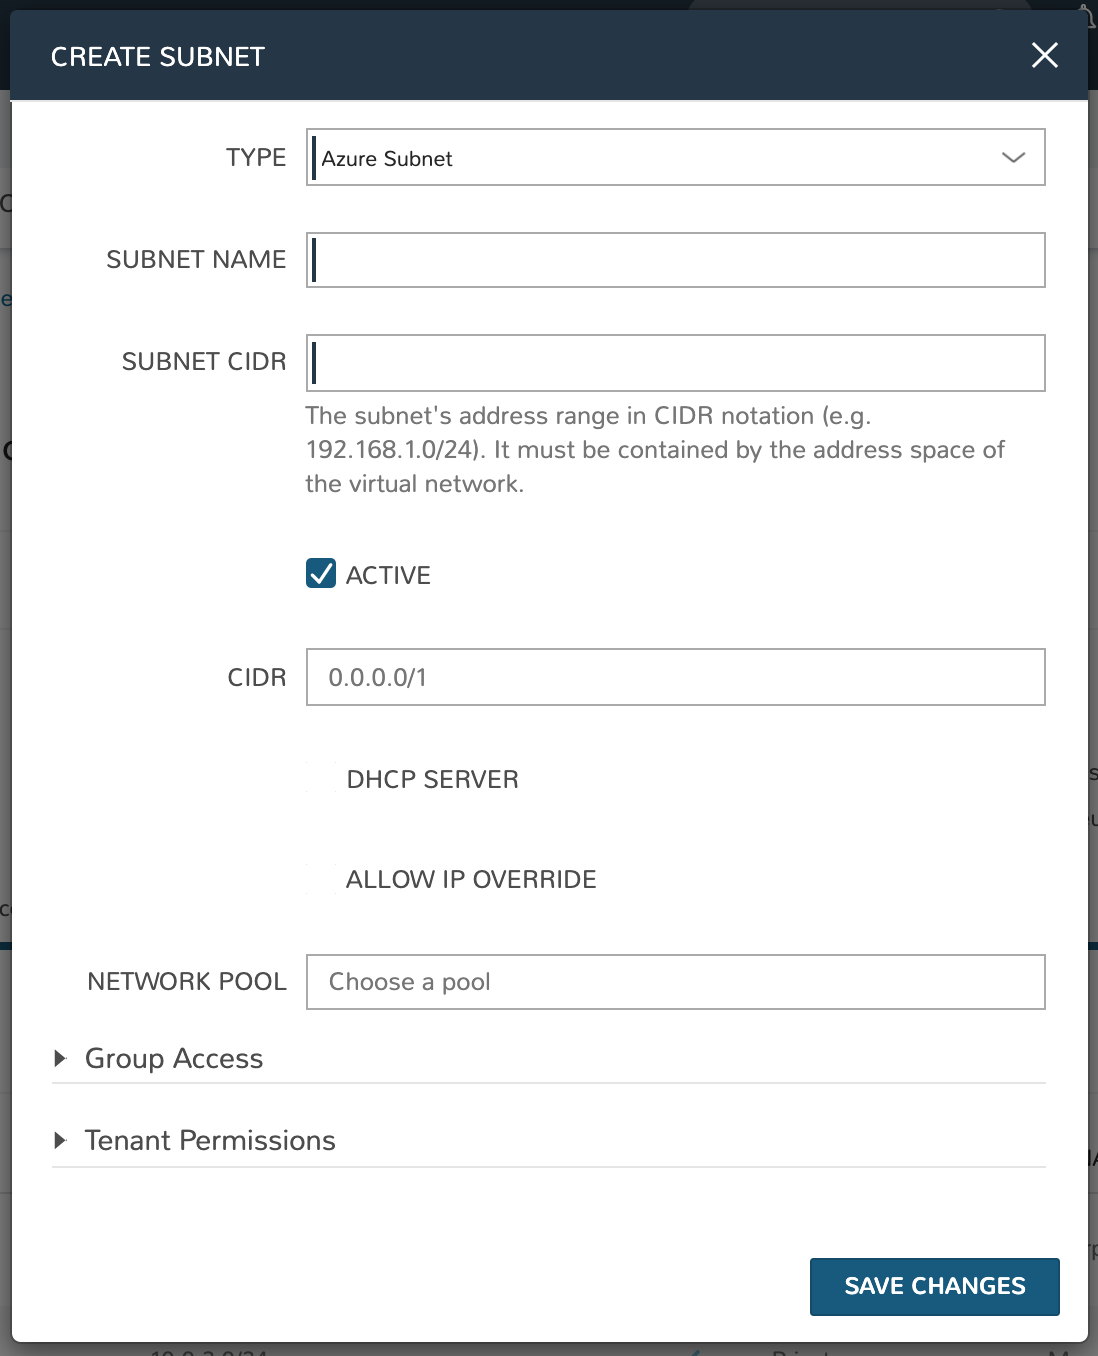
Subnets
Subnet details can be viewed from the SUBNETS tab on the detail page of a specific network. From the SUBNETS tab, Morpheus allows the user to search and edit existing subnets.
In an Azure VNet, you can also create new subnets with the +ADD button.