Clouds
Overview
Clouds are integrations or connections to public, private, hybrid clouds, or bare metal servers. Clouds can belong to many groups and contain many hosts. The clouds view includes clouds status, statistics, tenant assignment, and provides the option to add, edit, delete new clouds. Morpheus supports most Public Clouds and Private Clouds.
Supported Cloud Types
Alibaba Cloud
Amazon
Azure (Public)
Azure Stack (Private)
Canonical MaaS
Cloud Foundry
Dell (Cloud type for PXE and manually added Dell EMC Hosts)
DigitalOcean
Google Cloud
HPE (Cloud type for PXE and manually added HPE Hosts)
HPE OneView
Huawei
Hyper-V
IBM Cloud
IBM Cloud Platform
Kubernetes
MacStadium
Morpheus (Generic Cloud type for PXE/Bare Metal and manually added Hosts)
Nutanix
Open Telekom Cloud
OpenStack
Oracle Public Cloud
Oracle VM
Platform 9
SCVMM
Supermicro (Cloud type for PXE and manually added Supermicro Hosts)
UCS
UpCloud
vCloud Air (OVH)
VMWare ESXi
VMware Fusion
VMWare on AWS
VMware vCenter
VMware vCloud Director
XenServer
Information on each cloud type can be found in the Guides section.
Creating Clouds
Clouds can be added from Infrastructure > Clouds or in Infrastructure > Groups > (select Group) > Clouds. Individual Guides for adding specific Cloud Types can be found in the Guides section.
Cloud Detail View
The Cloud Detail view shows metrics on health, sync status, current month costs, average monthly costs, resource utilization statistics, and resource counts for Container Hosts, Hypervisors, Bare Metal, Virtual Machines, and Unmanaged resources.
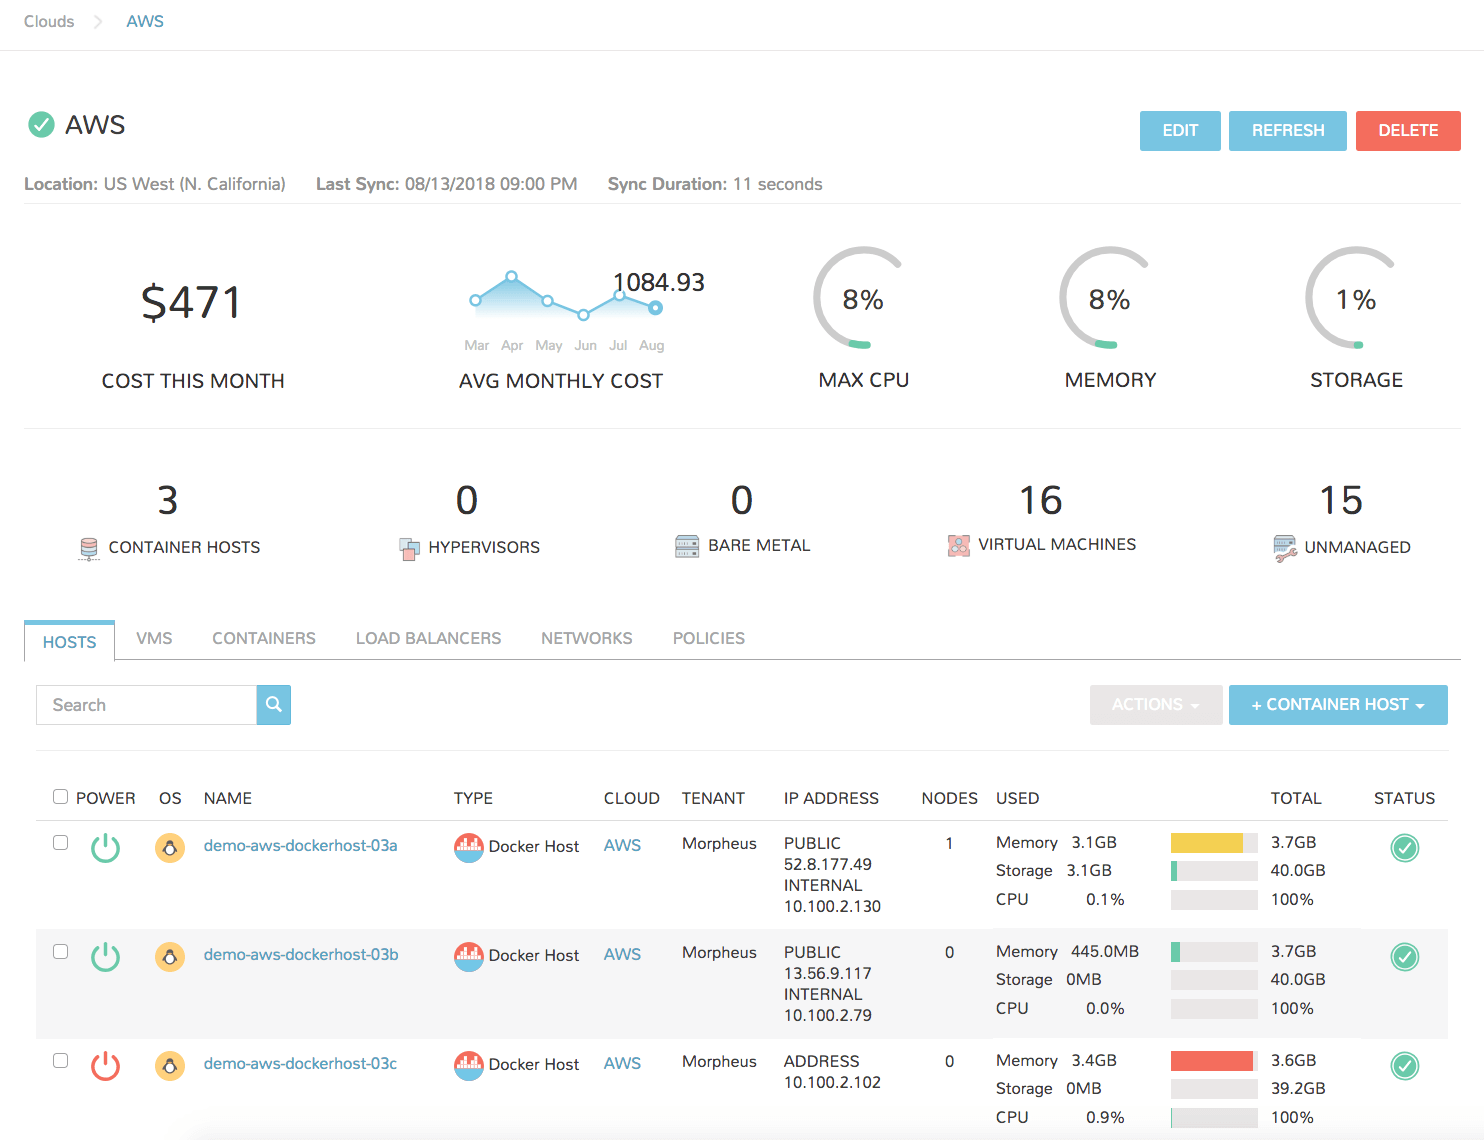
To view the Cloud List View, select the name of a Cloud to display the clouds Detail View.
- EDIT
Edit the setup configuration of the Cloud.
- REFRESH
Force a sync with the Cloud. Depending on the Cloud, choose to force a standard Cloud sync (occurs every five minutes by default) or a nightly sync. When syncing Costing data, Morpheus will force a pull of costing data for your specified period. If opting to “rebuild” the costing data, Morpheus will delete all costing data from the Cloud for that period and attempt to rebuild the data by calling the Cloud API.
- DELETE
Delete the Cloud from Morpheus
Important
All Instances and managed Hosts and VM’s associated with the Cloud must be removed prior to deleting a cloud.
Cloud Detail Tabs
Note
Not all tabs are available for all Cloud Types.
- Clusters
The Clusters tab displays clusters provisioned into the Cloud being viewed, including their status, type, name, layout, workers, and compute, memory, and storage stats. You can add a cluster by clicking ADD CLUSTER.
- Hosts
The Hosts tab displays available hosts in the Cloud and displays power, OS, name, type, cloud, IP address, nodes, disk space, memory, and status. You can add a resource by clicking ADD RESOURCE, add a hypervisor host by clicking ADD HYPERVISOR, or perform action an action by selecting one or more Hosts and clicking ACTIONS.
- VMs
Displays an inventory of existing Instances in your Cloud configuration and provides details such as power, OS, name, type, cloud, IP address, nodes, disk space, memory, and status.
- Bare Metal
Setup PXE Boot in the Boot section to add bare metal servers. Once set up you can view information such as power, OS, name, type, cloud, IP address, nodes, disk space, memory, and status.
- Security Groups
The Security Groups tab displays a list of existing security groups in the cloud. You can add a security group to this cloud by clicking EDIT SECURITY GROUPS.
- Load Balancers
The load balancers tab panel displays available load balancers in the cloud including the name, description, type, cloud and host. You can add a load balancer from this tab by clicking ADD LOAD BALANCER.
- Networks
Displays Networks synced or added to the Cloud, including their name, type, CIDR, pool, DHCP status, visibility and targeted Tenant.
- Data Stores
Displays Datastores synced or added to the Cloud, including their name, type, capacity, online status, visibility, and targeted Tenant.
- Resources
Displays Resource Pools synced from the Cloud, including their name, description, and targeted Tenant.
- Policies
Manages Policies enforced on the Cloud. Setting a policy on this tab is equal to creating a policy in Administration > Policies and scoping it to the selected Cloud.
- Profiles
Manages Terraform, Key/Value Profiles that create custom object associated secrets and metadata that will automatically be mapped per Cloud selection during provisioning and automation.
Deleting Clouds
To delete a cloud:
Select the Infrastructure link in the navigation bar.
Select the Clouds link in the sub navigation bar.
Click the Delete icon of the cloud to delete.
Important
All Instances, managed Hosts and VMs must be removed prior to deleting a Cloud. To remove Instances, hosts and VMs from Morpheus without deleting the Cloud resources they represent, select Delete on the host or VM, unselect “Remove Infrastructure”, and select “Remove Associated Instances” if Instance are associated with the selected Hosts or VMs.
Cloud Profiles
Role Permissions
Access to Profiles tab is determined by the following role permissions:
- Role: Feature Access:
Admin: Profiles None: Cannot access Profiles tab or create/view/edit/delete profiles
Read: Can access Profiles tab, can view profiles, cannot create/edit/delete profiles
Full: Can access Profiles tab, can create/view/edit/delete profiles
Terraform Profiles
Terraform Profiles allow creation of Cloud-associated tfvars secrets, allowing tf apps and specs to be provisioned across multiple clouds that required different tfvars.
Target Cloud Terraform Profiles are automatically mapped to tf apps/specs during provisioning, no manual scoping is required.
Terraform Profiles are encrypted in Cypher and creating a profile creates a Cypher entry with key tfvars/profile/cloud/$cloudCode/variables`
Terraform Profiles can be edited after creation
Terraform Profiles are limited to one per Cloud, once one is created for the Cloud the option to create a Terraform Profile is no longer present. Edit the existing Terraform Profile to make changes at that point
Important
Since Morpheus mounts Terraform Profiles in Cypher using a mount point which contains the Cloud code value, any Clouds which have the same code will share a Terraform Profile. Create or edit Clouds to have a unique code value if they should have a unique Terraform Profile. It’s also important to understand that Morpheus does not require Clouds have a code at creation time. When Clouds are created without a code, Morpheus applies a generic non-unique code based on the Cloud type (“amazon” for AWS Clouds, as an example). This sets up a potential situation where all Clouds of the same type have the same generic Cloud code and thus share a Terraform Profile. To avoid this situation, enter a Cloud code value at creation time or edit existing Clouds to have a unique code.
Create a Terraform Profile
Navigate to Infrastructure > Clouds and select a Cloud
Select the “Profiles” tab
Select + ADD PROFILE
Select Terraform Profile Type
Enter tfvars in the Terraform Profile Variables field
example Terraform Profile Variables
access_key="****acccessKey****"
secret_key="********secretKey**********"
region="us-west-1"
Select SAVE CHANGES
Now, when provisioning a Terraform Instance or App to the Cloud the profile was created in, the tfvars in the profile become available to Terraform. It is not necessary to manually tie this tfvars files to your App Blueprint, these tfvars will automatically be available to Terraform whenever you provision an App to this cloud.
Key/Value Store Profiles
Key/Value Profiles (Key/Value Store) expand provisioning, automation, billing and reporting capabilities by allowing dynamic custom object specific metadata in provisioning and automation mappings
Key/Value Profile entries are available using
<%=cloud.profile.key%>Terraform Profiles are limited to one Profile per Cloud, however multiple key/value pairs can be added to a single profile
Create a Key/Value Profile
Navigate to
/infrastructure/clouds/and select a CloudSelect the
ProfilestabSelect + ADD PROFILE
Select Key/Value Profile Type
Enter key/value entries, selecting + to add additional entries
Select SAVE CHANGES