Infoblox
Features
Network Pools synchronization
DNS Zone & Zone record synchronization
Host Record synchronization
Total & Free IP status bar for networks
Network Grid and List view with IP Status and records, date and user tracking
Automatic and manual IP Reservations, DNS A/PTR record creation and deletion
Use script variables like <%= variableX %> for evaluation of the key data in extended attributes
Adding Infoblox Integration
Note
Making full use of the Morpheus Infoblox integration requires credentials for an Infoblox user account with API access granted, access to list the pools and zones you wish to work with, and rights to create and destroy records. See Infoblox documentation for more information on user rights administration in that product.
Navigate to
Infrastructure - Network - IntegrationsSelect + ADD > IPAM > Infoblox
Enter the following:
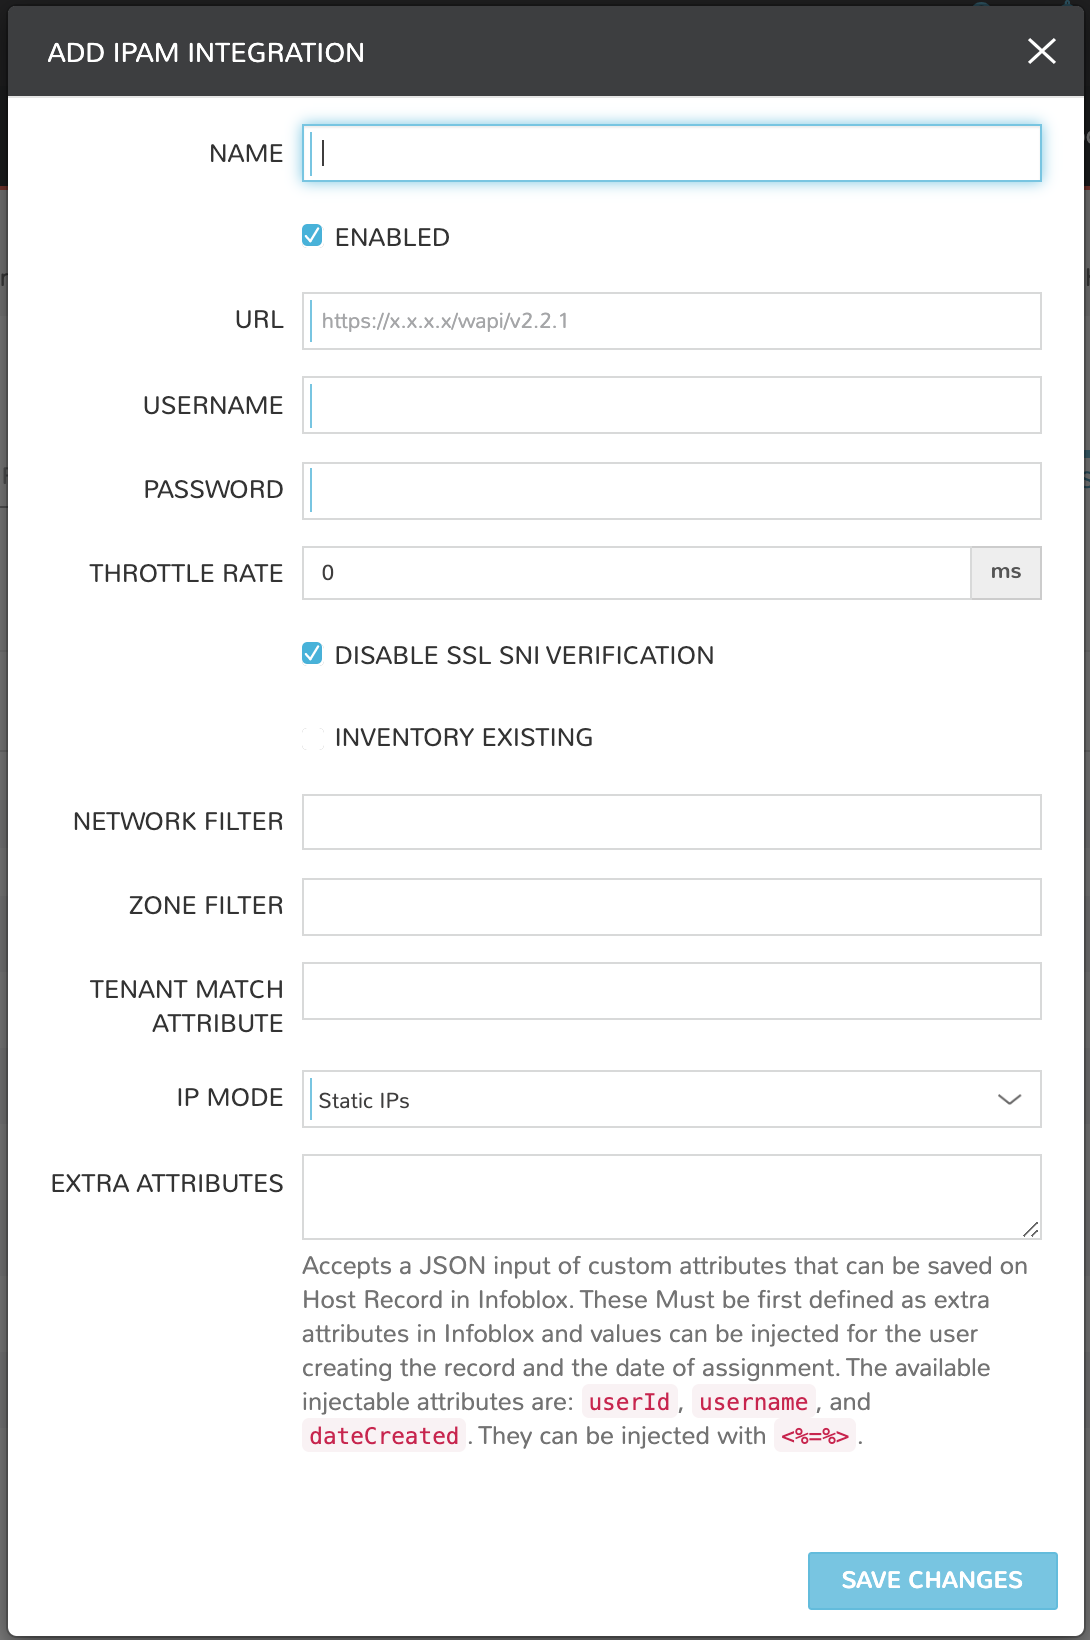
- NAME
Name of the Integration in Morpheus
- Enabled
Deselect to disable the Integration
- URL
Infoblox wapi url. Example: https://x.x.x.x/wapi/v2.2.1
Tip
The Infoblox wapi version can be found at https://x.x.x.x/wapidoc/
- USERNAME
Infoblox user username
- PASSWORD
Infoblox user password
- THROTTLE RATE
In milliseconds (ms)
- DISABLE SSL SNI VERIFICATION
Leave selected to disable SSL SNI Verification
- INVENTORY EXISTING
Mark this option to inventory existing network pools from Infoblox
- NETWORK FILTER
Filter which networks are synced into Morpheus. Example: Network Filter:
network_view=default&*Building=work- ZONE FILTER
Filter terms for Zone Records
- TENANT MATCH ATTRIBUTE
This can be set to the name of the extended attribute in Infoblox where Morpheus will check for the id of a morpheus tenant. This allows for setting the tenant’s Morpheus id to an extended attribute field on a network view or network in Infoblox, and when the network or view is discovered by morpheus, it will be auto assigned to the right tenant.
- IP MODE
Static IPs or DHCP Reservations
- EXTRA ATTRIBUTES
Accepts a JSON input of custom attributes that can be saved on host records in Infoblox. These Must be first defined as extra attributes in Infoblox and values can be injected for the user creating the record and the date of assignment. The available injectable attributes are: userId, username, and dateCreated.
{
  "Date Assigned":"<%=dateCreated%>",
  "Requestor":"<%=username%>",
  "Request Number":"<%=userId%>"
}
Select SAVE CHANGES
Upon save the Infoblox IPAM integration will be created and the following will sync:
Infoblox networks will be synced in and populate in the Infrastructure - Network - IP Pools tab and in the Infoblox detail page under the NETWORK POOLS tab
Host Records will sync and populate in the Network Pool detail view (select an IP Pool name to view)
DNS Zones will sync and populate under Infrastructure - Network - Domains and in the Infoblox detail page under the HOSTS tab
DNS Zone Records will sync and populate
Adding IP Pools to Networks
Morpheus can automatically assign the next available Infoblox IP in an IP/Network Pool and create the corresponding DNS records, as well as remove the records upon teardown. To enable this, add an Infoblox IP/Network Pool to the Network Pool section on a Network(s).
Navigate to Infrastructure > Network > Networks
Select a Network name and click EDIT
In the NETWORK POOL section, search for and select the name of the IP/Network Pool.
Gateway, DNS and CIDR must be populated for static/pool IP assignment
Select Allow IP Override to allow selecting between DHCP, Static entry and Pool Selection at provision time (if desired)
Deselect DHCP server if a DHCP server will not be used on the network (only static and/or IP Pool IP assignment)
Select SAVE CHANGES
Creating Host Records
Select a Network Pool from Infrastructure > Network > IP Pools or Infrastructure > Network > Services > Infoblox
Select + ADD
Enter the following
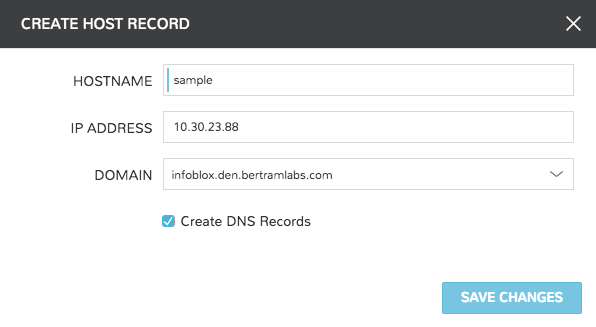
- HOSTNAME
Hostname for the record
- IP ADDRESS
IP address for the Host Record
- DOMAIN
Select an Infoblox Zone
- Create DNS Records
Select to create DNS A and PTR Records in Infoblox
Select SAVE CHANGES
Creating Zone Records
Select a Domain from Infrastructure > Network > Domains or Infrastructure > Network > Services > Infoblox > Zones
Select + ADD
Enter the following
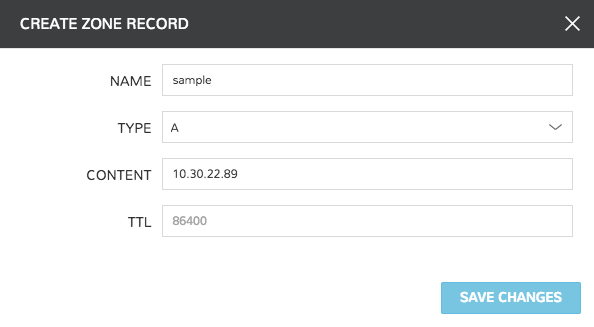
- NAME
Name for the record, such as Hostname
- Type
A, AAAA, CNAME, MX, NS, PTR, SOA, or TXT
- CONTENT
Content of the record, such as IP or A Record
- TTL
Time To Live value
Select SAVE CHANGES