Getting Started
To get started with VMware, simply start by adding a Cloud in the Infrastructure > Clouds section.
To start adding a VMware cloud there will be some things you will need:
- vCenter API Url
Typically this is the url to the vCenter web client with a
/sdkin the path- Username/Password
A set of credentials with high level access to VMware (ensure the account has Datacenter level access)
Once these fields are entered, some selections will start pre-populating. A cloud integration is scoped to a specific data center, and can optionally be scoped down to a single cluster or even a single resource pool. If the drop downs do not populate, please verify the api url is resolvable, morpheus has access to vCenter on 443, and the provided credentials are correct and the user has sufficient permissions.
Another cool feature provided with the cloud integration is optional Resource Pool scoping. One can choose to allow the cloud to provision into All Resource Pools or a singular Resource Pool. When choosing All, these Resource Pools can be managed from a sub-account and visibility perspective via the Cloud Detail page (multi-tenancy).
The VMware cloud integration provides a few additional options including allowing users to make host selections or keeping that aspect hidden such that the best host is automatically chosen for the requested provision.
The RPC Mode feature can be configured to allow Morpheus to install its agent on the Guest operating system via either SSH/WinRM or Vmware Tools Guest Process feature. The VMware tools Guest Execution API can be tricky so it is recommended to use SSH/WinRM if possible. However, if it is not possible for the Appliance to have outbound access to all networks in which VMs are being provisioned to the SSH/WinRM ports (22, 5985 respectively) then Guest Execution is the only option.
The Use VNC console option on the VMware cloud requires special configuration on each ESXI host but allowed hypervisor level remote console support. (See the Advanced Section for details)
When following this add cloud wizard an option will be presented to create a group or add to an existing group. These groups can be given provisioning permission via role based access control. It is normally recommended that groups are organized such that one cloud exists in one group unless the networks are setup such that internal routing is possible between the clouds. This is very useful for bursting, or hybrid cloud configurations.
Windows Provisioning Tips
By default when provisioning windows templates, Morpheus performs guest customizations which initiates a sysprep. This resets the Administrator user and password. Morpheus will set the Administrator password from Administration > Settings > Provisioning > Windows Settings > Password.
Users can also set the username on an image as Administrator and enter a different password if unique passwords are required per image.
Guest customizations are required when assigning static IP’s manually or using IP pools. They can be disabled per virtual image advanced settings under Library > Virtual Images > Edit Image > Advanced > Uncheck “Force Guest Customization” if using DHCP. However the SID will not be changed from the source template. In addition, new VM’s will not be able to join a domain that had already been joined by the source template or any other VM’s with that SID.
Existing Instances
Morpheus provides several features regarding pulling in existing virtual machines and servers in an environment. Most cloud options contain a checkbox titled ‘Inventory Existing Instances’. When this option is selected, all VMs found within the specified scope of the cloud integration will be scanned periodically and Virtual Machines will be synced into Morpheus. Users may also choose to onboard only virtual machines that are running within specific Resource Pools. Once the vCenter Cloud is integrated, navigate to the detail page for the specific Cloud (select it from the list at Infrastructure > Clouds). From the Resources tab, locate the Pools section. Click ACTIONS > Edit next to a selected Resource Pool. If INVENTORY is checked, Morpheus will automatically onboard virtual machines from that Resource Pool.
By default these virtual machines are considered ‘unmanaged’ and do not appear in the Provisioning > Instances area but rather Infrastructure > Compute > Virtual Machines. However, a few features are provided with regards to unmanaged instances. They can be assigned to various accounts if using a multitenant master account, however it may be best suited to instead assign the ‘Resource Pool’ to an account and optionally move all servers with regards to that pool (more on this later).
A server can also be made into a managed server. During this process remote access is requested and an agent install is performed on the guest operating system. This allows for guest operations regarding log acquisition and stats. If the agent install fails, a server will still be marked as managed and an Instance will be created in Provisioning, however certain features will not function. This includes stats collection and logs.
Note
All Cloud data is resynchronized on a 5 minute interval. This includes Datastores, Resource Pools, Networks, Blueprints, and Virtual Machines.
Service Plans
A default set of Service Plans are created in Morpheus for the VMware provisioning engine. These Service Plans can be considered akin to AWS Flavors or Openstack Flavors. They provide a means to set predefined tiers on memory, storage, cores, and cpu. Price tables can also be applied to these so estimated cost per virtual machine can be tracked as well as pricing for customers. By default, these options are fixed sizes but can be configured for dynamic sizing. A service plan can be configured to allow a custom user entry for memory, storage, or cpu. To configure this, simply edit an existing Service Plan tied to VMware or create a new one. These all can be easily managed from the Admin > Plans & Pricing section.
Virtual Images / Blueprints
Morpheus will automatically take an inventory of all blueprints configured in vCenter and present them as options during provisioning. However, in order for Morpheus to properly provision these virtual machines and provide accurate stats and health of these virtual machines, an agent must be installed during virtual machine startup. This means remote access needs to be granted at the guest operating system level to Morpheus . To properly configure these virtual images, find the relevant images in Library > Virtual Images and edit the entry. On this form, a few options are presented. The first is a check box asking whether or not cloud-init is enabled. If cloud-init is enabled, simply provide the default OS username configured (for Ubuntu the username is ubuntu and for CentOS the username is centos). For those looking to add cloud-init to existing blueprints Morpheus requires no special configuration and can use the default cloud.cfg settings.
A global cloud-init username/password can also be configured per account as well as a keypair via the Admin->Provisioning settings section. The great benefit of utilizing cloud-init is default blueprints do not need common credential sets thereby increasing provisioning security.
Windows systems do not typically support cloud-init. So simply turn this checkbox off and provide the Administrator credentials. It should be noted that these credentials are encrypted in the database. If using WinRM for the RPC Mode instead of VMware tools, a Local or Domain Administrator account credential set can be provided instead.
Snapshots
Morpheus allows the ability to create a snapshot of a VM in VMware vCenter. From the instance detail page, simply select Actions > Create Snapshot to begin creation of a new Snapshot. Existing snapshots can be viewed in the BACKUPS tab on the instance detail page. Snapshots taken in vCenter will sync into Morpheus every five minutes. To revert to a previous snapshot, click on the revert icon located on the right side of the Snapshot. Snapshots can be deleted by clicking on the trash can icon.
Note
Access to Snapshots can be limited or removed entirely for specific user roles as needed. To edit a role’s Snapshots permissions, go to Administration > Roles > (Your selected role) > Snapshots. Users can be given Full, Read-only, or No access.
Tagging and Metadata
As of Morpheus version 4.1.0, tagging support is included for vCenter in addition to the other clouds that have already supported it in past versions. Tags will sync to vCenter from Morpheus and existing tags are also inventoried from vCenter into Morpheus.
Note
This feature requires a minimum API version of vCenter 6.5. The API version can be edited by navigating to ‘Infrastructure > Clouds’ and clicking the edit (pencil) button in the row for the relevant cloud. The field is labeled ‘VERSION’.
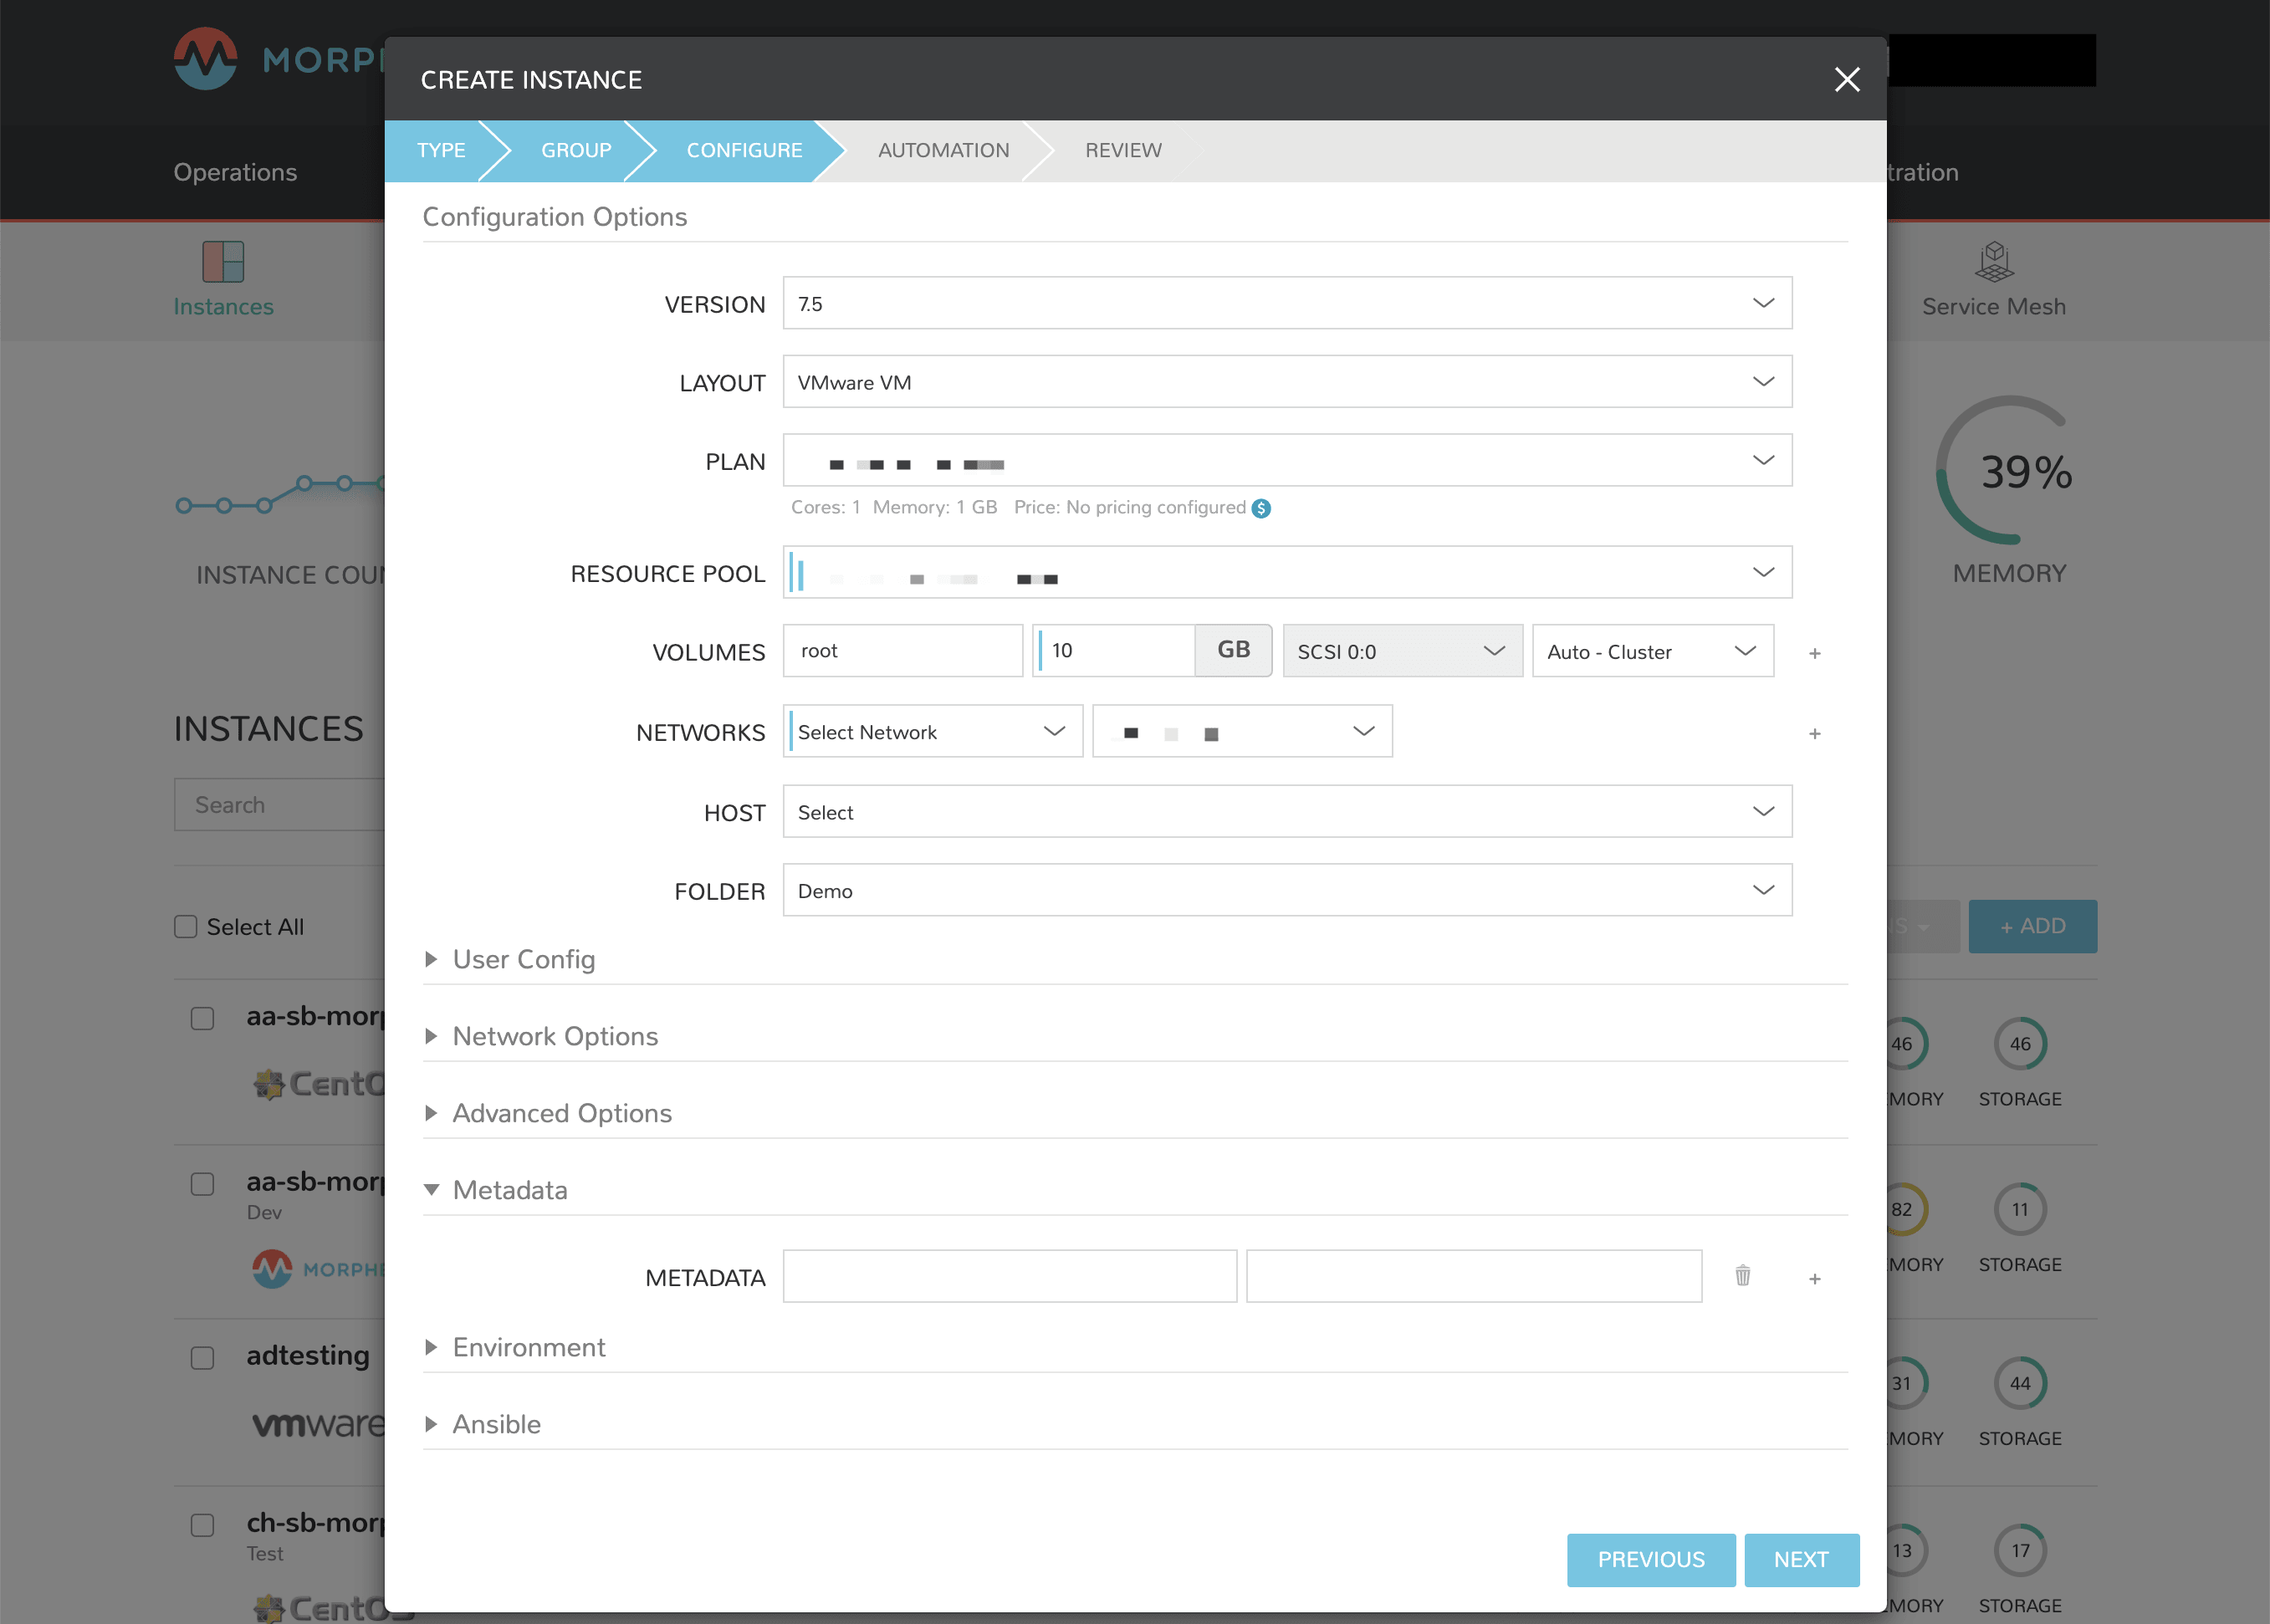
Tags can be created on-demand when provisioning from the ‘CONFIGURE’ tab of the ‘CREATE INSTANCE’ wizard (Provisioning > Instances). Within the ‘Metadata’ drawer, you will see sets of fields to enter key/value pairs. On creation of the instance, this metadata will be synced into vCenter.
‘Inputs’ from your library can also be exported as metadata for use with vCenter. When adding or editing a new Input (Library > Options > Inputs), simply mark the box labeled ‘EXPORT AS METADATA’. The ‘FIELD NAME’ becomes the tag category in VMWare.