Puppet
Each Morpheus Puppet integration ties to a specific Puppet Master and makes it easy to install the Puppet Agent onto target Instances and Servers. Once integrated, we can trigger the agent installation by creating Puppet Agent Install Tasks through Morpheus automation or at provision time when spinning up instances in Clouds associated with a Puppet integration.
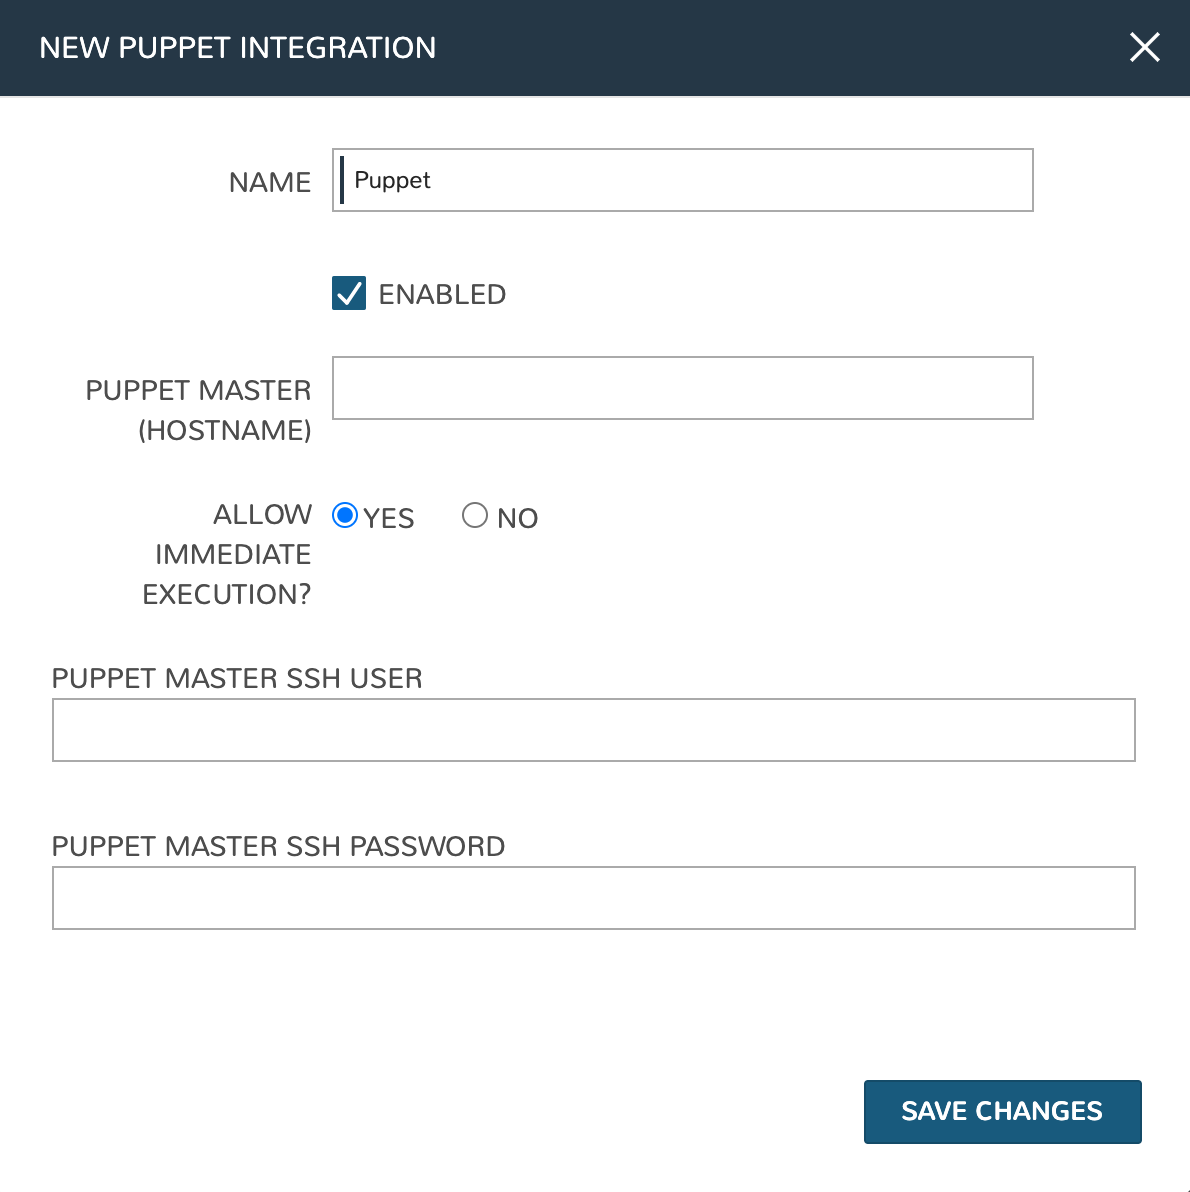
Add Puppet Integration
Navigate to Administration > Integrations
Click + NEW INEGRATION
Select Integration type “Puppet”
Populate the following fields
Name: A friendly name for this Puppet integration in Morpheus
Enabled: When marked, this Puppet integration will be available to users at provision time and when creating Tasks
Puppet Master (Hostname): The resolvable DNS name to the Puppet Master, communicating on port 443 by default
Allow Immediate Execution: Yes or No (See additional details below)
Click SAVE CHANGES
Allow Immediate Execution
When adding or editing a Puppet integration, users have the option to “Allow Immediate Execution”. Using this feature will connect to the Puppet Master after the Puppet Agent is installed and force configuration application immediately. This is an optional convenience feature, if it’s not used, the Puppet Master will still apply configuration to the node on its own schedule. Using this feature requires supplying SSH credentials. If you do not wish to provide SSH credentials to Morpheus select “No” to opt out of this feature and they do not need to be provided.
Associating a Puppet Integration with a Cloud
By associating a Puppet Integration with a Cloud, users are able to automatically install the Puppet Agent, select a Puppet environment, and supply a Puppet Node Name at provision time. The integration association is made when adding or editing a Cloud integration in Morpheus.
Navigate to Infrastructure > Clouds
Identify the Cloud to associate with Puppet and edit it by clicking on the pencil icon at the right end of the row
In the EDIT CLOUD modal, expand the Advanced Options section
In the CONFIG MANAGEMENT dropdown, choose the Puppet integration
Save changes to the Cloud integration
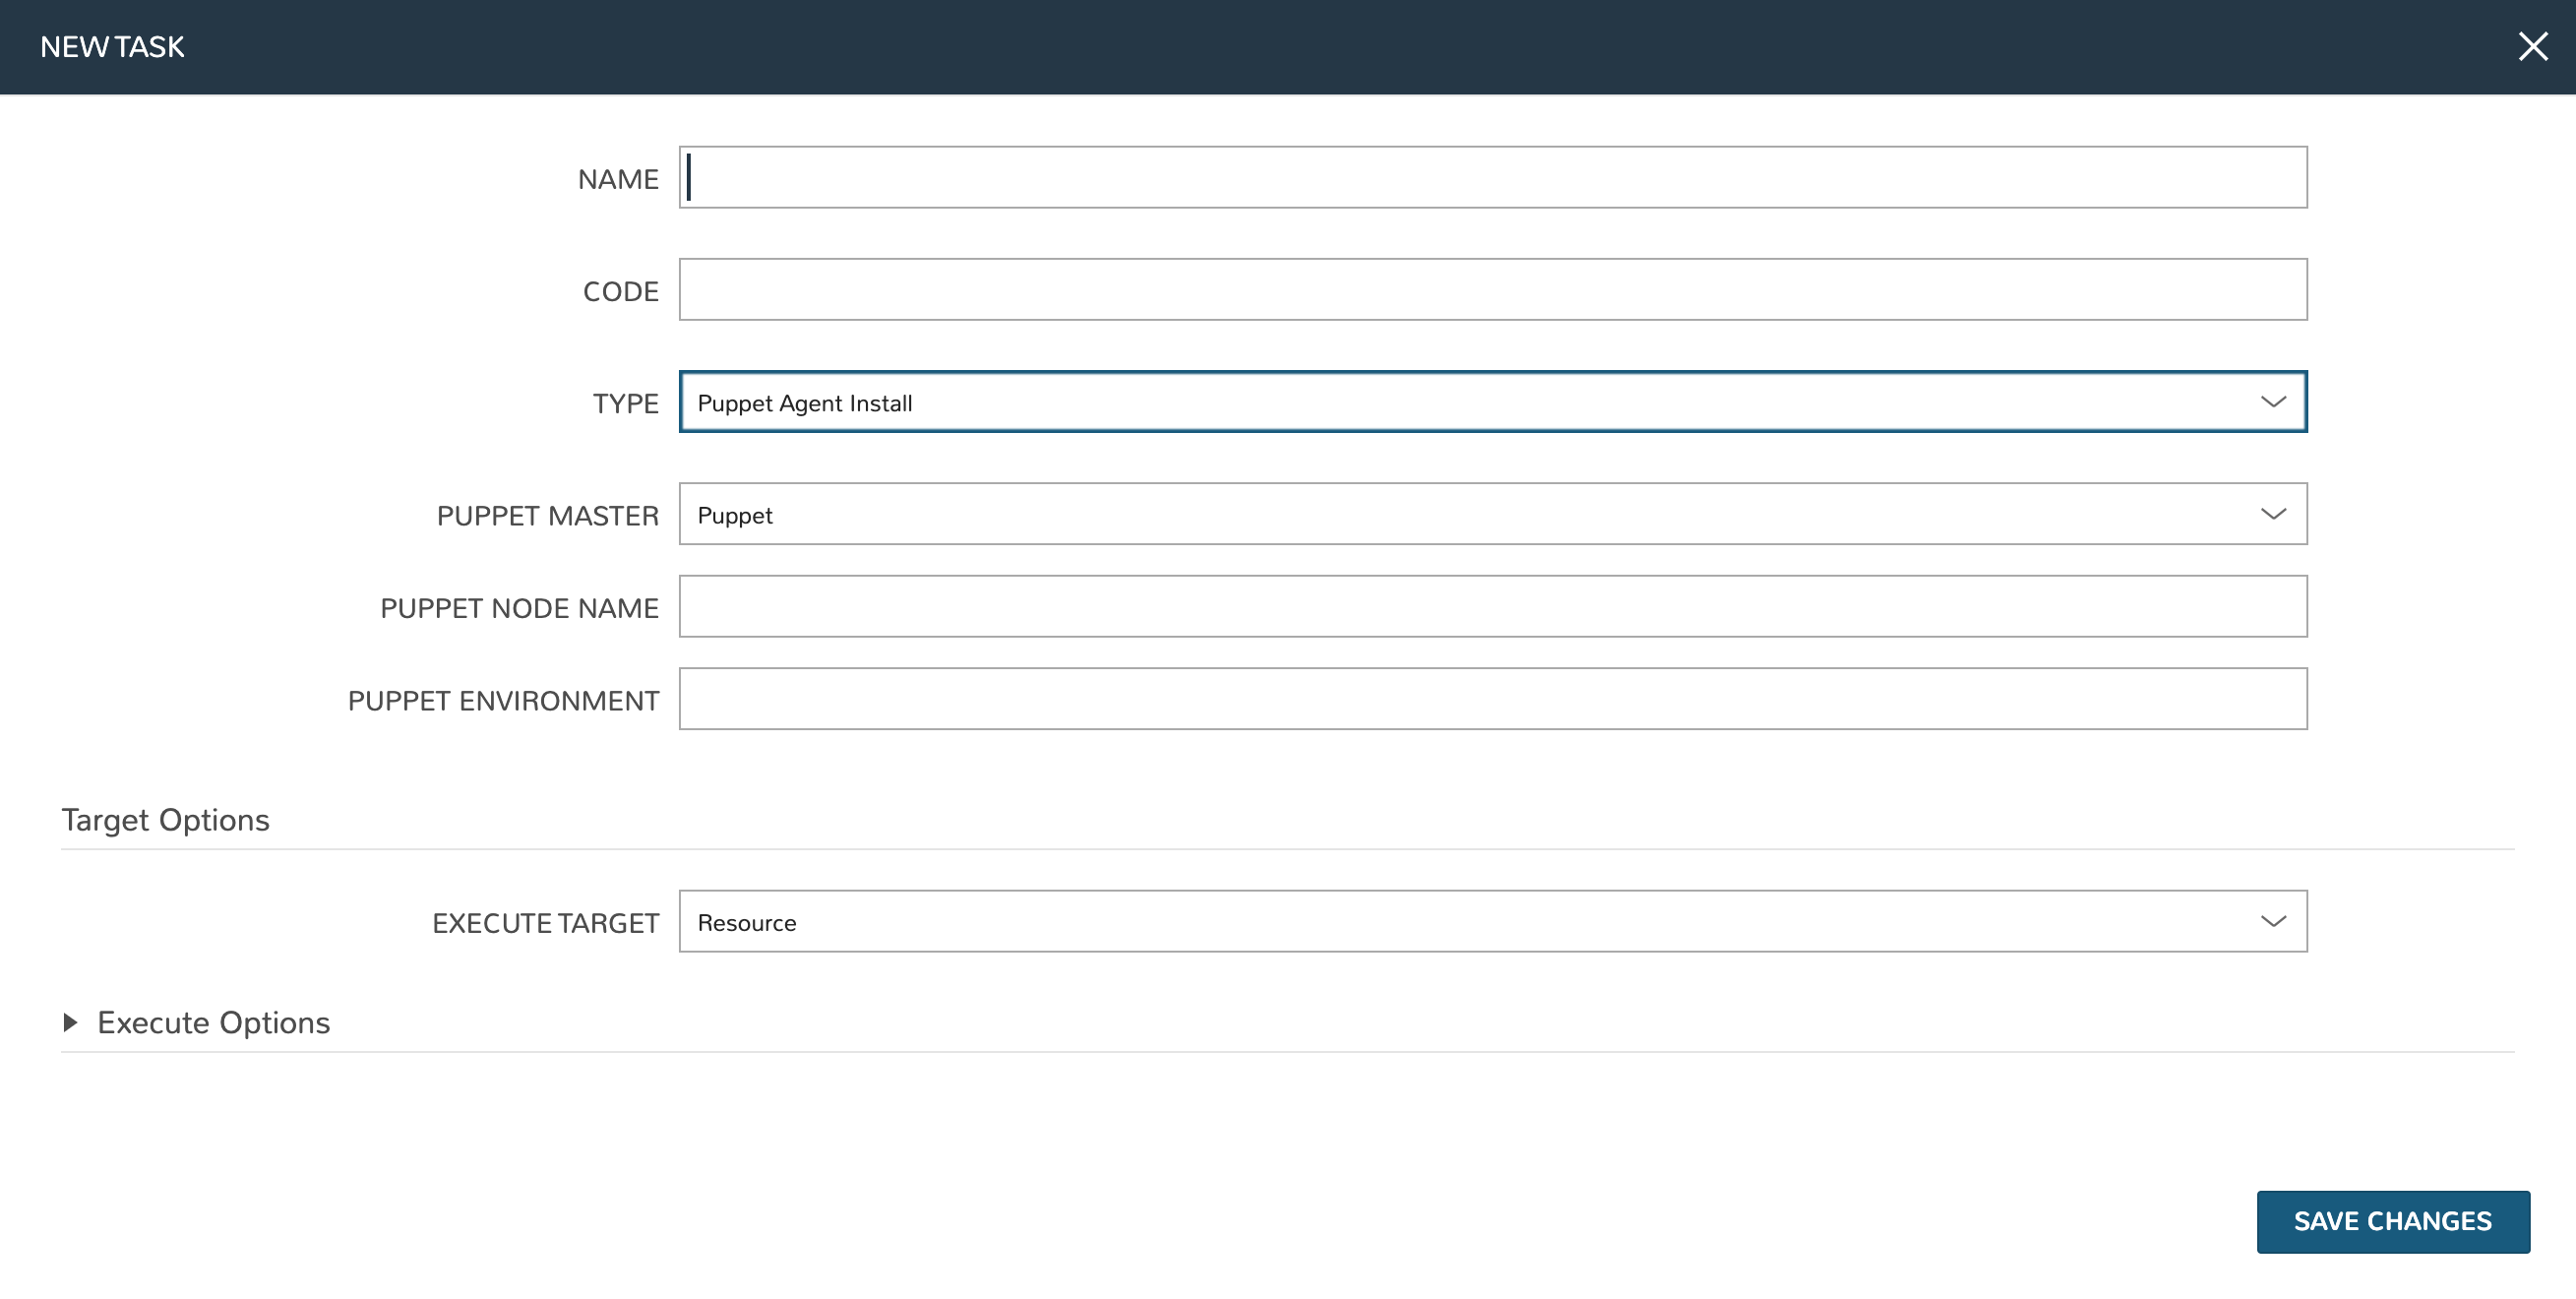
Creating Puppet Agent Install Tasks
Puppet Agent Install Tasks automate the process of installing the Puppet Agent, selecting the Puppet environment, and supplying the Puppet Node Name. We can run this Task on-demand as needed for individual Instances or servers or add them to workflows to build a Puppet Agent installation step into larger automation suites.
Navigate to Library > Automation
Select the Tasks tab
Click + ADD
From the “Type” field, select Puppet Agent Install
Complete the fields as needed to target a specific Puppet Master and to identify Puppet environment and node names
Save changes
Installing Puppet Agent at Provision Time
With a Puppet integration associated with a Cloud (as described above), users can opt to install the Puppet Agent at provision time. When provisioning into an associated Cloud, a new “Puppet” section will appear on the CONFIGURE tab of the provisioning wizard. Here users can select a specific Puppet Master, select the Puppet environment, and select a Puppet node name. During provisioning, the Puppet Agent will be automatically installed and configured for the selected Master.