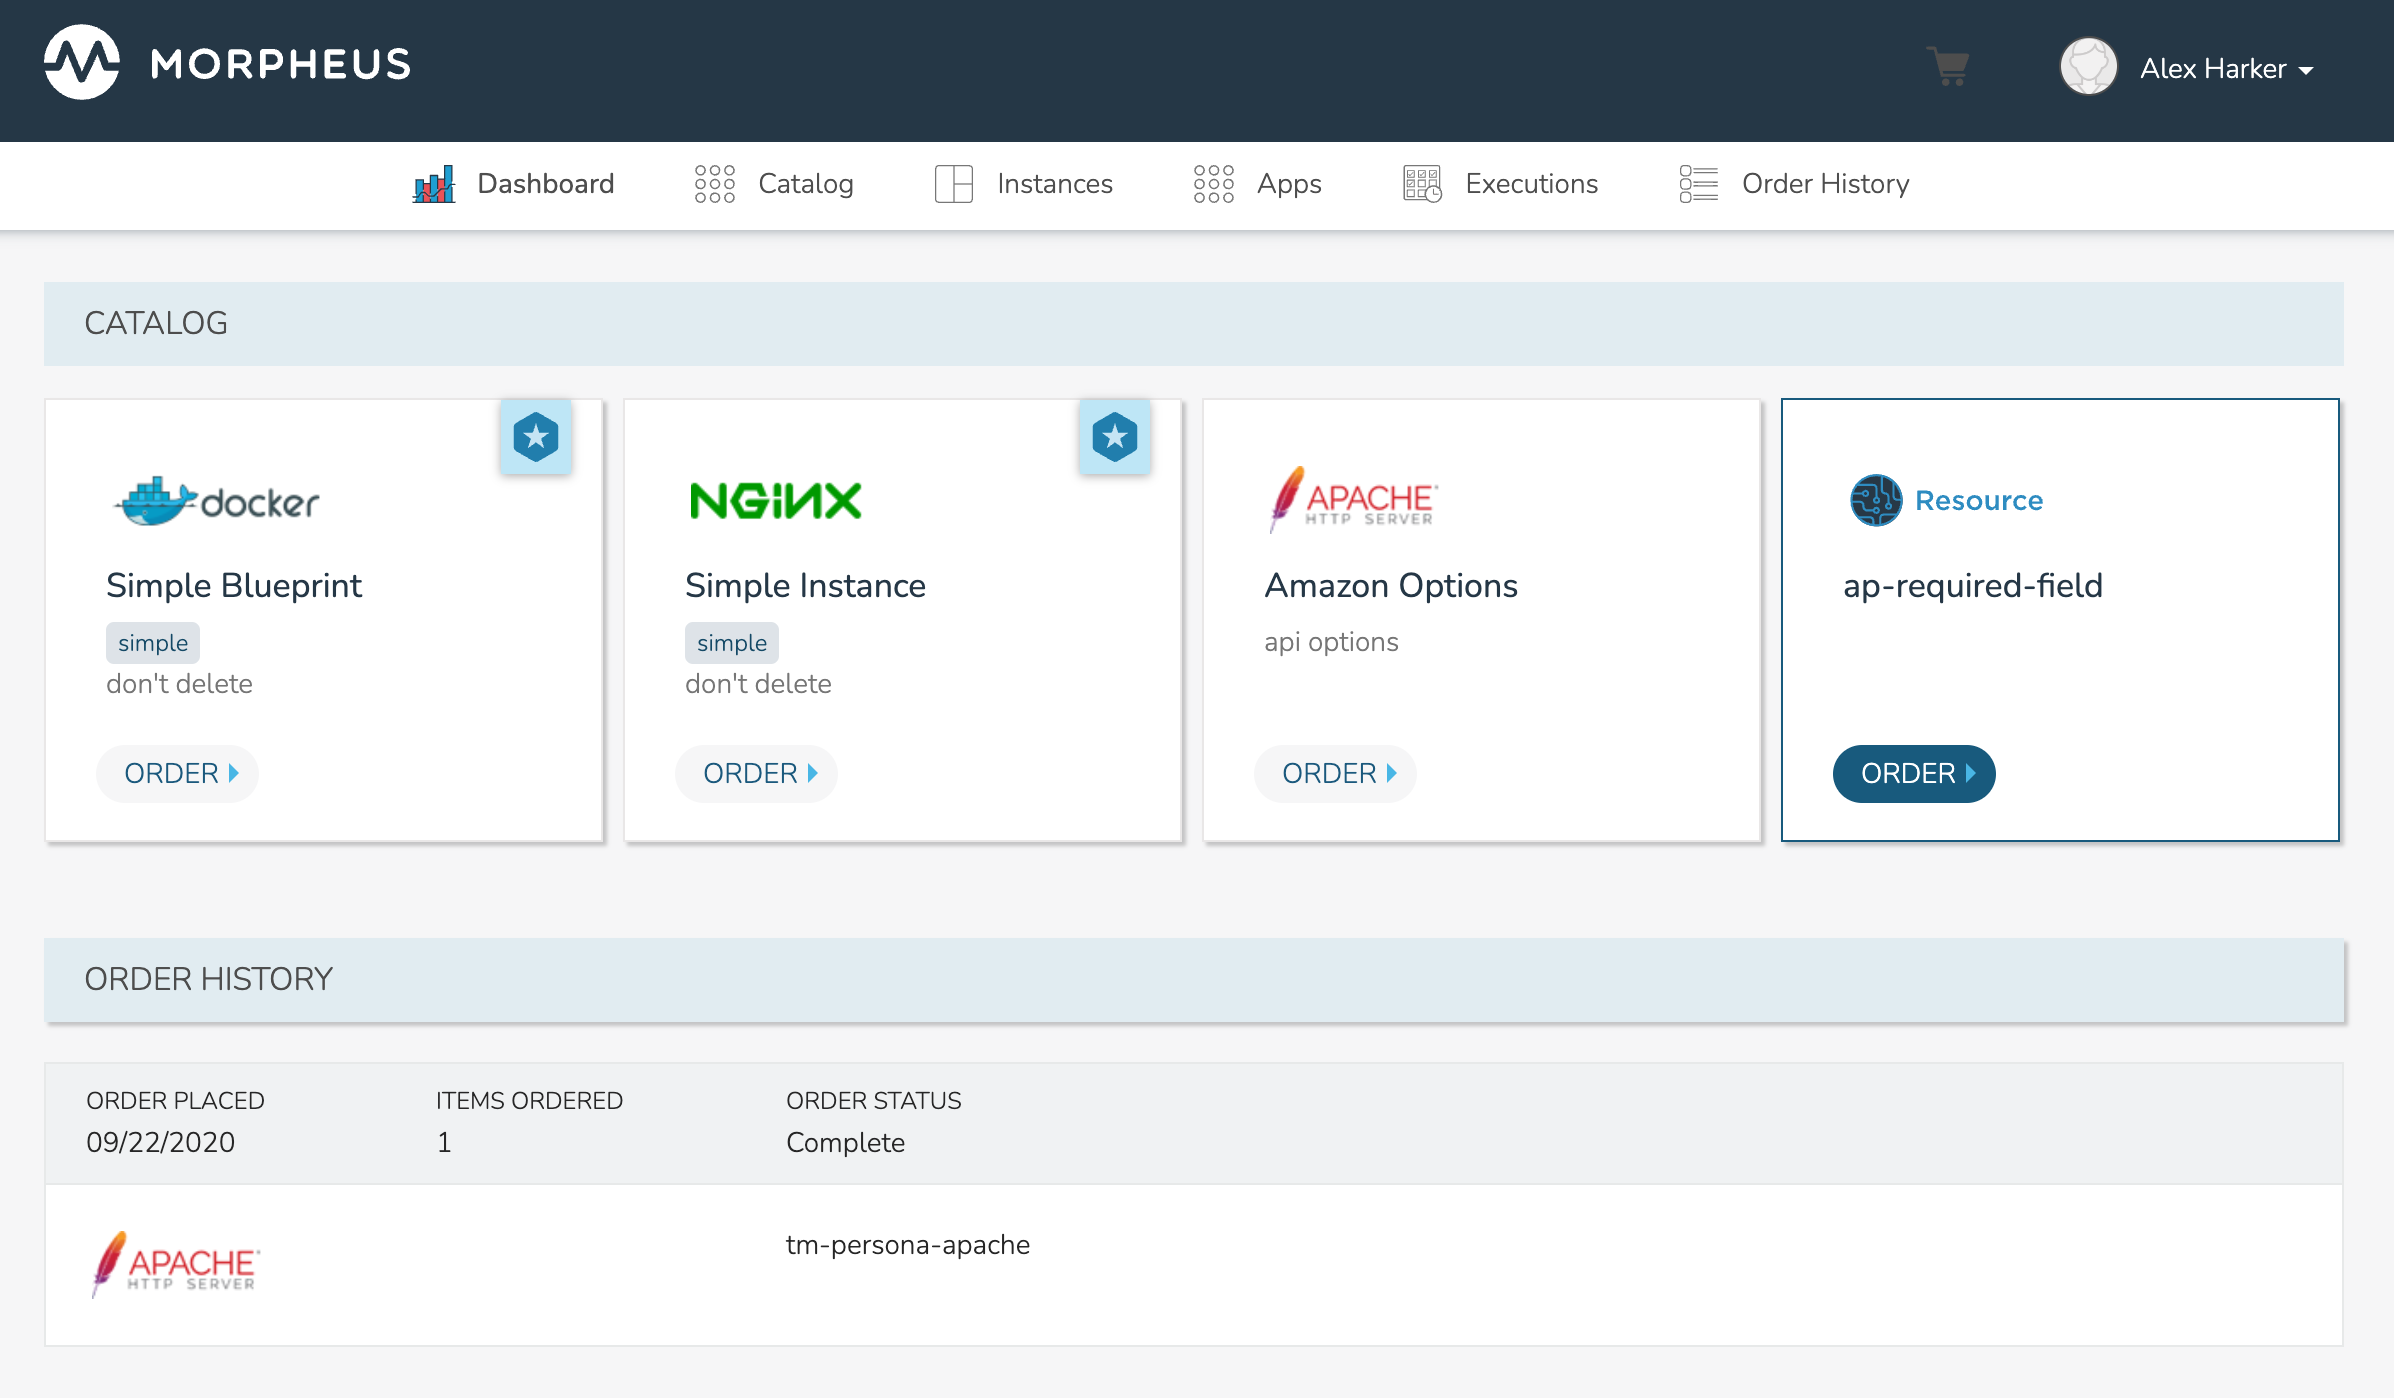
Catalog
The Catalog presents a simplified self-service view where users can select and deploy Instances, Blueprints or Workflows with pre-defined configuration in just a few clicks and without presenting an overwhelming list of options. Selections are presented as tiles and users can add items to a cart as if shopping on an eCommerce website. For users who tend to provision regularly from a small selection of Instance Types and configurations, the catalog is an easier option compared with the much more detailed and option-rich Instance provisioning wizard.
Configuring Catalog Item Access
Within the Catalog, users are presented with selections based on their User Role. Additionally, Catalog Item access can be set on the Tenant Role to restrict certain items from all users in the Tenant. By default, User Roles have no access to any catalog items. Thus, administrators will need to enable access to some Catalog Items in order for users to make use of this view.
Configuring Global Access:
Full: Gives access to all Catalog Items
Custom: Gives access to individually-selected items from the list below
None: No access is given to any Catalog Items
Tip
When giving Custom access, be sure to set access on some of the individual catalog items to Full in order to reveal those items to the Role group.
Catalog
The catalog shows the complete list of predefined items available to the user for provisioning. Catalog items are not created here, however. For more on creating catalog items, see the Catalog Items tab in the Morpheus Library section (Library > Blueprints > Catalog Items).
Placing Orders
From the Catalog page, select the tile for your chosen item to see any custom options that may need to be set prior to provisioning. The catalog shows a complete list of items but the list can be filtered by entering search terms or by selecting a category. When adding or editing catalog items, an optional category may be set which aids in filtering for environments which have a lot of catalog items to select from.
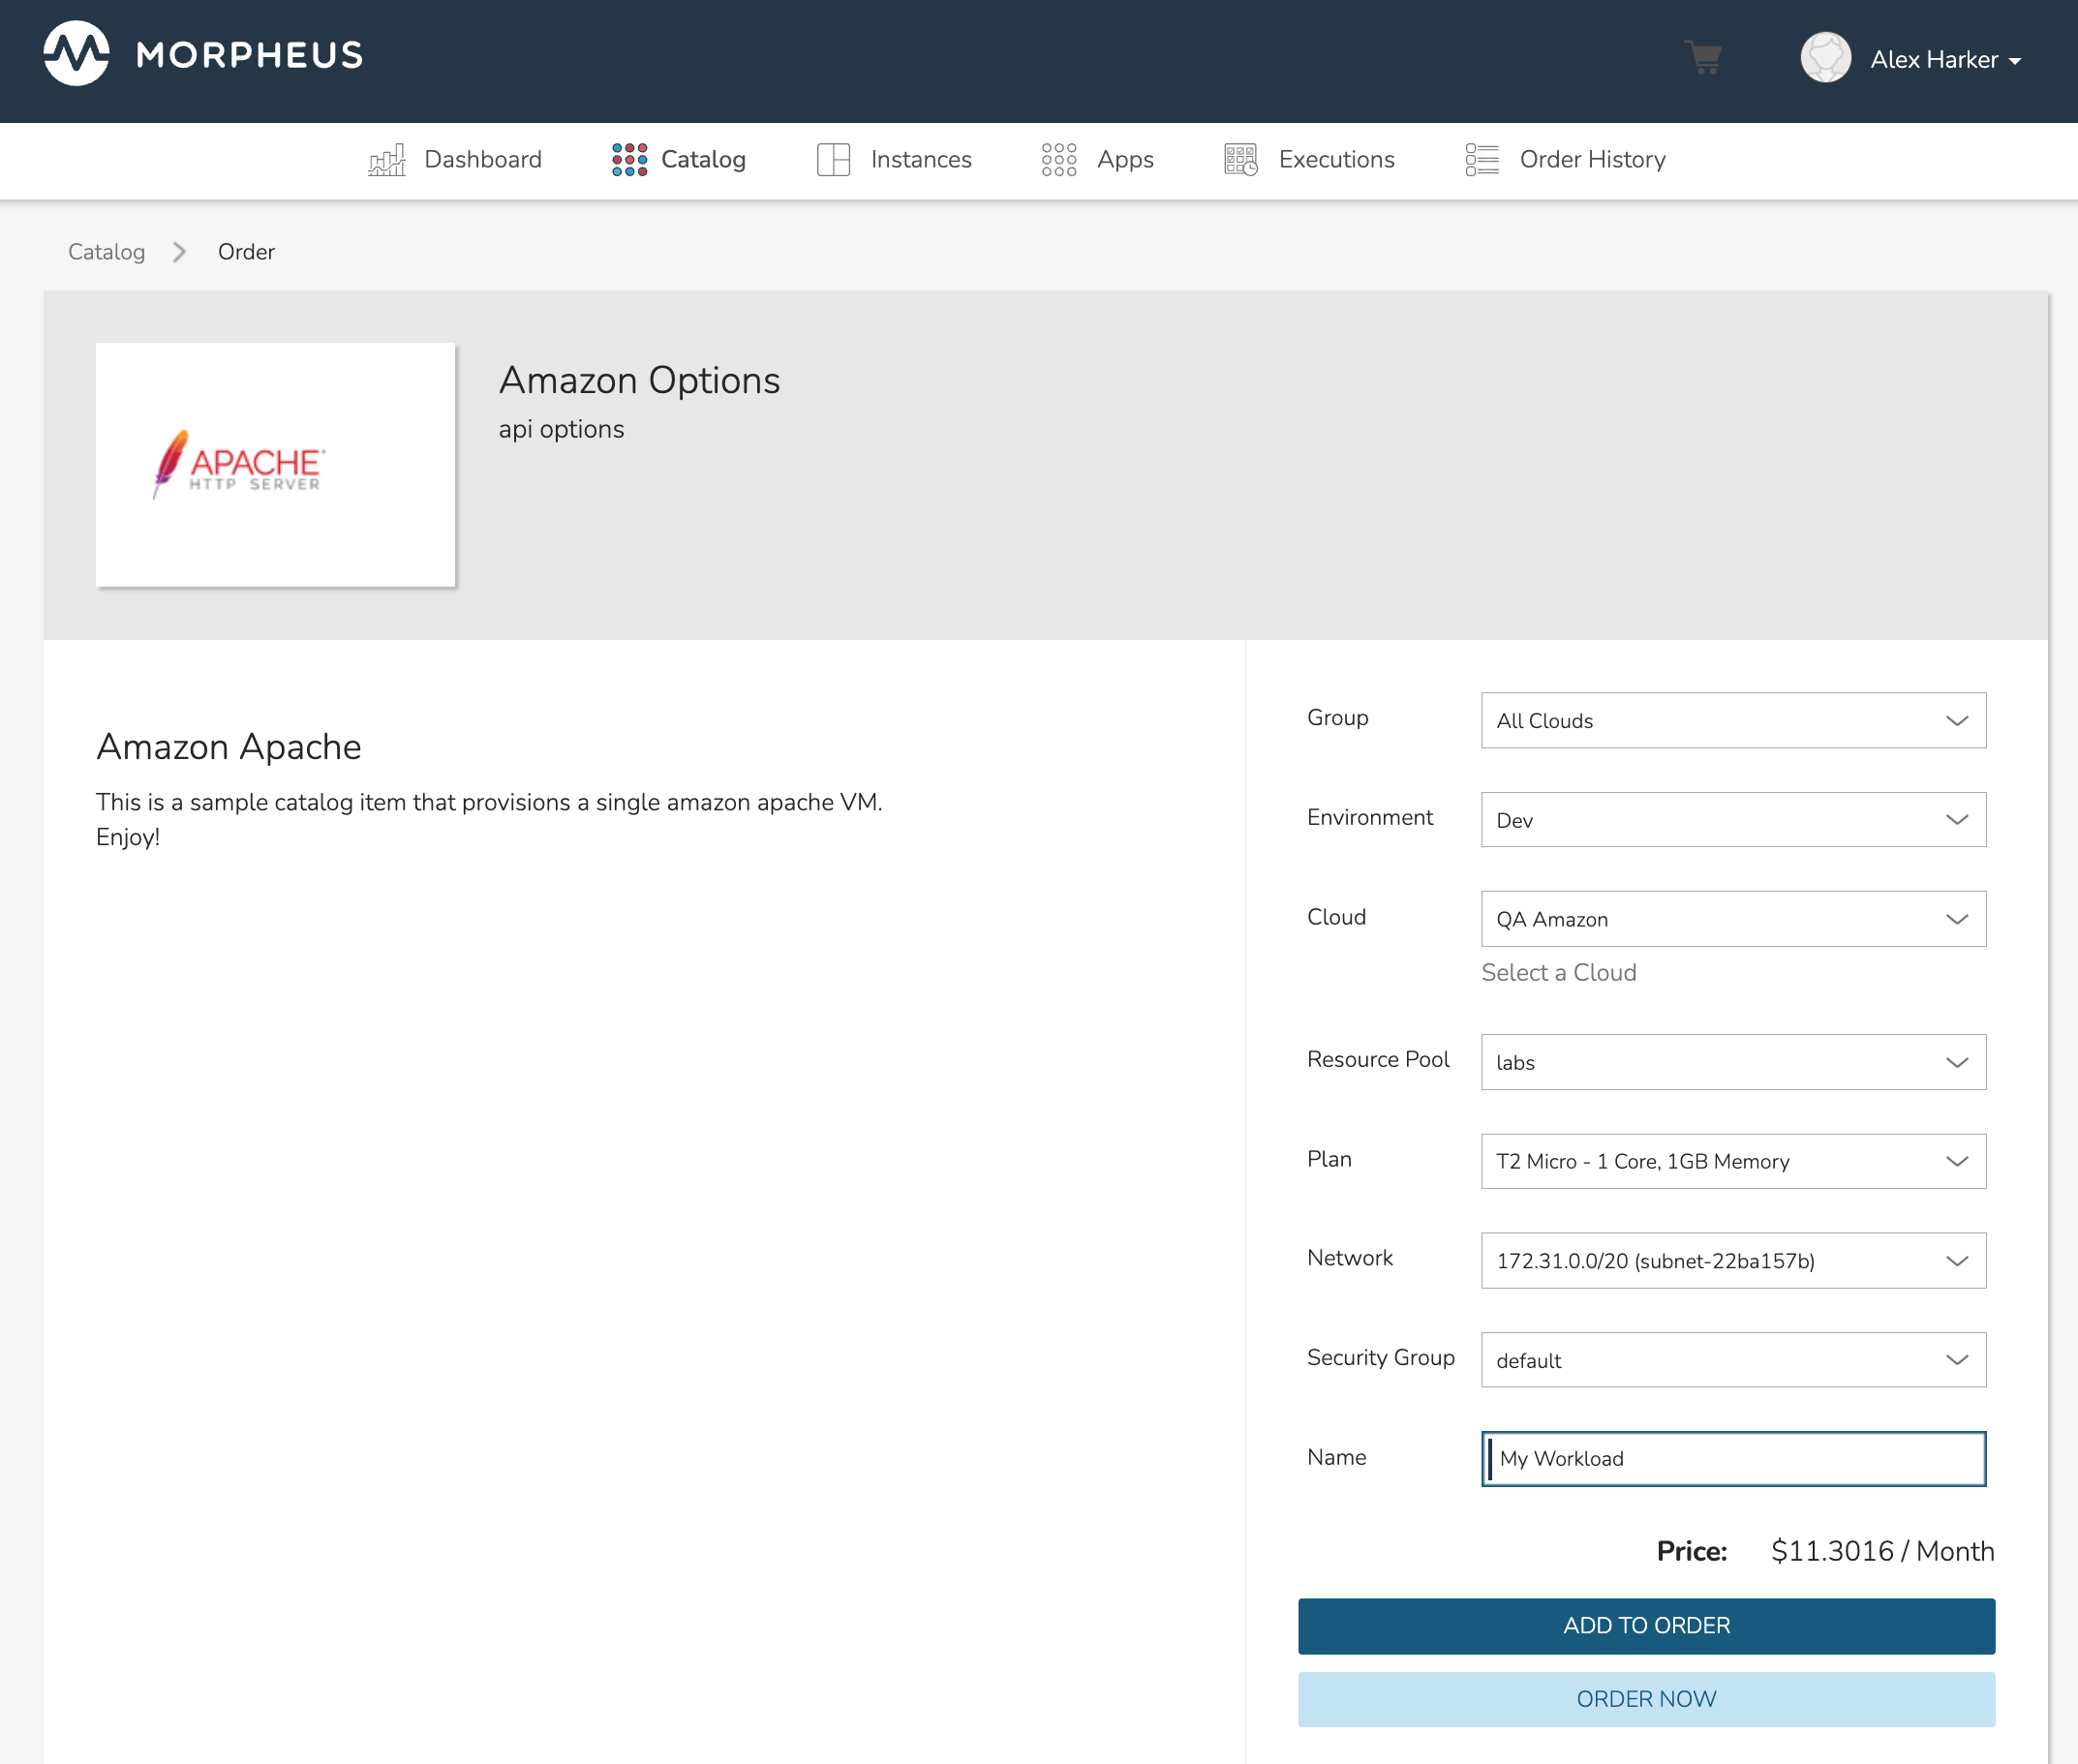
Once the item is in the cart, make any additional selections to complete the order. Once finished, proceed to the cart by clicking on the cart icon at the top of the application window. Each selected item is listed along with its estimated cost. The total estimated cost for the entire order is also computed.
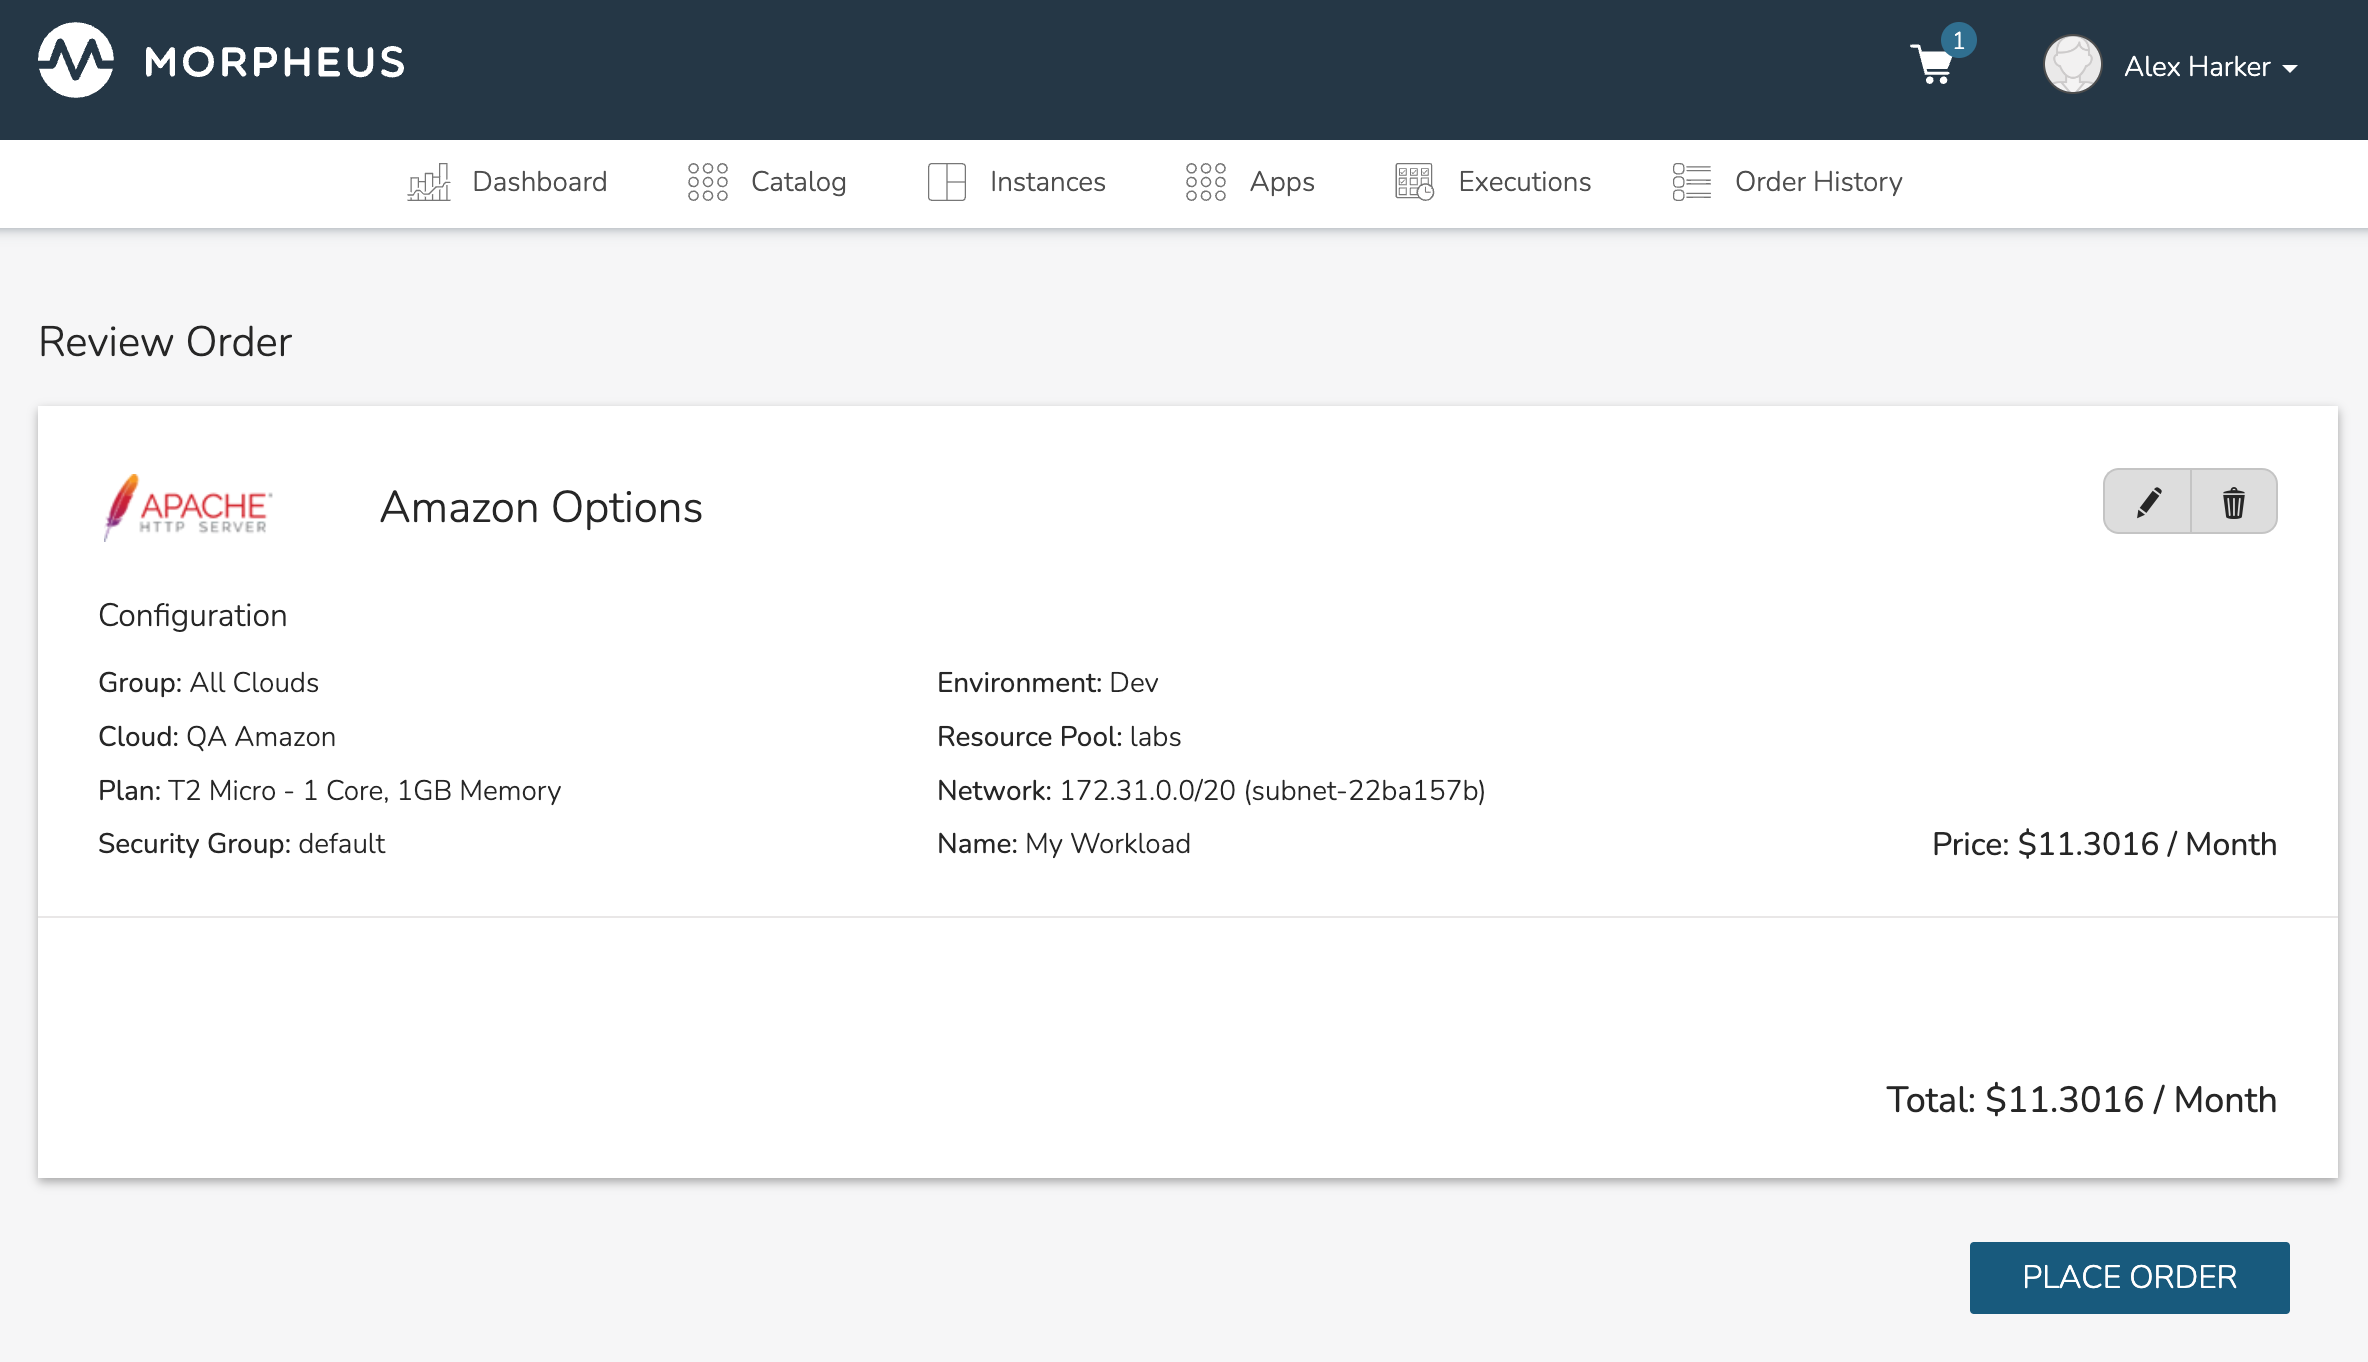
Once PLACE ORDER is clicked, the provisioning process will begin and the user is redirected back to the catalog page. Any new orders can now be viewed from their respective list pages. Depending on whether you’ve ordered an Instance, App, or Workflow execution, navigate to the appropriate list page for your item to view it.
Order Detail

The Order Detail page includes a complete list of orders and some basic details about them. If the item still exists, you can link through to the detail page for the item (whether that be Instance detail, App detail, or Execution detail). When the item name is not hyperlinked, the item has been deleted but the record of the order remains in the history.