EfficientIP SOLIDserver
Features
Network Pools synchronization
DNS Zone & Zone record synchronization
Host Record synchronization
Total & Free IP status bar for networks
Network Grid and List view with IP Status and records, date and user tracking
Automatic and manual IP Reservations, DNS A/PTR record creation and deletion
Required Role Permissions
Add, edit and remove EfficientIP SOLIDserver integrations
Infrastructure: Network Integration: Full
View and edit synced IP pools
Infrastructure: Network IP Pools: Full
View networks and add synced IP pools to networks
Infrastructure: Networks: Full or Group
View and edit synced DNS zones, including creation of zone records
Infrastructure: Network Domains: Full
Adding EfficientIP SOLIDserver Integration
The EfficientIP SOLIDserver integration type is a plugin that must be added to Morpheus before the option to create one will be available. In the future, users will be able to download this and other plugin types from a centralized marketplace. For now, the plugin jar file can be compiled from a public Github repository or can be requested from your account team. See the Plugins Section of Morpheus documentation for more on the process of uploading the plugin JAR to your appliance.
Navigate to Infrastructure > Network > Integrations and click + ADD
Under the IPAM section, select EfficientIP SOLIDserver
Configure the following:
NAME: Friendly name for this EfficientIP SOLIDserver integration
ENABLED: When checked, this integration will be accessible in Morpheus
API URL: The FQDN for the EfficientIP server, not a specific path
USERNAME: The username for an EfficientIP service account. Bear in mind this account will need API access as well as the rights to work with pools, zones, and records you wish to consume from Morpheus
PASSWORD: The password for the above named account
THROTTLE RATE: In larger environments, it may be necessary to introduce a rate limit on calls to the EfficientIP API from Morpheus. If the EfficientIP console UI becomes less responsive than it was prior to integration with Morpheus, it may be due to a high number of API calls in the background from Morpheus. In such a case, start with a 50ms throttle rate and adjust accordingly depending on performance
DISABLE SSL SNI VERIFICATION: If necessary, disable the check for a valid SSL certificate on the EfficientIP server
INVENTORY EXISTING: When checked, used IP space will be continually synced between Morpheus and EfficientIP. If left unchecked, only IP space claimed (and freed) from Morpheus is shown on the detail page for the EfficientIP pool
Click SAVE CHANGES
Once saved, Morpheus will begin to onboard data from EfficientIP. EfficientIP networks are viewable in Infrastructure > Network > IP Pools under the IP Pools tab. Depending on EfficientIP configuration, you may see up to two “types” of Network Pools sync from EfficientIP, SOLIDserver Subnet and SOLIDserver Pool. In EfficientIP, “pools” are an optional construct that subdivides subnets. In Morpheus, both constructs are synced which gives an additional layer of organization when linking Network Pools with Networks (described in the next section) for organizations that use the pools construct. Within a selected IP Pool, host records will also sync and can be viewed in a grid or list layout. DNS Zones are synced under Infrastructure > Network > Domains. By clicking into the domain, DNS Zone records can be viewed.

Adding IP Pools to Networks
At provision time, Morpheus can automatically assign the next available IP address in an EfficientIP pool and create the corresponding DNS records. Morpheus can also clean up DNS records and free up IP address space on teardown. In order to enable this functionality, add an EfficientIP IP Pool as the Network Pool for an existing network (or networks).
Navigate to Infrastructure > Network > Networks
Select a network to view the network detail page and click EDIT
In the typeahead field for NETWORK POOL, search for and select the EfficientIP pool
Click SAVE CHANGES
Note
Gateway, DNS and CIDR must be populated for static/pool IP assignment. If desired, select “Allow IP Override” to allow selecting between DHCP, Static entry, and pool selection at provision time. Finally, deselect “DHCP server” if a DHCP server will not be used on the network (only static and/or IP Pool assignment).
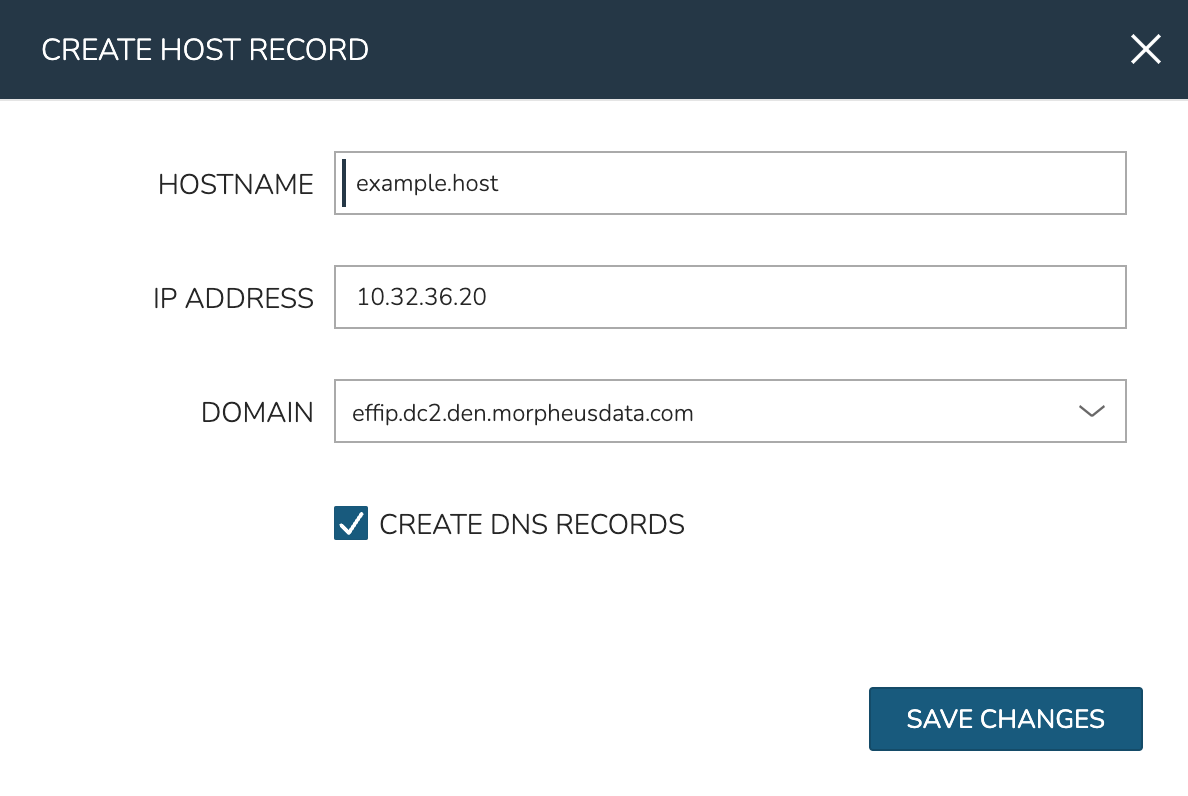
Creating Host Records
Select an EfficientIP Network Pool from Infrastructure > Network > IP Pools
Select + ADD
Configure the following:
HOSTNAME: The hostname for the record
IP ADDRESS: The IP address for the host record
DOMAIN: Select an EfficientIP zone
CREATE DNS RECORDS: If selected, DNS A and PTR records will be created in EfficientIP
Click SAVE CHANGES
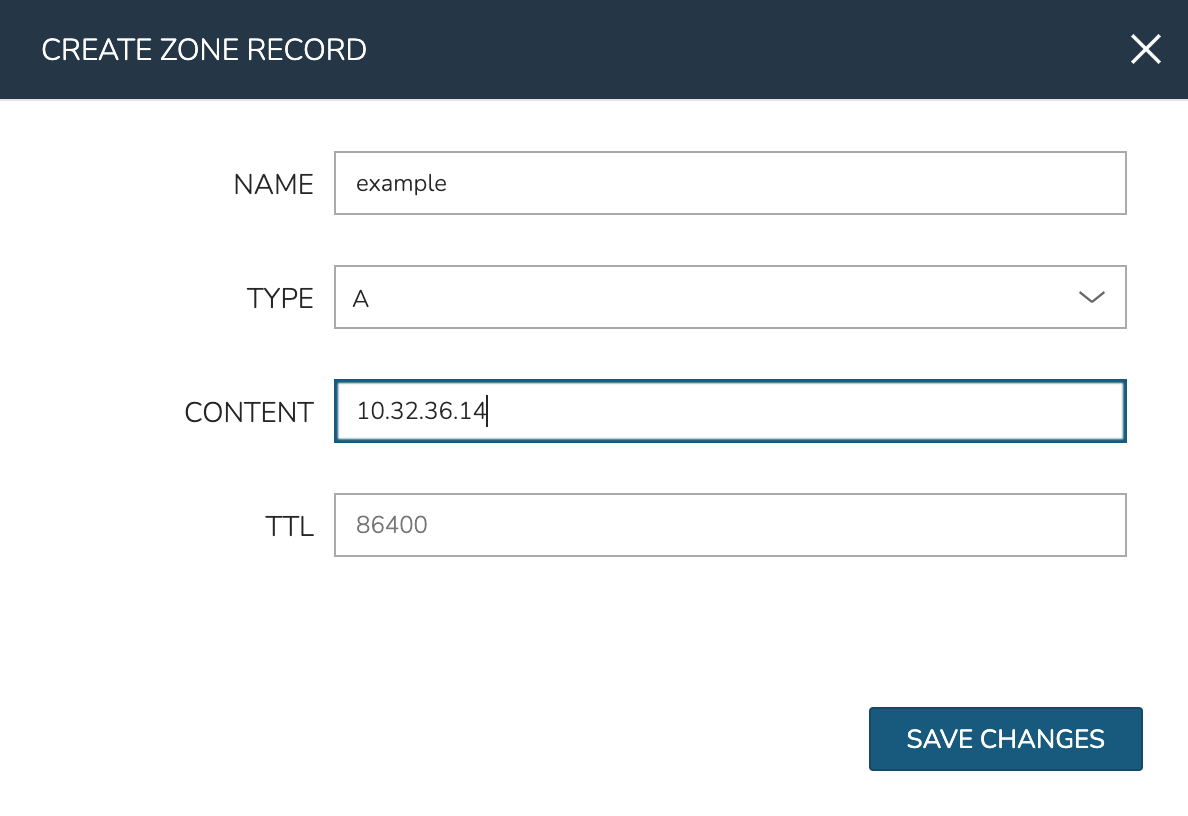
Creating Zone Records
Select an EfficientIP zone from the domains list at Infrastructure > Network > Domains
Click + ADD on the Zone Records tab
Configure the following:
NAME: The name for the records (hostname)
TYPE: The record type: A, AAAA, CNAME, MX, NS, PTR, SOA, or TXT
CONTENT: The content of the record, such as IP address or A record
TTL: The time to live value
Click SAVE CHANGES