Getting Started with Terraform Instance Types
Terraform is a common tool that allows IT administrators to map out infrastructure as code in configuration files and supports all of the popular providers used in the modern datacenter. Once configured, Terraform will plan, deploy, and manage the infrastructure as needed. Configuration files can be brought under version control so teams can easily make changes to environments. Infrastructure can also be monitored for drift and corrective action can easily be taken.
HPE Morpheus Enterprise allows users to on-board or even draft Terraform spec directly. With the configuration on-board, we can begin to piece together infrastructure constructs into the HPE Morpheus Enterprise Library as Layouts and Instance Types. With the Library items staged, users can deploy new infrastructure directly into the selected providers. Once deployed, infrastructure can be monitored for drift from within HPE Morpheus Enterprise UI. When needed, we can plan and take corrective action easily from the detail page of a HPE Morpheus Enterprise Terraform Instance.
In this section, we’ve discussed a high-level overview of Terraform and working with Terraform in the HPE Morpheus Enterprise context. In the next section, we’ll actually onboard Terraform spec, create Library items, and deploy real infrastructure to AWS with HPE Morpheus Enterprise.
Terraform Instance Types in Action
In this example, we’re going to deploy a VPC and three subnets to AWS using Terraform and HPE Morpheus Enterprise. I’ve created Spec Templates to onboard .tf configuration files which handle the AWS provider (with assume role for account flexibility), VPC creation, subnet creation, and variable injection.
We’ll onboard the Terraform configuration files as modular Spec Templates, create new Instance Types with custom Layouts for the HPE Morpheus Enterprise Library, and set up Inputs to inject variable values at provision time. Once deployed, we’ll take a look at the new infrastructure in HPE Morpheus Enterprise and go over the management capabilities for the new environment.
Spec Templates
Terraform configuration is stored as a Spec Template in HPE Morpheus Enterprise. You can store your configuration as one monolithic file for each Instance Type you intend to create or you can create individual Spec Templates for modular pieces which can be reused across multiple Instance Types. When added to the Layout later, we’ll be able to include as many Spec Templates as we wish which enables us to reuse smaller modular pieces if desired.
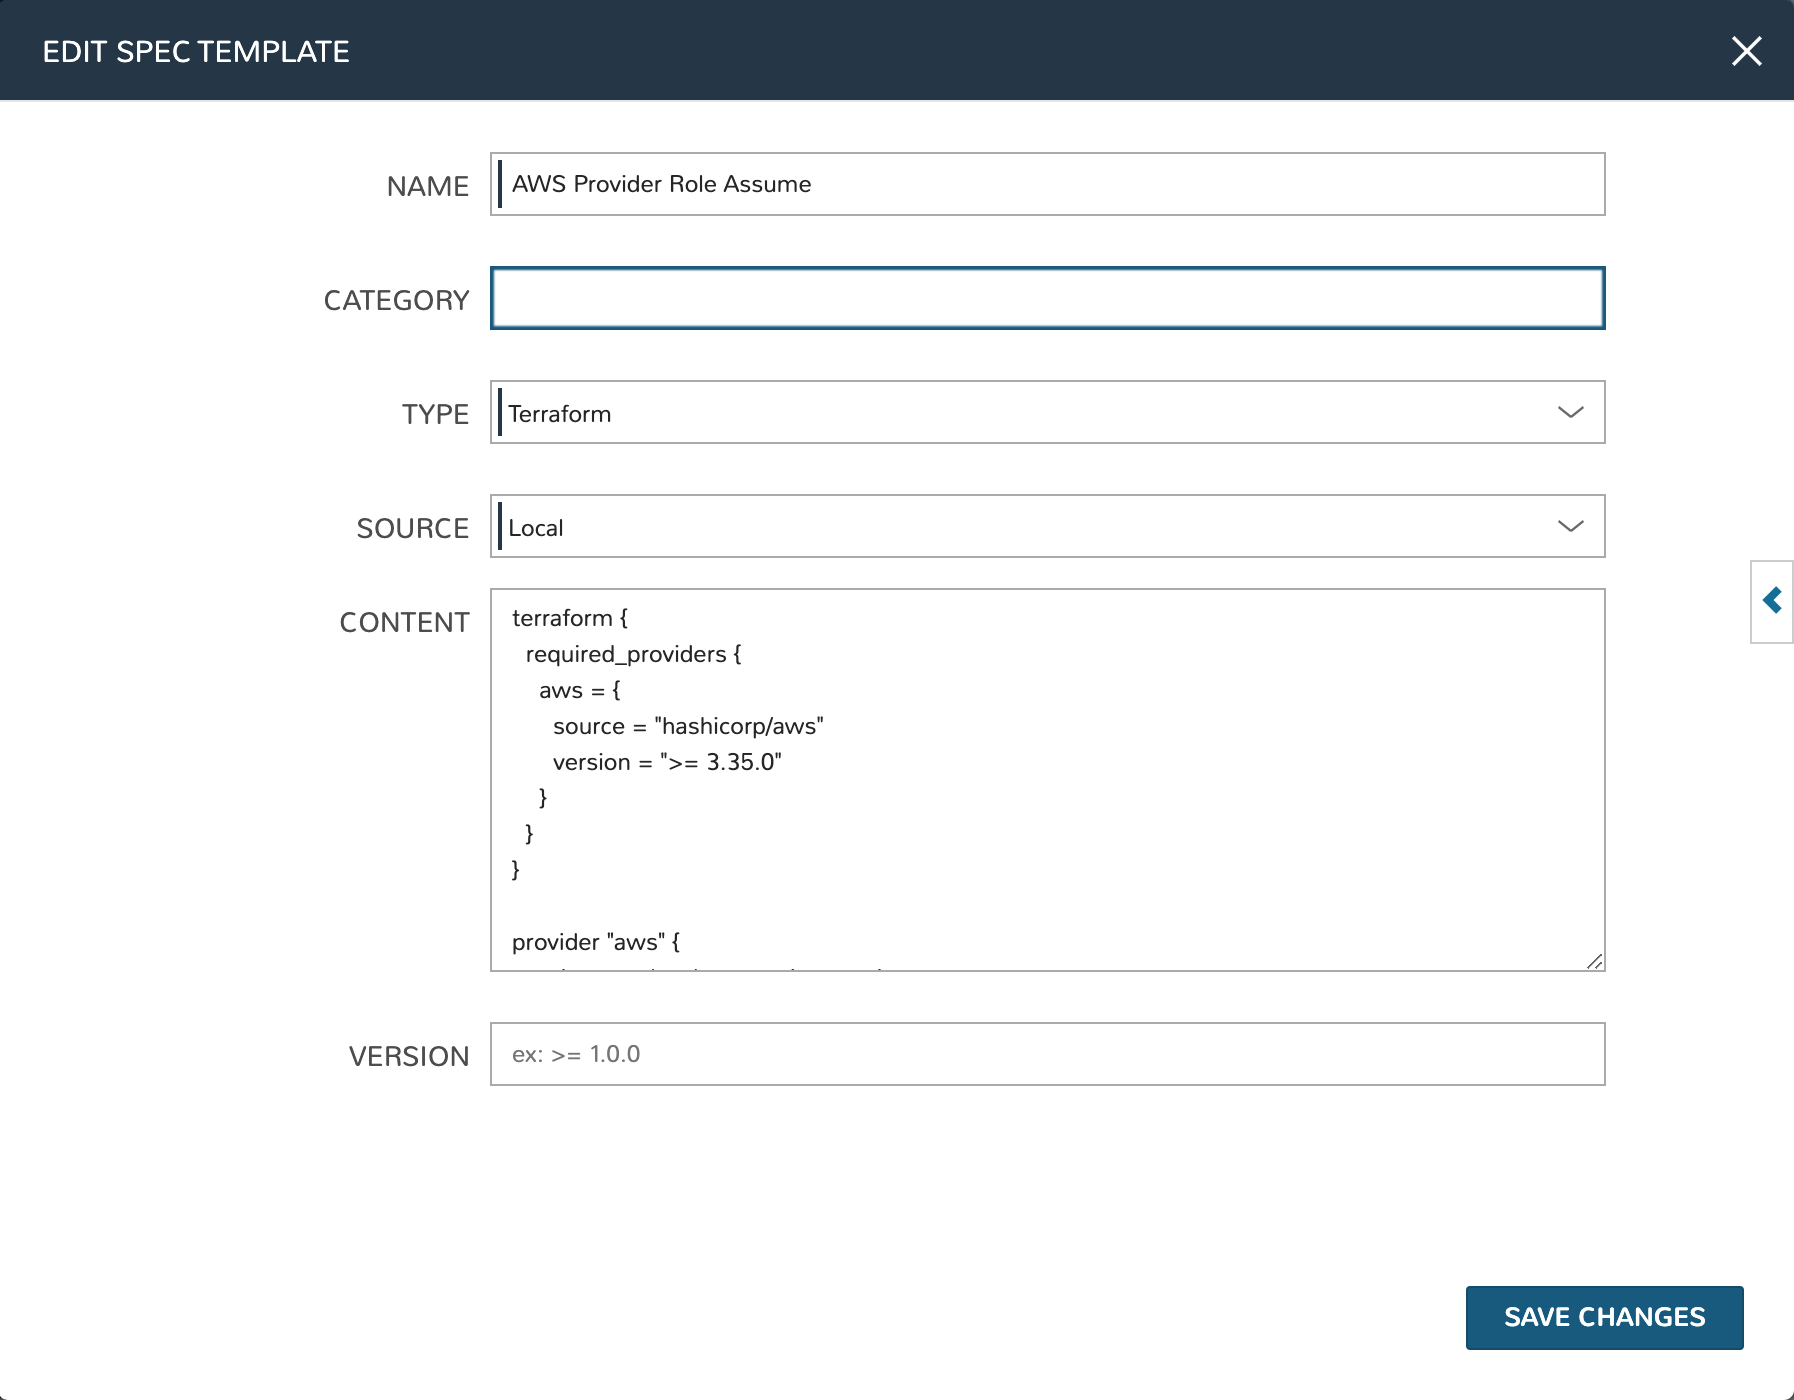
Spec Templates are added in the HPE Morpheus Enterprise Library (Library > Templates > Spec Templates tab). We can pull in the template from some type of repository, such as through a Github integration, or write new spec directly into the New Spec Template modal. In most cases, the spec will be pre-existing and pulled in from a version-controlled repository but here I have my Terraform spec entered locally. Click + ADD, complete the fields as I’ve done in the example below and click SAVE CHANGES.
In the VERSION field at the bottom of the TF Spec Template modal, enter a Terraform version number to force that version to be used. This version is only honored if the Terraform Runtime setting (Administration > Settings > Provisioning) is set to “auto”. When “manual” is selected as the Terraform Runtime setting, HPE Morpheus Enterprise will simply use the version installed on the appliance box.
Tip
When declaring variables, keep in mind that HPE Morpheus Enterprise expects users to follow Terraform best practices. For example, when a variable type is not defined, it defaults to string. See Terraform Documentation for additional resources on variable declaration.
AWS Subnet by Count
# This spec template creates AWS subnets based on the count requested utilizing the vpc cidr provided in var.vpc_cidr variable

locals {
  bitCount = sum([tonumber(local.subnet_options.cidrMask),-tonumber(split("/",var.vpc_cidr)[1])])
}

resource "aws_subnet" "main" {
    count = tonumber(var.subnetCount)
    vpc_id     = aws_vpc.main.id
    cidr_block = cidrsubnet(var.vpc_cidr, local.bitCount, count.index)

    tags = merge(
        local.default_tags,
        {
        Name = "${var.vpc_name}-subnet-0${count.index}"
        }
    )
}

output "aws_subnet" {
  value = aws_subnet.main
  sensitive = true
}
AWS Terraform Default Vars
variable "access_key" {
  type        = string
}

variable "secret_key" {
  type        = string
}

variable "subnetCount" {
  type = number
  default = "<%=customOptions.subnetCount%>"
}

variable "sensitive_thing" {
  type = string
  default = "this_var_is_sensitive"
  sensitive = true
}
AWS Provider Role Assume
terraform {
  required_providers {
    aws = {
      source = "hashicorp/aws"
      version = ">= 3.35.0"
    }
  }
}

provider "aws" {
  region     = local.vpc_options.region
  access_key = var.access_key
  secret_key = var.secret_key

  assume_role {
    # The role ARN within Account B to AssumeRole into.
    role_arn = "arn:aws:iam::${local.vpc_options.aws_account}:role/OrganizationAccountAccessRole"
  }
}
AWS Terrform Locals
locals {
  #  Common tags to be assigned to all resources
  default_tags = {
    Owner    = "<%=username%>"
    Group = "<%=groupName%>"
    Management_Tool = "Terraform"
    Management_Platform = "Morpheus"
  }

  subnet_options = {
    cidrMask = "<%=customOptions.cidrMask%>"
    subnetCount = "<%=customOptions.subnetCount%>"
  }
  vpc_options = {
    region = "<%=customOptions.awsRegion%>"
    aws_account = "<%=customOptions.awsAccount%>"
  }
}
AWS VPC
variable "vpc_cidr" {
  type        = string
  description = "CIDR for the the VPC"
  default = "172.16.0.0/24"
}

variable "vpc_name" {
  type        = string
  description = "Name for the VPC"
  default = "durka"
}

resource "aws_vpc" "main" {
    cidr_block = var.vpc_cidr

 tags = merge(
    local.default_tags,
    {
      Name = var.vpc_name
    }
  )
}

output "aws_vpc" {
  value = aws_vpc.main
  sensitive = true
}
Note
In the AWS Terraform Locals example Spec Template above, pre-provision variables are used. Note the use of pre-provision variables to store the value for Owner and Group, among other things. See the variables section of HPE Morpheus Enterprise documentation (linked in the prior sentence) for a listing of other possible pre-provision variables and a complete map of variables which can be resolved after provisioning has completed.
Inputs and Option Lists
In order to create the Layout later in the guide, I need to create four Inputs so the user can make certain selections at provision time. I wrote my Terraform Configuration with this flexibility in mind so that the same Instance Type can be reused in different scenarios. In this particular case, I’m populating the Inputs with manual Option Lists but they can also be populated through REST calls or calls to the HPE Morpheus Enterprise API when needed.
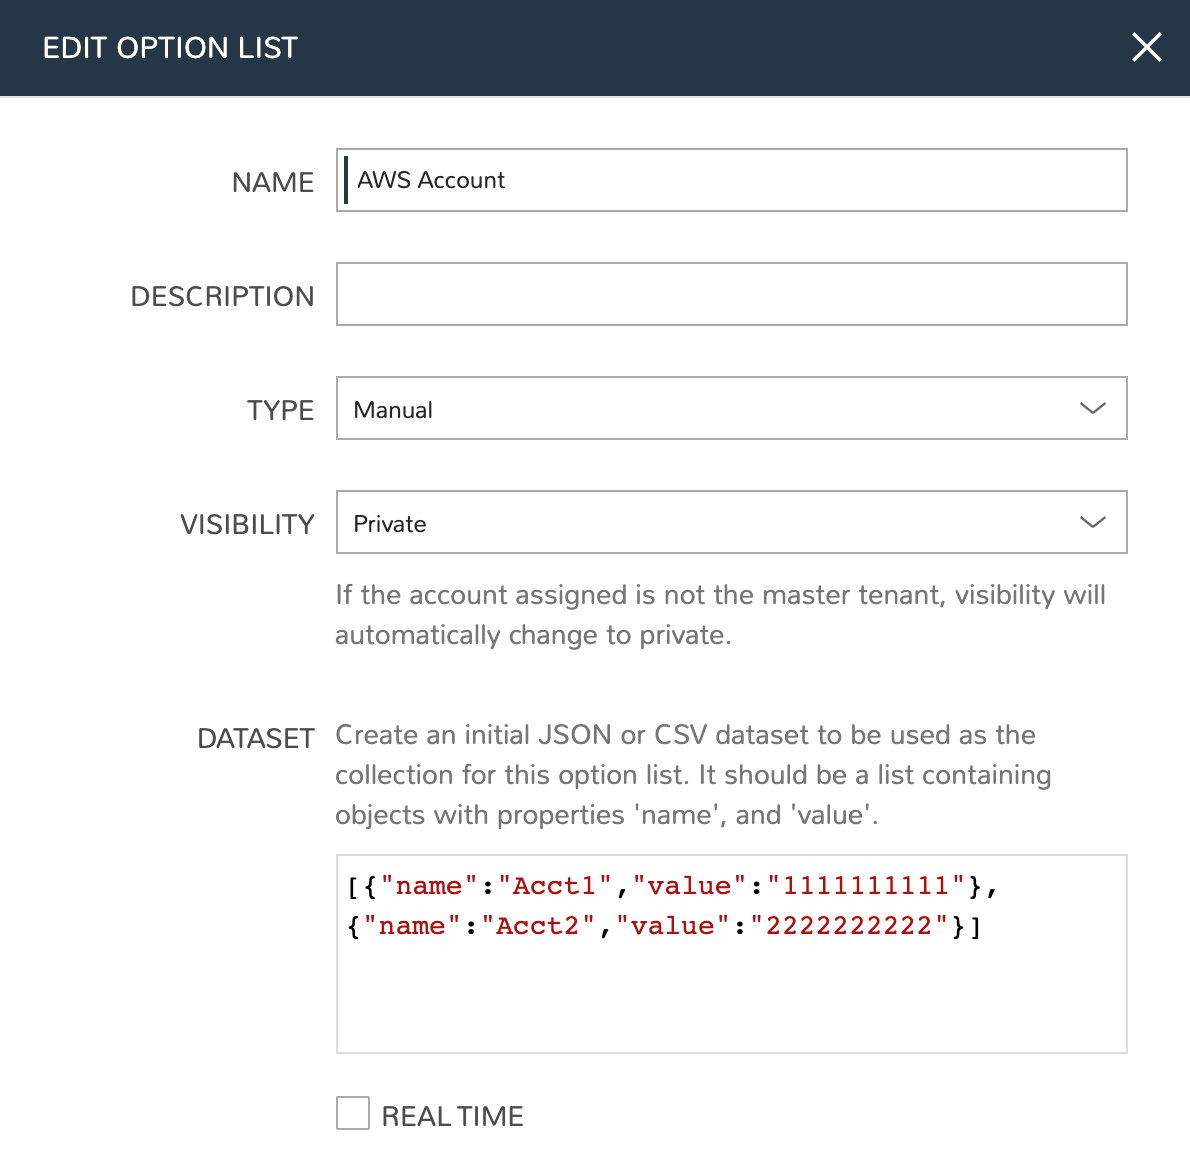
Option Lists are created in the Library (Library) under the Option Lists tab. These are lists of items which will be used to create dropdown selections at provision time. Click + ADD, complete the fields as I’ve done in the example below and click SAVE CHANGES. I’ve created one each for the AWS account selection, region selection, and CIDR mask input.
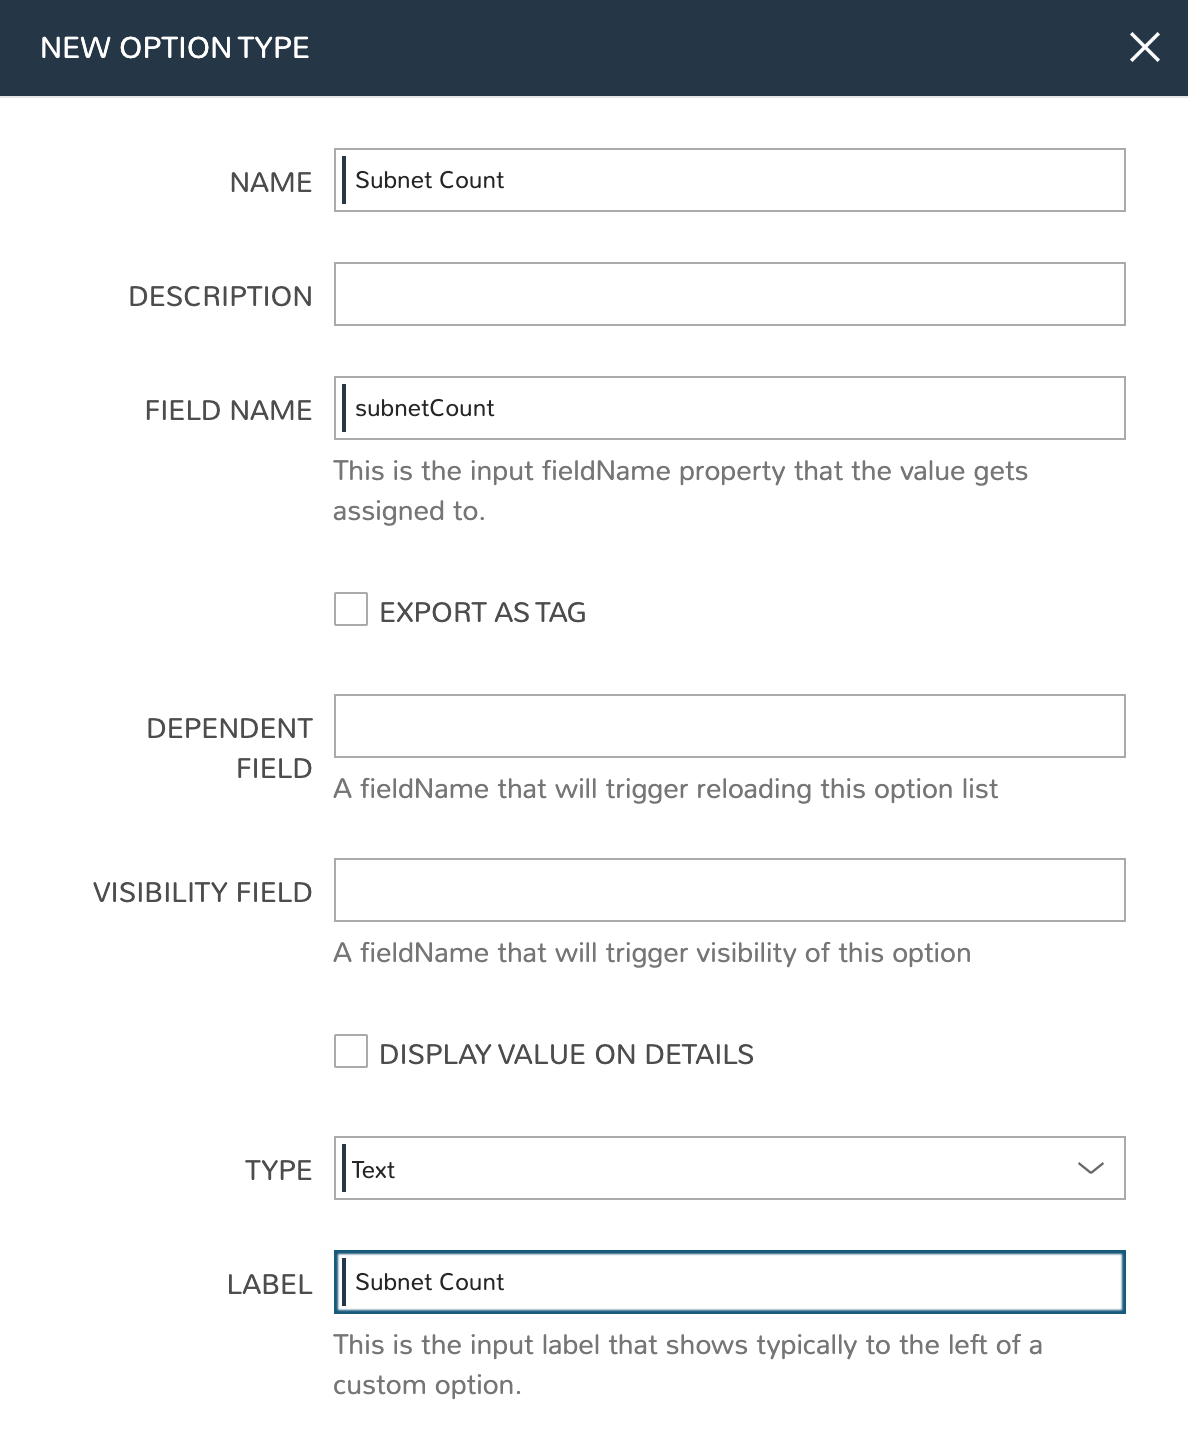
Inputs are also created in the Library under the Inputs tab. In this case, I’m creating four Inputs. Three of them will display as dropdown selections and will be tied to one of the Option Lists we just made. The other will be a simple text input where the user can indicate the total number of subnets that should be created. Click + ADD, complete the fields as I’ve done in the example below and click SAVE CHANGES.
Instance Type
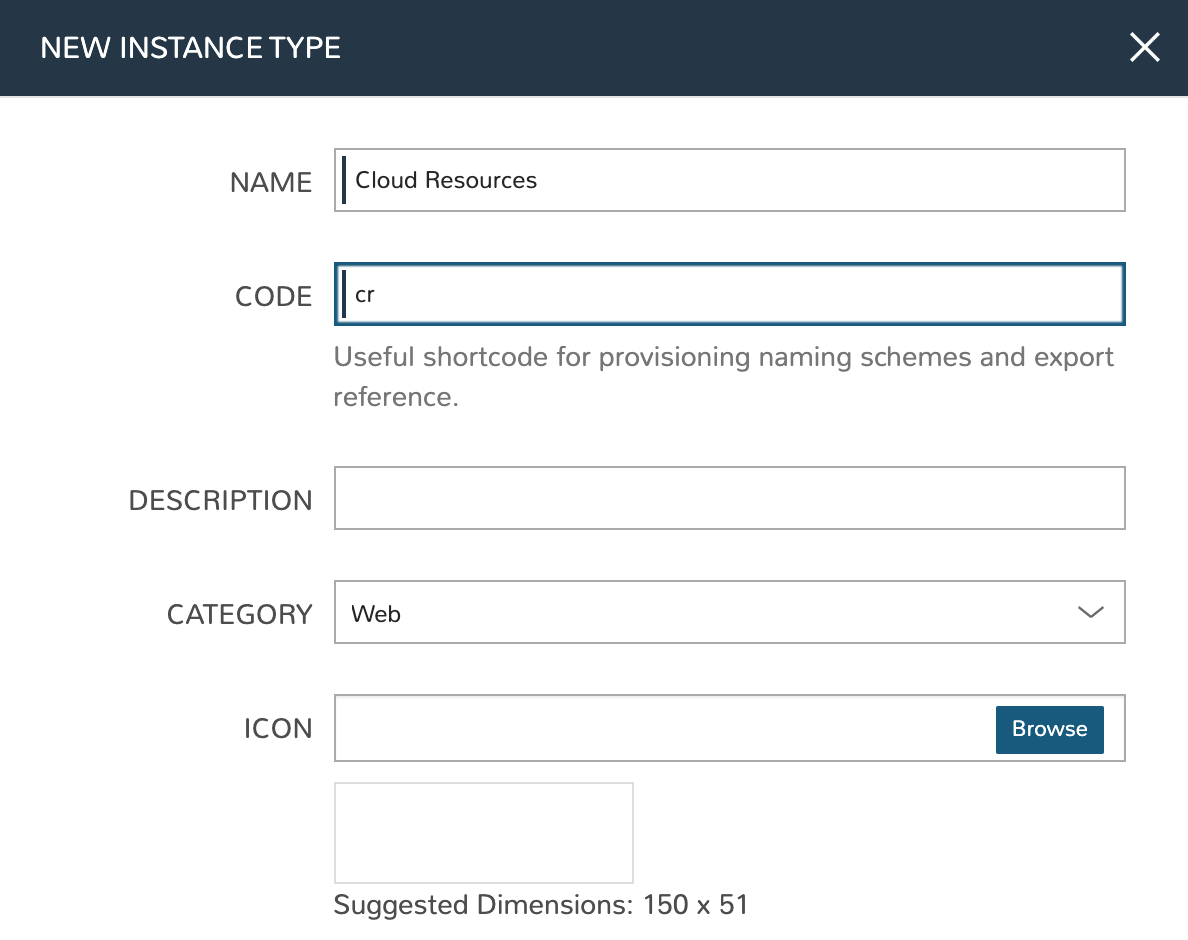
At this point we’re ready to create a new Instance Type. We’ll give the Instance Type a name, which users will use to identify the Instance Type from the list in the provisioning wizard. We don’t need to set much else in this case, most of the pieces we’ve created in previous steps will be associated with the Layout that we create next. The Layout will also be tied to the Instance Type we’re creating now. Instance Types are also created in the Library (Library) under the Instance Types tab. Click + ADD, complete the fields as I’ve done in the example below and click SAVE CHANGES.
Layout
The Layout will bring together everything we’ve made to this point, the Spec Templates, Inputs and the Instance Type. We can add a new one from the Instance Type detail page (Library > Blueprints > Instance Types > Selected Instance Type) by clicking + ADD LAYOUT. We can also create one from the Layouts section (Library > Blueprints > Layouts) by clicking + ADD.
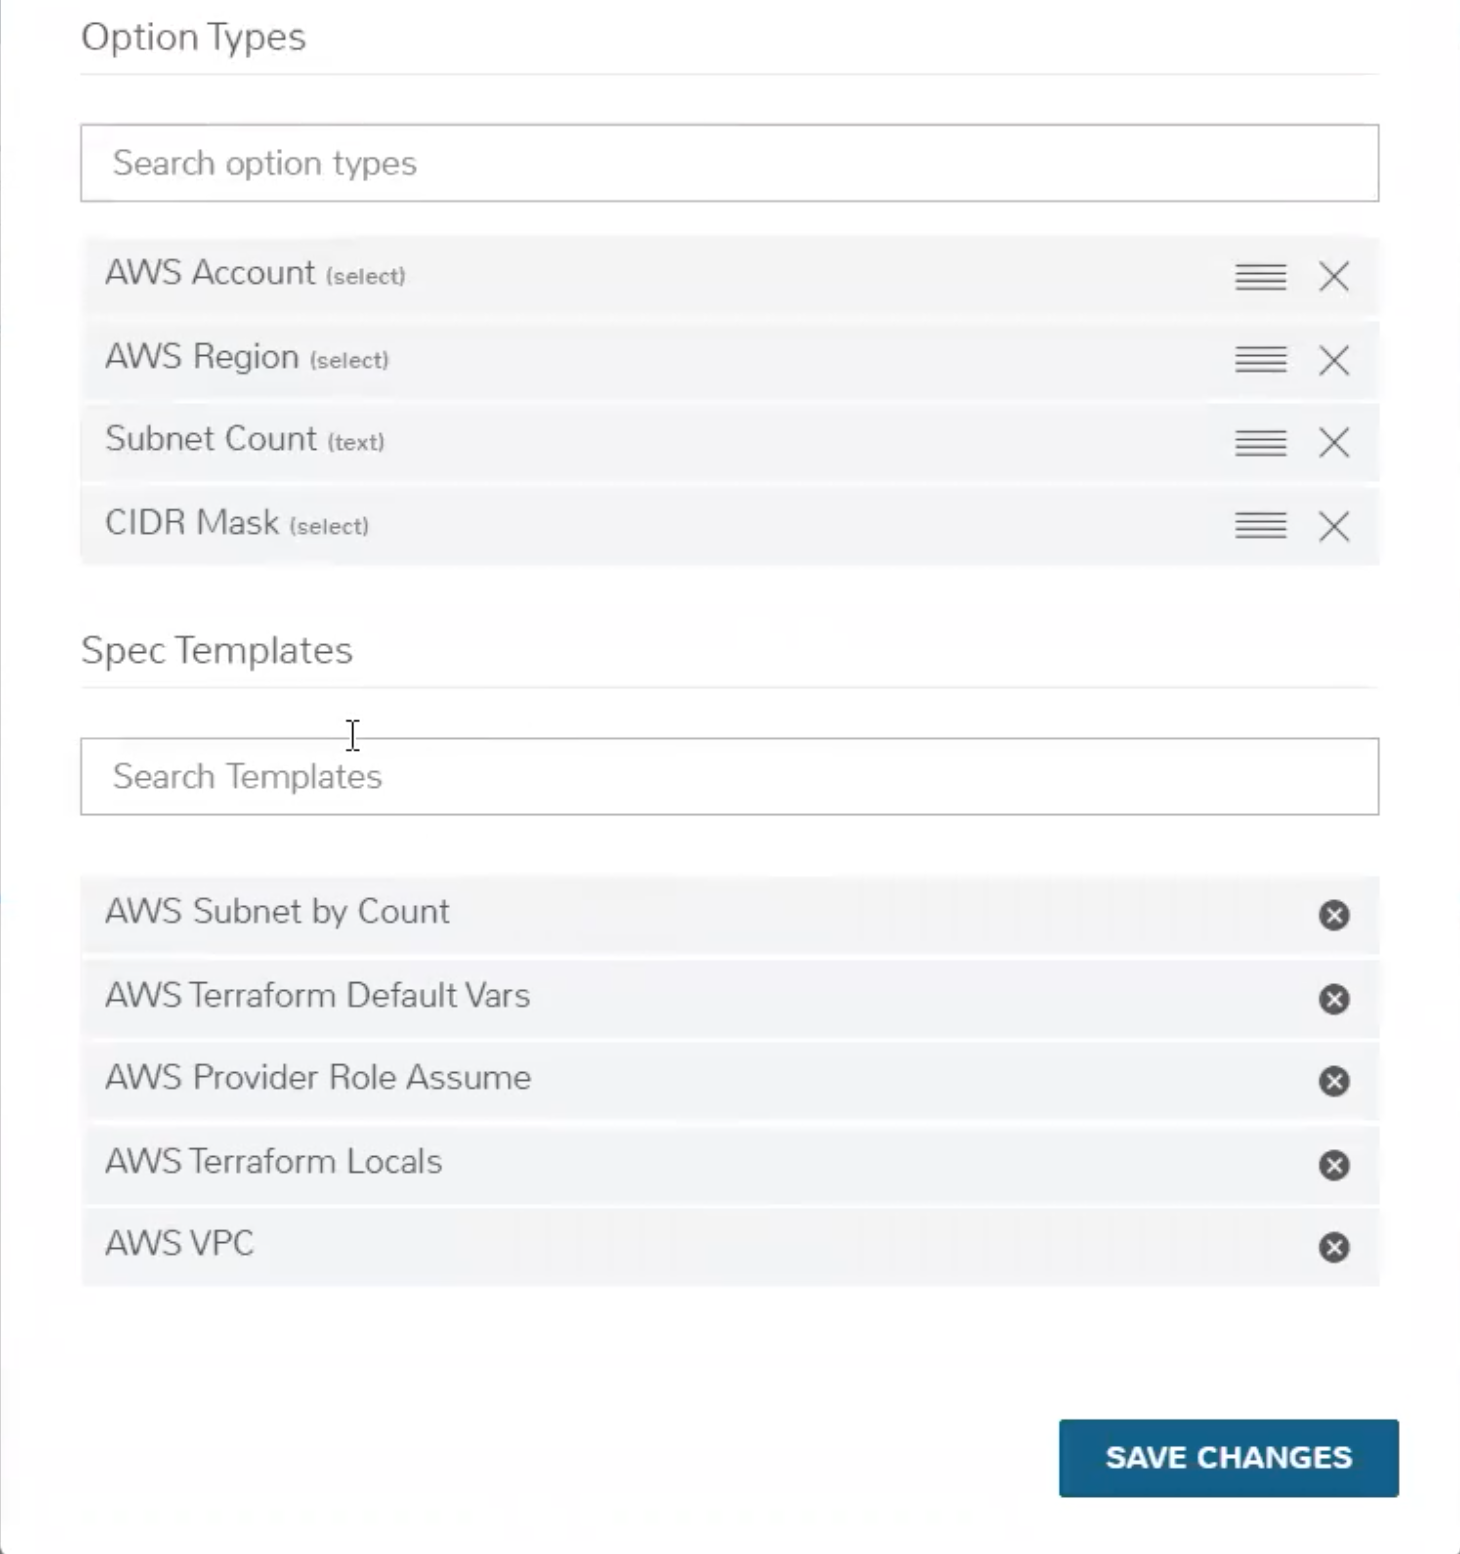
First, change the TECHNOLOGY value to Terraform and the fields will change to allow proper configuration. Next, provide a name for your Layout. If you’re creating the Layout through the Layout tab rather than from the Instance Type detail page, you’ll need to identify the Instance Type the Layout goes with. Using the typeahead fields at bottom of the modal window, add our four Inputs and our five Spec Templates to the Layout. Finally, point the layout to a TFVAR SECRET from HPE Morpheus Enterprise Cypher if needed. You can see a screenshot of my Layout configuration below
Provisioning
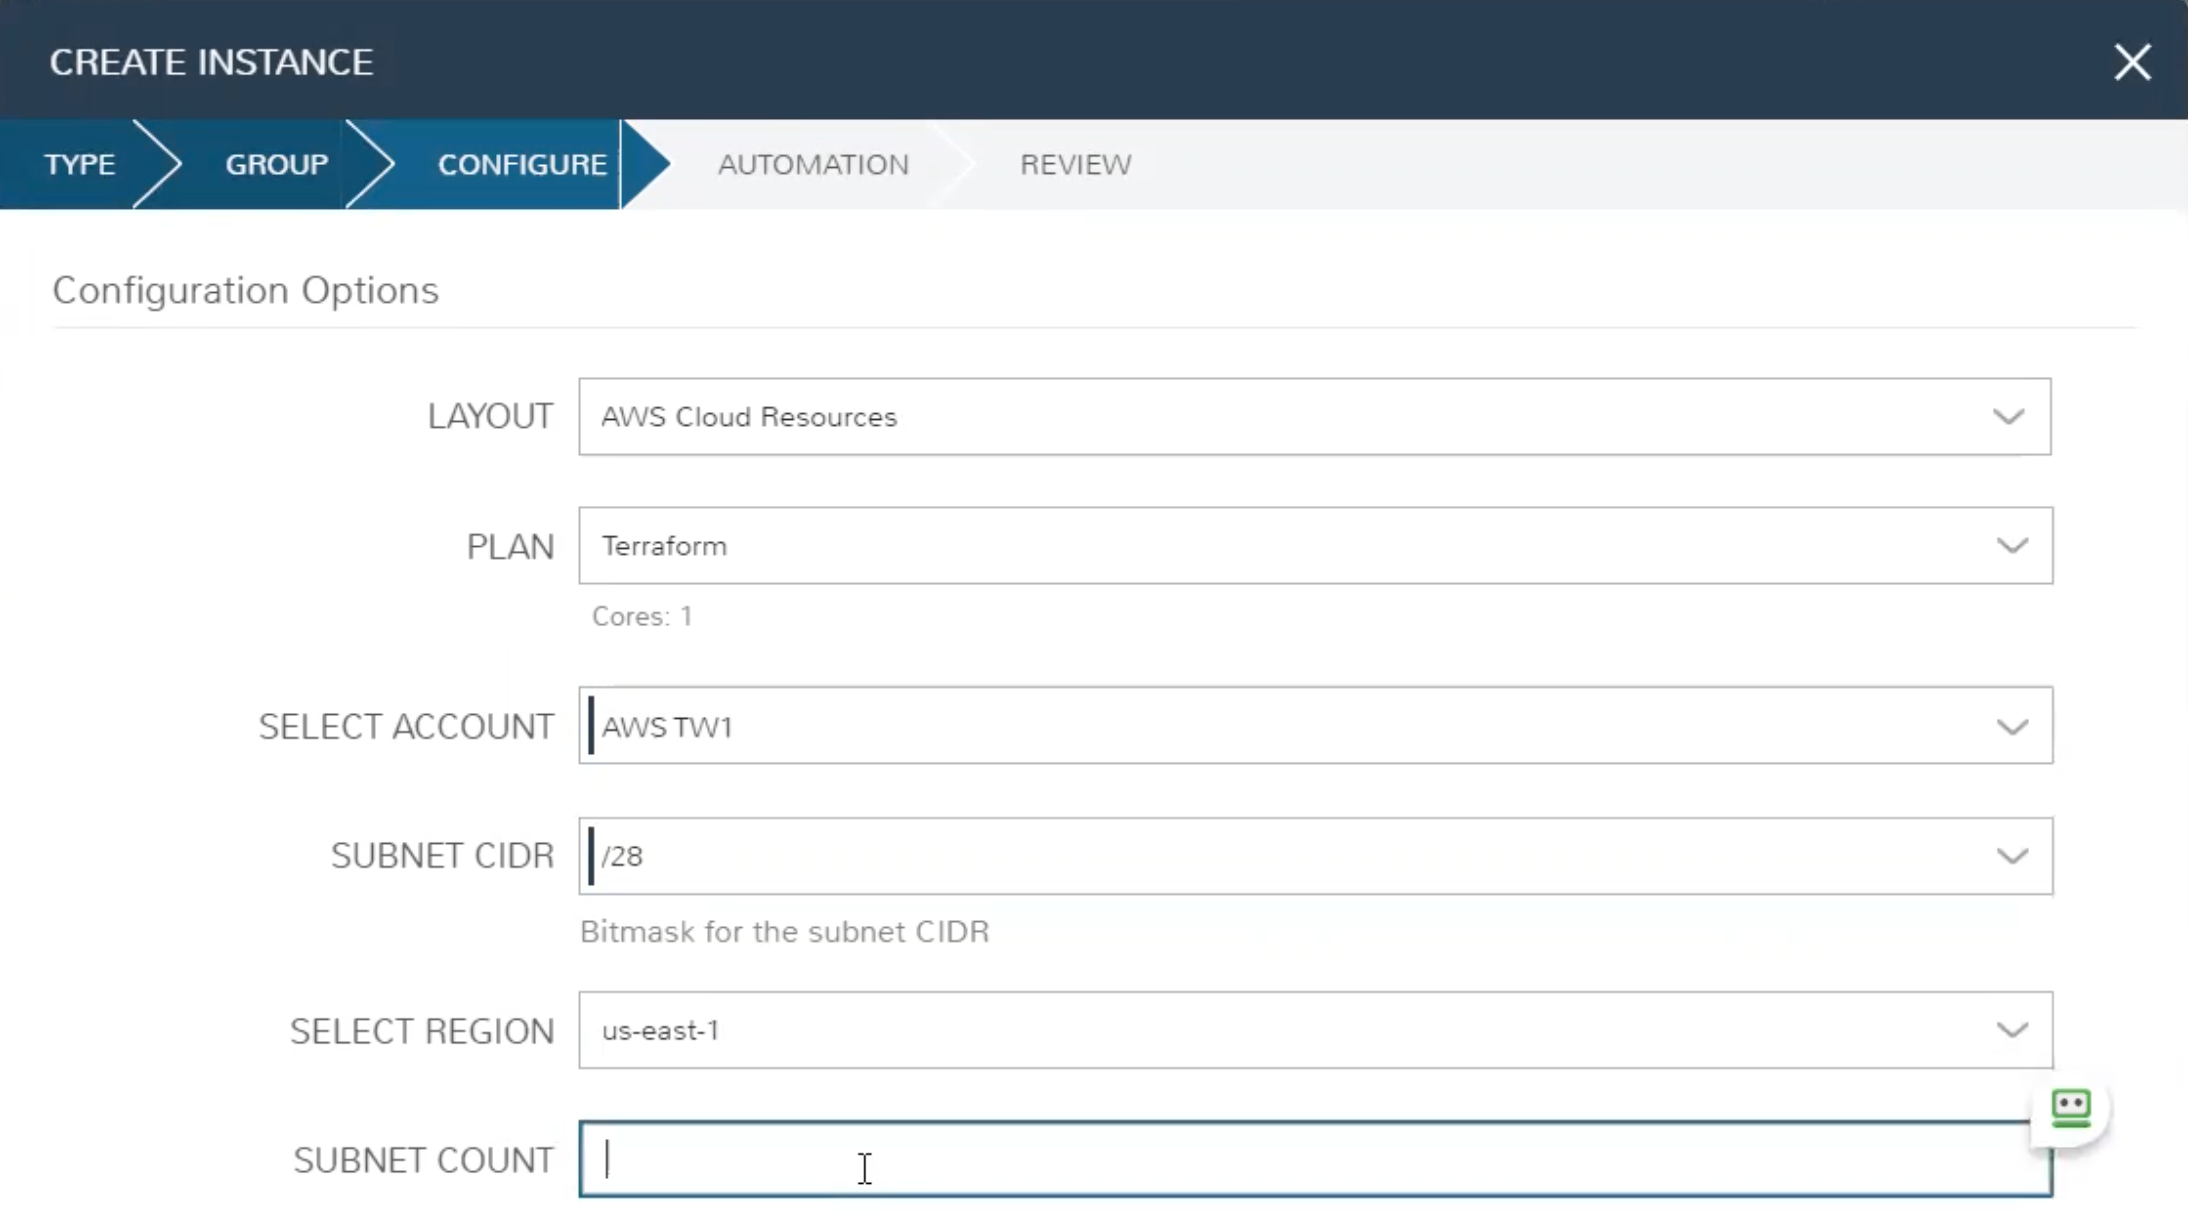
Now, we’re ready to provision new infrastructure into AWS using HPE Morpheus Enterprise and Terraform. Just like any other Instance Type, we begin from the Instances list page (Provisioning > Instances) and click + ADD. Select the Instance Type we’ve just created and move on to the GROUP tab of the wizard. Here you’ll give the new instance a name and select your Group and Cloud. Once finished, you’ll move on to the CONFIGURE tab where we’ll see the Inputs we created and associated with the Layout. Once finished with this tab, step through the rest of the wizard to complete the process. You can see the options I’ve selected for this configuration in the image below.
Review the New Instance
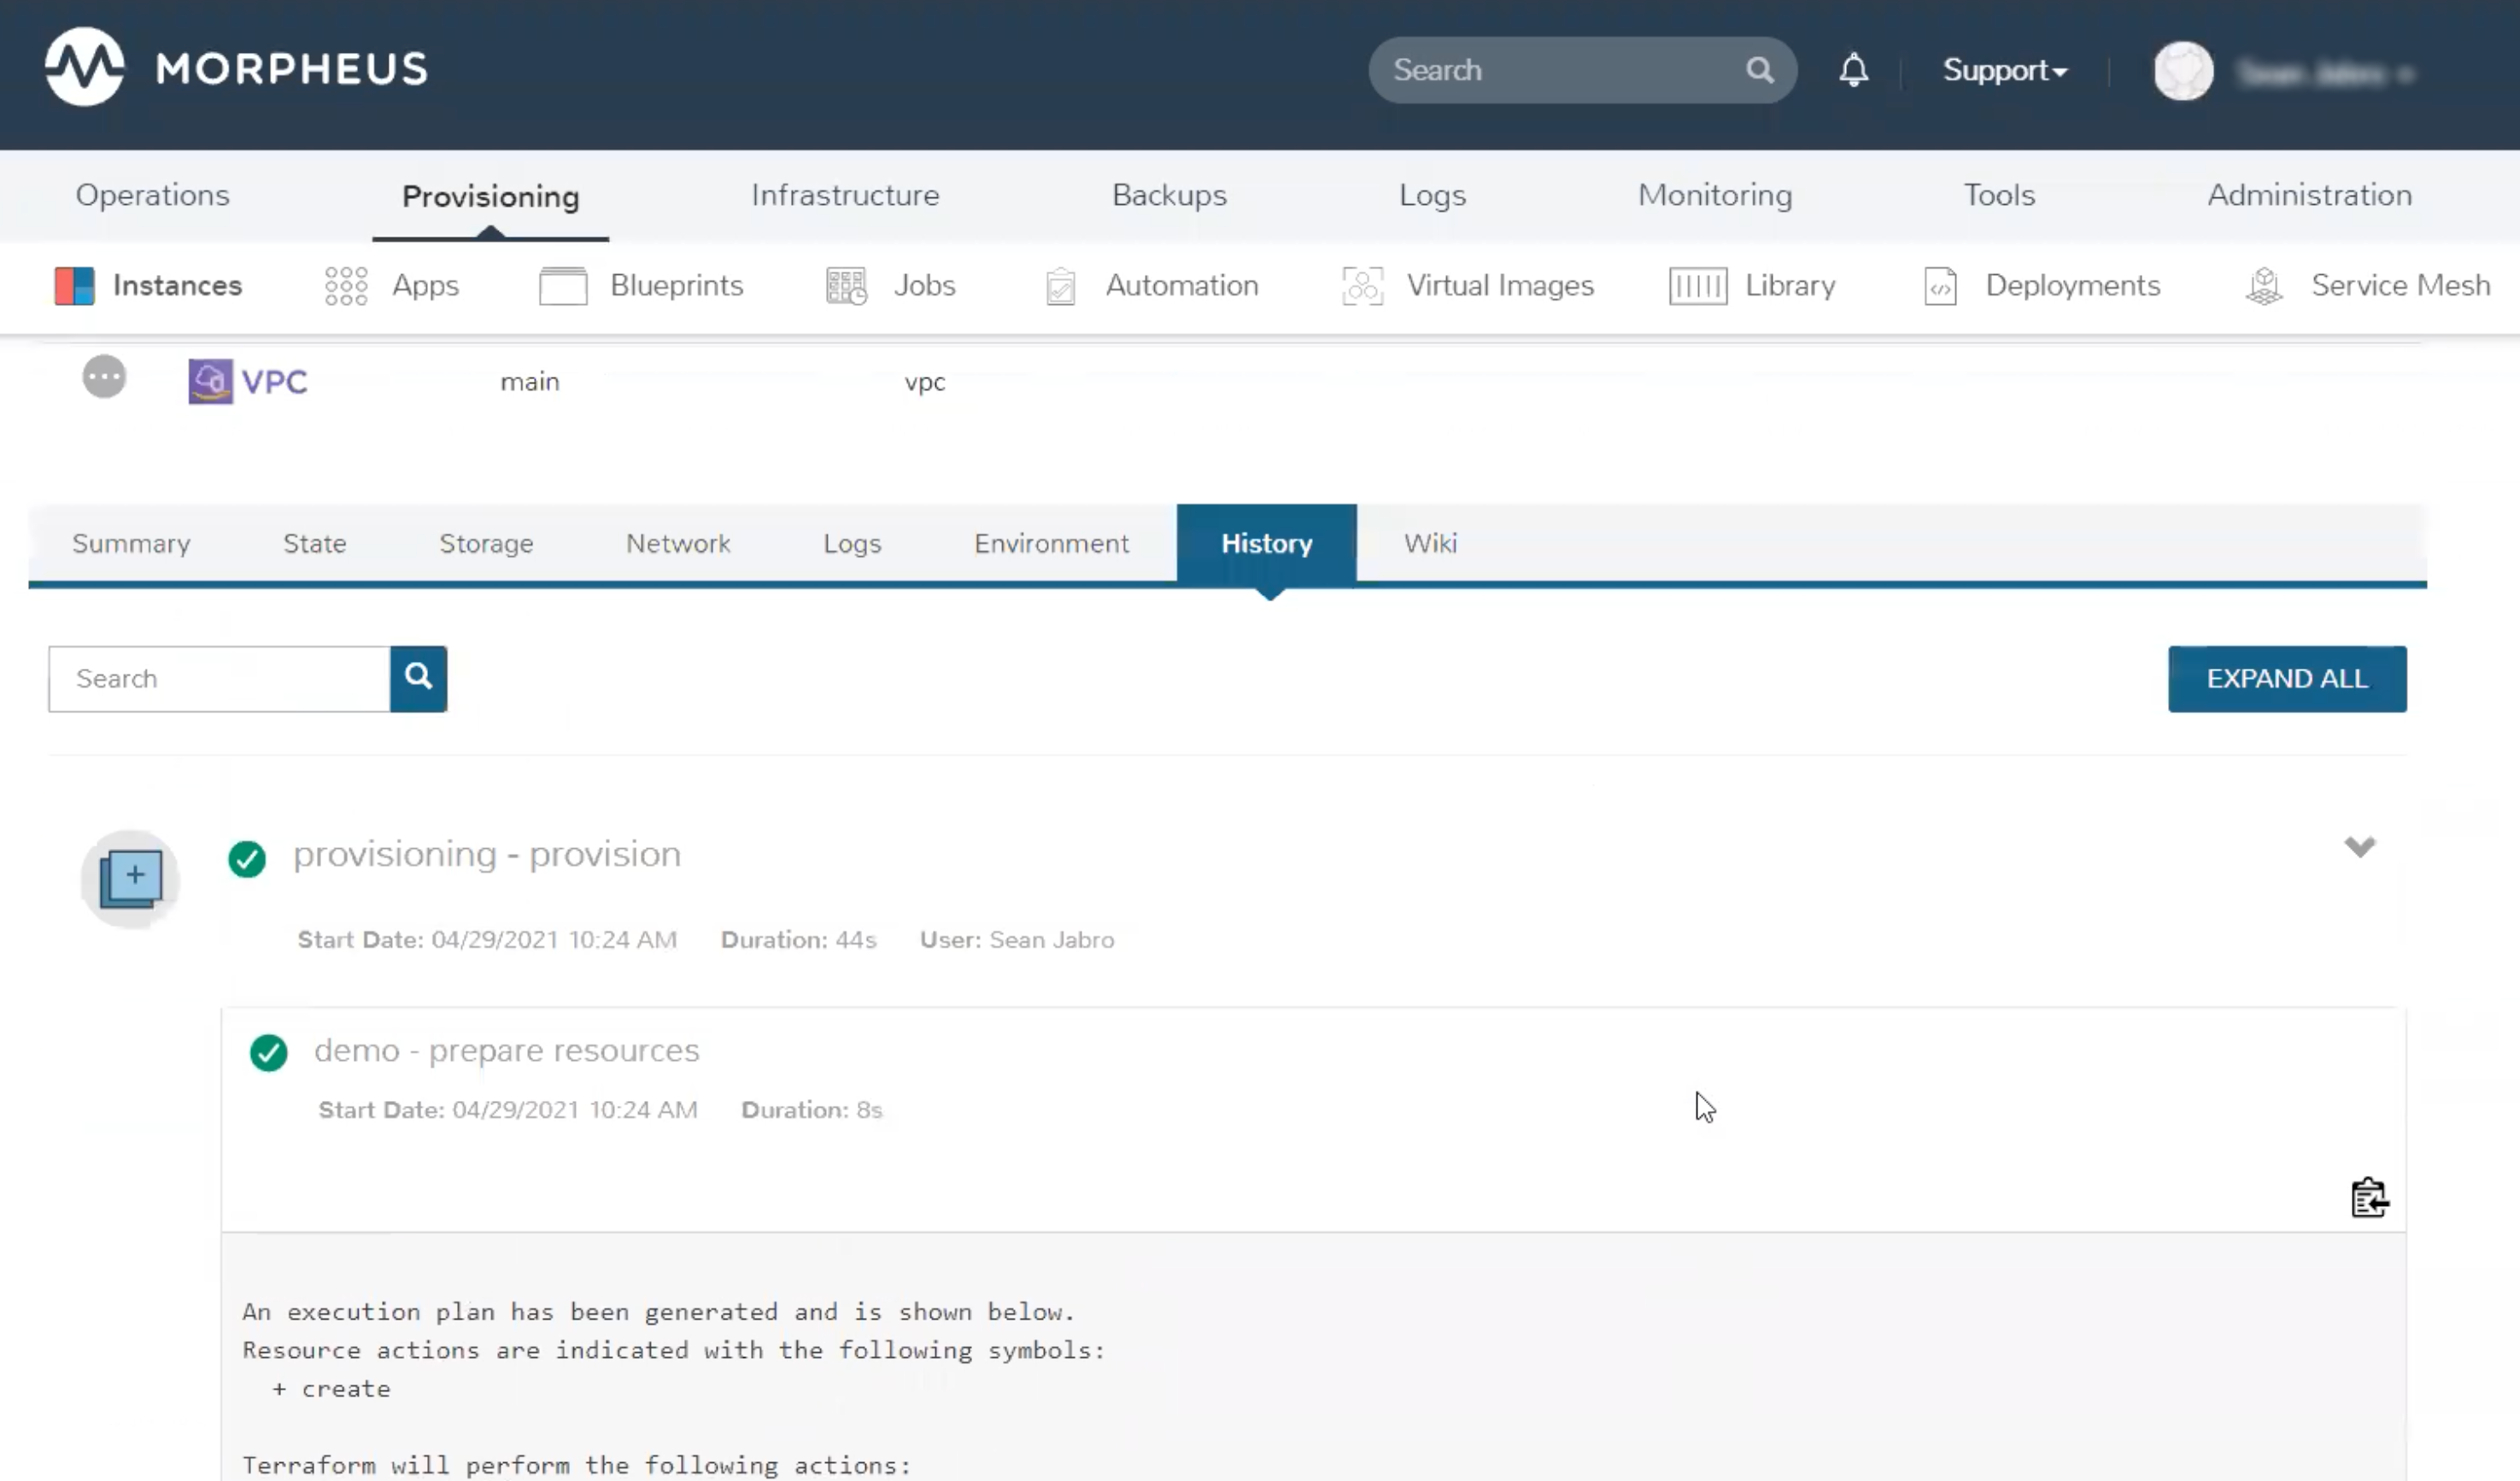
After completing the wizard, from the History tab of the Instance detail page users can review the Terraform plan being executed and see the output while the resources are still being provisioned.
Once the provisioning process is complete, head to the State tab. Here we can see and link through to the associated Spec Templates. If needed, you can also edit the configuration spec by clicking on the pencil icon at the end of the row for any listed Spec Template.
By clicking APPLY STATE, the user can once again see the Input selections which were presented during the initial provisioning and make changes when needed. After making changes and clicking NEXT, HPE Morpheus Enterprise will show the plan output no different than if you’d run terraform plan. On clicking COMPLETE, the plan will be executed as if you’d run terraform apply. Back on the State tab you will see the output from the Apply process as well as an indicator of the success or failure of the operation.
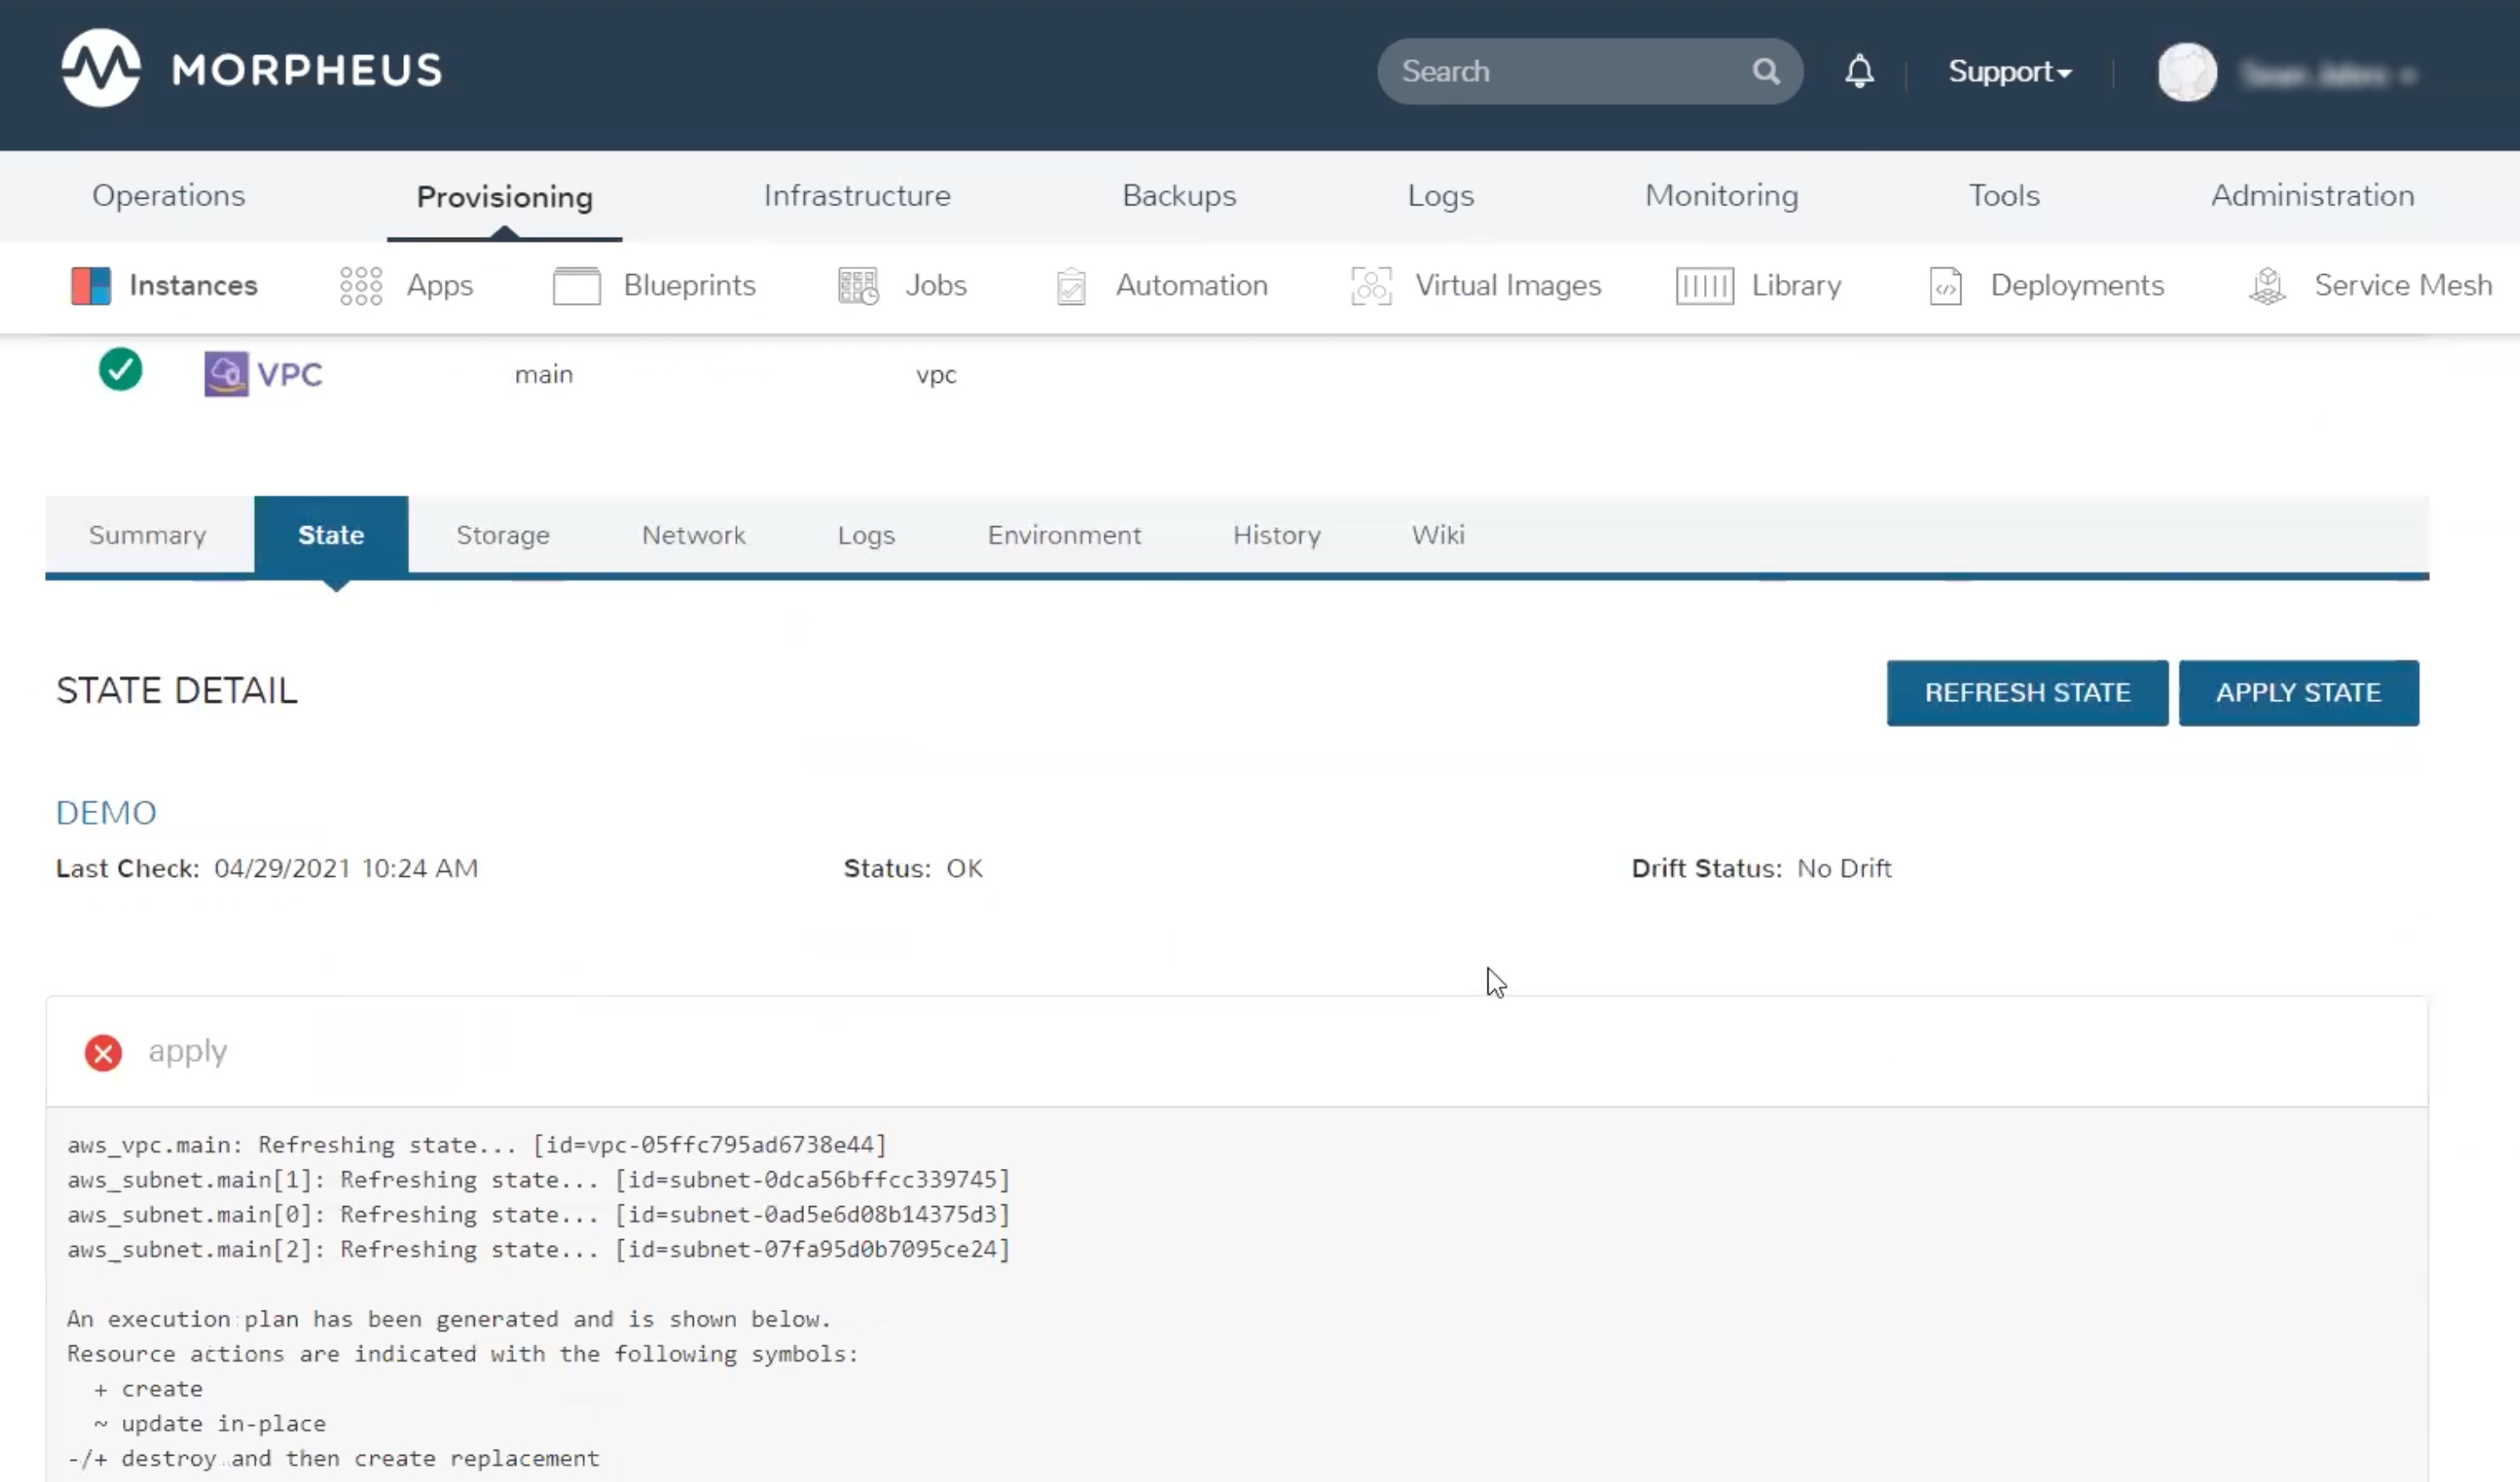
HPE Morpheus Enterprise will also regularly check for drift from the Terraform configuration. On the State tab near the top is a “Drift Status” indicator. This will either show Drift or No Drift depending on the situation. HPE Morpheus Enterprise will automatically check for drift every few minutes but you can perform a manual check at any time by clicking REFRESH STATE. Drift can be corrected when needed by reapplying state (APPLY STATE button).