Apps
Apps allow instances having general relationships to be grouped in a clean and organized manner. App functionality enables full control of which instances belong in an app as well setting Firewall and Access Control List (ACL) rules. Use Apps to structure all necessary components into a single place. Add checks and groups for web servers, database nodes, etc.
Apps can be created from Blueprints, which are made in Library > Blueprints > App Blueprints or from Existing Apps.
Creating Apps
New Apps can be created from Blueprints or using existing Instances.
Creating Apps from Blueprints
Click +ADD on the right side of the main Apps section in Provisioning.
Select an existing App Blueprint and click NEXT.
Note
App Blueprints must be created in Library > Blueprints > App Blueprints to appear as options when provisioning an App.
Enter a Name for the App and select a Group. Default Cloud and Env can also be selected.
Click NEXT. Blueprint configurations matching the Group, Cloud and Environment selections will auto-populate the configurations of the Instances in the App. If no Blueprint Configuration matched the Group, Cloud or Env selections, the Instances will have default configurations.
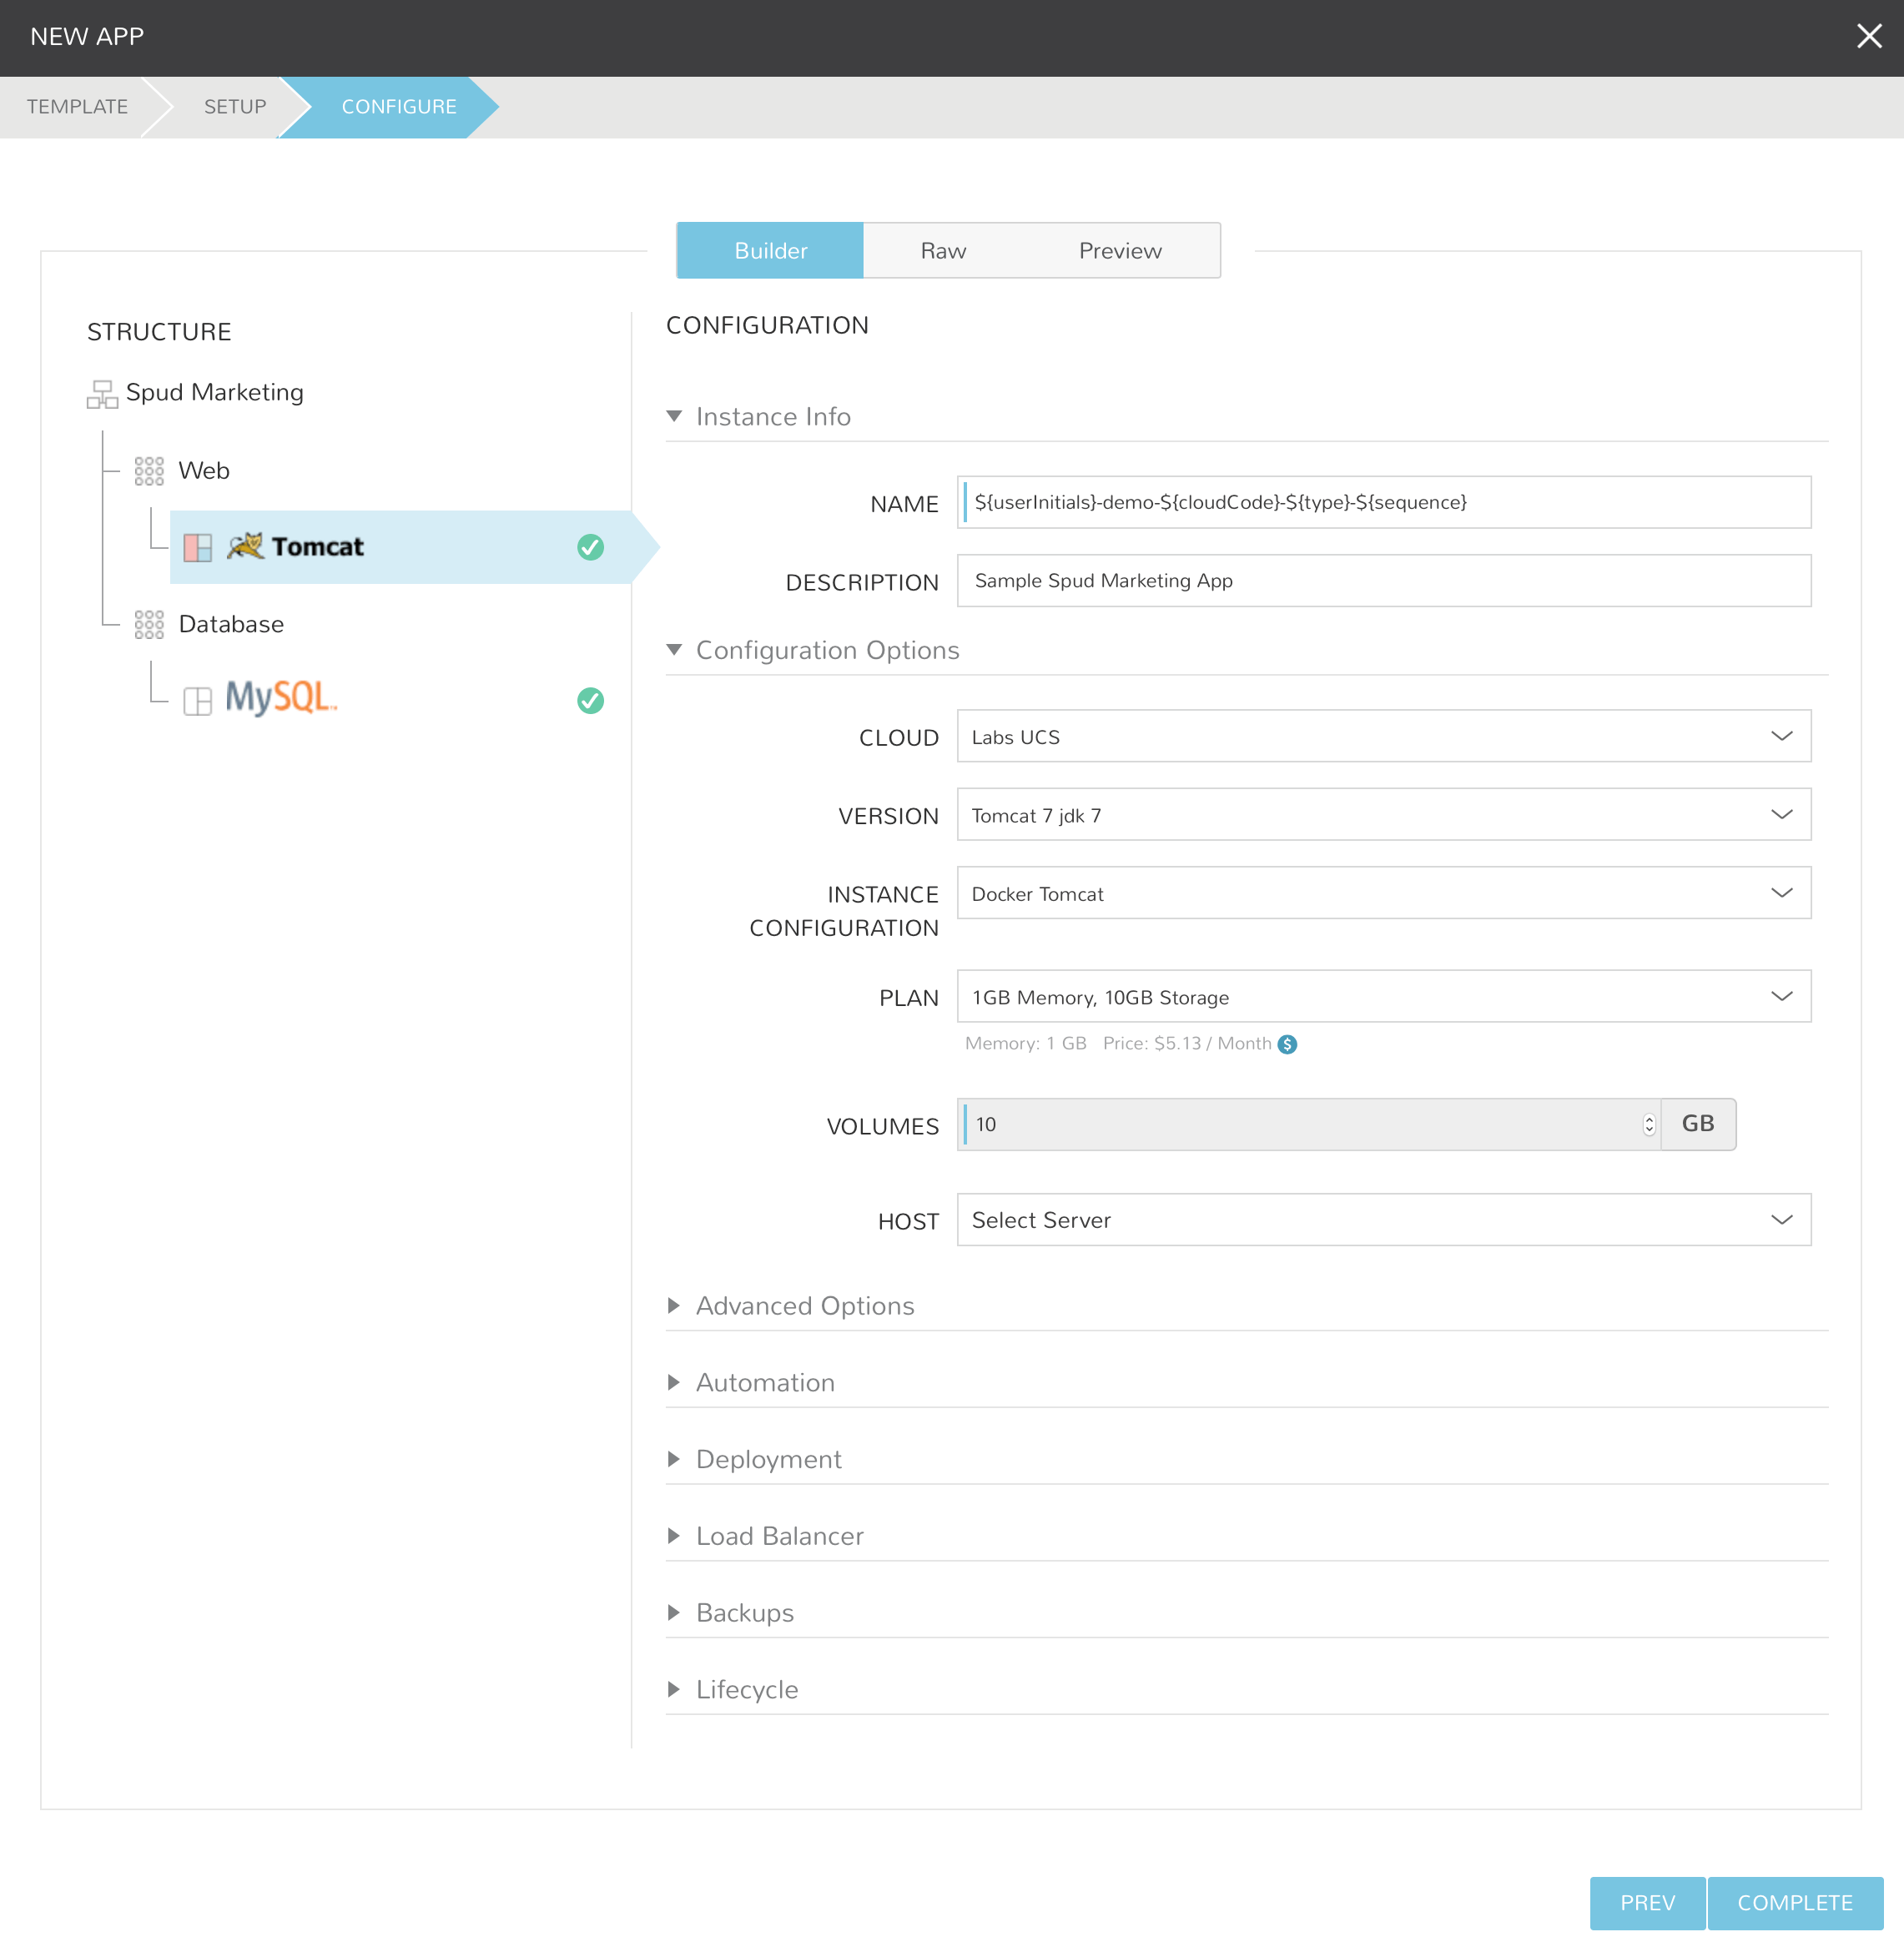
Configure your Instances. Depending on the Blueprint Configurations settings, instances may already be fully configured. Fields that are locked in a Blueprint cannot be edited when creating an App.
Note
Once an Instance is fully configured, a green checkmark will appear next to the Instance. Instances that have required fields that need populated will have a red X and must be completed. If your Blueprint is already fully configured, you can simply select COMPLETE!
Select COMPLETE and the App will be created, and the Instances will begin provisioning.
Creating Apps from Existing Instances
Click +ADD on the right side of the main Apps section in Provisioning.
Select
APP FROM EXISTING INSTANCESfrom the Blueprints list and click NEXT.Enter a Name for the App and select a Group. Default Cloud and Env can also be selected.
Note
Only instances within the selected Group and Cloud will be available to be added to the App.
In the STRUCTURE section, select + to add a Tier
Select or enter a Tier Name.
Select the Tier to set Boot Order, rename, or once multiple Tiers are added, connect the Tier to other Tiers.
In the STRUCTURE section, select + in a Tier to add an Instance
Select the Instance Type of the Existing Instance to be added to the App.
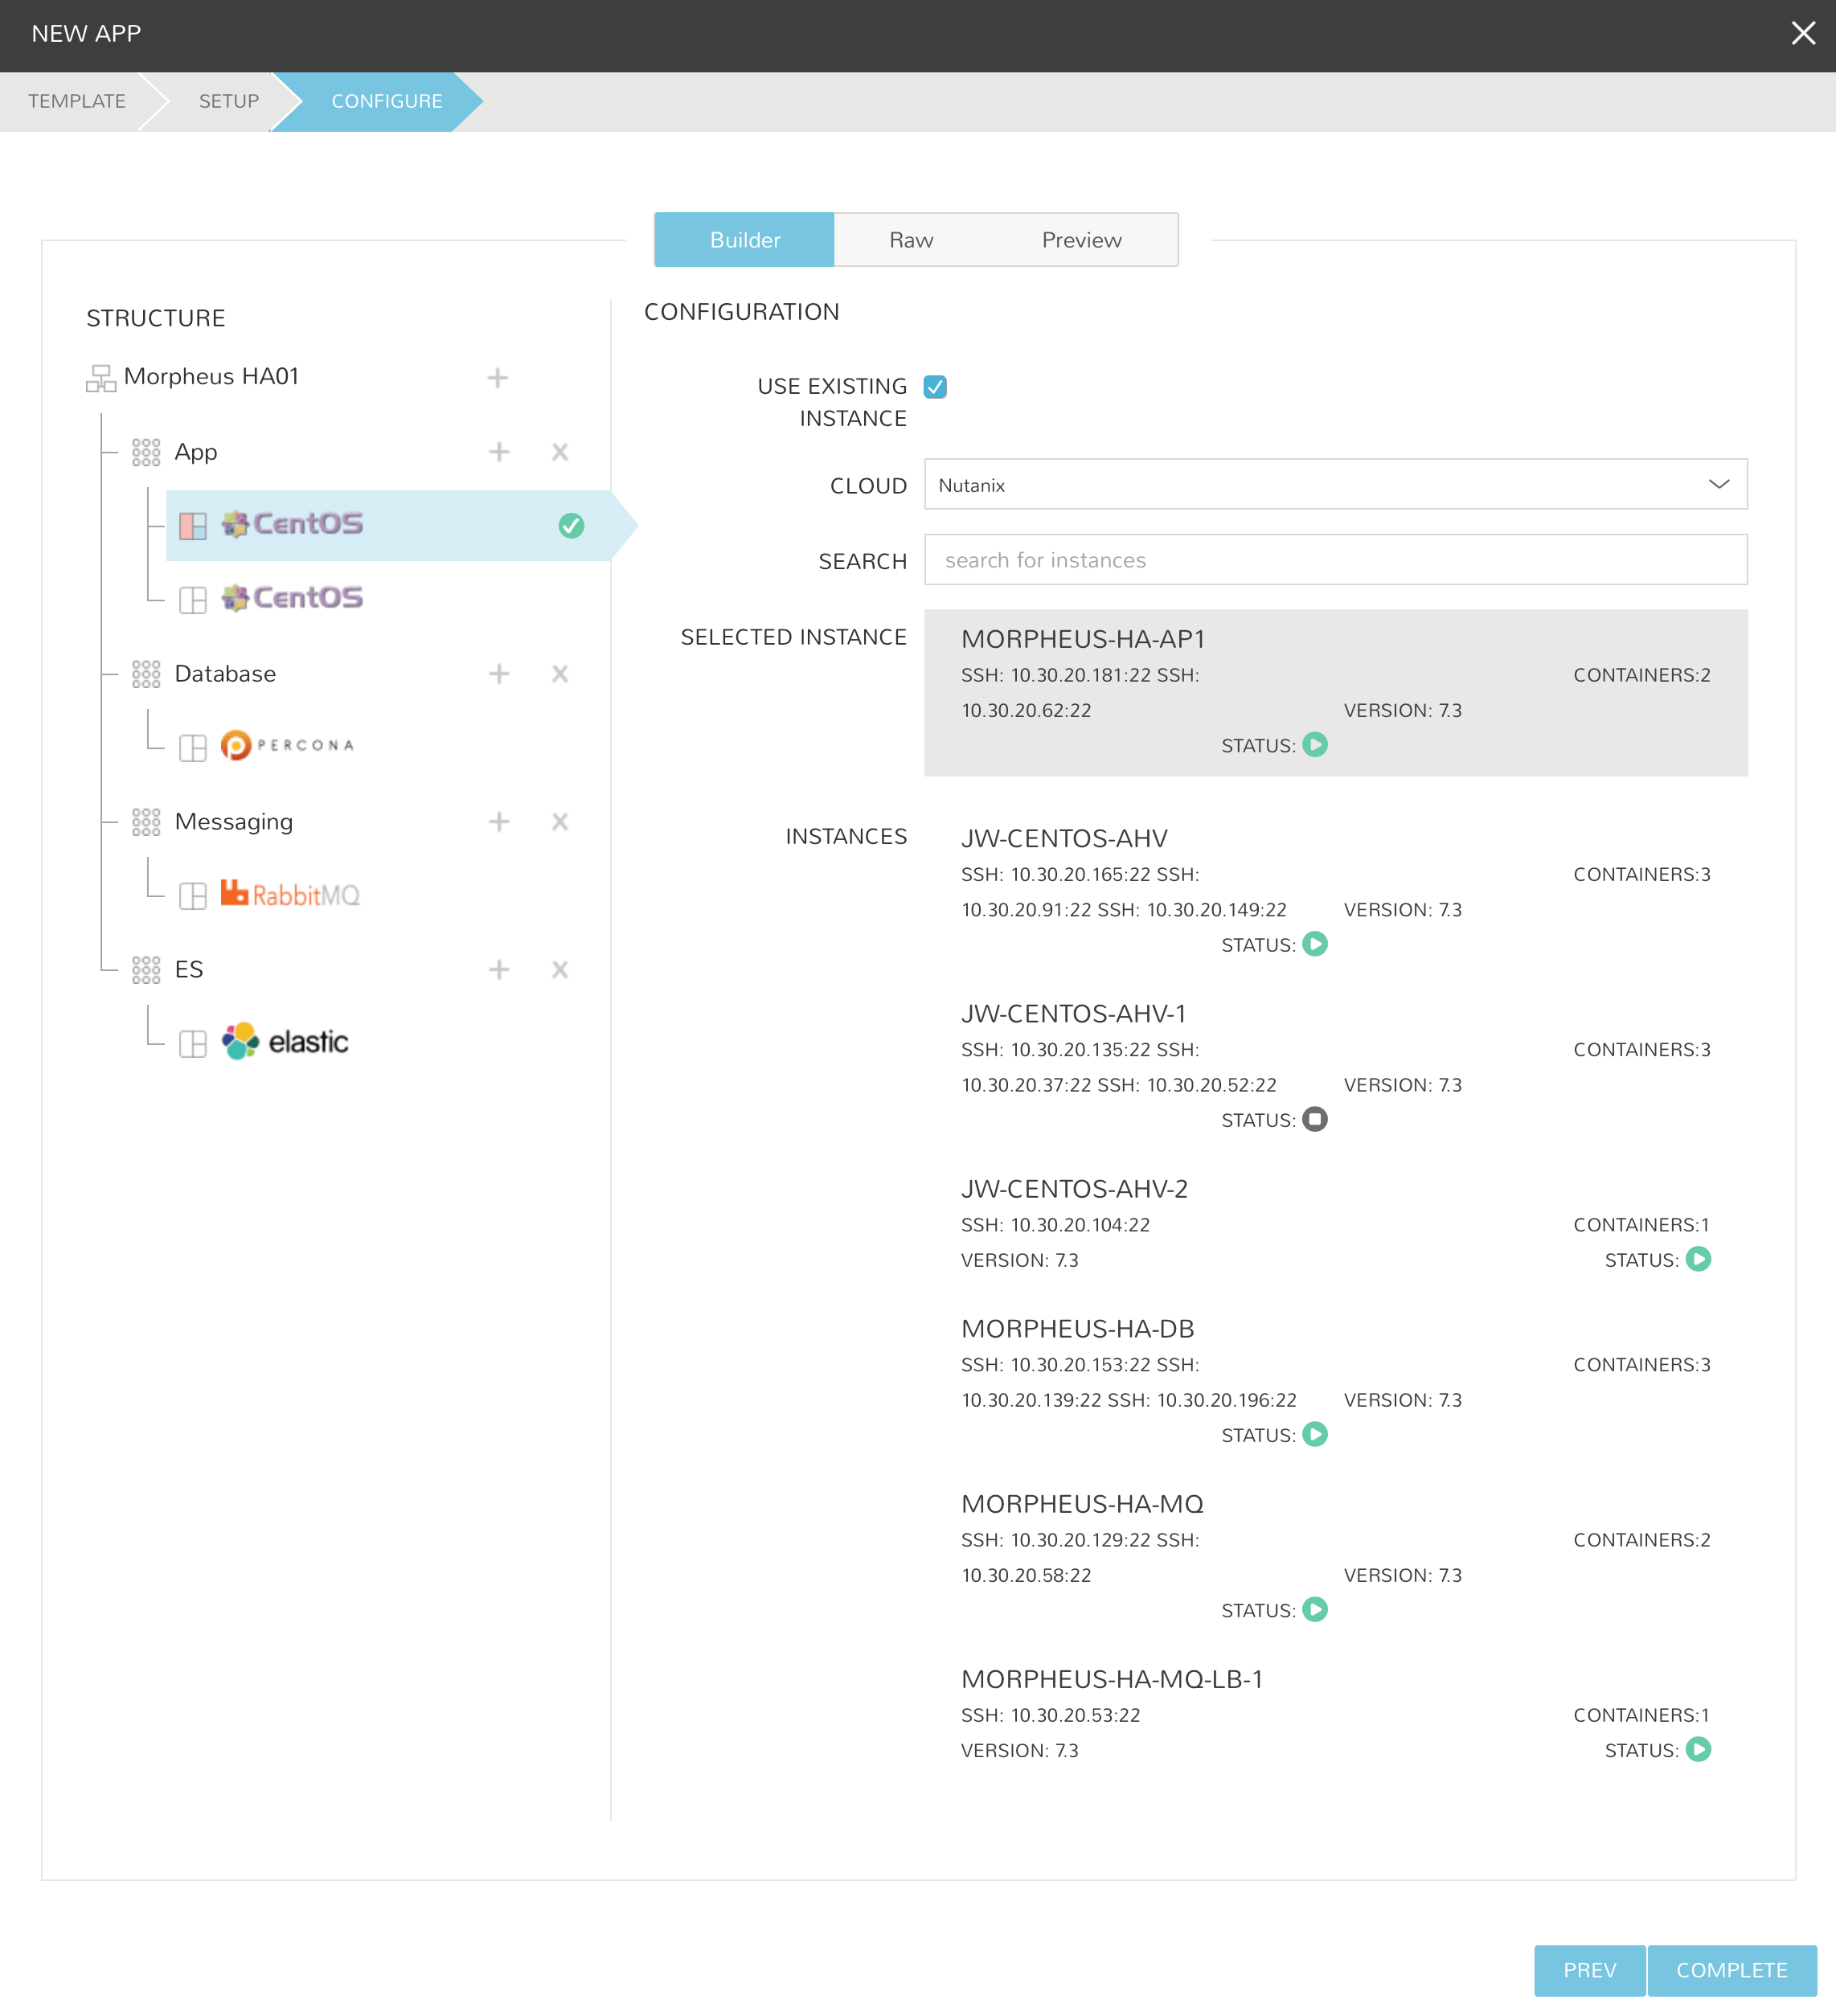
In the STRUCTURE section, select the Instance.
In the CONFIGURATION section, select the Cloud the Existing Instance is in. Existing INSTANCES that match the Group, Cloud and Instance Types set will populate.
Select the desired Instance from the INSTANCES list. Selected instance will show in the SELECTED INSTANCE section.
Note
Only one existing Instance can be added per Instance. To add multiple Existing Instances, repeat the step above including adding an Instance for each Existing Instance to be added to the App.
Once all Existing Instances have been selected, click COMPLETE.
A new App will be created out of the Existing Instances.
Managing Apps
App Status
App Status is determined by the status of the Instances within the App or by the DELETE action. All Instances in an App must be in ‘Running’ status for the App status to equal ‘Running’.
Status Icon |
App Status |
Status Reason |
|---|---|---|
Running |
All Instance Statuses = Running |
|
Failed |
Any Instance Status = Failed |
|
Pending |
Any Instance Status = Pending |
|
Pending Removal |
Any Instance Status = Pending Removal |
|
Provisioning |
Any Instance Status = Provisioning |
|
Removing |
The DELETE action was trigger on the App |
|
Unknown |
Any Instance Status = Unknown, or the App is empty |
Editing an App
The EDIT action allows permissioned users to update an Apps metadata, Environment, Group and Owner.
Navigate to Provisioning > Apps
Select an App from the list to view the App detail page
Select EDIT
Update the following
- NAME
App Name
- DESCRIPTION
App Description
- ENVIRONMENT
App Environment
- GROUP
App Group assignment
- OWNER
User assigned as Owner of the App
Select SAVE CHANGES
Deleting an App
The DELETE action allows permissioned users to delete an App and, by default, all Instances within the App.
Navigate to Provisioning > Apps
Select an App from the list to view the App detail page
Select DELETE
The DELETE APP? confirmation modal will be displayed:
- Remove Instances
Deletes all Instances associated with the App - Enabled by Default
- Preserve Backups
Preserves Backups of the Instances associated with the App - Disabled by Default
- Preserve Volumes
Preserves Storage Volumes of the Instances associated with the App - Disabled by Default
- Force Delete
Forces deletion of the App - Required when any Instances associated with the App are in “provisioning” state - WARNING Force deleting may cause orphaned infrastructure or resources. - Disabled by Default
Select DELETE to proceed with deleting the App, or CANCEL to abort the delete action.
Exporting Configuration JSON
To export an App Blueprint as JSON:
Navigate to Provisioning > Apps
Select an App from the list to view the App detail page
Select ACTIONS > Export
The App export file will be downloaded to your computer as
{app_name}.json