Cohesity
HPE Morpheus Enterprise integrates with Cohesity for selection as a Cloud backup target for compatible Cloud types and for adding Cohesity S3 storage servers and storage buckets. HPE Morpheus Enterprise integrates with your existing Cohesity appliance, which can then be set as the default backup solution for any existing Clouds. From there, easily schedule backup routines during Instance provisioning and restore Instances when needed. To utilize storage features, integrate a Cohesity S3 storage server and then create a Cohesity S3 storage bucket.
This section discusses the process for integrating Cohesity with HPE Morpheus Enterprise, setting backup options during Instance provisioning, restoring Instances from Cohesity backup, and using Cohesity S3 storage.
Adding the integration
Cohesity integrations are added in the backup integrations area of the UI (Backups > Integrations). If a Cohesity integration is not an option, you must download and add the Cohesity plugin to the HPE Morpheus Enterprise appliance. For additional information on adding a plugin, including how to access the Hewlett Packard Enterprise-maintained repository which includes the Cohesity plugin, see the plugin section of this documentation.
With the Cohesity plugin installed, navigate to Backups > Integrations to add a new Cohesity integration. Click + ADD and a modal appears for creating a new Cohesity backup provider.
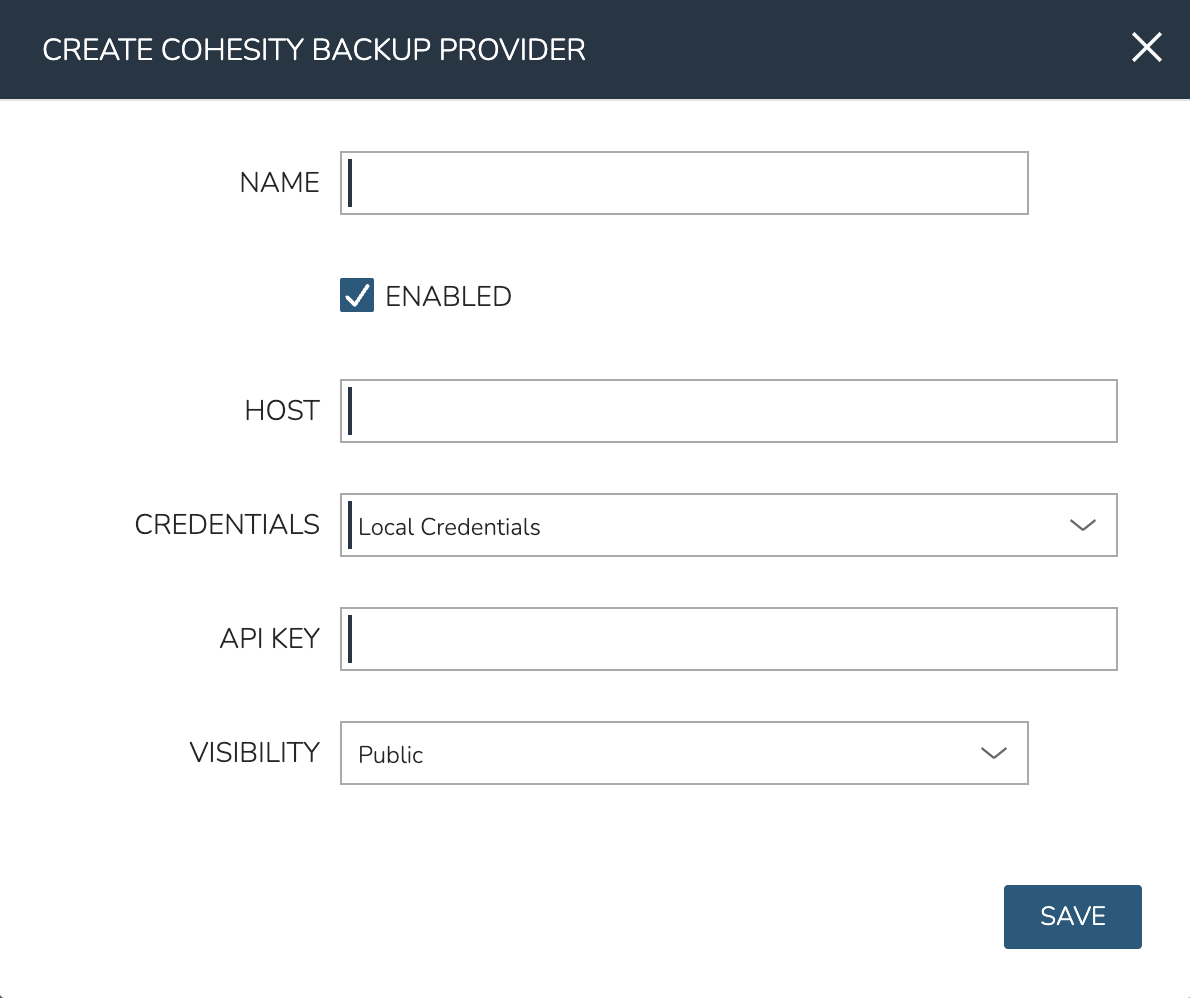
Provide the following information:
NAME: A name for the Cohesity provider in HPE Morpheus Enterprise UI
ENABLED: When marked, the Cohesity provider will be available for use
HOST: The hostname for the Cohesity cluster
CREDENTIALS: An API key is required for authentication. Select “Local Credentials” to enter the API key directly into this modal. Select “api key” under the “New Credentials” heading to enter the API key directly into this modal and save it in a chosen secure secret store for later use. If an API key has already been stored in an integrated secret store, you may also choose it here rather than directly entering the key into this modal
SECRET STORE: Optional and only visible if you’ve opted in the CREDENTIALS field to securely store your entered API key
API KEY: Only visible if authenticating through local credentials (that is, you haven’t selected a saved API key from the CREDENTIALS field). Enter the API key
VISIBILITY: Cohesity integrations with private visibility are consumable only by the Tenant in which the integration is created
When finished, click SAVE. The new Cohesity backup provider should be successfully created.
Setting the Cloud Backup Provider
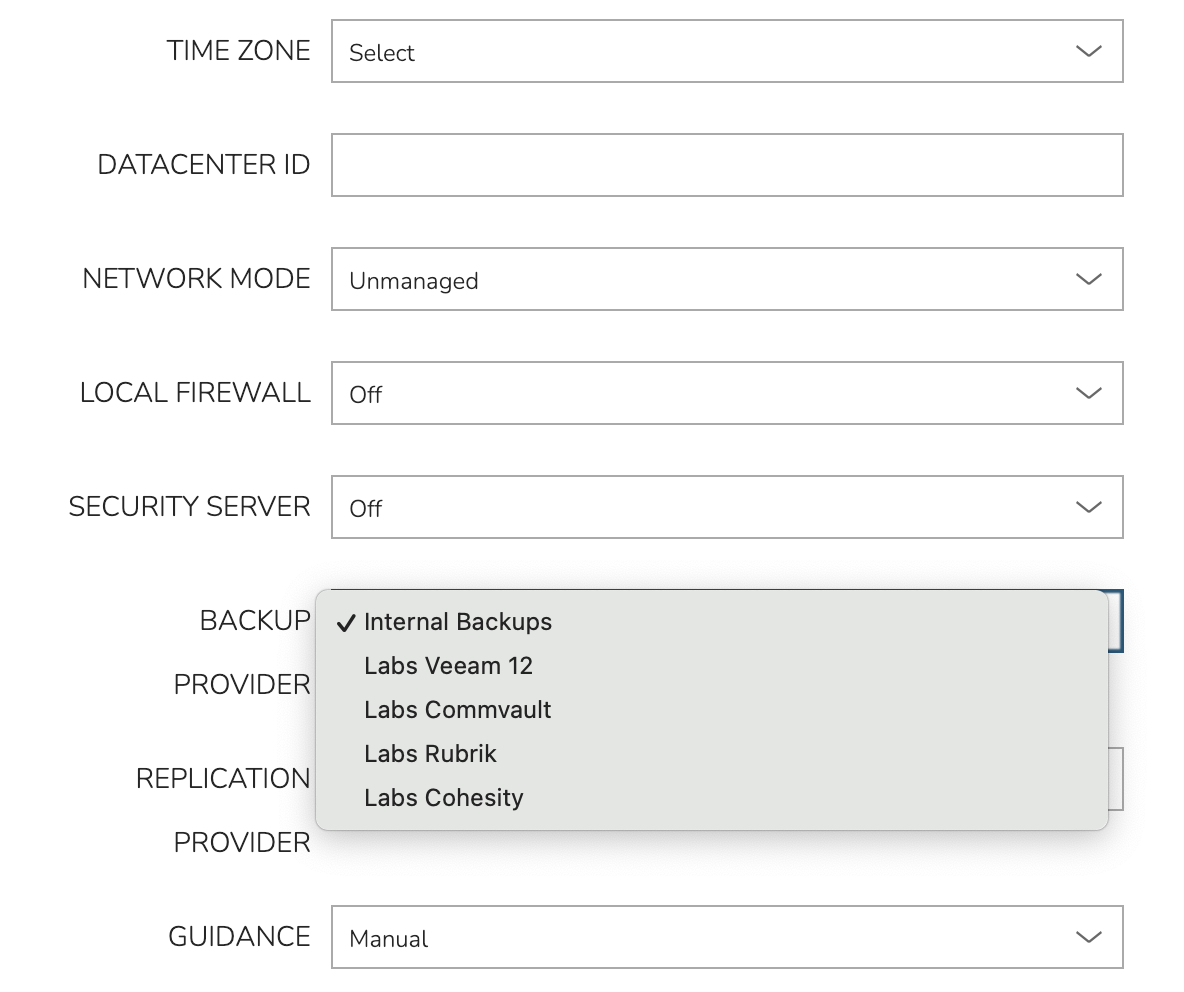
Now that the Cohesity backup provider is created, it can be set as the default backup provider for supported Cloud types. To set this configuration on a Cloud, navigate to the Clouds list page (Infrastructure > Clouds) and edit a compatible Cloud (✎ icon). Expand the “Advanced Options” section and locate the BACKUP PROVIDER configuration. Set the Cohesity provider as the backup provider for the Cloud and click SAVE CHANGES.
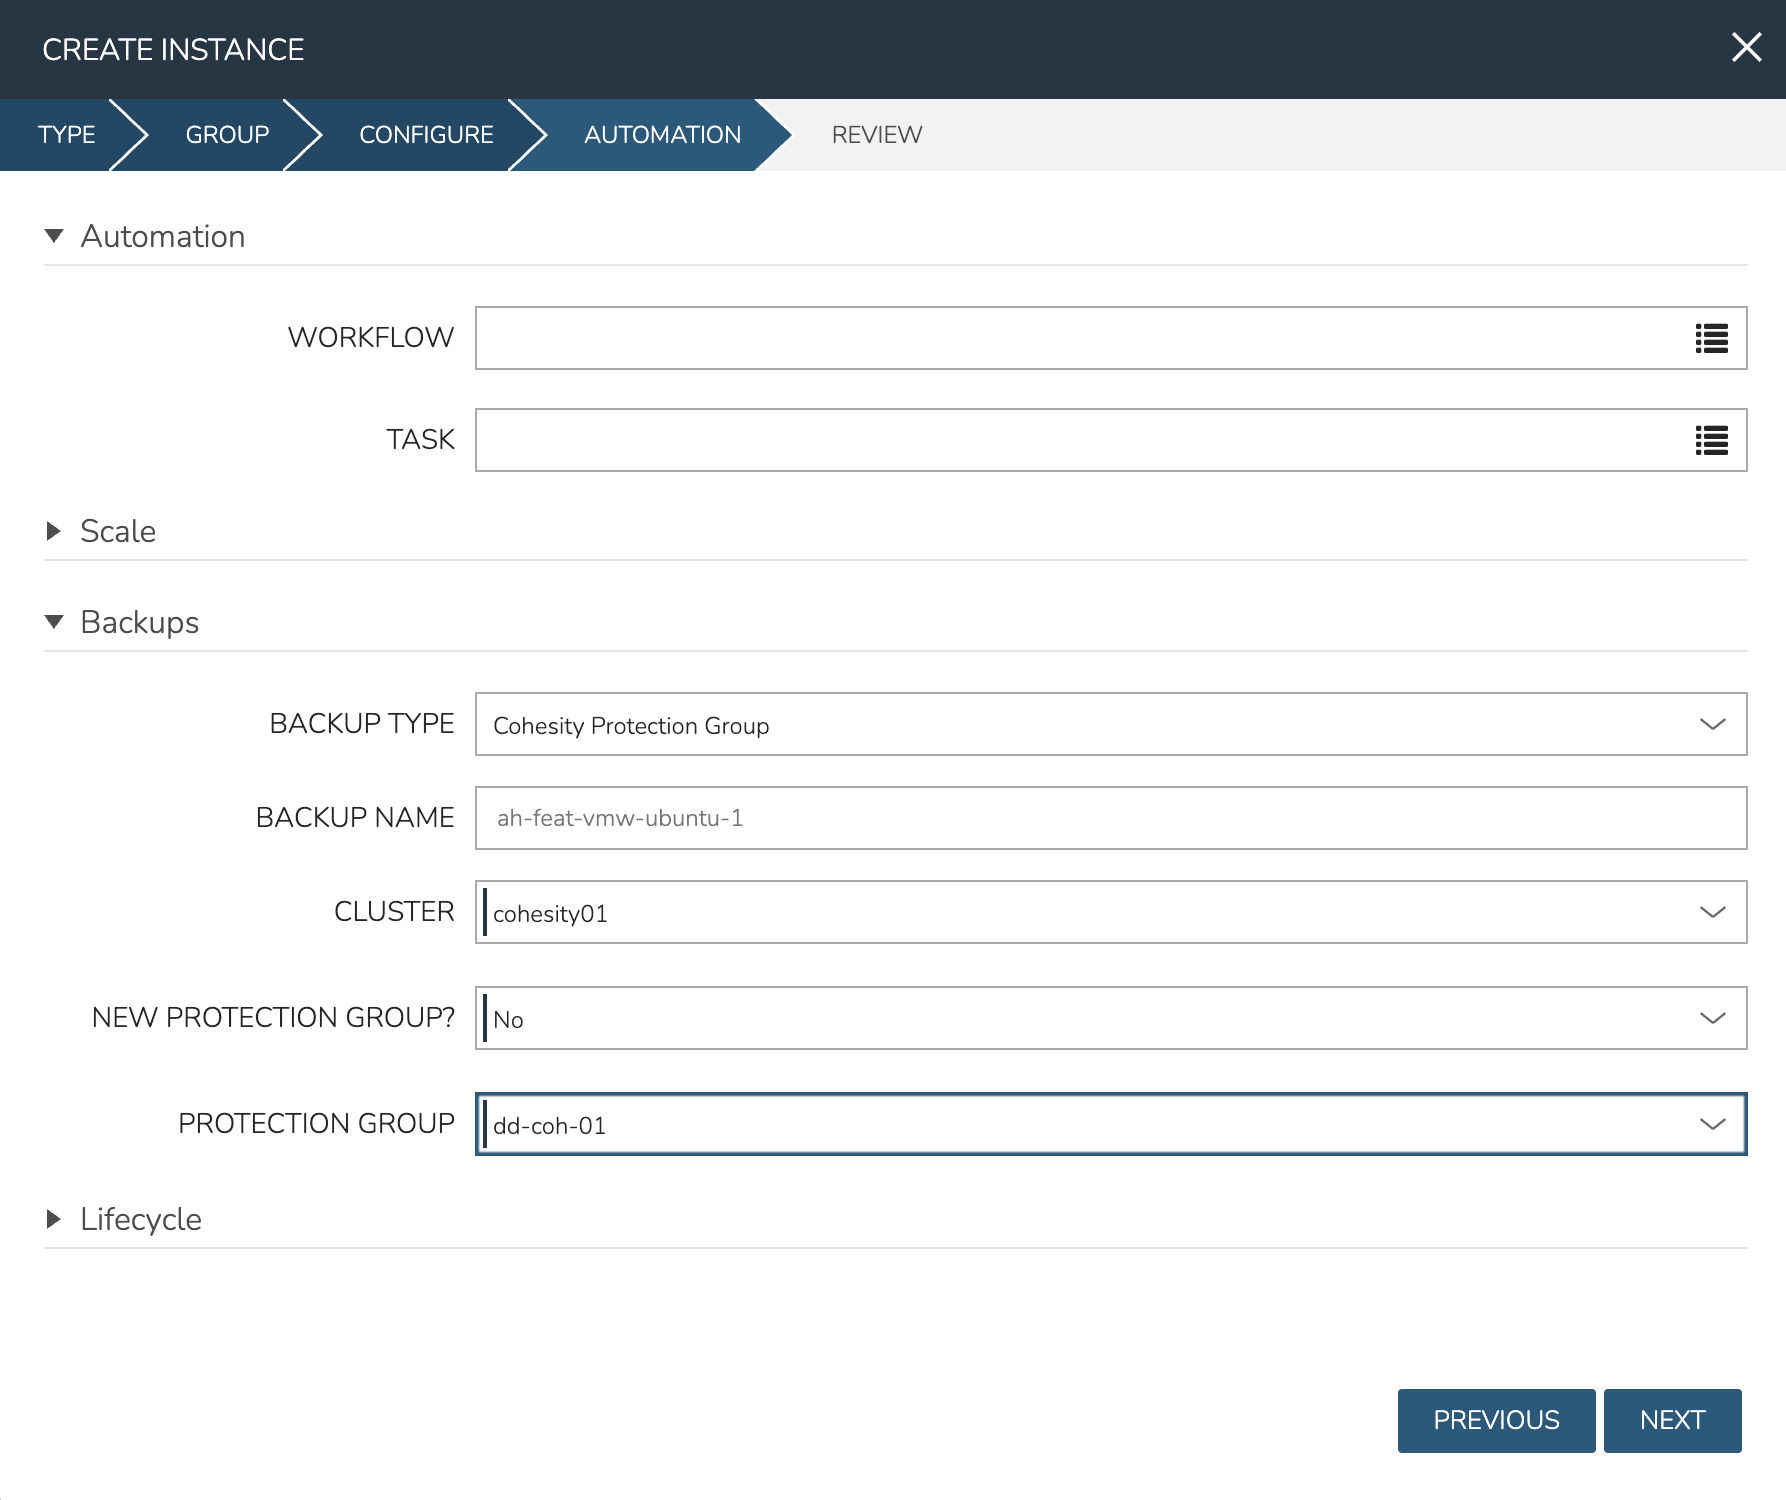
Backup Options at Provision Time
With Cohesity set up as the backup provider for a Cloud (or Clouds), additional backup options are made available when provisioning to the Cloud. These configurations are made from the AUTOMATION tab of the provisioning wizard (launched by clicking + ADD from the Instance list page at Provisioning > Instances). From the AUTOMATION tab, expand the “Backups” section. The BACKUP TYPE of “Cohesity Protection Group” should be preselected. Then, make the next two configurations:
BACKUP NAME: A name for the backup (often named for the Instance associated with the backup)
CLUSTER: Select the correct Cohesity cluster from the dropdown
As a final selection, choose whether or not to create a new Protection Group. If “No” is selected, a dropdown menu appears which allows selection of an existing Protection Group.
If “Yes” is selected, additional configuration fields appear to facilitate creation of the Protection Group:
PROTECTION GROUP NAME: A name for the Protection Group
POLICY ID: Select the required Policy from the dropdown menu
STORAGE DOMAIN: Select the correct Storage Domain from the dropdown menu

Once these configurations are provided, complete the provisioning wizard and the configured backup options are applied to the new Instance.
Creating Backups for Existing Instances
In addition to creating Backups at provision time, as discussed in the previous section, Cohesity backups can be configured for existing Instances. Start from the Backups list page (Backups > Backups) and click + ADD. When the CREATE BACKUP modal appears, select “Instance” from the SELECT SOURCE tab and click NEXT. From the NAME/TYPE tab use the INSTANCE field, which is a typeahead field, to search for a compatible Instance. In the NAME field, enter a name for the new Backup and click NEXT. From the INFO tab, the following configurations are made:
BACKUP TYPE: Cohesity Protection Group
CLUSTER: Select the correct Cohesity cluster from the dropdown
As a final selection, choose whether or not to create a new Protection Group. If “No” is selected, a dropdown menu appears which allows selection of an existing Protection Group. If “Yes” is selected, additional configuration fields appear to facilitate creation of the Protection Group:
PROTECTION GROUP NAME: A name for the Protection Group
POLICY ID: Select the required Policy from the dropdown menu
STORAGE DOMAIN: Select the correct Storage Domain from the dropdown menu
On clicking COMPLETE, the new Backup is successfully created.
Restoring from Cohesity Backups
To restore an Instance from a Cohesity backup, begin at the Backups list page (Backups > Backups). From the list of Backups, click on the desired backup making sure to click the Backup name and not the name of a Backup Job. On the Backup detail page, note the BACKUP ARCHIVES section. Identify the correct restore point (if more than one are available) and click ACTIONS > Restore. The Instance will be successfully restored from backup.

Using Cohesity S3
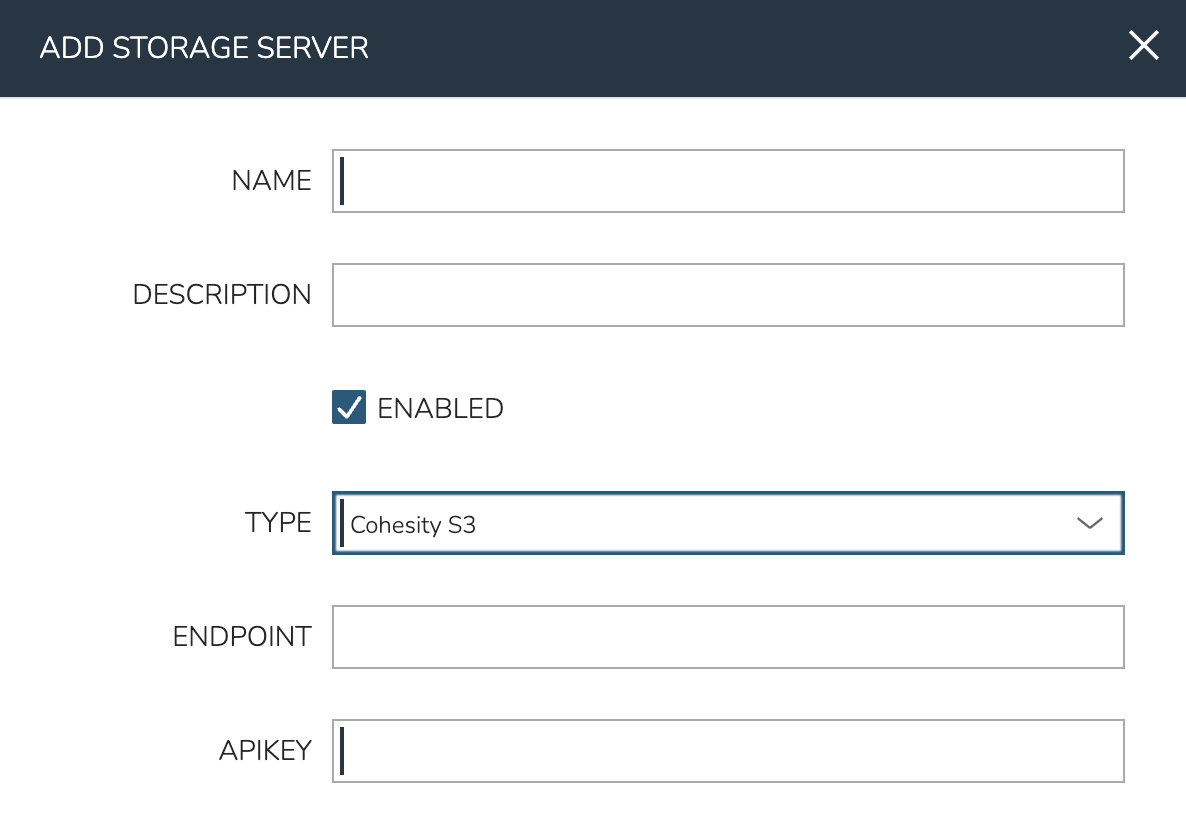
To work with Cohesity S3, start by creating a Cohesity storage server object in HPE Morpheus Enterprise. To do so, navigate to Infrastructure > Storage > Servers and click + ADD. Make the following configurations:
NAME: A name for the storage server object in HPE Morpheus Enterprise
DESCRIPTION: An optional description field
ENABLED: When marked, the storage server object is available for consumption in HPE Morpheus Enterprise
TYPE: Cohesity S3. When this type is selected, the required configuration fields appear
ENDPOINT: The endpoint of the cluster
API KEY: A valid API key for authentication
Click SAVE CHANGES and the storage server object is created.
With the storage server created, Cohesity S3 buckets may be created. Buckets are created at Infrastructure > Storage > Buckers. Click + ADD and then Cohesity S3 Bucket. On the NEW BUCKET modal, first select a Cohesity S3 storage server from the STORAGE SERVICE dropdown menu. This will preload other configuration field dropdown menus, such as STORAGE DOMAIN and QOS. From this modal, the bucket can be set as a default backup target or as a default target for Virtual Images or deployment archives. Once finished, click SAVE CHANGES
