ArubaCX Network Integration
Overview
The ArubaCX network plugin is implemented as a HPE Morpheus Enterprise GenericIntegrationProvider in Groovy. The plugin handles network and cluster events generated by HPE Morpheus Enterprise and modifies the configuration of ArubaCX switches based on the cable connections between the affected servers and switches.
HPE Morpheus Enterprise integrates directly with ArubaCX to create or delete networks for OVS Port Groups that are added or deleted within a configured Cluster.
Features
Network - Create or Delete OVS Port Group.
Prerequisites
A pair of ArubaCX 8325 series switches
All the hosts in the Cluster are connected to these pair of switches
REST API access to the ArubaCX switches with administrative rights
User credentials for the ArubaCX switch pair with API access granted and read/write access to the switch configuration
Server Network Configuration (Netplan)
On each host, configure a
bond0interface on the management interfacesThe management interfaces should be connected to the ArubaCX switch pair
Sample configuration:
{
    bonds:
      bond0:
        interfaces:
          - ens2f0np0
          - ens1f0np0
        parameters:
          mode: "active-backup"
    ...
}
Switch Configuration
Configure the management interface and IP address on both switches in the pair
The switch pair must be configured with
vsx-syncenabled for high availability and redundancySample configuration:
vsx
    inter-switch-link lag 256
    role primary
    keepalive peer 192.168.0.1 source 192.168.0.0
    vsx-sync loop-protect-global mclag-interfaces vsx-global
vsx
    inter-switch-link lag 256
    role secondary
    keepalive peer 192.168.0.0 source 192.168.0.1
    vsx-sync loop-protect-global mclag-interfaces vsx-global
Create a Multi-Chassis Link Aggregation Group (MC-LAG) between the ArubaCX switch and the upstream network, referred to as
lag1Configure the
lag1interface on both switches in the pair
Sample configuration:
interface lag 1 multi-chassis
    no shutdown
    no routing
    vlan trunk native 1
    vlan trunk allowed 1,175
    lacp mode active
    loop-protect
The switch ports connected to the server’s management interfaces should be set to “Trunk mode” with a “Native VLAN”
Sample configuration:
interface 1/1/1
no shutdown
no routing
vlan trunk native 175
vlan trunk allowed 175
Adding ArubaCX Integration
Note
Making full use of the HPE Morpheus Enterprise ArubaCX integration requires credentials for Aruba CX switch pair with API access granted and read/write access to switch configuration. See ArubaCX 8325 documentation for more information on user rights administration in that product.
Navigate to Administration > Integrations
Select + New Integration > Other > ArubaCX
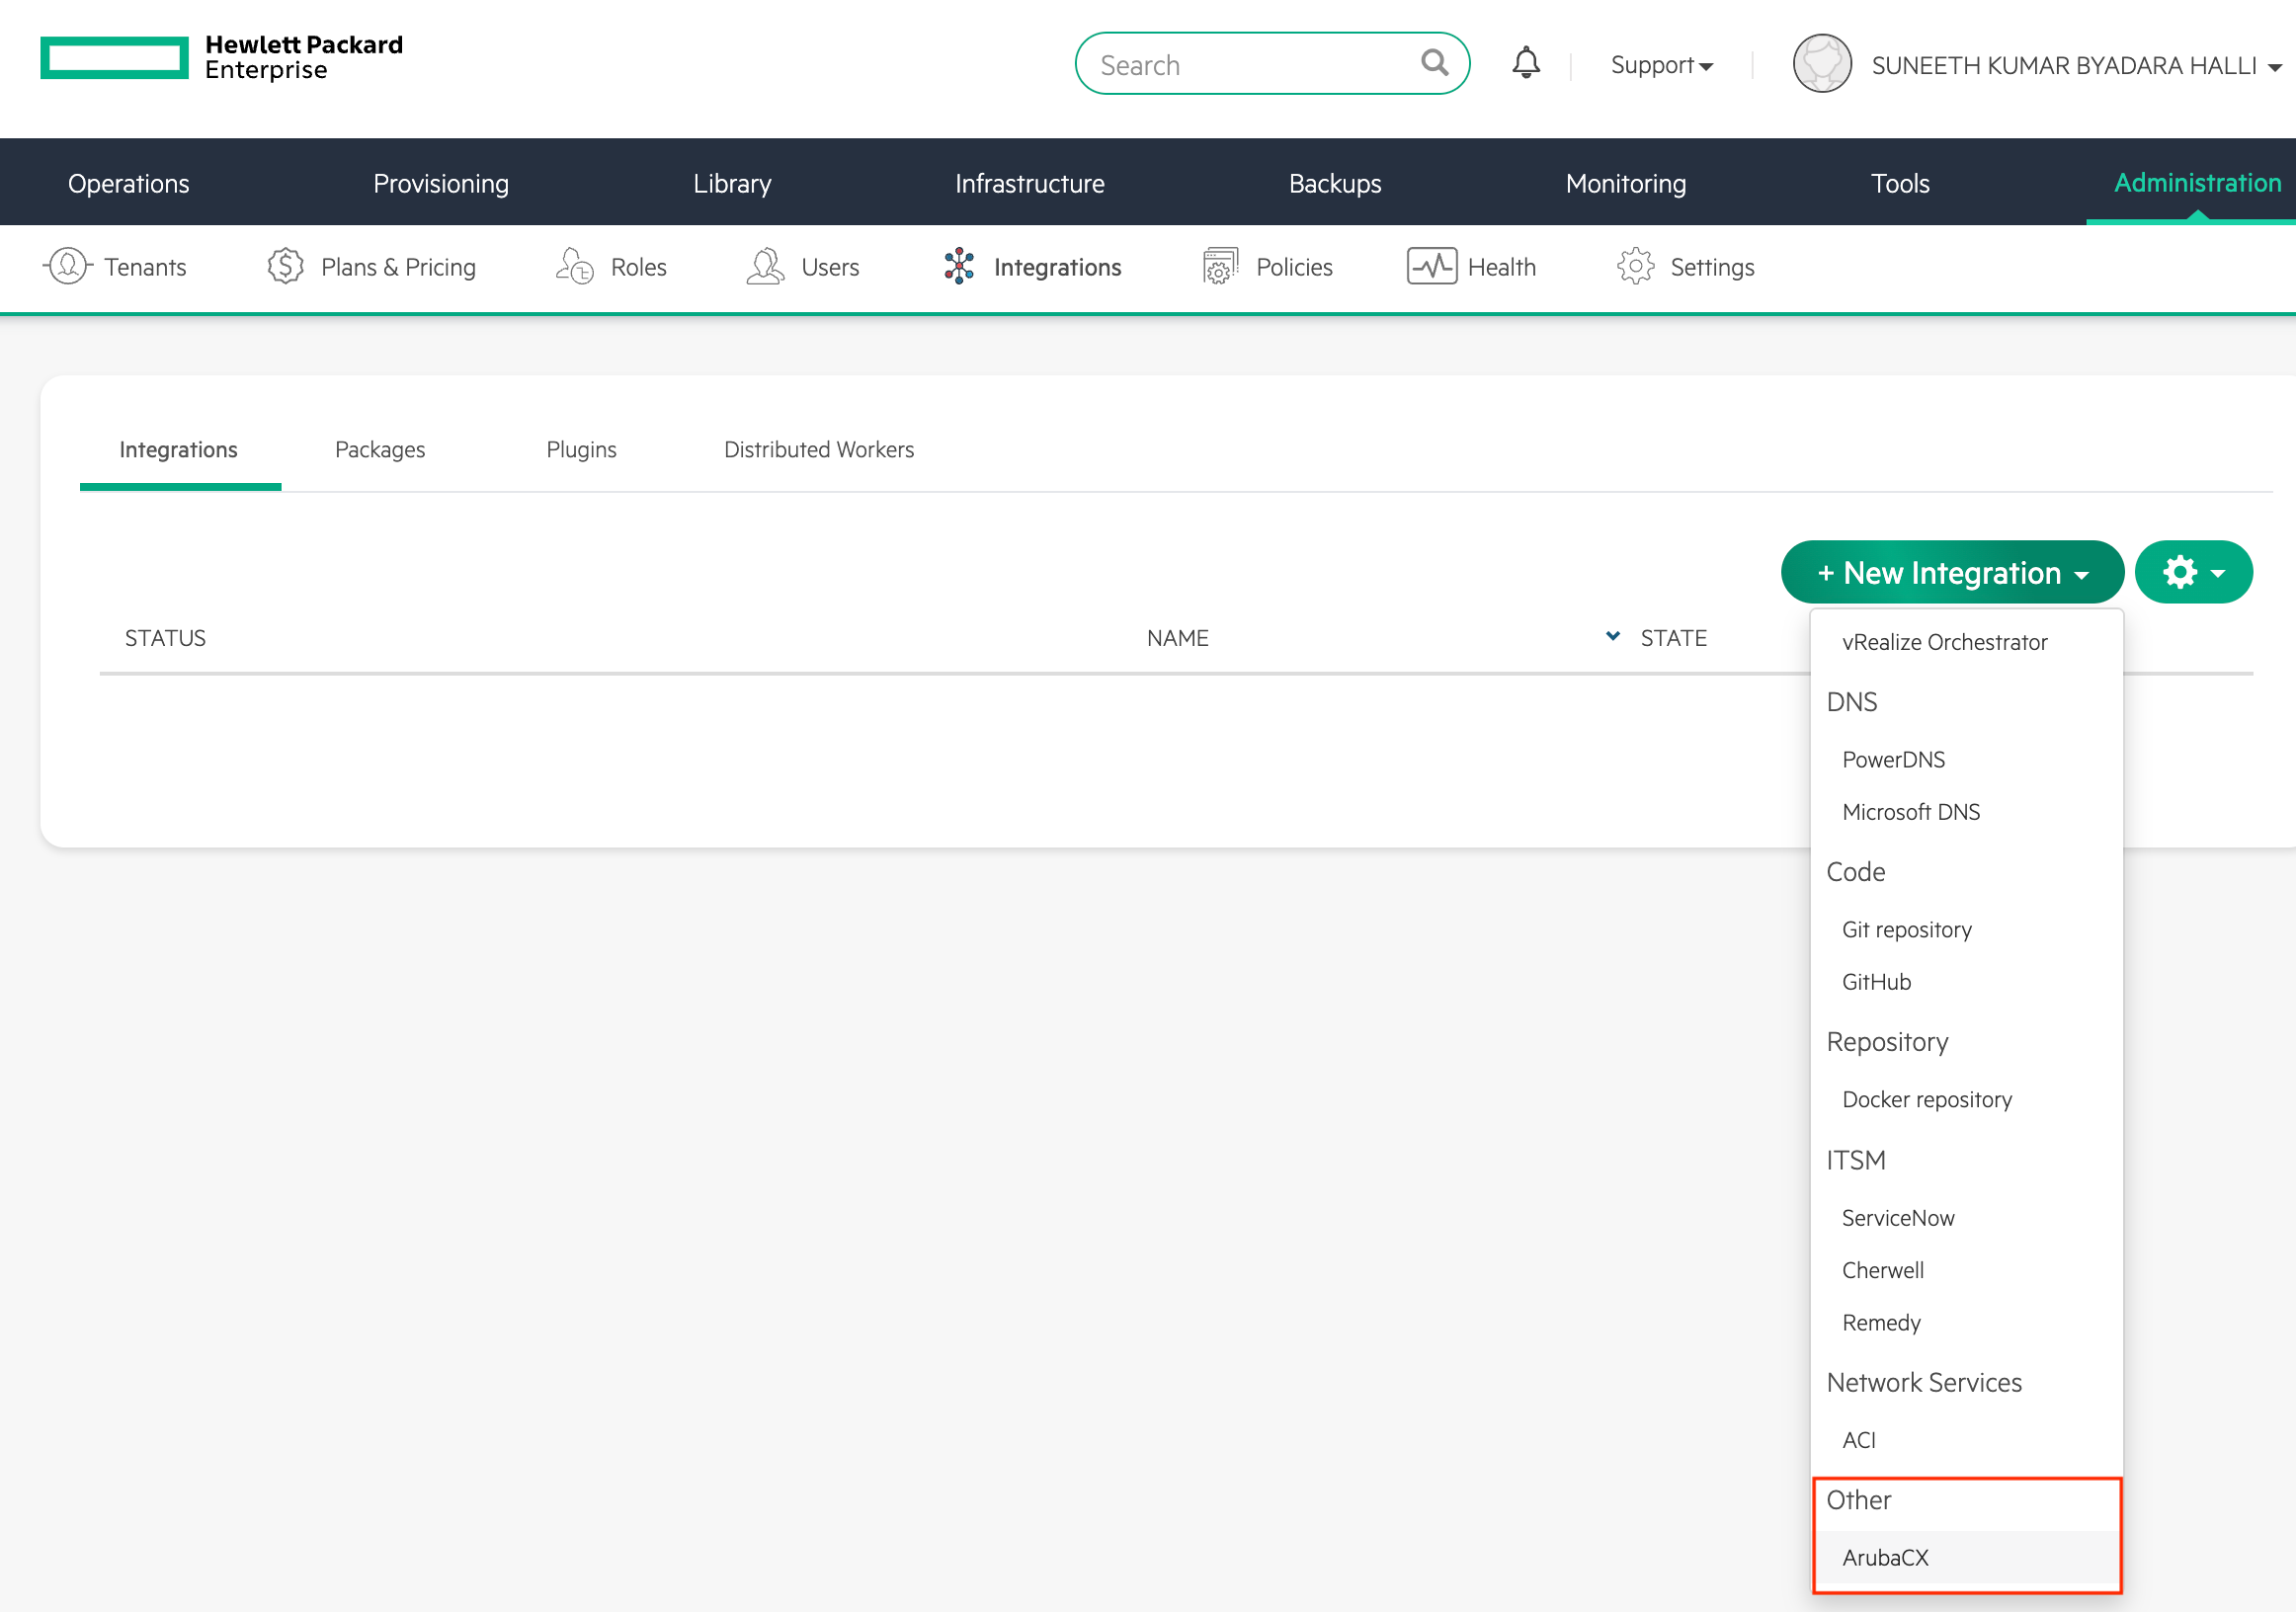
Enter the following:
- NAME
Name of the integration in HPE Morpheus Enterprise
- ENABLED
Deselect to disable the integration
- ARUBA SWITCH IP
Primary switch IP address
- ARUBA SWITCH USERNAME
Primary switch user username
- ARUBA SWITCH PASSWORD
Primary switch user password
- ARUBA SWITCH IP
Secondary switch IP address
- ARUBA SWITCH USERNAME
Secondary switch user username
- ARUBA SWITCH PASSWORD
Secondary switch user password
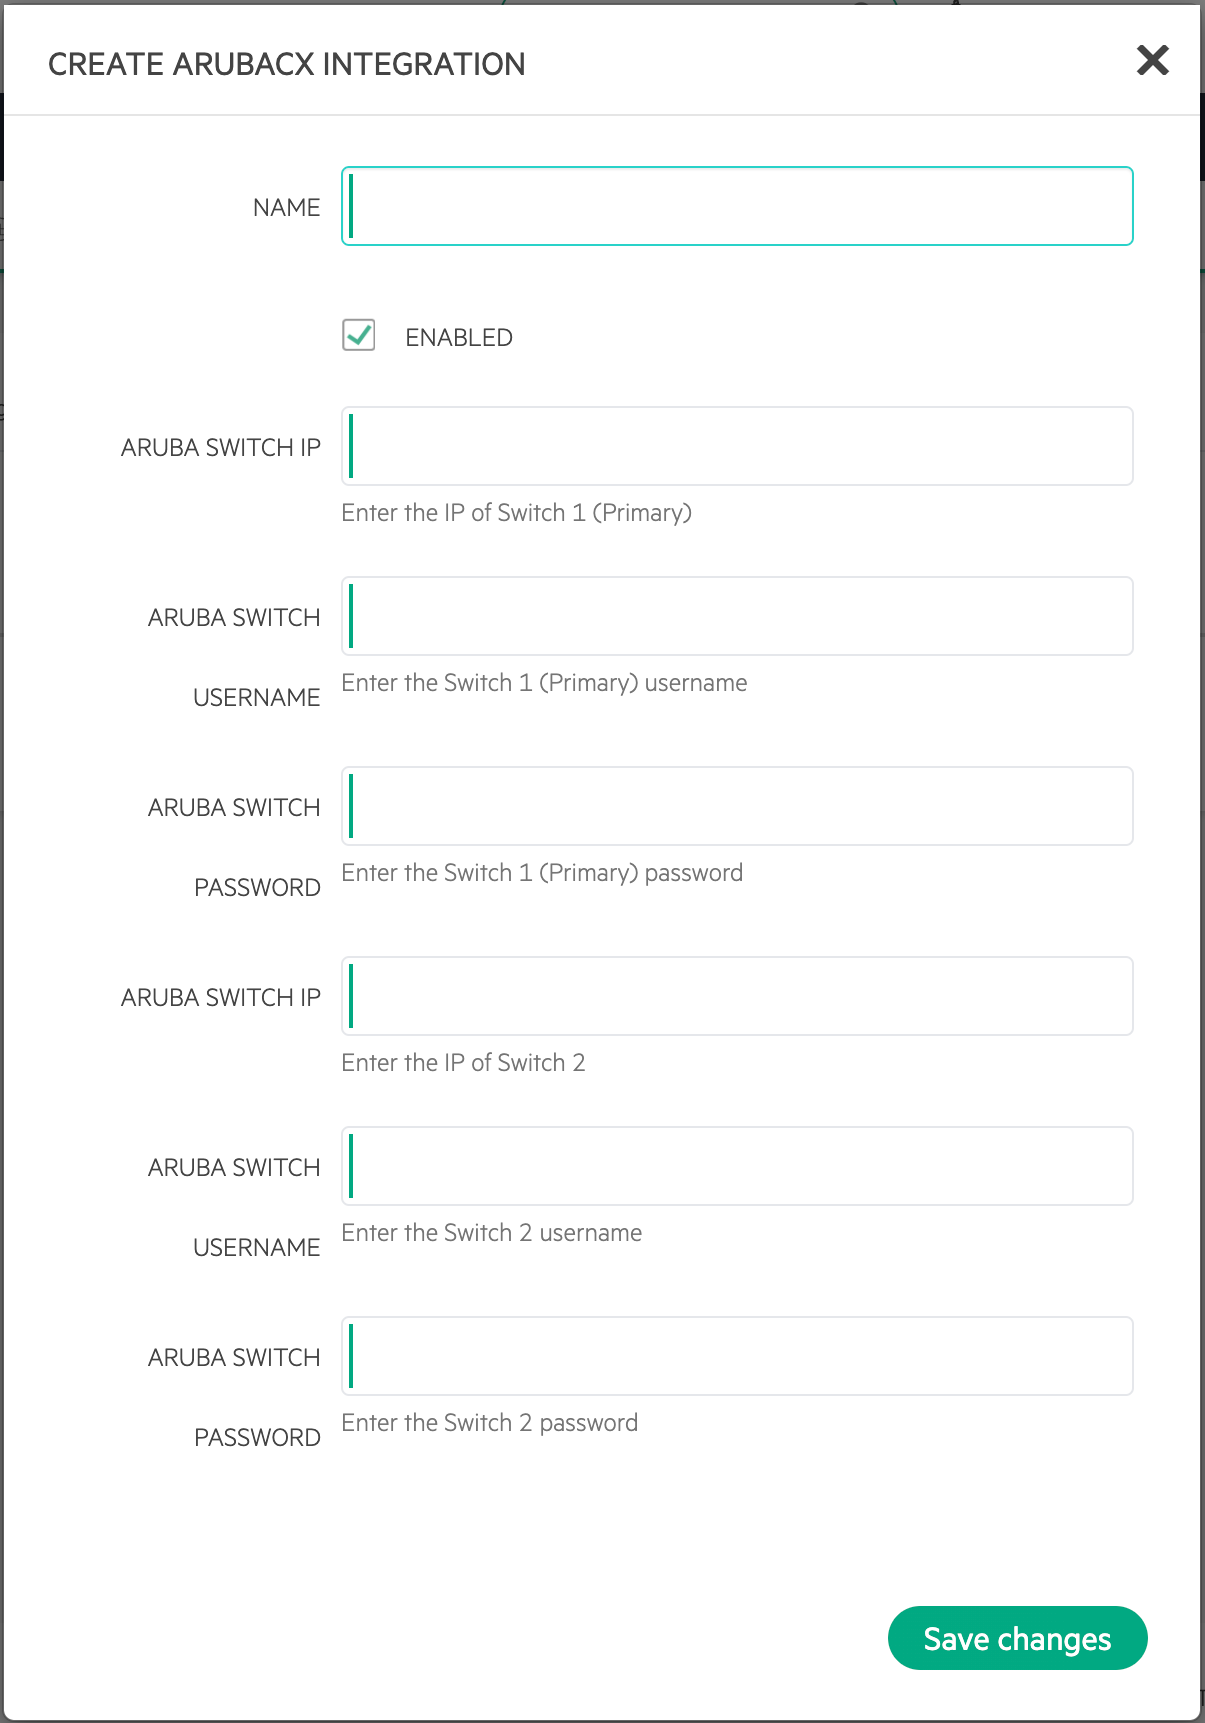
Select SAVE CHANGES
Upon save the ArubaCX Network integration will be created.
Note
All fields can be edited after saving.
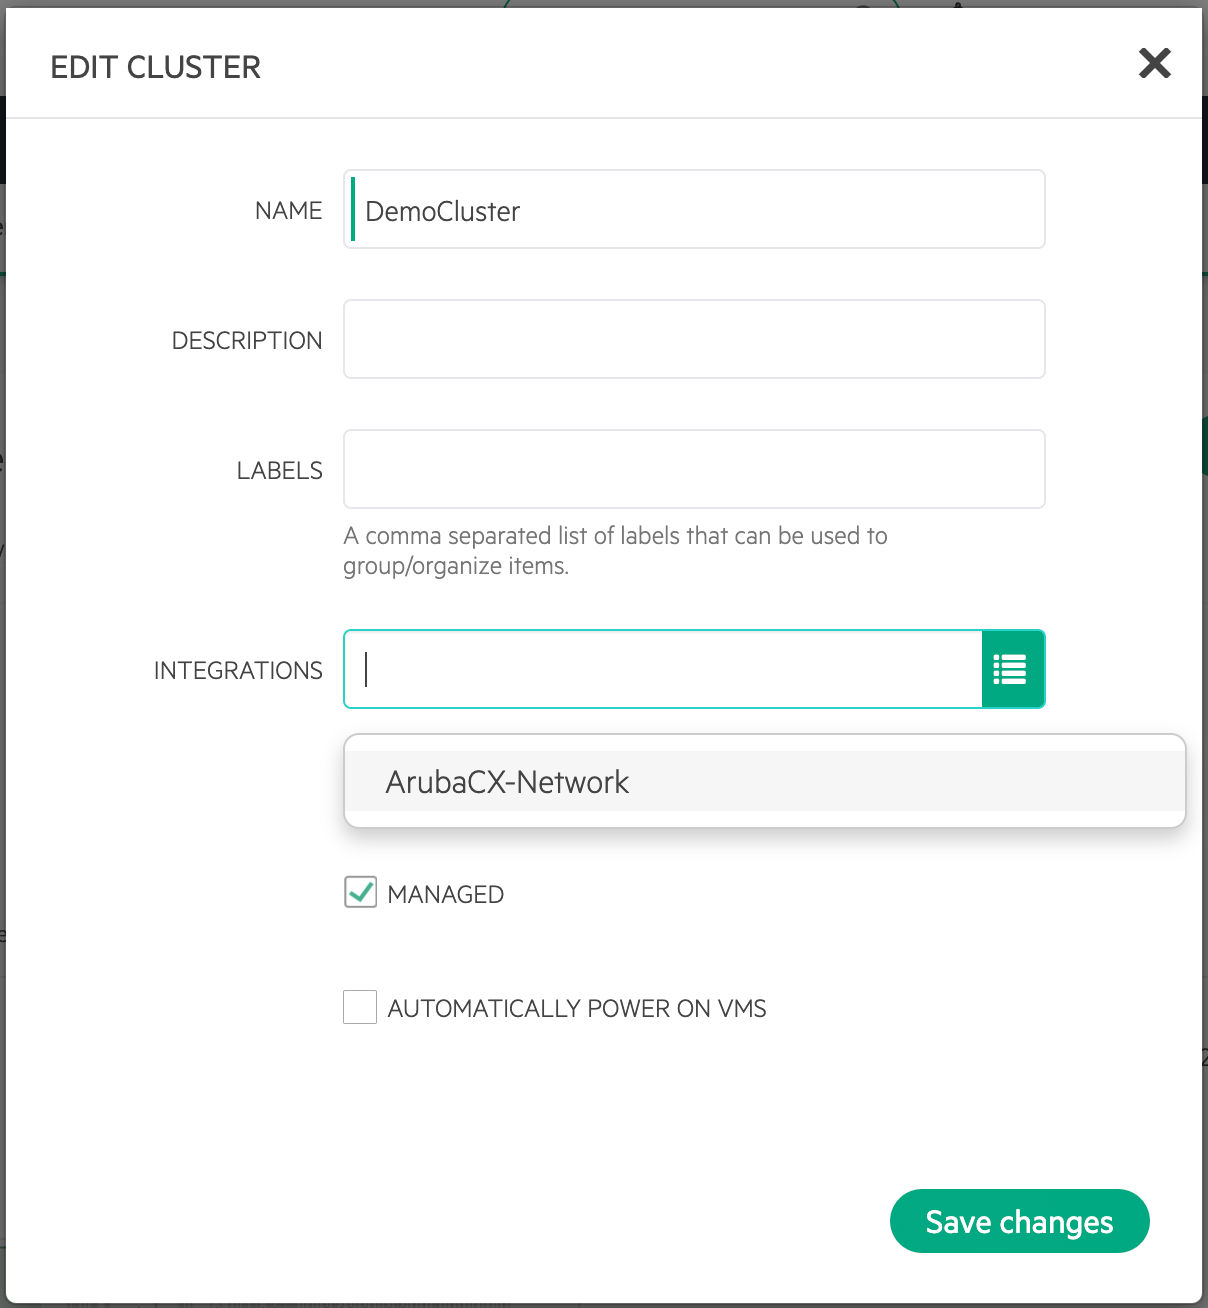
Add ArubaCX Integration to a Cluster
In Infrastructure > Clusters select the target Cluster
Select the Edit icon for the Cluster
In the “Integrations” dropdown, select an available ArubaCX Integration
Save Changes