Automated Single-Node Application Deployment with Morpheus
This document provides a complete step-by-step guide to automating the configuration, installation, and deployment of the open source CRM application SuiteCRM using Morpheus. In this guide, we will create a custom Instance Type for SuiteCRM which can then be selected during provisioning. Once configured, the provisioning process is completely automated and results in SuiteCRM and a database installed on a single node. There is also an accompanying guide which automates the process for deployed SuiteCRM as a multi-tiered application consisting of a MySQL database on one node and the SuiteCRM application on a second node.
In this guide, we’ll use the following Morpheus constructs to fully automate the provisioning process of a single-node application:
Instance Types
Layouts
Node Types
Cypher
Inputs
File Templates
Tasks
Provisioning Workflows
Each of these constructs can be explored more deeply in their own specific sections of Morpheus docs but this guide will illustrate how these pieces can be pulled together to automate deployment, ensure consistency and security, and enable self-service. Additionally, while this could be done on many different Cloud types, I’m setting up this Instance Type for provisioning on a VMware vCenter Cloud. You would need to have a VMware Cloud already integrated with Morpheus in order to follow the guide exactly but I will not go through the process of creating new Clouds here. If you do not have a vCenter Cloud available to you, the concepts in the guide will translate to other Cloud types, including public clouds like Amazon AWS. You may have to make slight modifications in spots in order to make a fully working Instance Type for other Clouds.
Create Cypher
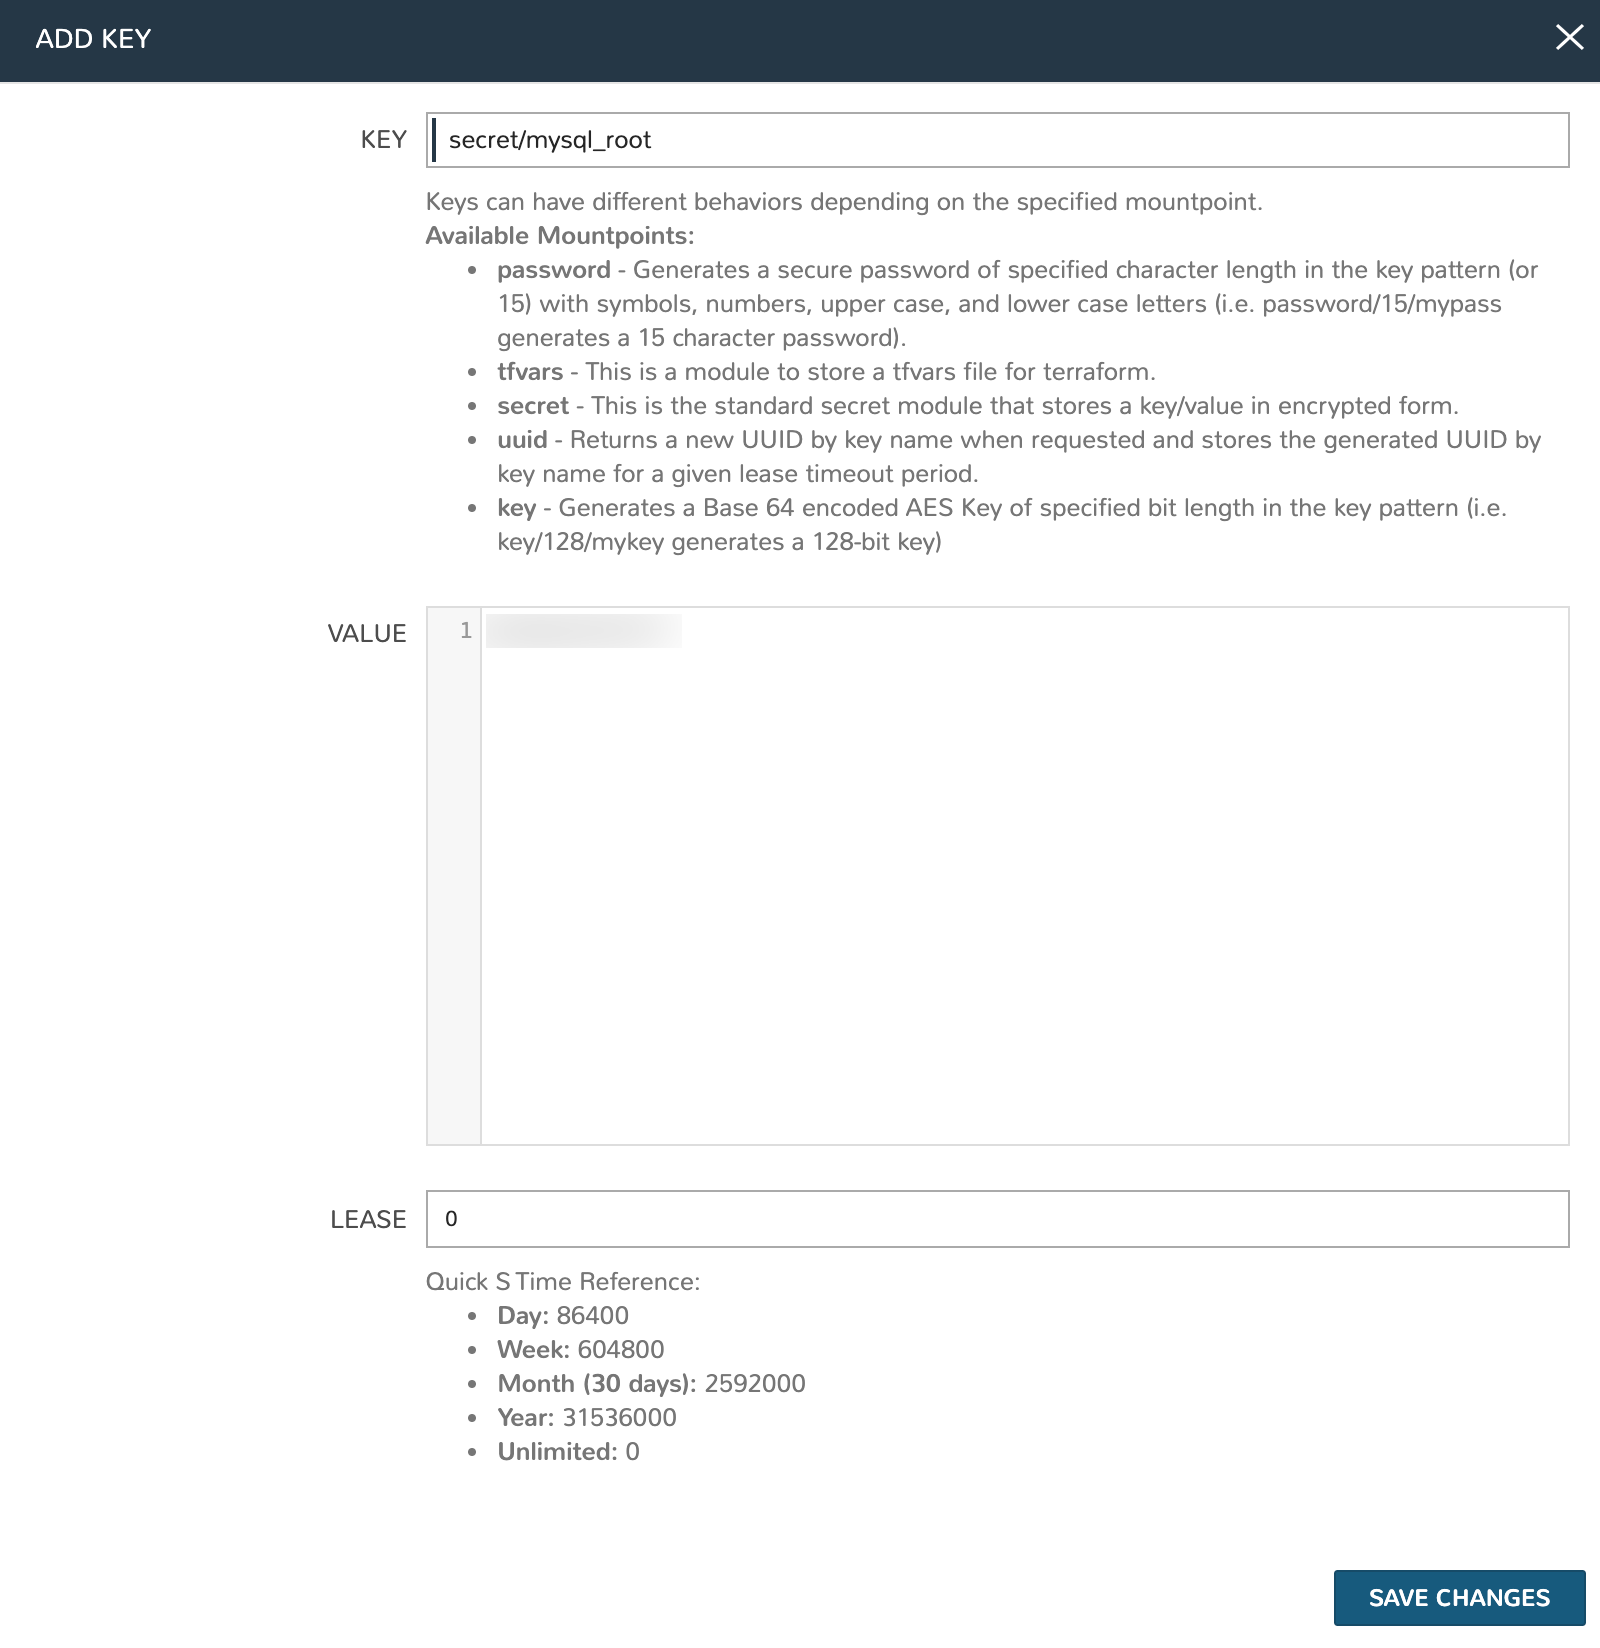
Cypher is a secure key/value store in Morpheus. Using Cypher, we can securely store passwords and other secret values (such as API keys) which can then be called into automation Tasks and templates. Here we will store the MySQL root user password as a Cypher entry. In the Morpheus UI, go to Tools > Cypher and click + ADD.
There are a number of different types of Cypher keys, which are useful in different contexts. Here’s we’ll use the “secret” type which allows us to enter some known value which can be securely accessed later. Enter the following:
KEY: secret/mysql_root
VALUE: Enter the MySQL root account password here
LEASE: 0 (Lease time is given in seconds, with “0” being unlimited)
Click SAVE CHANGES
Create Inputs
Inputs are custom input fields which can be added to Layouts, Instance Types, and other constructs in Morpheus. The input can be consumed as variables within templates and scripts. We’ll create three inputs in this case for the database name, the database username, and the database user password.
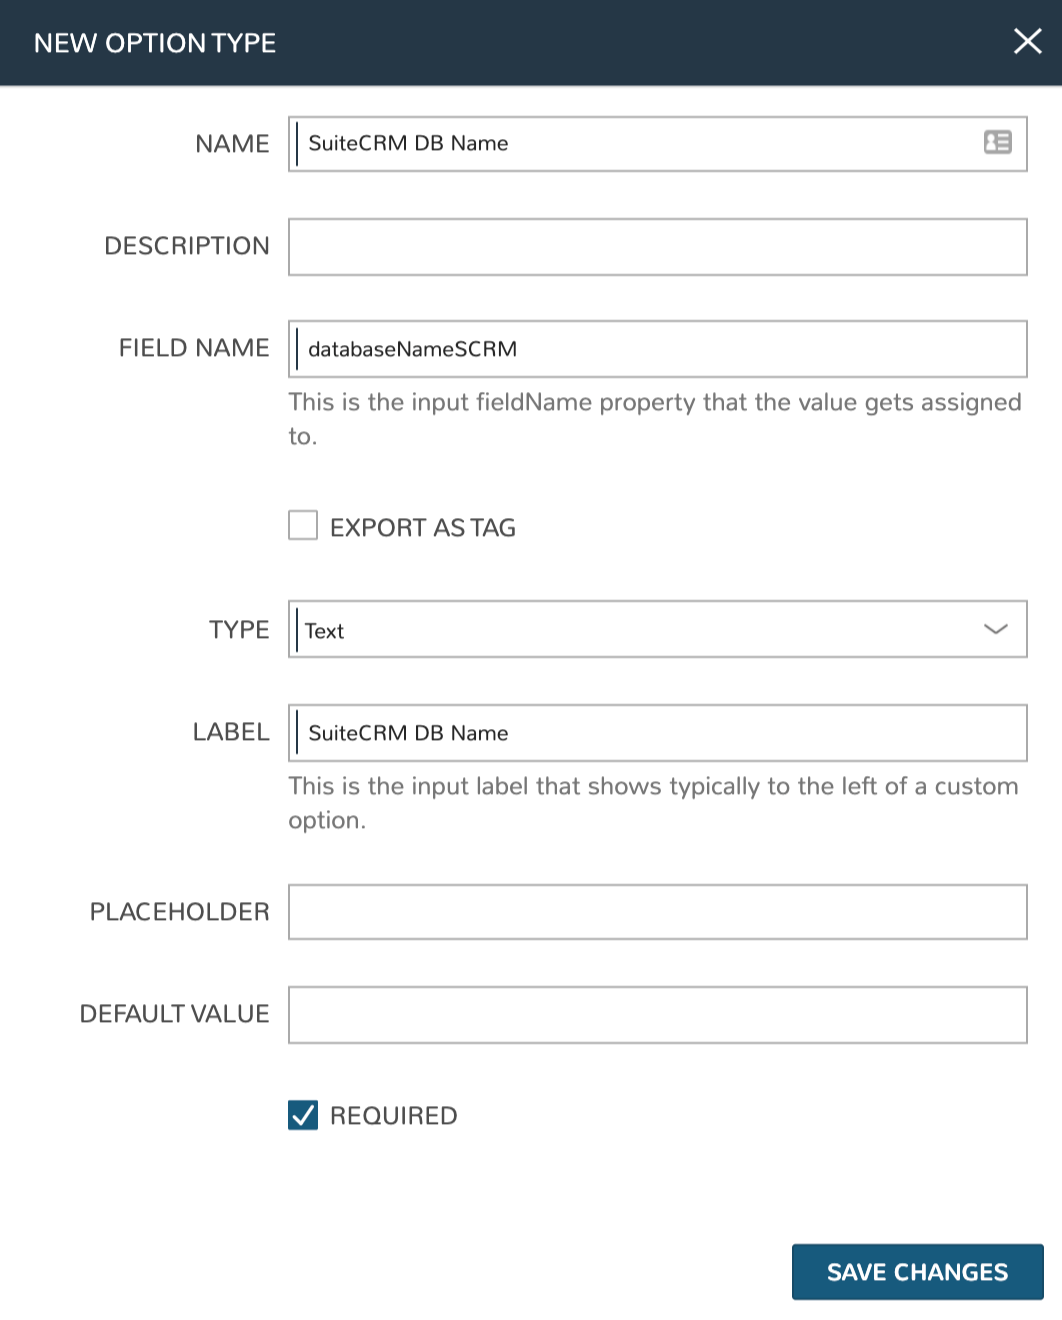
In Morpheus UI, navigate to Library > Options > Inputs. Click + ADD. Complete the following fields:
NAME: SuiteCRM DB Name (The name for the Input object in Morpheus)
FIELD NAME: databaseNameSCRM (The internal property which the input value is assigned to)
TYPE: Text (The input type, in this case an open text field for the user)
LABEL: SuiteCRM DB Name (The label the user sees next to the input field)
Database Name Input
Click SAVE CHANGES. Then, create two additional Inputs:
NAME: SuiteCRM DB User
FIELD NAME: databaseUserSCRM
TYPE: Text
LABEL: SuiteCRM DB User
Database Username Input

NAME: SuiteCRM DB Password
FIELD NAME: databasePassSCRM
TYPE: Password (Entries in a password field are not shown in plaintext on screen when entered and internally are passed securely as well)
LABEL: SuiteCRM DB Password
Database Password Input

Create File Templates
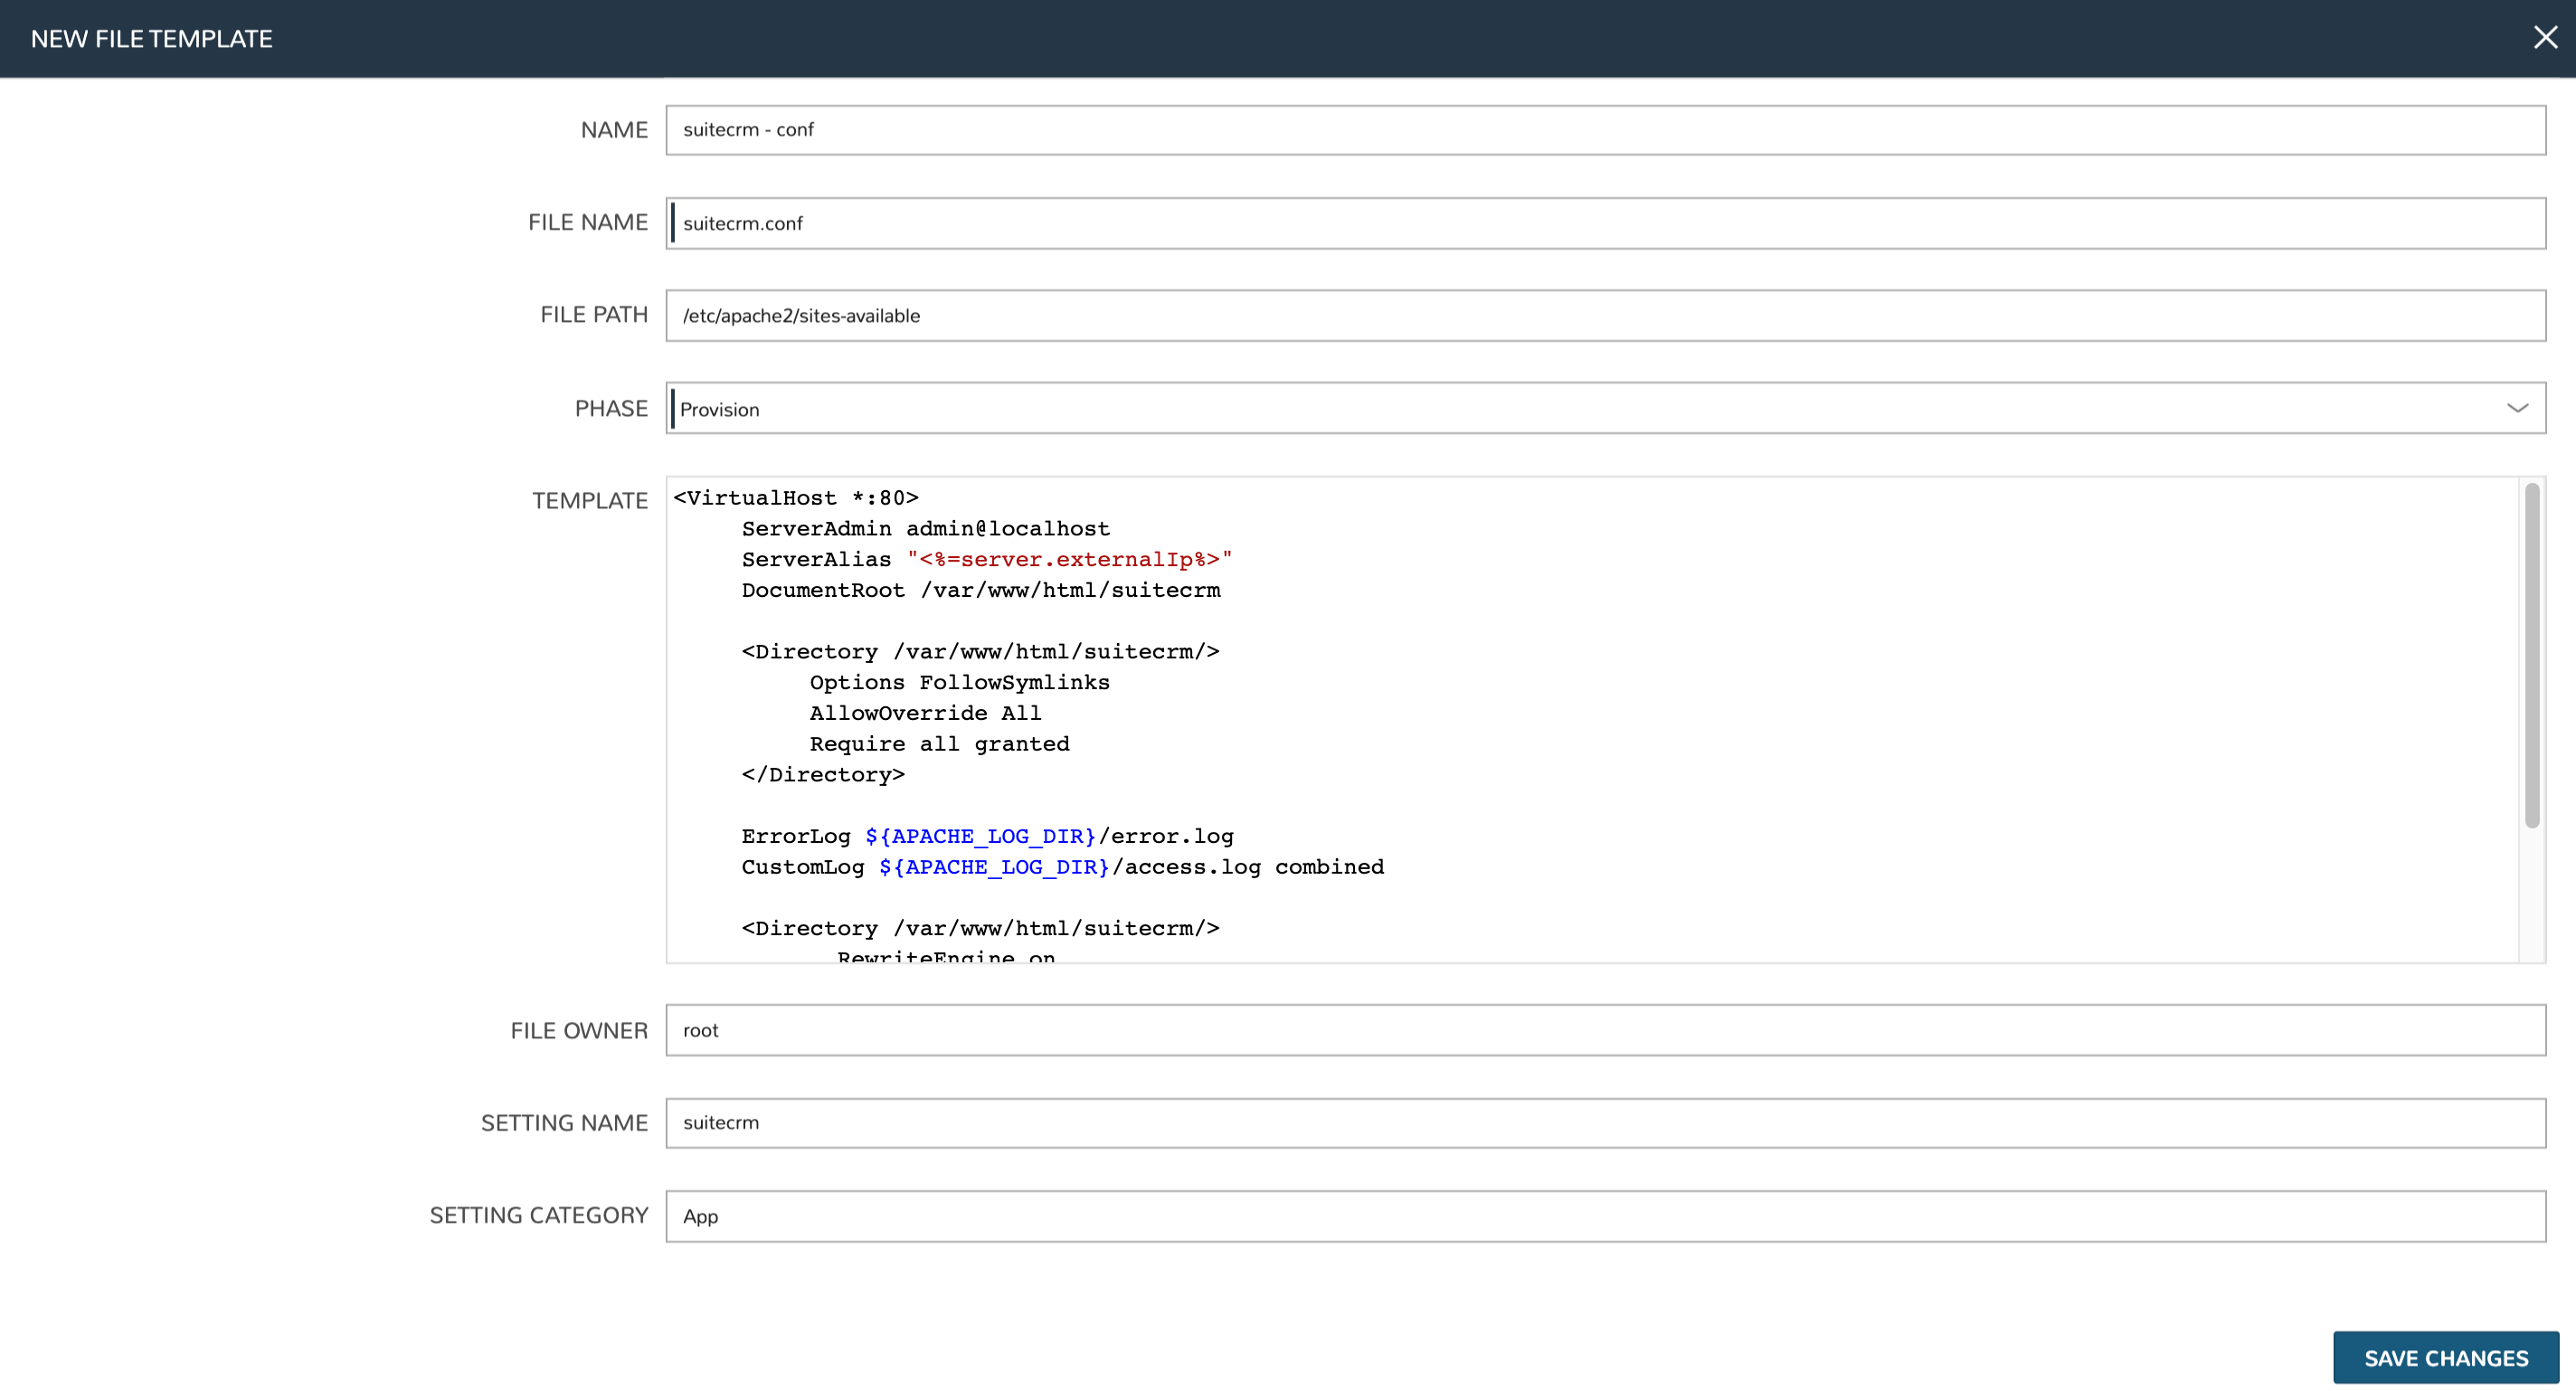
For our SuiteCRM application, we’ll need to create an Apache config file. We can create a File Template in Morpheus and the config file will be generated dynamically at provision time with the appropriate values. Navigate to Library > Templates > File Templates and click + ADD. Enter the following:
NAME: suitecrm - conf
FILE NAME: suitecrm.conf
FILE PATH: /etc/apache2/sites-available
PHASE: Provision
TEMPLATE: See below for the complete template, note how we’re able to dynamically resolve Morpheus variables within the template
FILE OWNER: root
SETTING NAME: suitecrm
SETTING CATEGORY: App
<VirtualHost *:80>
   ServerAdmin admin@localhost
   ServerAlias "<%=server.externalIp%>"
   DocumentRoot /var/www/html/suitecrm

   <Directory /var/www/html/suitecrm/>
        Options FollowSymlinks
        AllowOverride All
        Require all granted
   </Directory>

   ErrorLog ${APACHE_LOG_DIR}/error.log
   CustomLog ${APACHE_LOG_DIR}/access.log combined

   <Directory /var/www/html/suitecrm/>
          RewriteEngine on
          RewriteBase /
          RewriteCond %{REQUEST_FILENAME} !-f
          RewriteRule ^(.*) index.php [PT,L]
  </Directory>
</VirtualHost>
Create Tasks
At this point, we need to create three automation Tasks. One will set the Apache config file we just created, another will be a Bash script Task to actually install and configure SuiteCRM on the box, and the third will be another Bash script Task which will restart the Apache service.
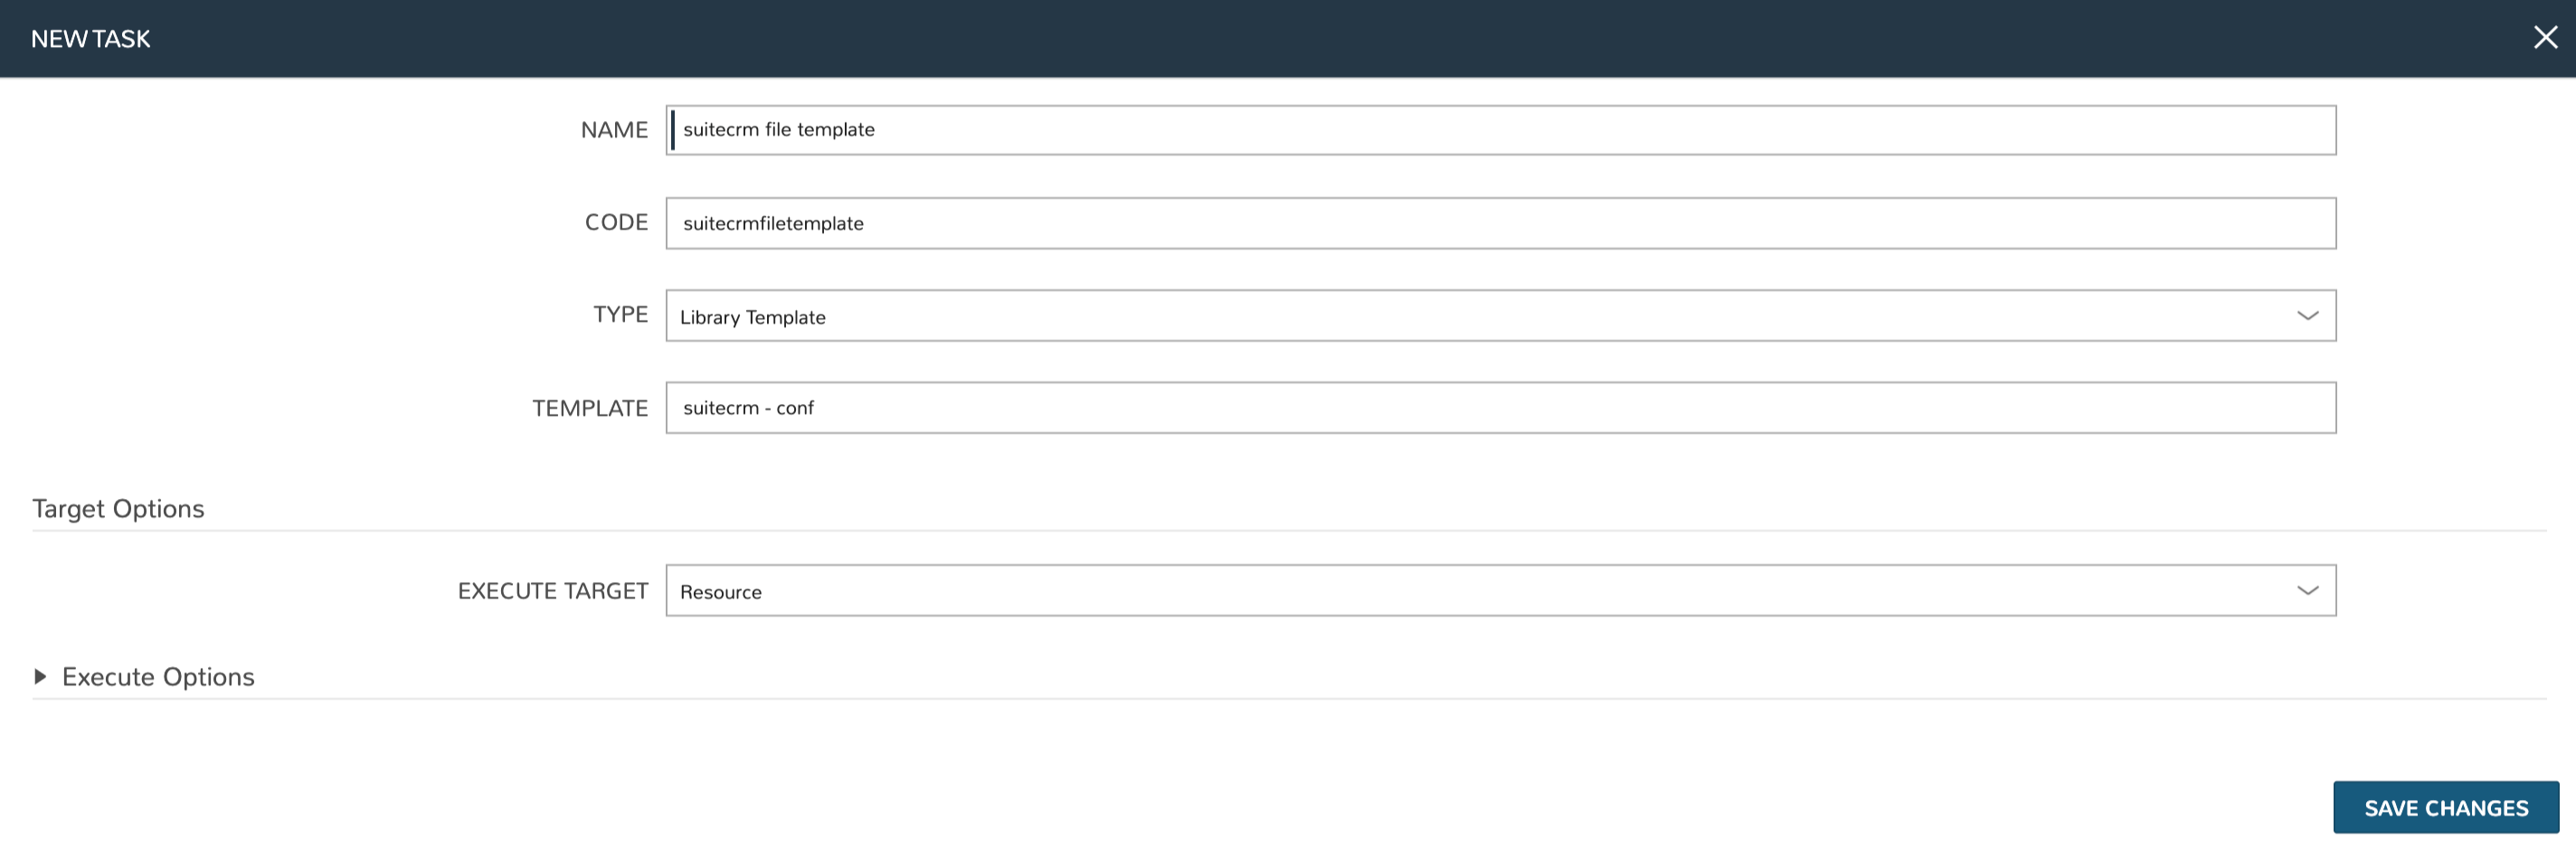
To create a Library Template Task, navigate to Library > Automation > Tasks. Click + ADD. Enter the following:
NAME: suitecrm file template
CODE: suitecrmfiletemplate
TYPE: Library Template (The proper fields will appear once the Type is set)
TEMPLATE: suitecrm - conf (Select the File Template we already created from this dropdown menu)
EXECUTE TARGET: Resource
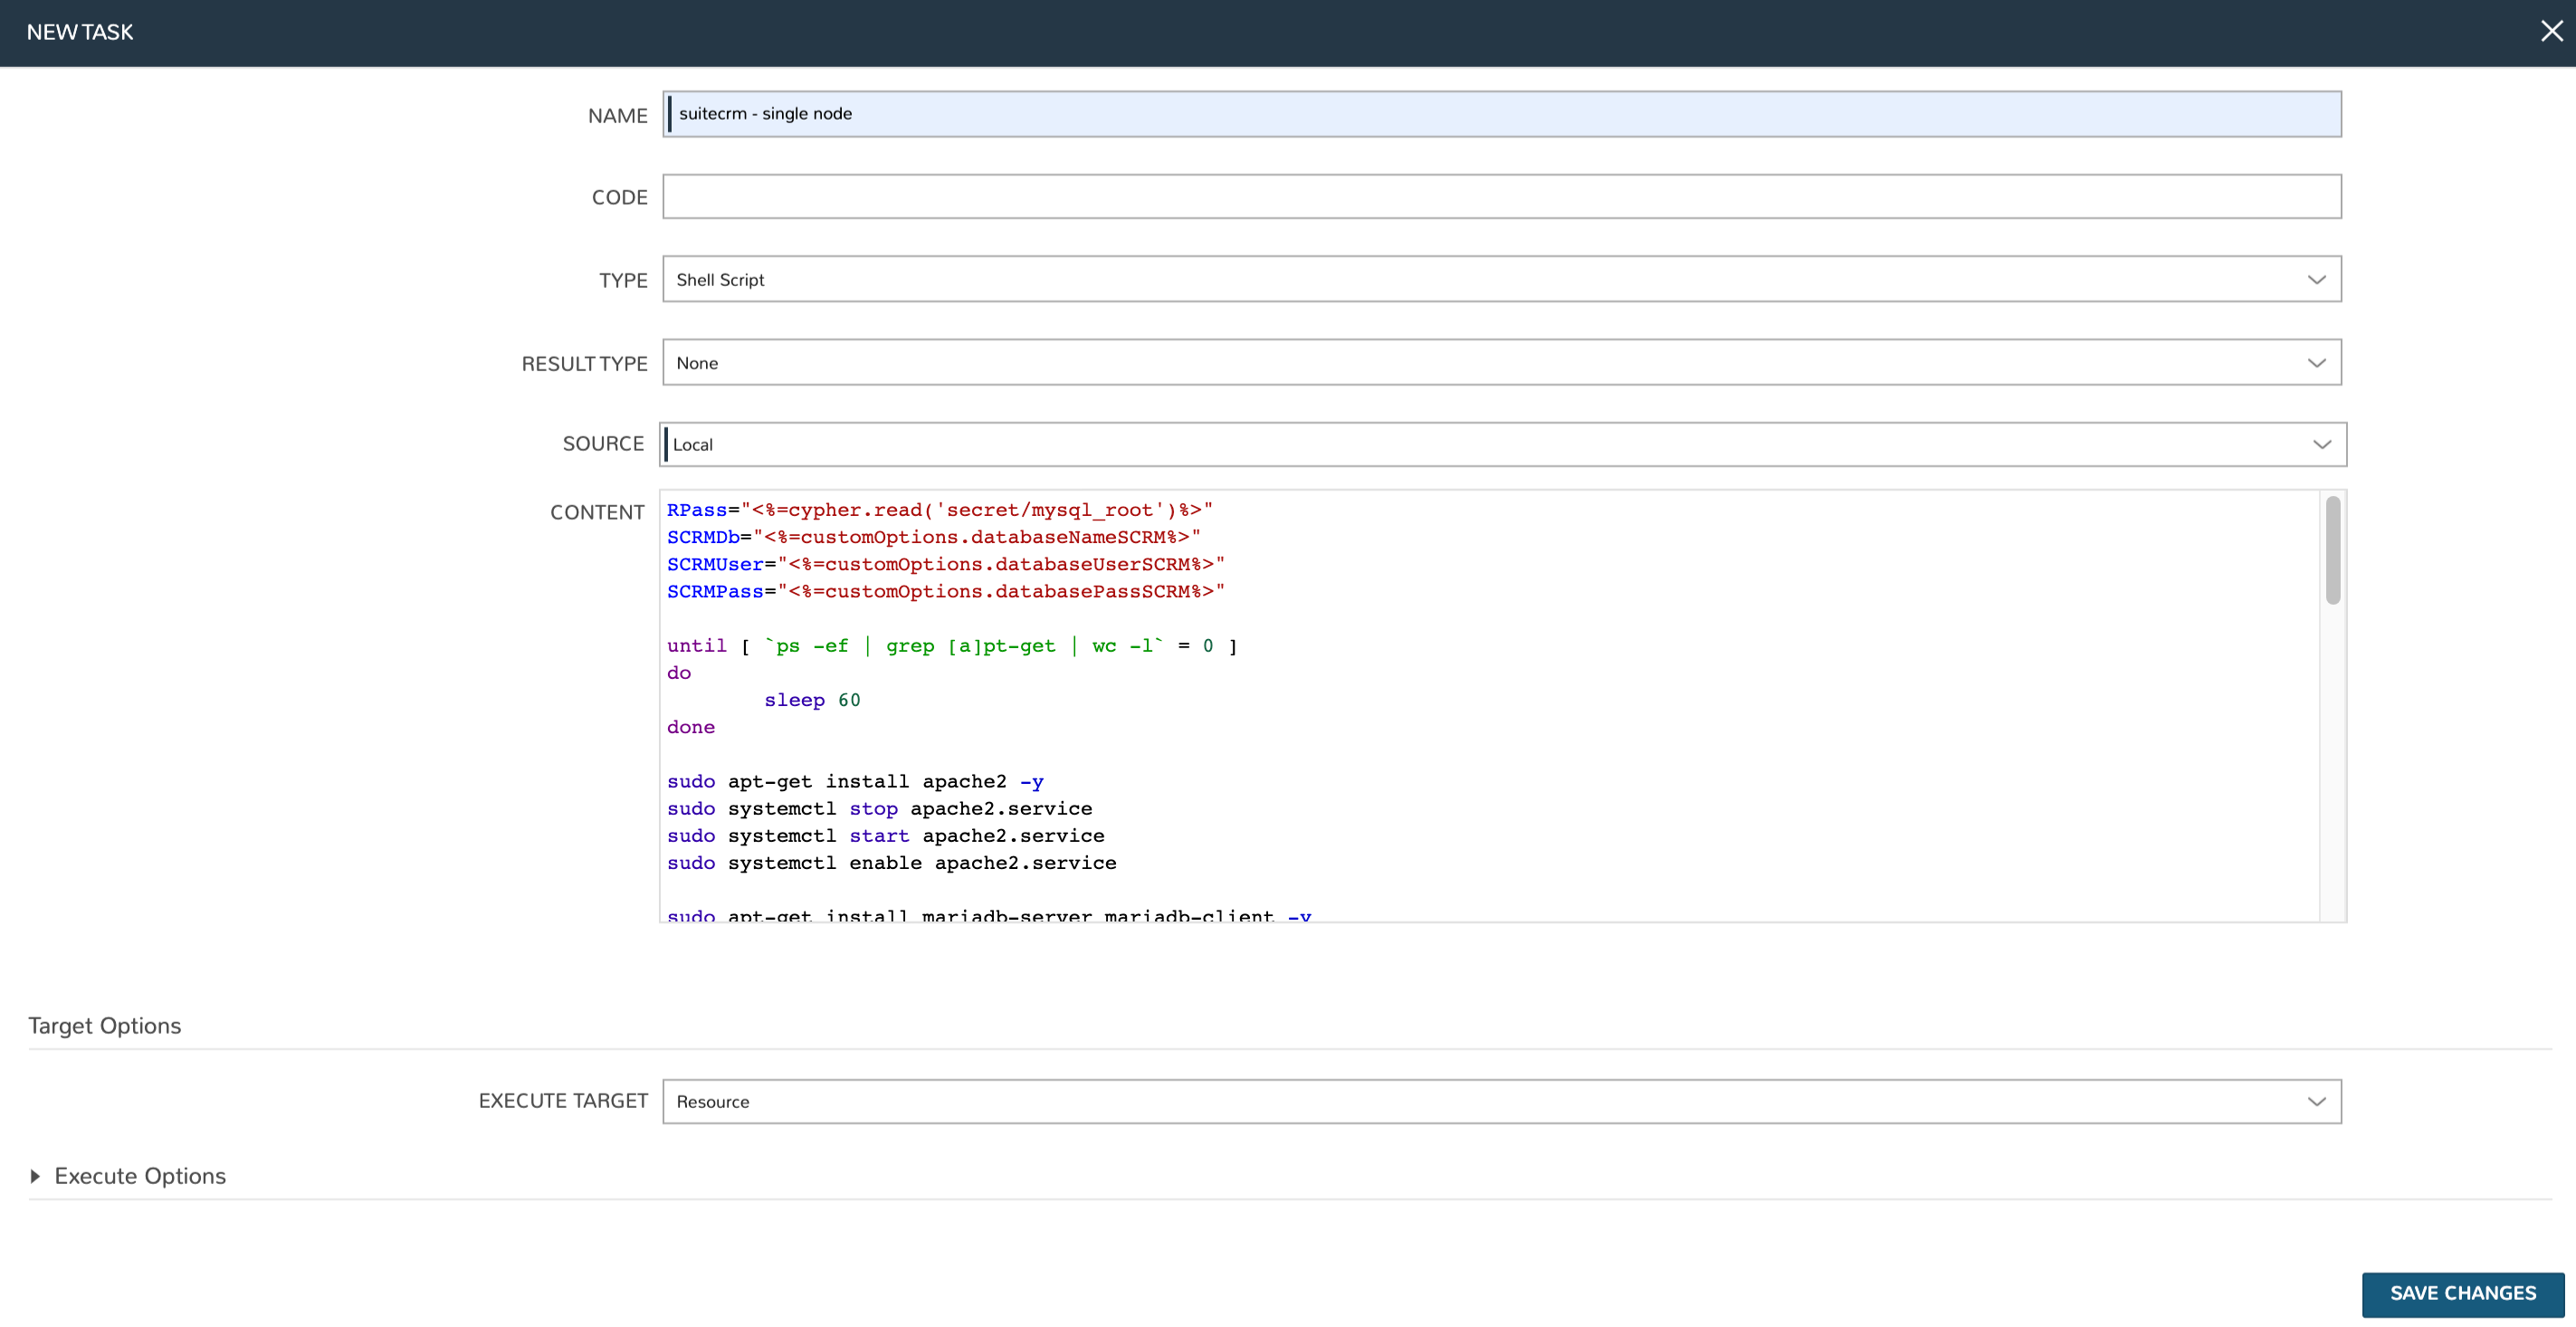
Now create the first Bash Task which will install and configure SuiteCRM on a newly-provisioned box:
NAME: suitecrm - single node
TYPE: Shell Script (The proper fields will appear once the Type is set)
RESULT TYPE: None
SUDO: Checked
SOURCE: Local (We will enter the script locally in this case but if version control repositories are integrated, such as Github, script content can be dynamically pulled from the repository at the time the Task is invoked. This ensures the code is always current without ever manually updating Tasks)
CONTENT: Expand the section below to see the script content. Note how Cypher secrets and custom option (Input) values are invoked in this script
EXECUTE TARGET: Resource
Install Task Content
RPass="<%=cypher.read('secret/mysql_root')%>"
SCRMDb="<%=customOptions.databaseNameSCRM%>"
SCRMUser="<%=customOptions.databaseUserSCRM%>"
SCRMPass="<%=customOptions.databasePassSCRM%>"

#Wait until any apt-get processes have finished
if [ `ps -ef | grep [a]pt-get | wc -l` = !0 ]
then
    sleep 120
fi

#Install apache, start service and enable on boot
apt-get install apache2 -y
systemctl stop apache2.service
systemctl start apache2.service
systemctl enable apache2.service

#Install MariaDB, start service and enable on boot
wget https://downloads.mariadb.com/MariaDB/mariadb_repo_setup
echo "fd3f41eefff54ce144c932100f9e0f9b1d181e0edd86a6f6b8f2a0212100c32c mariadb_repo_setup" | sha256sum -c -
chmod +x mariadb_repo_setup
./mariadb_repo_setup  --mariadb-server-version="mariadb-10.6"
apt update
apt-get install mariadb-server mariadb-client -y
systemctl stop mariadb.service
systemctl start mariadb.service
systemctl enable mariadb.service

#The following commands are from the mysql secure installation guidance
mysql -u root -e "UPDATE mysql.user SET Password=PASSWORD('$RPass') WHERE User='root';"
mysql -u root -e "flush privileges"
mysql -u root -p$RPass -e "DELETE FROM mysql.user WHERE User='';"
mysql -u root -p$RPass -e "DELETE FROM mysql.user WHERE User='root' AND Host NOT IN ('localhost', '127.0.0.1', '::1');"
mysql -u root -p$RPass -e "DROP DATABASE IF EXISTS test;"
mysql -u root -p$RPass -e "DELETE FROM mysql.db WHERE Db='test' OR Db='test\_%';"
mysql -u root -p$RPass -e "FLUSH PRIVILEGES;"

#Create the SuiteCRM database
mysql -u root -p$RPass -e "CREATE DATABASE $SCRMDb;"
mysql -u root -p$RPass -e "GRANT ALL ON $SCRMDb.* TO $SCRMUser@localhost IDENTIFIED BY '$SCRMPass';"
mysql -u root -p$RPass -e "FLUSH PRIVILEGES;"

#Install required software for SuiteCRM
add-apt-repository ppa:ondrej/php -y
apt-get update
apt-get install php7.3 libapache2-mod-php7.3 php7.3-common php7.3-mysql php7.3-gmp php7.3-curl php7.3-intl php7.3-mbstring php7.3-xmlrpc php7.3-gd php7.3-bcmath php7.3-imap php7.3-xml php7.3-cli php7.3-zip -y

#Update php.ini file with required settings
short_open_tag=On
memory_limit=256M
upload_max_filesize=100M
max_execution_time=360

for key in short_open_tag memory_limit upload_max_filesize max_execution_time
do
    sed -i "s/^\($key\).*/\1 $(eval echo = \${$key})/" /etc/php/7.3/apache2/php.ini
done

#Restart apache
systemctl restart apache2.service

#Test file created for debugging
echo "<?php phpinfo( ); ?>" | sudo tee /var/www/html/phpinfo.php

#Download and install latest SuiteCRM. Composer v2 does not work with Suitecrm.
curl -sS https://getcomposer.org/installer | sudo php -- --version=1.10.9 --install-dir=/usr/local/bin --filename=composer
git clone https://github.com/salesagility/SuiteCRM.git /var/www/html/suitecrm

cd /var/www/html/suitecrm
composer install --no-dev
chown -R www-data:www-data /var/www/html/suitecrm/
chmod -R 755 /var/www/html/suitecrm/
Finally, we’ll add the Apache restart Task. Configure a new Task as shown below:
NAME: suitecrm apache restart
TYPE: Shell Script (The proper fields will appear once the Type is set)
RESULT TYPE: None
SUDO: Checked
SOURCE: Local
CONTENT: Expand the section below to see the script content
EXECUTE TARGET: Resource
Restart Task Content
a2ensite suitecrm.conf
a2enmod rewrite
systemctl restart apache2.service

Create the Provisioning Workflow
Morpheus Workflows pull multiple Tasks together into a logical group. There are two types of Workflows: Operational and Provisioning. We won’t use any Operational Workflows here but these Workflows can be run on-demand as needed or set to run on a recurring time schedule (like a cronjob). Provisioning Workflows are associated with an Instance at provision time and will automatically run when the Instance reaches certain phases of its lifecycle, such as during provisioning, teardown, startup, or shutdown. In this case, we can create a Provisioning Workflow with our Tasks in the provisioning phase so that SuiteCRM will be installed, the Apache config file will be set, and the Apache service will be restarted automatically when the Instance is provisioned.
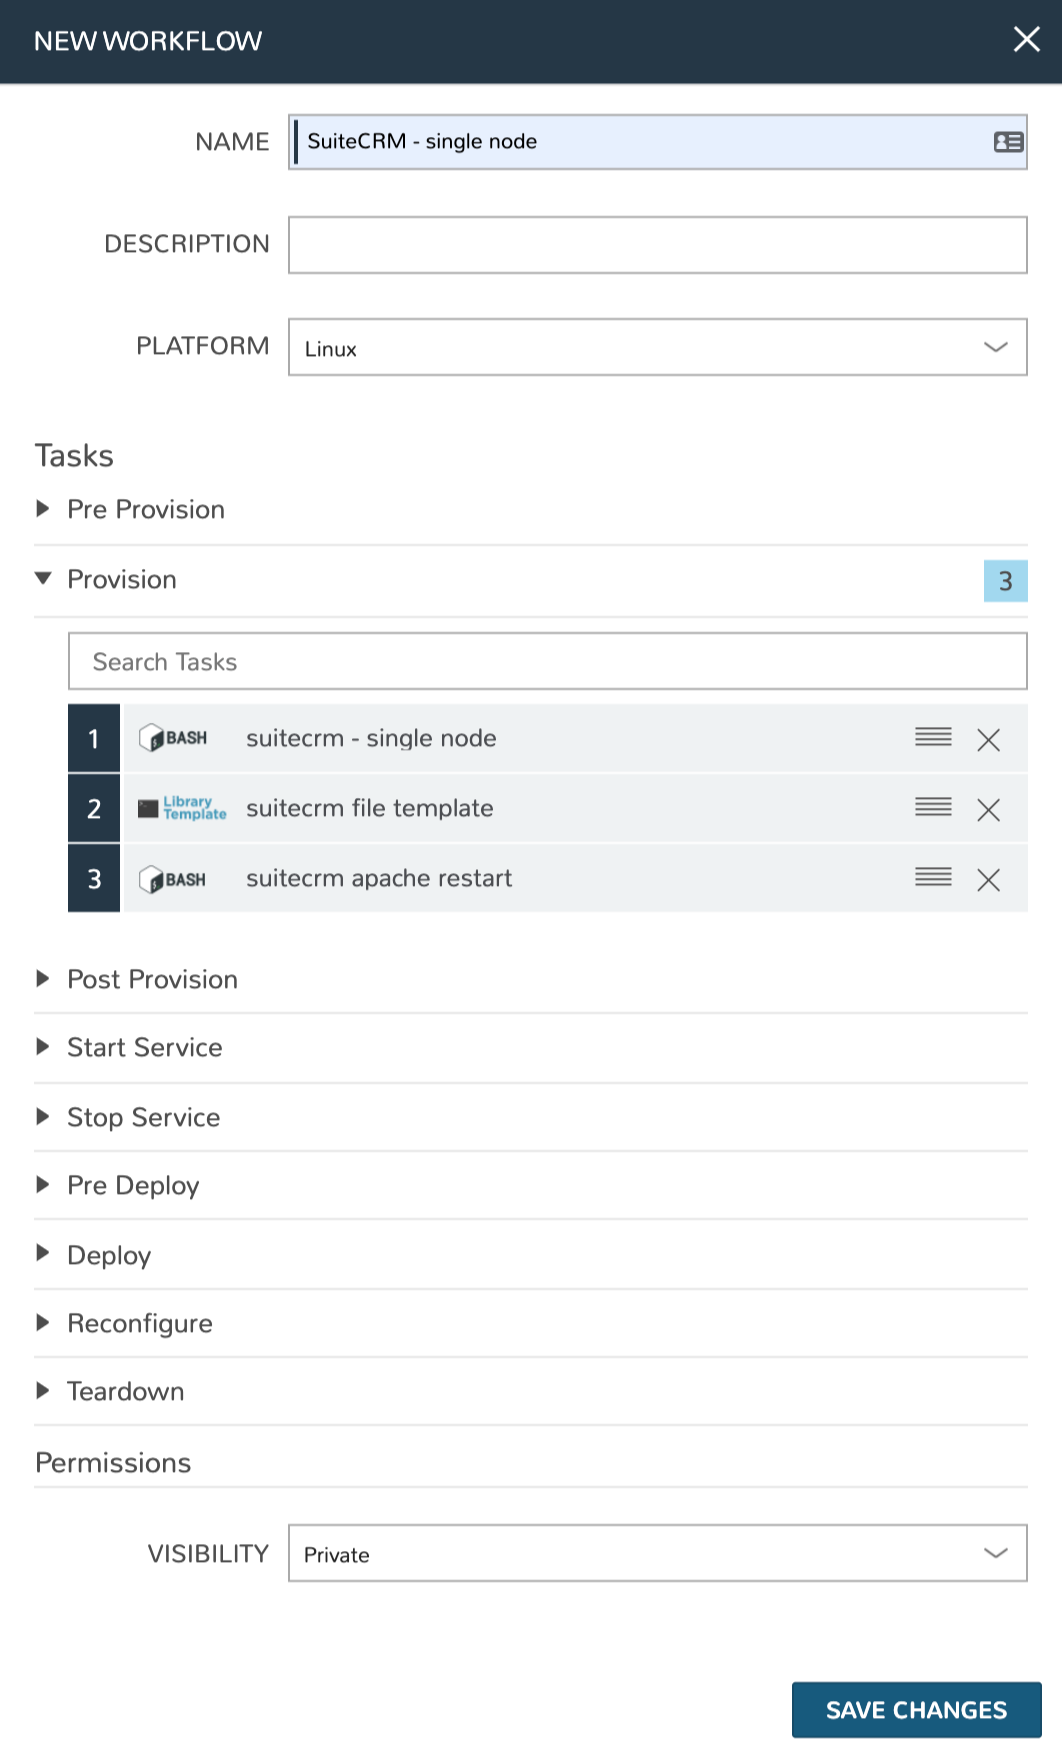
Navigate to Library > Automation > Workflows and click + ADD. Set the following configurations:
NAME: SuiteCRM - single node
PLATFORM: Linux
TASKS: Expand the Provision section and begin typing the names of our Tasks in the Search field. After adding them, they can be reordered but they should be set such that the install script is run first, the file template is set second, and the Apache restart is run last
Click SAVE CHANGES
Create a Custom Library Item
Having created Cypher entries, Inputs, and Tasks, we’re ready to put them all together into a custom Instance Type for our Morpheus Library. We’ll create a new SuiteCRM Library entry that will be available to some or all users (depending on Role permissions) in the provisioning wizard. This will allow them to stand up single node SuiteCRM appliances will just a few clicks. In Morpheus there are three layers to such Library items: Instance Types, Layouts, and Node Types. We’ll create the Instance Type first:
Navigate to Library > Blueprints > Instance Types and click + ADD. Enter the following configurations:
NAME: Suite_CRM
CODE: SuiteCRM
CATEGORY: Apps
ICON: If desired, search the file system on your local computer for a SuiteCRM logo icon for easier identification of this Instance Type at provision time
ENVIRONMENT PREFIX: SUITE_CRM
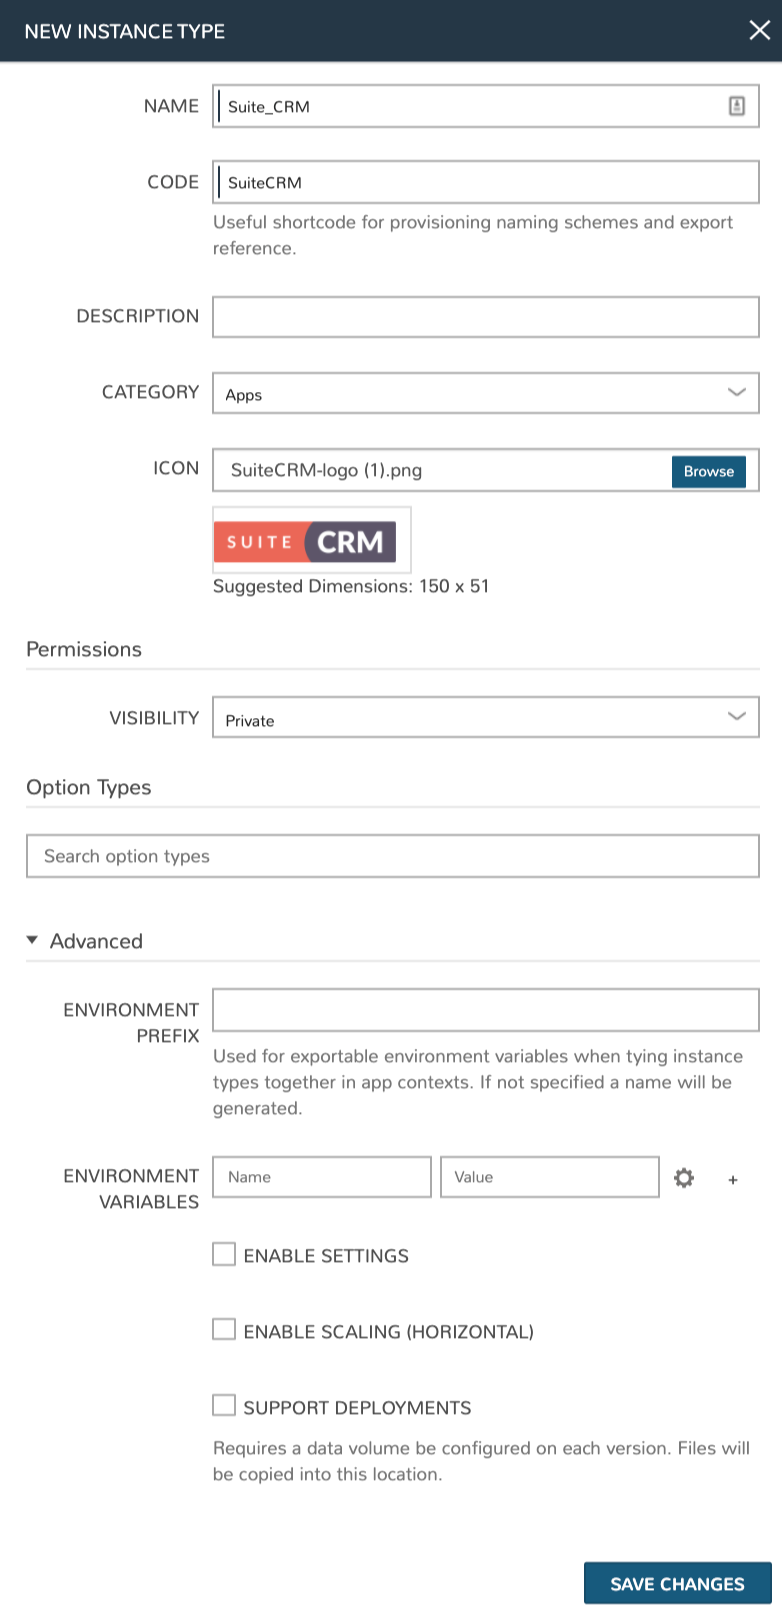
Click SAVE CHANGES. After creating the Instance Type, click into it and then click + ADD LAYOUT from the Instance Type Detail Page. A Layout specifies the technology the Instance will run on, in this case VMware. It’s possible to have multiple Layouts associated with an Instance Type which can be selected depending on the chosen Cloud the user might be provisioning on. Configure the Layout as follows:
NAME: Single Node SuiteCRM
VERSION: Latest
CREATABLE: Checked (If unchecked, this Layout won’t be an available option at provision time)
TECHNOLOGY: VMware
MINIMUM MEMORY: 2 GB (If entered, this value will override any memory requirement set on the virtual image to ensure your Instance service will run properly)
WORKFLOW: Select the Workflow we’ve already created
INPUTS: Search and find the three custom Inputs we created earlier
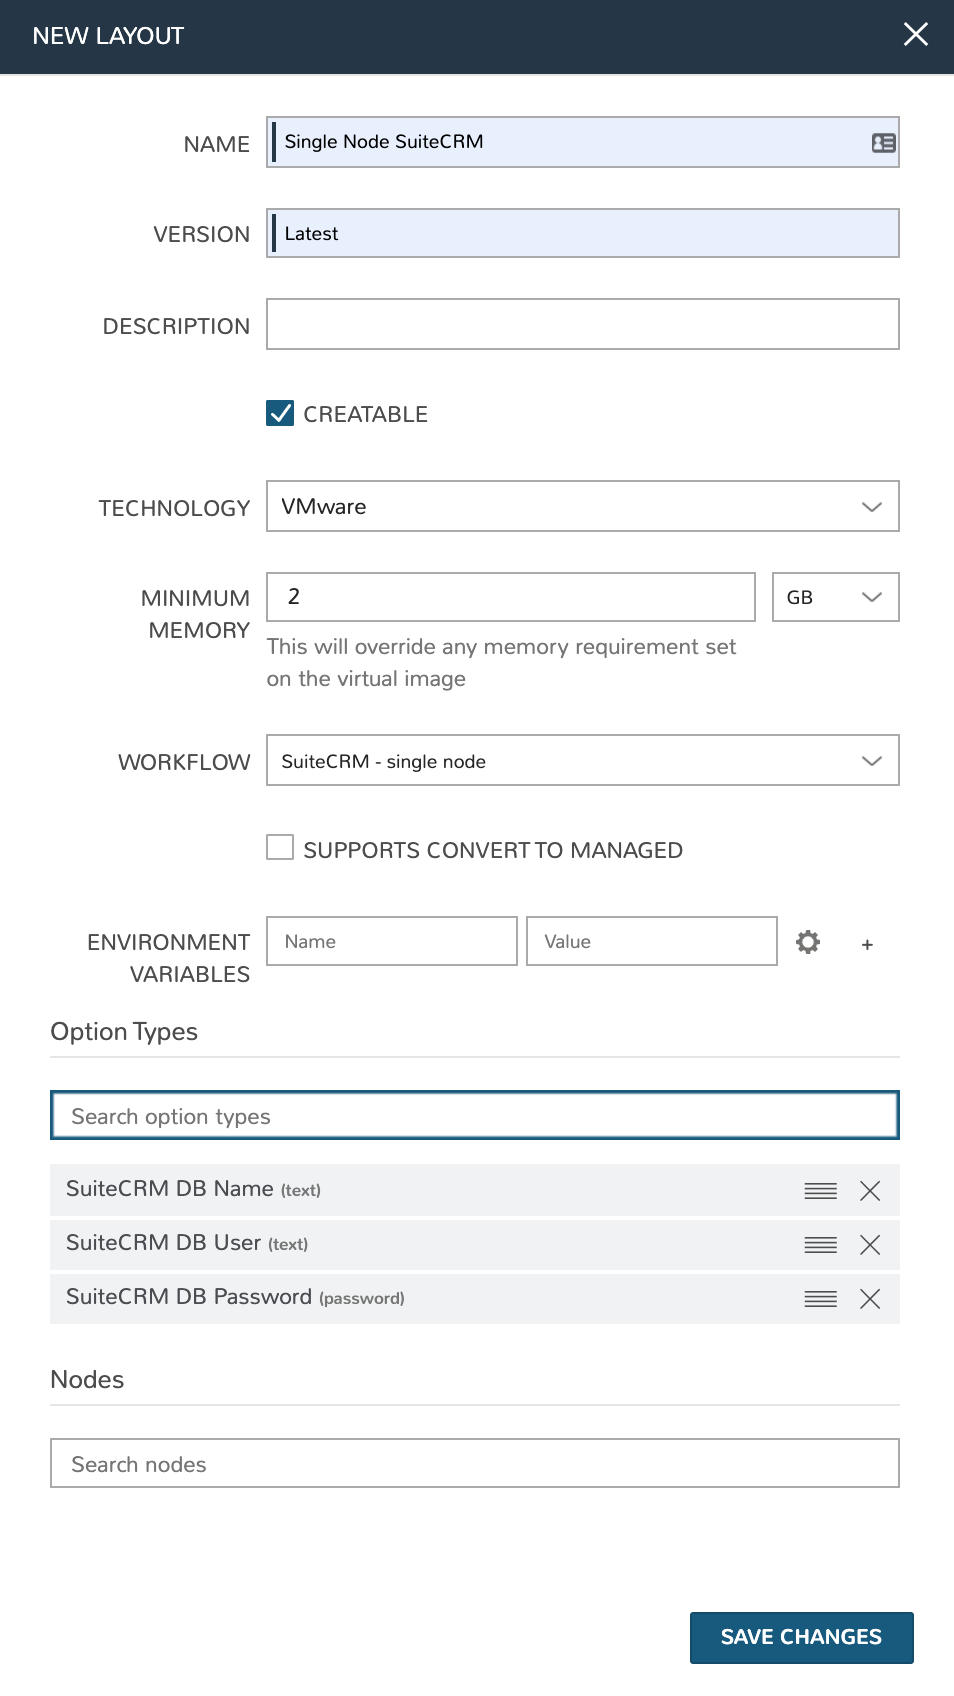
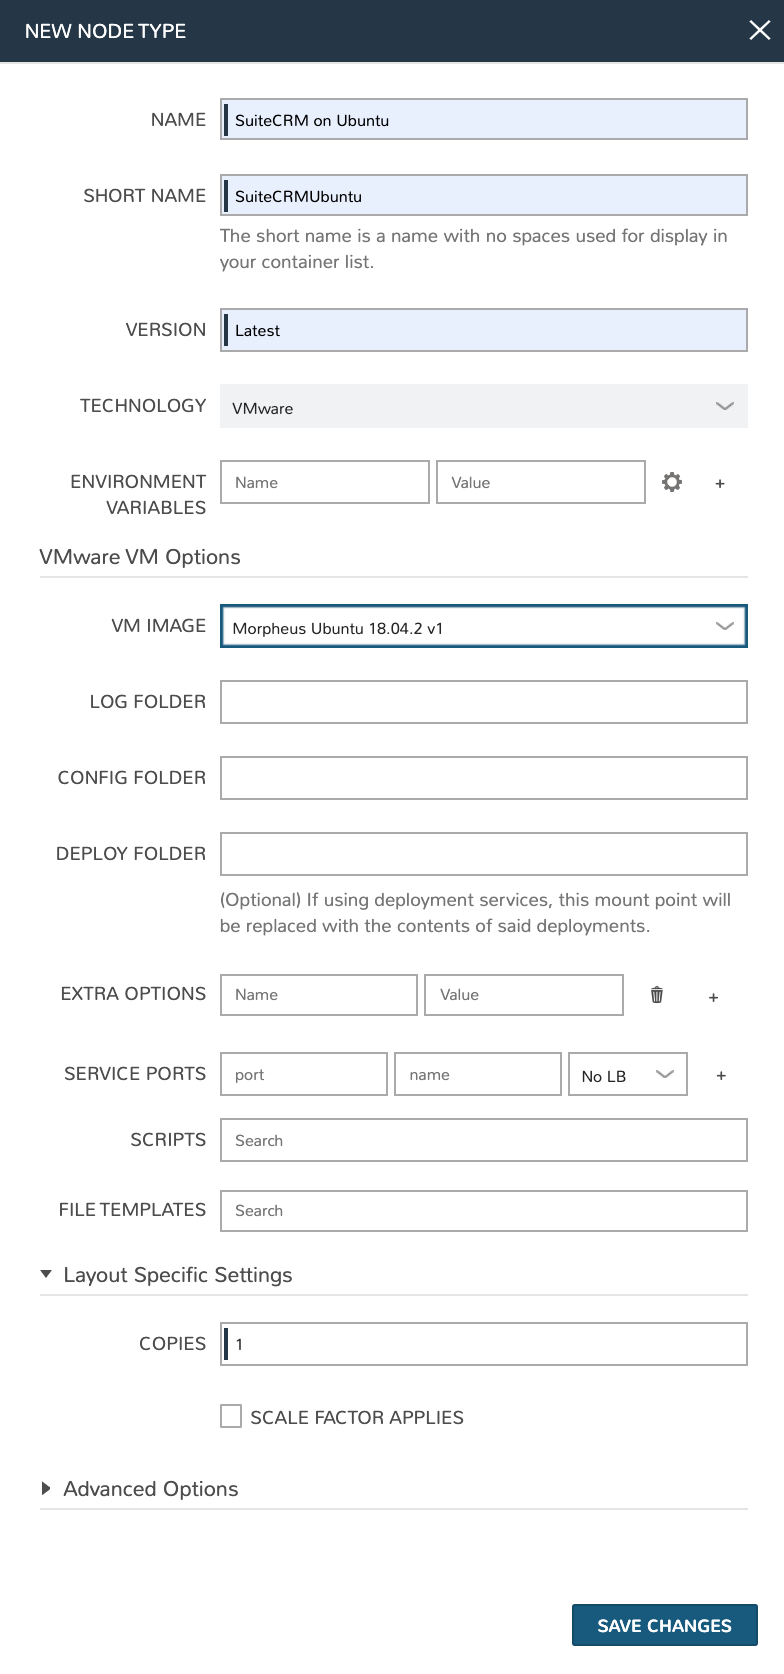
Once the configurations are entered, click SAVE CHANGES. After creating the Layout, we need to associate a Node Type. From the Layout Detail Page, click + ADD within the “VM Types” section. The term VM Types is sometimes used in place of Node Types in Morpheus but they refer to the same thing and are fully interchangeable. In this case, we’re simply going to point to a default Ubuntu image which is supplied by Morpheus though you can associate Node Types with your own custom virtual images when needed. Set the following configurations on the new Node Type:
NAME: SuiteCRM on Ubuntu
SHORT NAME: SuiteCRMUbuntu
VERSION: Latest
VM IMAGE: Select the included Ubuntu 18.04 image
COPIES: 1
Click SAVE CHANGES
Provision the SuiteCRM Instance Type
At this point, the setup is finished and SuiteCRM will be available as an Instance Type option for your users. We’ll go ahead and walk through the provisioning process at this point just to take a look.
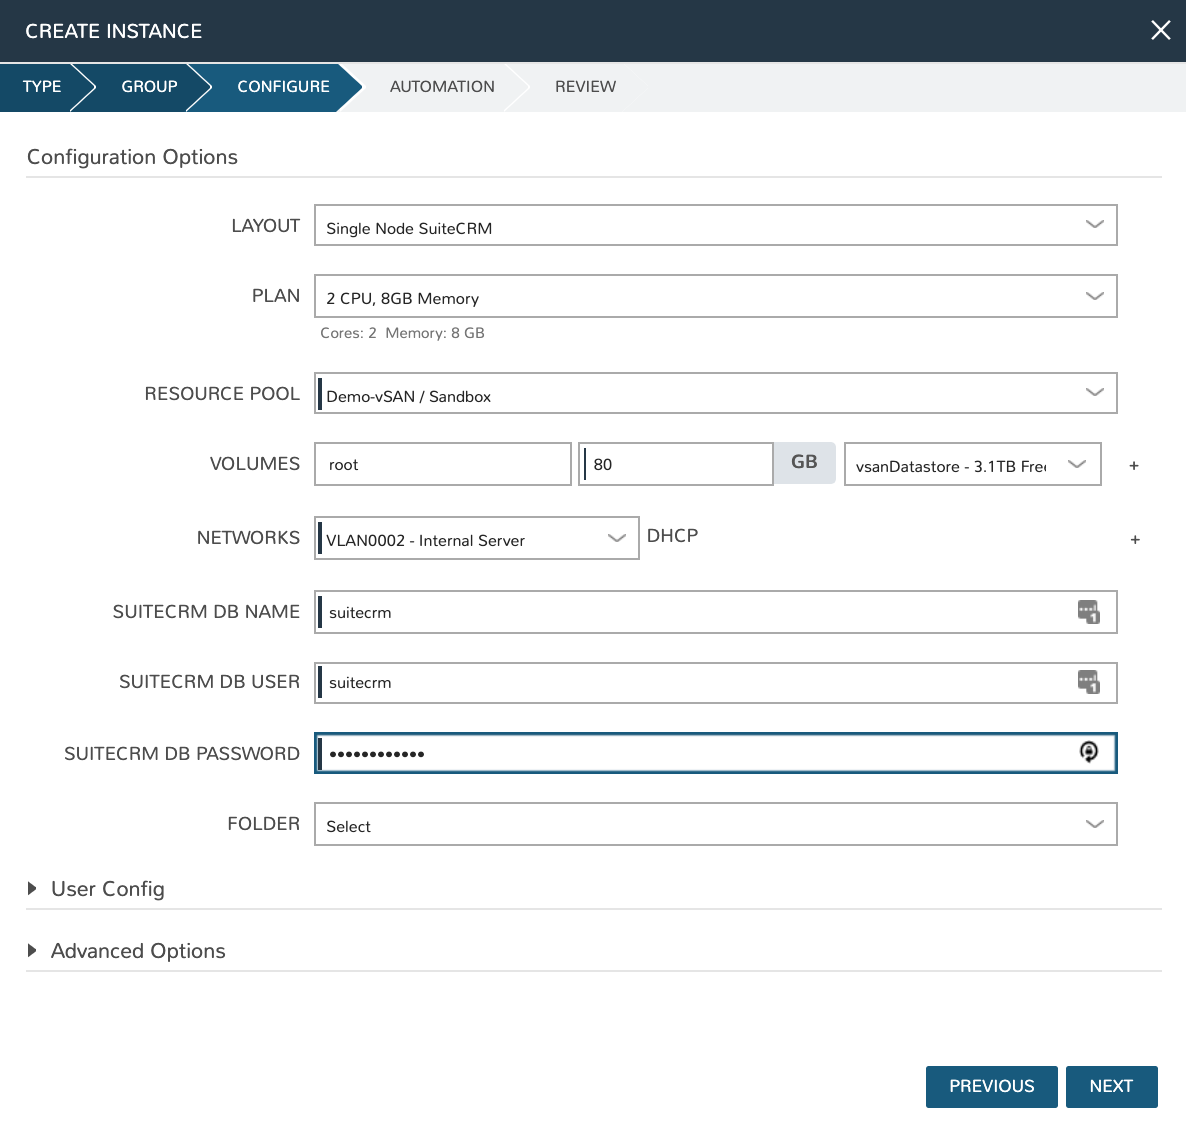
To begin provisioning, navigate to Provisioning > Instances and click + ADD. From the list of Instance Types, select the “SUITE_CRM” Instance Type we just created, click NEXT. From the Group tab, select a Group which contains a VMware Cloud and then select the VMware Cloud you’d like to provision the app onto. Click NEXT. From the Configuration Tab, select the Layout we created and configure a plan, Resource Pool, and network which makes sense for your specific vCenter. You’ll then notice the Input fields we created where you’ll need to enter a SuiteCRM database name, Username, and Password. Click NEXT. On the Automation tab, we do not need to select a Workflow as our Workflow is already set on the Layout. Click NEXT and click COMPLETE.
Configure SuiteCRM
SuiteCRM is now ready for its initial setup. In a web browser, go to http://<YOUR_INSTANCE_IP>/install.php. You should see the license agreement page and can proceed with the setup steps. SuiteCRM is now up and running. Additional instances of SuiteCRM can be stood up in the future with just a few clicks!
