Cloud Resource Tagging with Morpheus
Introduction
As organizations scale their cloud environments, they often need to devise methodologies for organizing those resources. Tags consist of key and optional value pairs which make it easier to search for or filter your cloud resources based on categories relevant to the organization. While each public or private cloud handles tagging slightly differently, Morpheus removes that complexity and differentiation by handling tags in a consistent way across clouds. In addition, the Morpheus policy engine gives administrators tools to set up guard rails and ensure cloud resource tagging is handled consistently with each provisioning.
This guide will go through Morpheus tagging features and best practices, as well as include provisioning examples from some of the most commonly integrated clouds.
Note
Tag syncing is bi-directional in Morpheus for supported clouds. Tag syncing is currently supported in Amazon, Azure, Google, VMware, and Alibaba Clouds.
Tagging on Provisioning
In the simplest use case, tags can be entered manually in most provisioning scenarios. For example, on the Configure tab of the Create Instance wizard, the user can expand the Tags section and enter as many Tags as he or she needs to comply with organization practices.
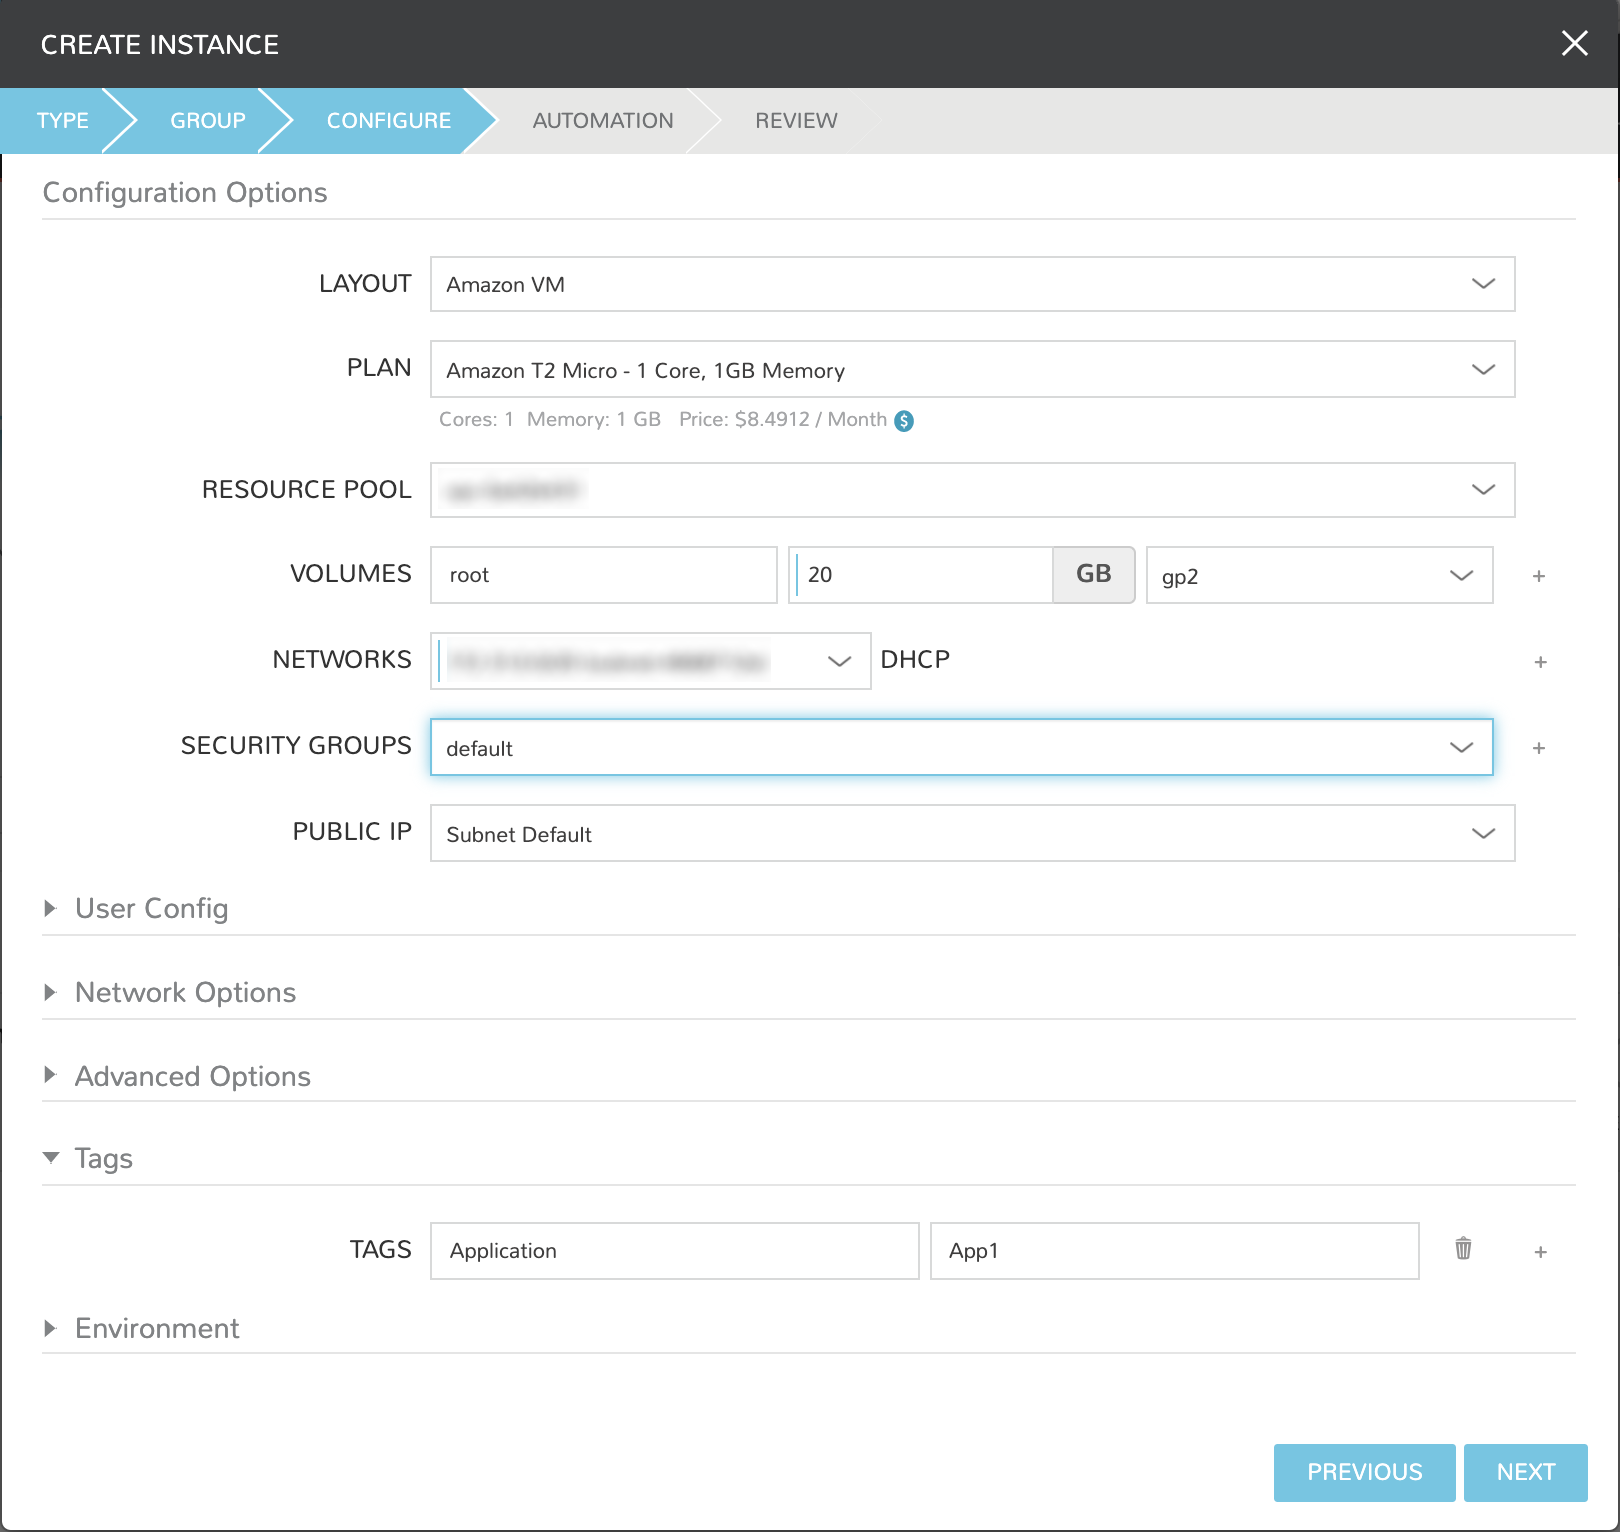
Once the resource is deployed, Tags are synced and applied to the provisioned machine in the relevant cloud. Tags are shown on the Instance detail page in Morpheus and can also be confirmed in the cloud console if desired. Tag syncing is also a two-way street in that any tag updates applied within Morpheus or within the cloud console will be reflected everywhere.
Note
Tag updates made in the cloud console may take up to five minutes to be reflected in Morpheus UI following the next sync of cloud data.
Custom Instance Types and Tagging
Manually tagging resources as described in the previous section will work in some cases but many administrators will likely need to pre-seed the provisioning wizards with tagging prompts or build dropdown lists for tag values. This is accomplished in Morpheus through the use of custom Instance Types, Inputs, and Option Lists.
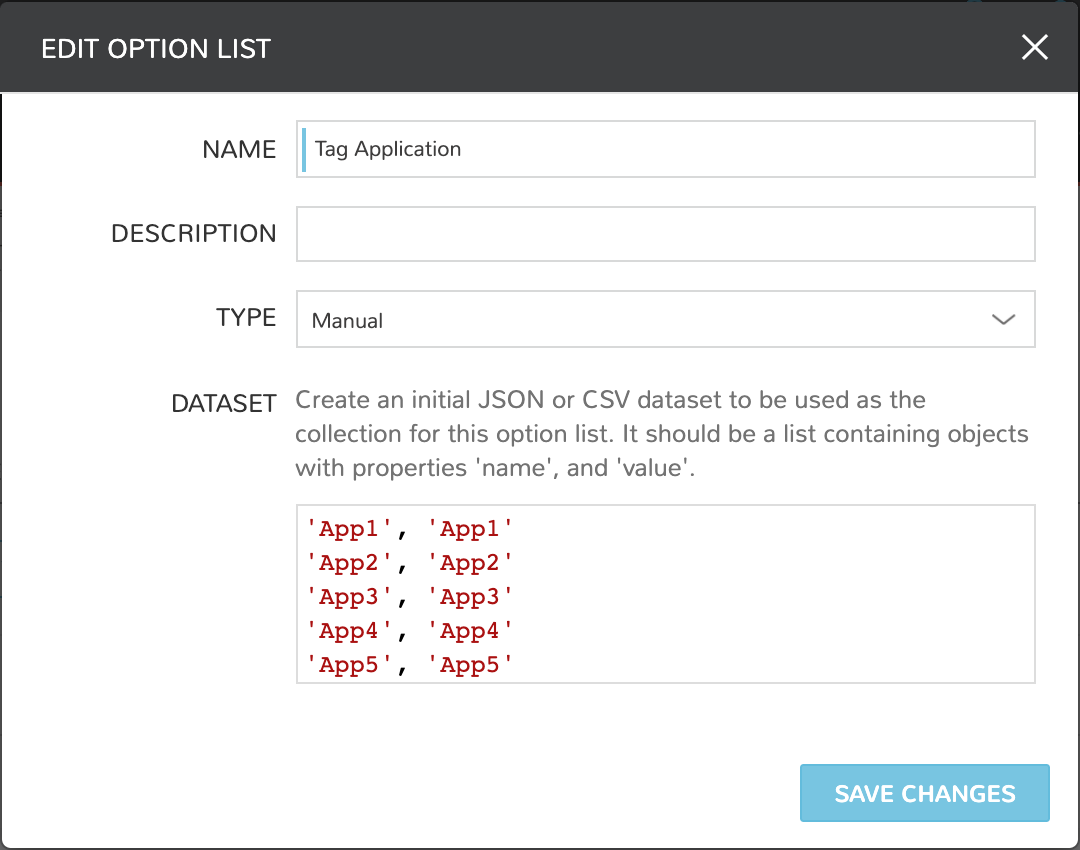
To get started, first create an Option List to hold dropdown or typeahead sets of available key values if needed based on organizational tagging policy. If the tag value field should be manually entered at provision time or if the value field is to be left blank, this step can be skipped. Option Lists are created and stored in the Morpheus Library (Library). They can be populated manually by entering CSV or JSON datasets as shown in the example below. They can also be dynamically populated through Morpheus API or REST calls.
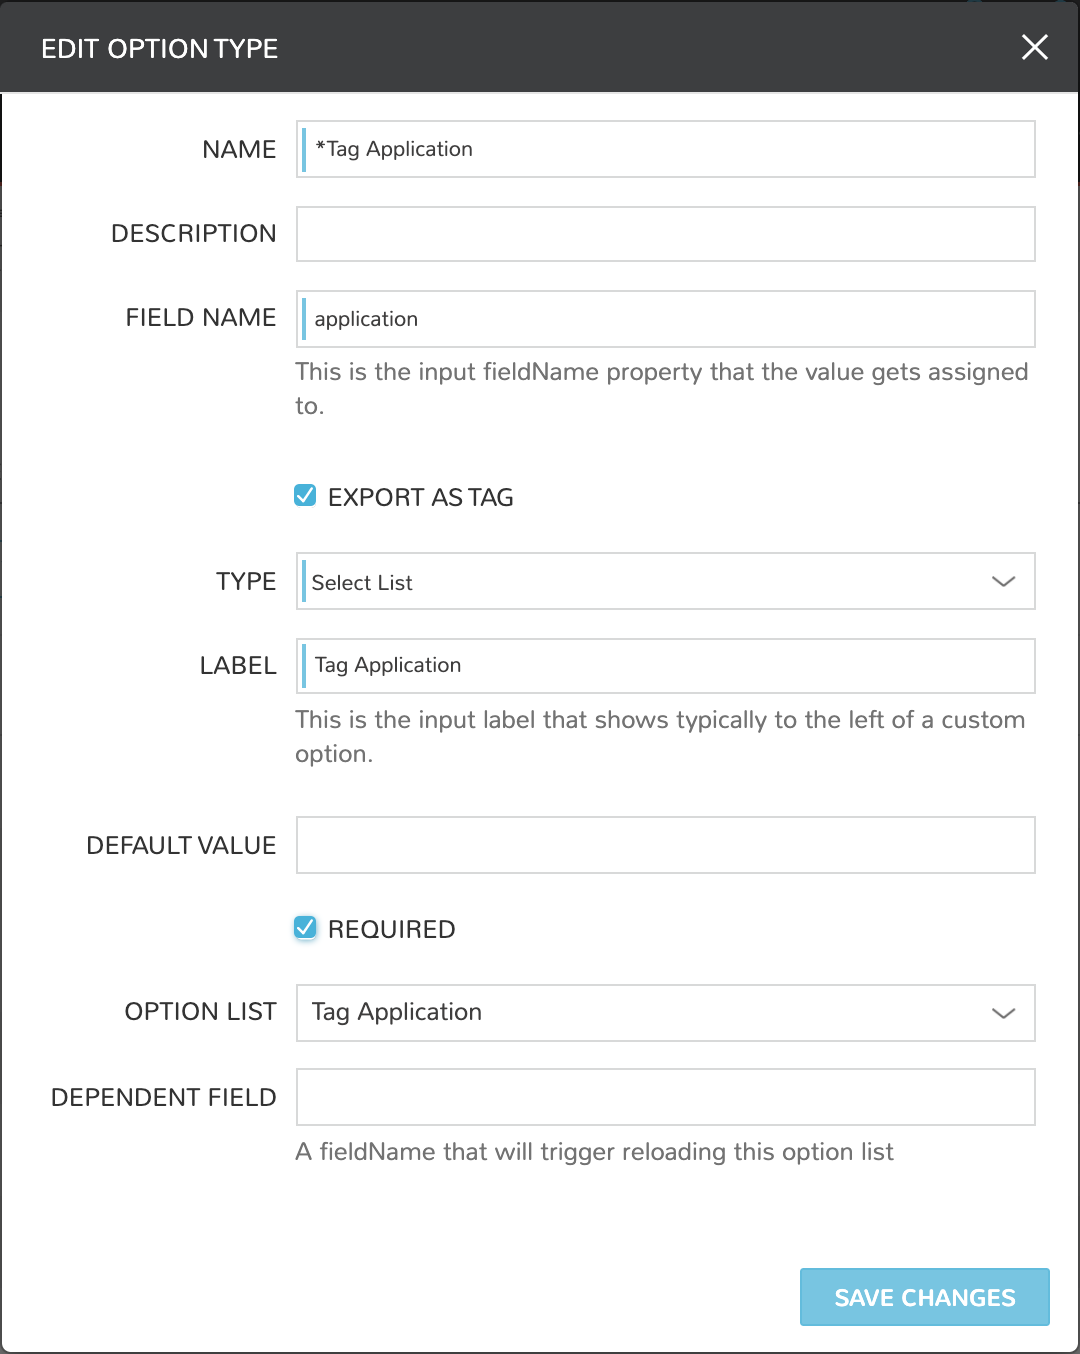
With the set of possible values defined (if needed), we next create an Input to prompt the user for tag input when provisioning relevant Instance types. Inputs are also housed in the Morpheus Library (Library).
It’s important to note the value entered for the FIELD NAME on the new Input will be set as the tag key. The EXPORT AS TAG box should also be marked. By default, the TYPE value is Text. This is appropriate when the user should be prompted with a free text field at provision time to enter a tag value. To tie this Input to the Option List that was just created (if needed), change the TYPE value to Select List or Typeahead. Typeahead works best for very long lists while Select List is often a better user experience for lists of a more manageable size. Set the Option List we created in the previous step in the OPTION LIST value (if needed).
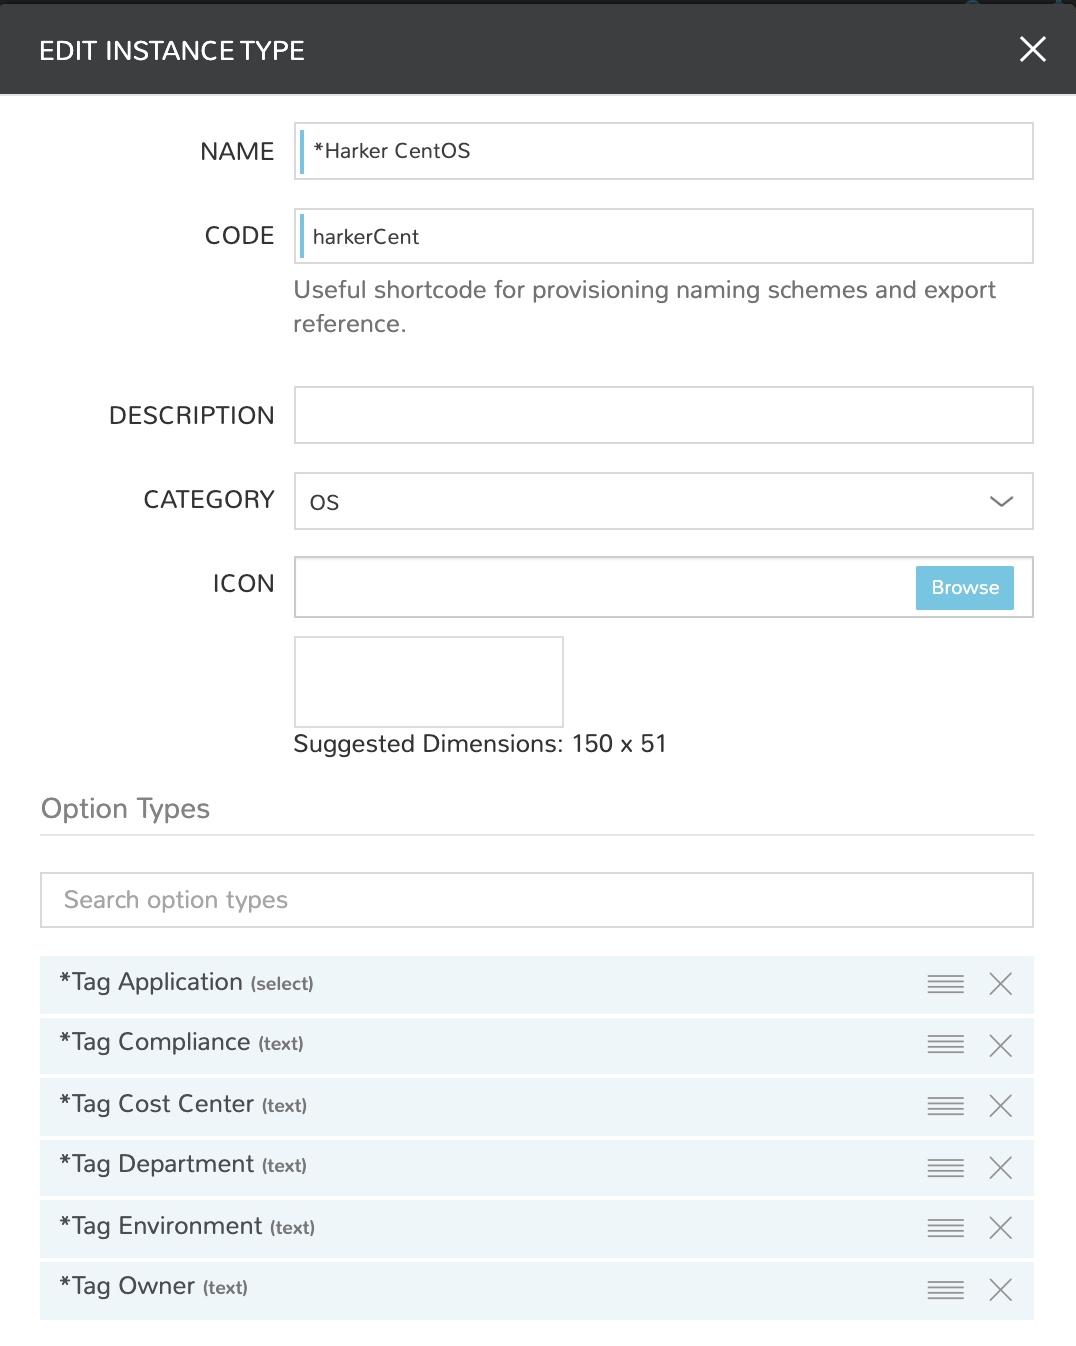
At this point, we are ready to add this Input to any custom Instance Types or Layouts. When those Instance Types or Layouts are provisioned, the values input by the user become tags associated with the created cloud resources. By setting the Input on an Instance Type, the tag selection appears when provisioning all associated Layouts. Alternatively, if the Input is set on individual Layouts, it will only appear when those Layouts are provisioned.
Instance Types and Layouts are also stored in the Morpheus Library (Library). By opening up any custom Instance Type, we can add the Input we just created when editing the Instance Type. Additionally, we can drill into associated Layouts and apply the Input to selected Layouts if that’s more appropriate.
Going forward, each time the chosen Instance Type or Layout is provisioned, the user will be prompted to enter relevant tag selections. We can even require the user input these values or govern their inputs through tagging policies which will be discussed in the next section.
Instituting Tagging Policies
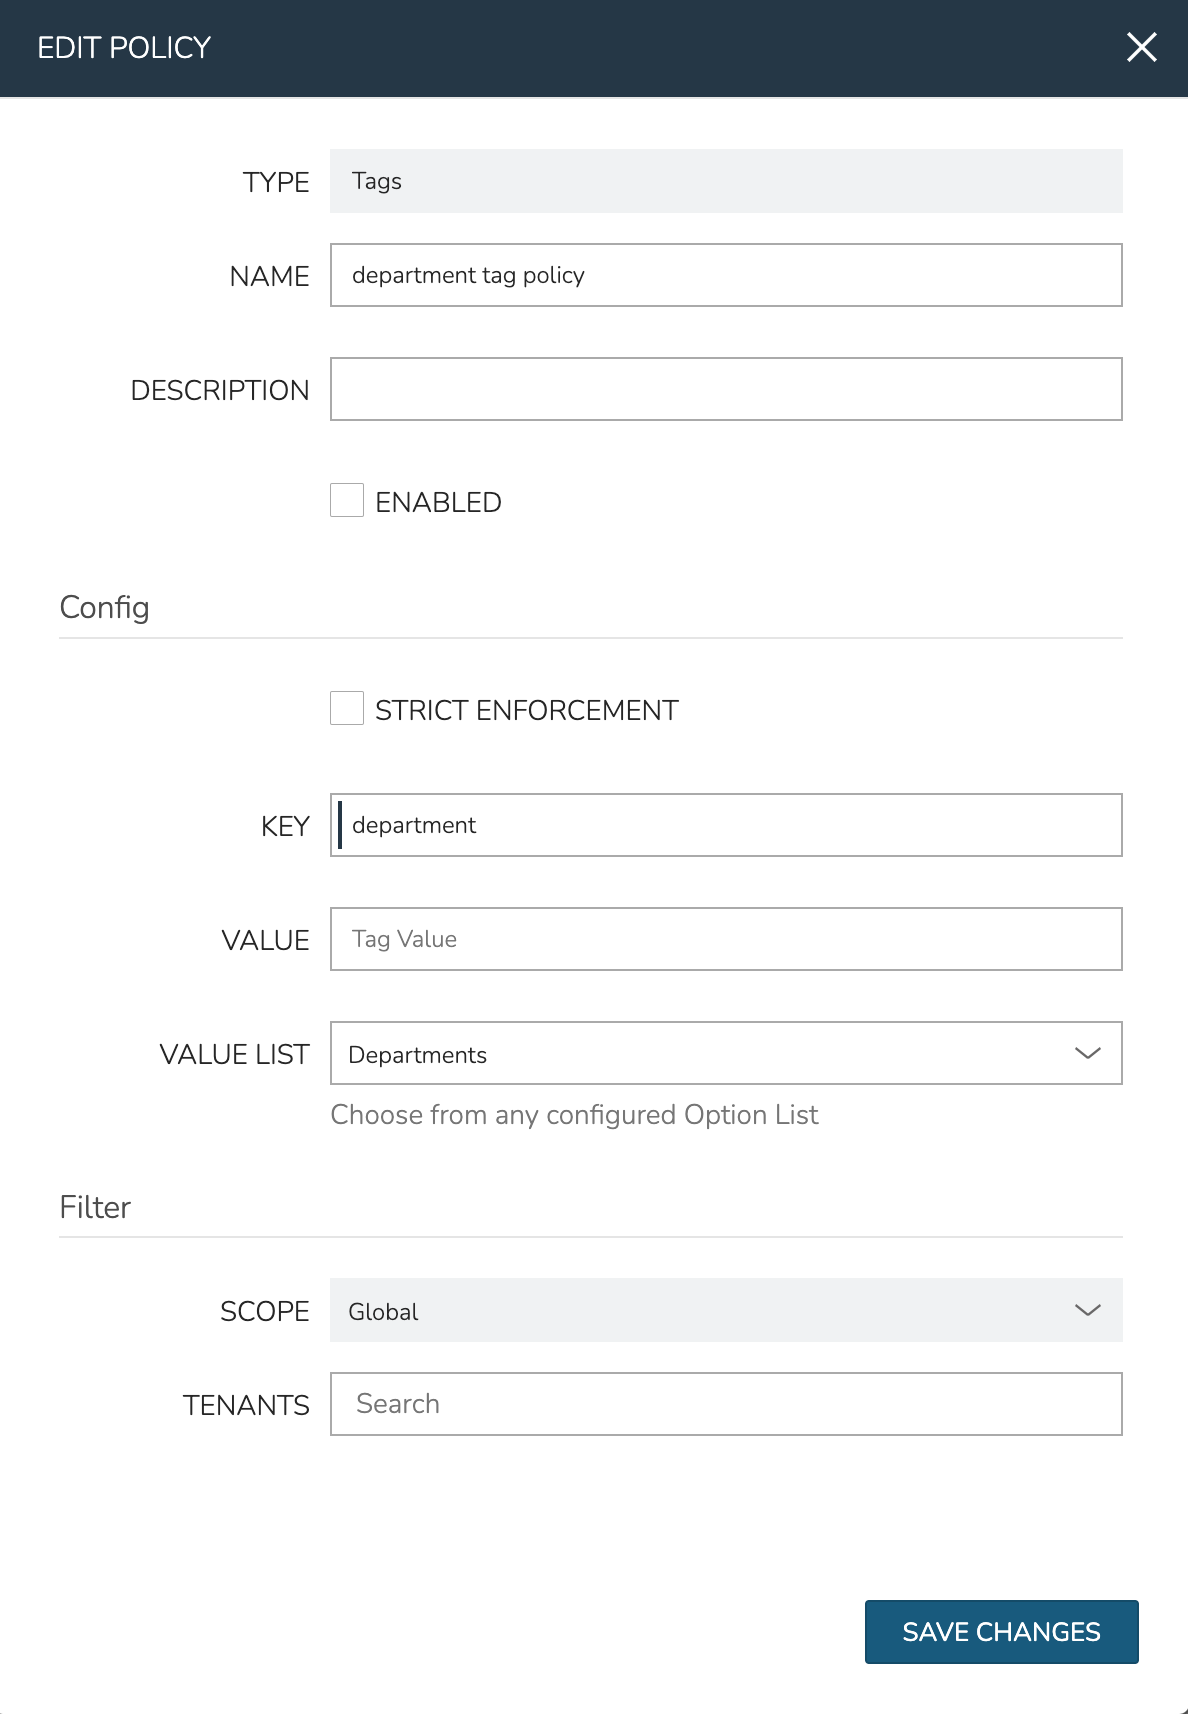
If needed, Morpheus allows cloud resource tagging to be governed through its native policy engine. Like other policies, tag policies are added from Administration > Policies. By creating a new policy and setting the TYPE to Tags, the relevant fields are revealed.
Note
Tag policy scanning and enforcement is only currently supported for Azure, Amazon AWS, VMware, and Google Cloud Platform clouds. Additional Clouds may be supported in the future.
With a tag policy, we can choose to enforce the policy on a strict or passive basis by marking or unmarking the STRICT ENFORCEMENT box. Strictly enforced tagging policies will not allow provisioning to proceed in supported clouds if the policy requirements are not met. If we opt to enforce the policy passively, a warning banner will appear on the detail page of any server that does not meet policy requirements. Additionally, existing servers in supported clouds will be scanned and those which do not meet policy requirements will also receive the warning banner.
A tag policy must be given a KEY value. If we define only a KEY value, the policy will look for a tag with that key and any (or no) value. Alternatively, we can select any pre-existing Option List as the VALUE LIST to require the tag contain a value that exists in that list or even enter a specific VALUE.
Finally, like other Morpheus policies, we can choose to scope it globally, by group, by cloud, or by user. Primary Tenant administrators can also choose to scope the policy to one or more Subtenants.
Tagging in Action
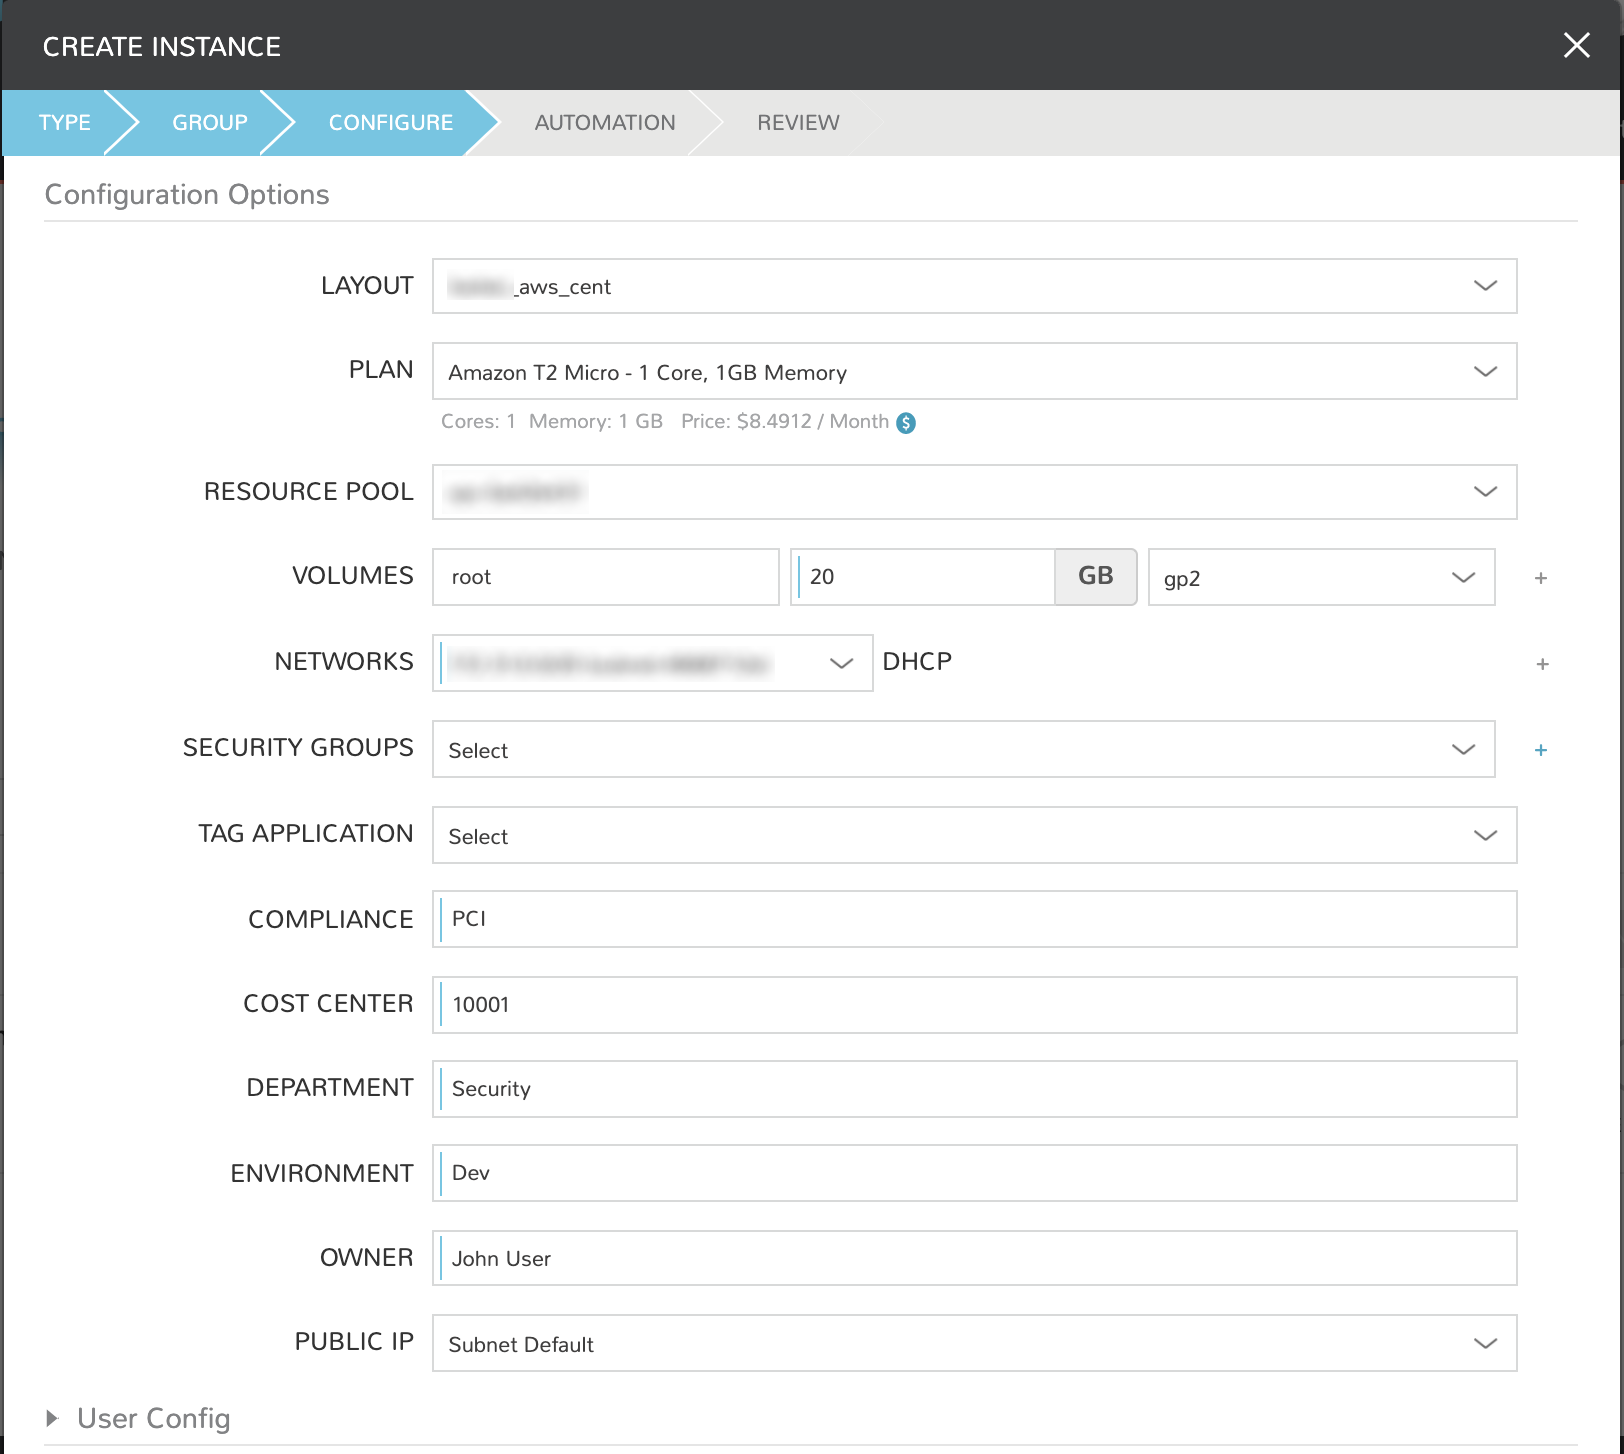
With the prep work complete, we can take a look at our Inputs in action at provision time. In this example case, several Inputs have been created and applied to one custom Instance Type. The example Instance Type has three associated CentOS Layouts, one for AWS, one for VMware, and one for Azure. Regardless of the selected Layout, users are prompted to fill the same tag fields and our tagging remains consistent regardless of the user who is provisioning a new resource at the time.
Tagging and AWS
When provisioning my CentOS Instance Type with an Amazon Layout, the tag prompts are shown in the provisioning wizard.
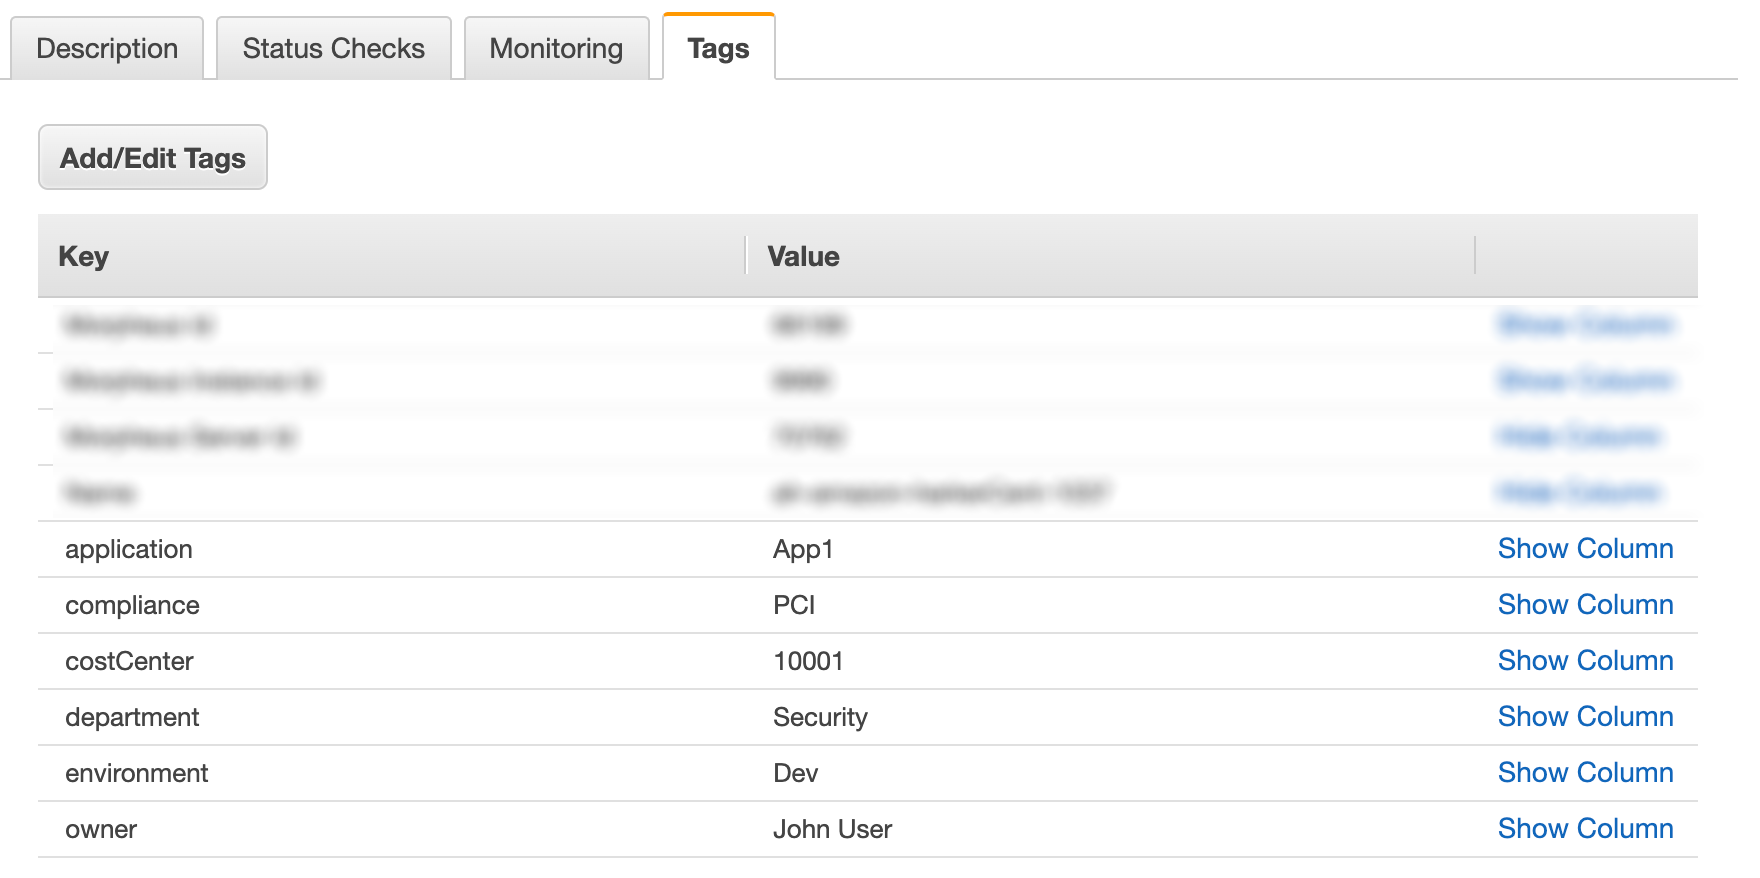
In the AWS web console, we can see the same tags are applied. We also have two-way tag sync going forward. When tags are updated in Morpheus, the changed is synced to the AWS web console. The opposite is also true.
Tagging and VMware
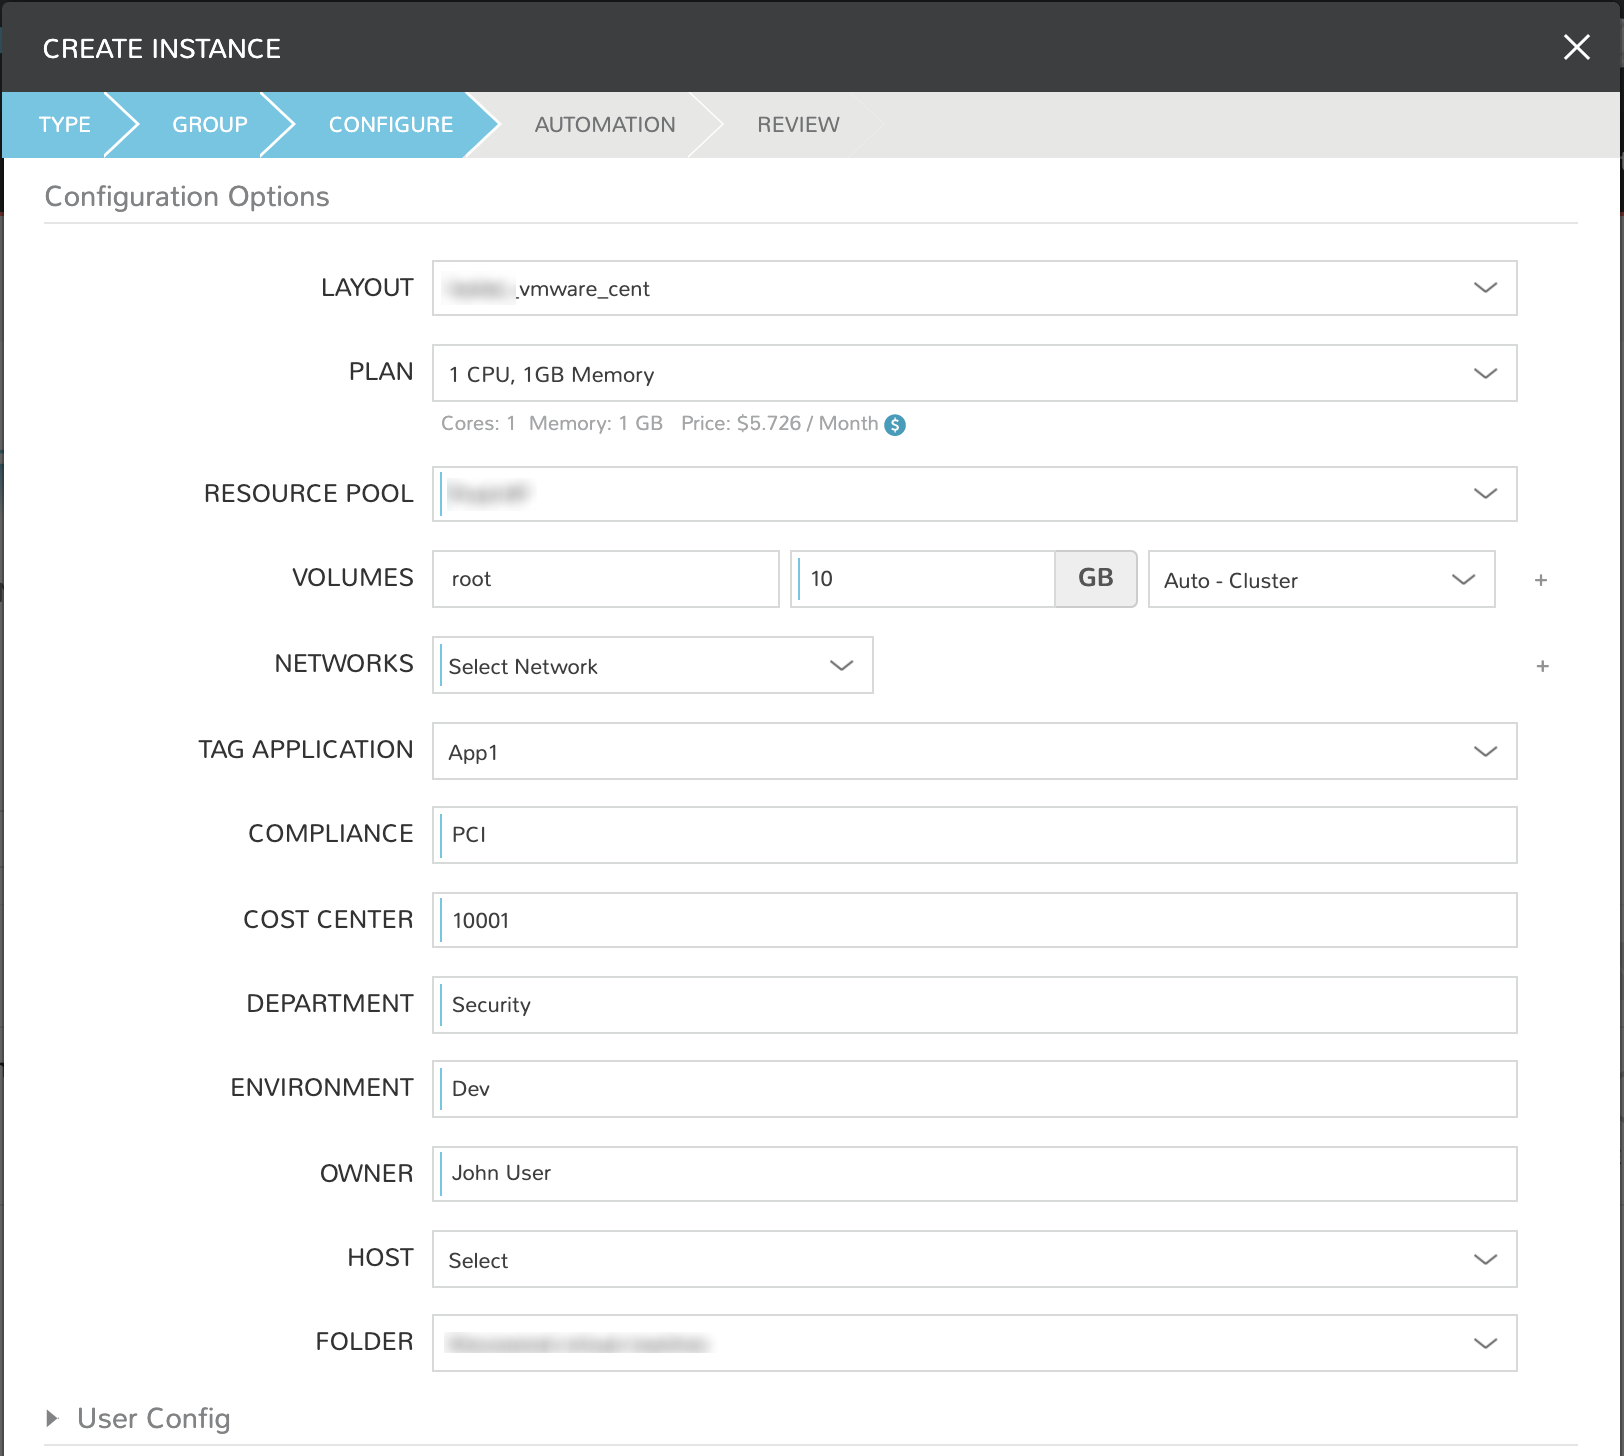
When provisioning my CentOS Instance Type with a VMware Layout, the tag prompts are shown in the provisioning wizard.
In the VMware console, we can see the same tags are applied. We also have two-way tag sync going forward. When tags are updated in Morpheus, the changed is synced to VMware. The opposite is also true.
Tagging and Azure
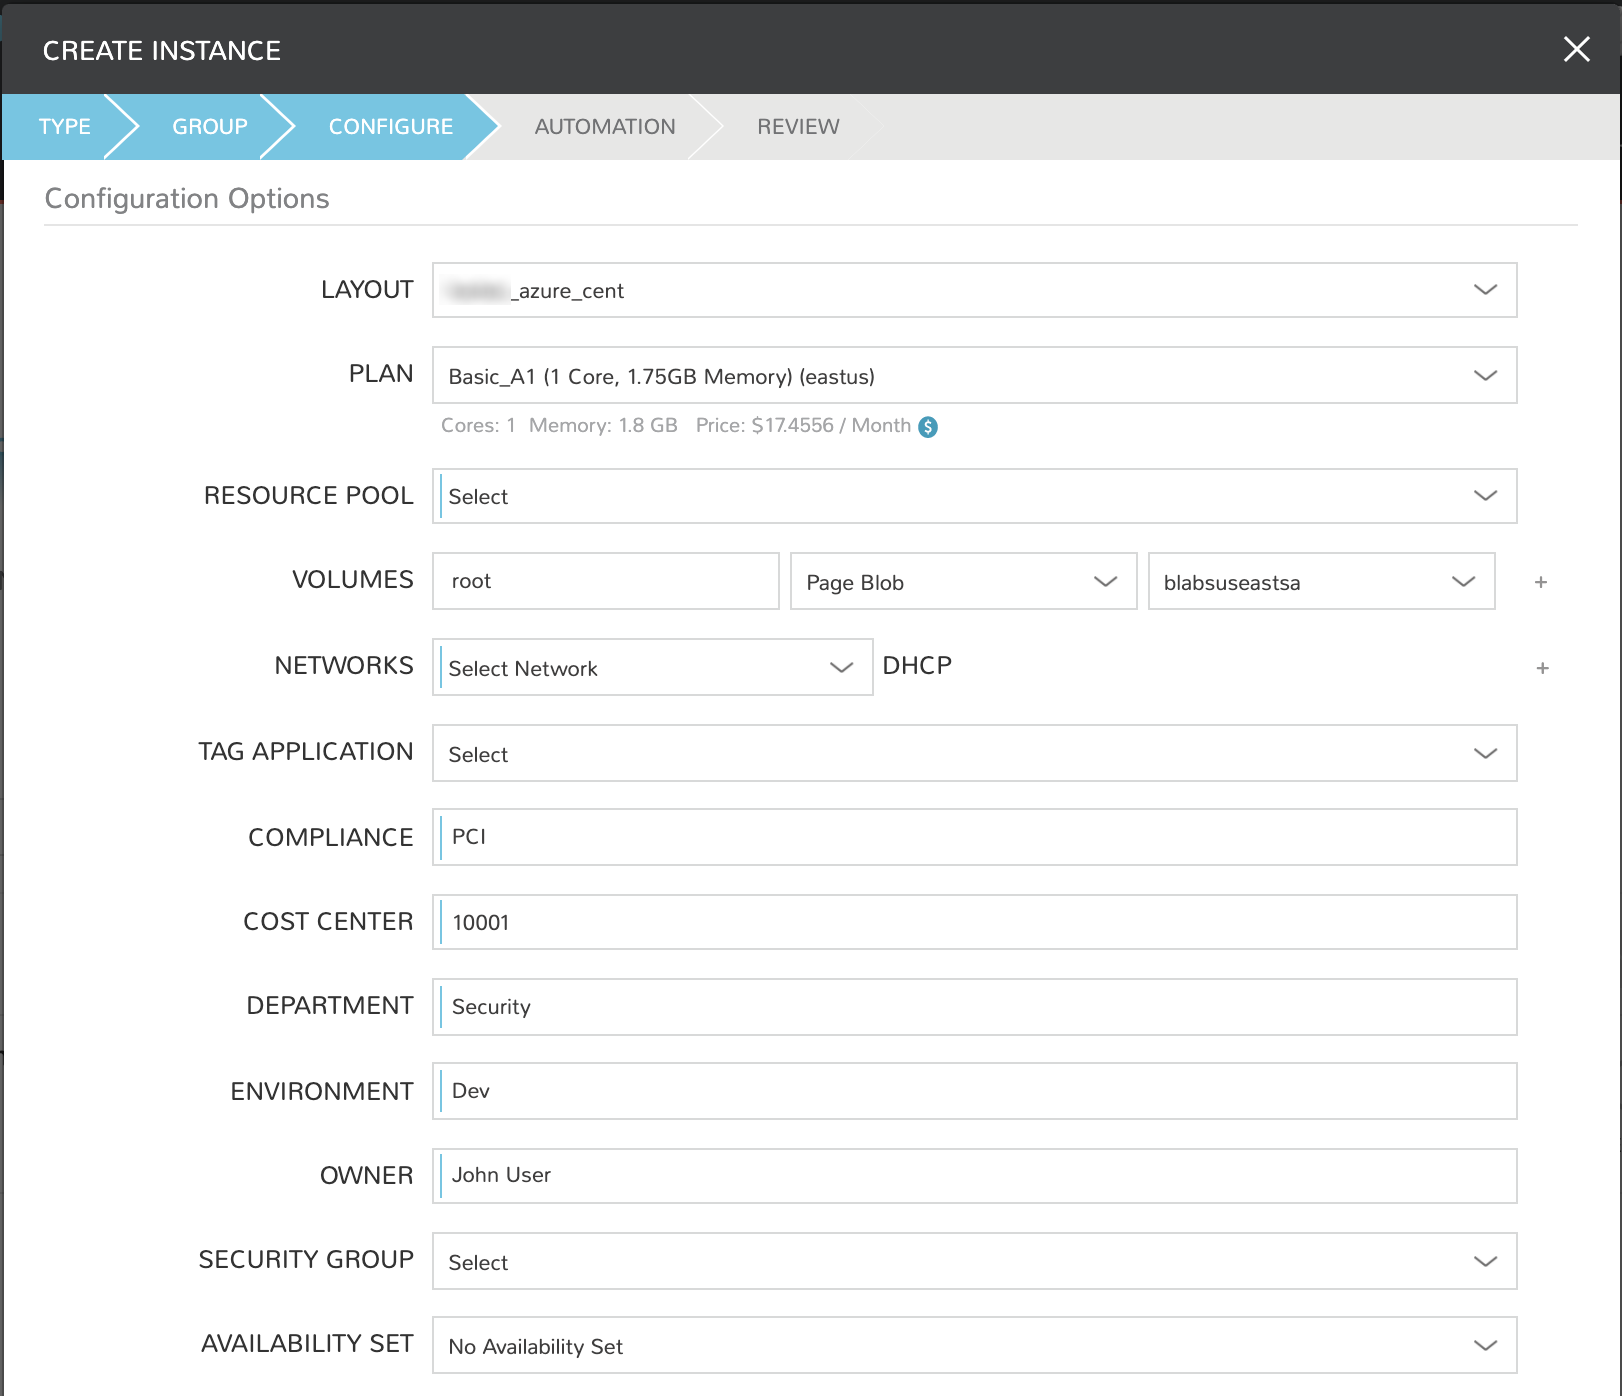
When provisioning my CentOS Instance Type with an Azure Layout, the tag prompts are shown in the provisioning wizard.
In the Azure console, we can see the same tags are applied. We also have two-way tag sync going forward. When tags are updated in Morpheus, the changed is synced to Azure. The opposite is also true.