Adding Functionality Through Operational Workflows
Operational Workflows, in Morpheus, are logically arranged sets of individual automation Tasks designed to accomplish some function. They can be executed on a one-off basis as needed or set on a timed execution schedule, similar to a cron job. While they’re often used to orchestrate some facet of cloud resource management, they can also be used to speed and standardize creation of Morpheus constructs.
As an example case for this guide, we’ll create an Operational Workflow which will allow Primary Tenant administrators to create Groups within Subtenants. This is not natively-available functionality as Groups are not a tenanted construct in Morpheus. They exist solely within the Tenant that created them and cannot be shared or viewed by others.
In this guide, we’ll use the following Morpheus constructs:
Groups
Cypher
Tasks
Workflows
Inputs
Morpheus API
Initial Considerations
Since we’re creating Groups in a second Tenant, you’ll need to have at least one other Tenant in your appliance (Administration > Tenants). You’ll also need access to a user account within the Subtenant which has rights to create Groups. You could use a pre-existing user account or create a service user for automated processes like this one.
Impersonate or log in with your service account and create an API Key. API Keys are created by clicking on the user’s name in the upper-right corner of the application window, then clicking User Settings. On the User Settings page, click API ACCESS. Next to one of the entries (it doesn’t matter which one but be careful about overwriting a key that is already in use), click ACTIONS and then Generate. Copy the Access Token into a secure place you can retrieve it from in the next step. You will not be able to see this key again after closing the modal containing the API Keys. Return to your primary Morpheus account in the original Tenant to continue with the guide.
Create Cypher
Cypher is a secure key/value store in Morpheus. Using Cypher, we can securely store passwords and other secret values (such as API keys) which can then be called into automation Tasks and templates. Here we will store the API Key for our service account user so we can call it into automation scripts in a later step. In the Morpheus UI, go to Tools > Cypher and click + ADD.
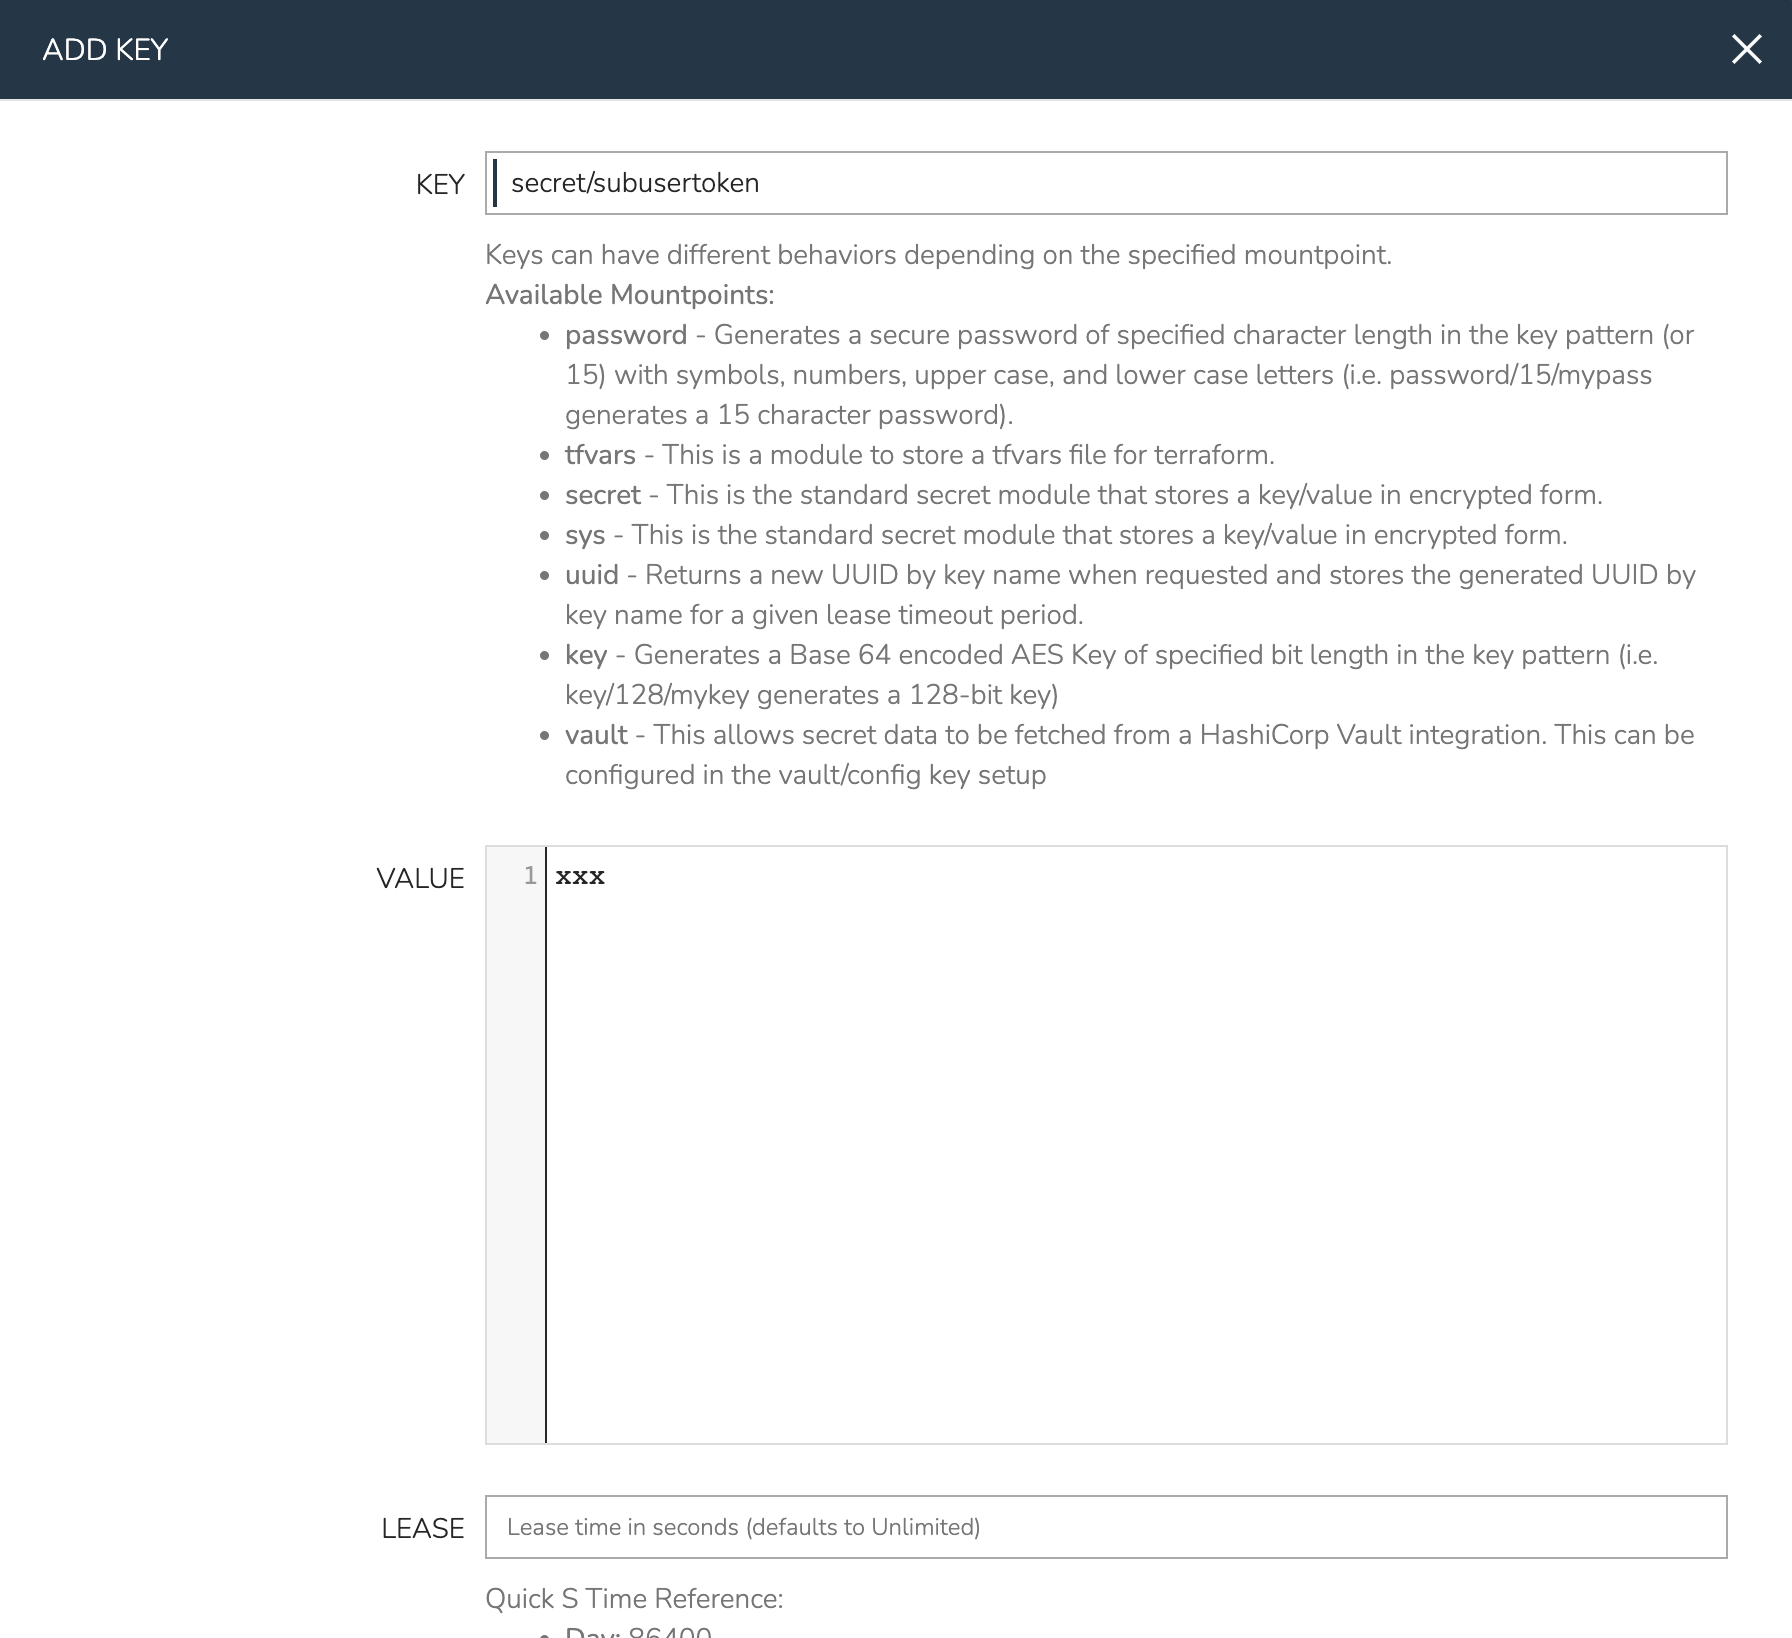
There are a number of different types of Cypher keys, which are useful in different contexts. Here we’ll use the “secret” type which allows us to enter some known value which can be securely accessed later. Enter the following:
KEY: secret/subusertoken
VALUE: Enter Morpheus API Key for the Subtenant user
LEASE: 0 (Lease time is given in seconds, with “0” being unlimited)
Click SAVE CHANGES
Create Inputs
Inputs are custom input fields which can be added to Layouts, Instance Types, Workflows, and other constructs in Morpheus. The input can be consumed as variables within templates and scripts. In this case, the Inputs will be associated with our Operational Workflow. We will create three so the user can define a name for the new Group and optionally provide a code and/or location value if desired.
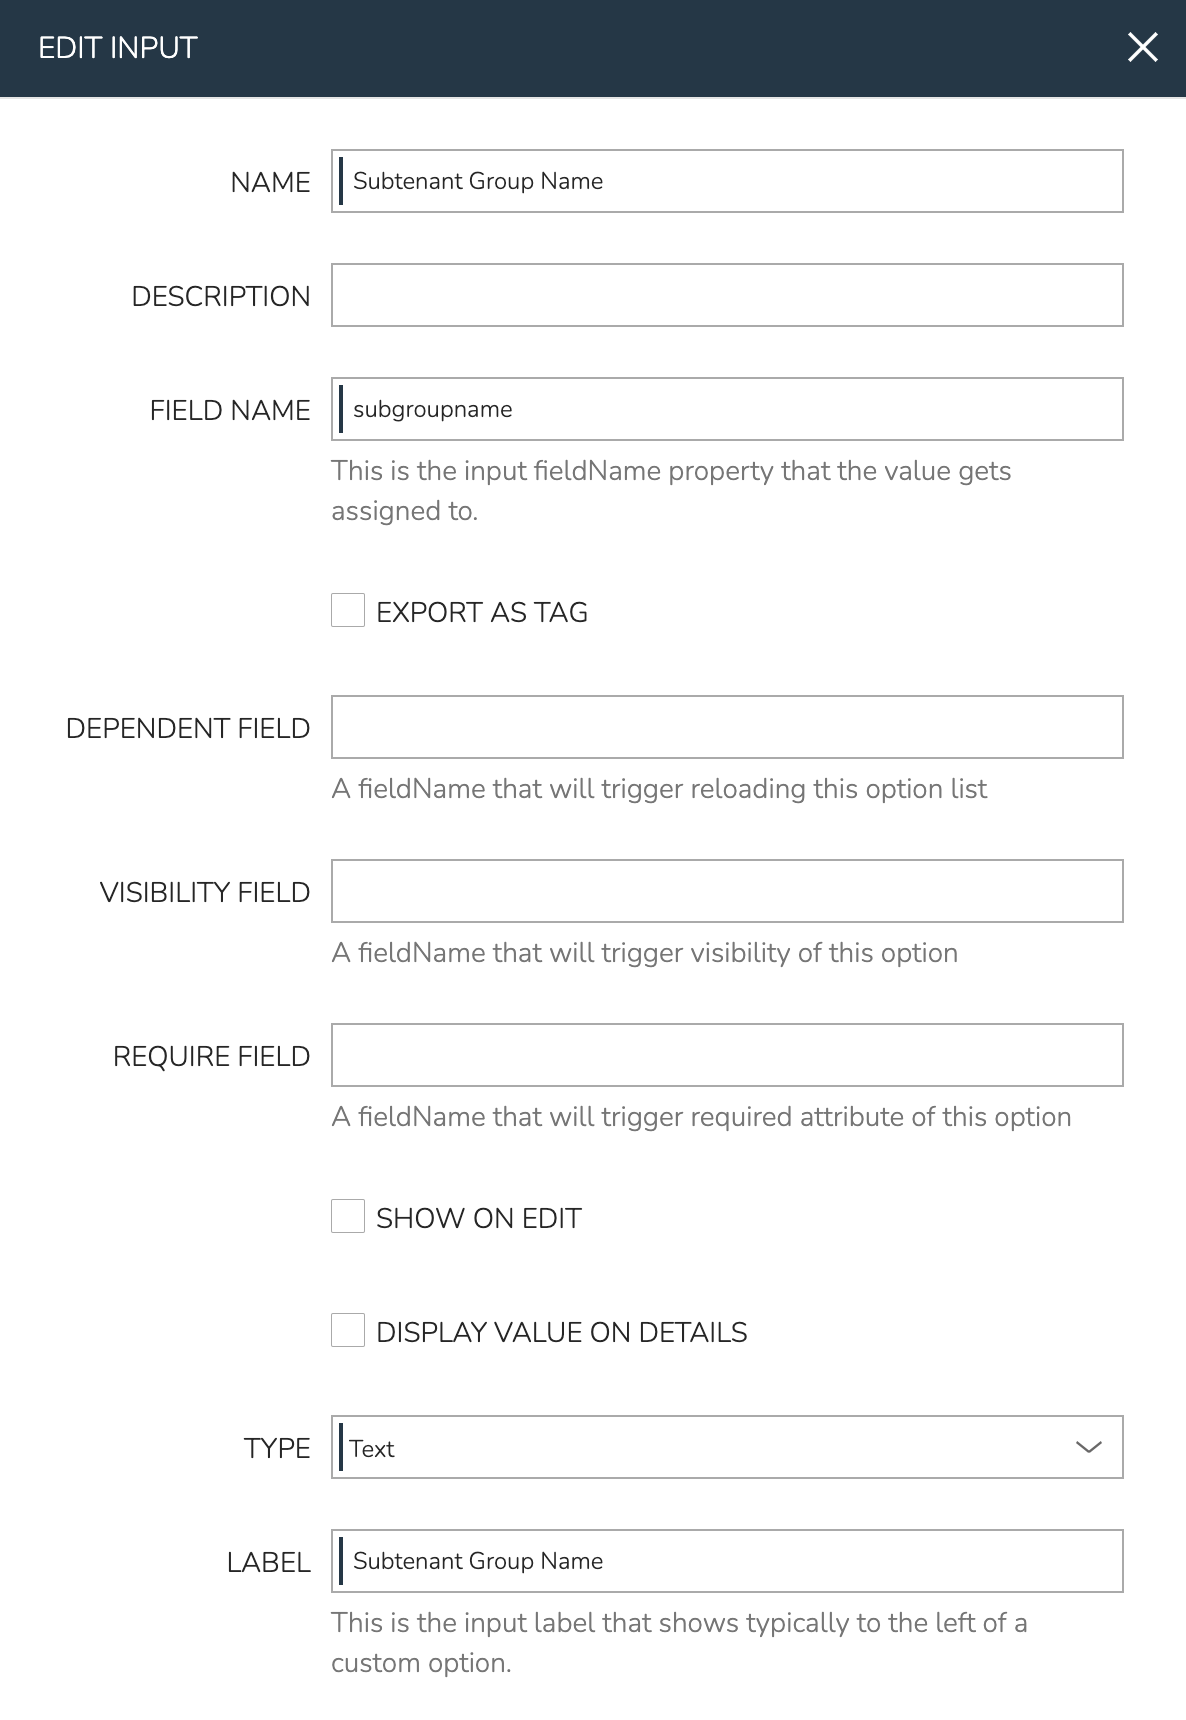
In Morpheus UI, navigate to Library > Options > Inputs. Click + ADD. Complete the following fields:
NAME: Subtenant Group Name (The friendly name for the Input object in Morpheus)
FIELD NAME: subgroupname (The internal property which the input value is assigned to)
TYPE: Text (The input type, in this case an open text field for the user)
LABEL: Subtenant Group Name (The label the user sees next to the input field)
REQUIRED: Checked (A name value is required for our Group so this Input should be marked required. The other two Inputs we’ll create will not be required as they are optional fields when creating a Group)
Once done, click SAVE CHANGES.
Create two more Inputs in a similar fashion with the following configuration:
Code Input
NAME: Subtenant Group Code
FIELD NAME: subgroupcode
TYPE: Text
LABEL: Subtenant Group Code
HELP BLOCK: Optional Code Value (I opted to enter help block text to make it clearer to the user that this is an optional input)
REQUIRED: Unchecked
Location Input
NAME: Subtenant Group Location
FIELD NAME: subgrouplocation
TYPE: Text
LABEL: Subtenant Group Location
HELP BLOCK: Optional Location Value
REQUIRED: Unchecked
Create Task
Tasks, in Morpheus, are individual automation scripts. They can be pieced together into Workflows (as we’ll see later) to create more comprehensive automation packages. They can be written in a number of different languages (including BASH, Powershell, Python, Javascript, and more) or to accomplish specific functions like restarting a server or sending an email notification. In this case, I’ve written a Python script outside Morpheus and tracked it in a Github repository. Since my Github account is integrated with Morpheus, I can simply refer to the script in a new Task. This prevents me from having to cut and paste code and also ensures the latest version of my code in executed every time the Task is invoked. Integrating with version control is optional, for simplicity you can also draft a quick script directly in Morpheus if you’d prefer. If you want to view, copy, or fork the code, you can see it here. New Github integrations can be added in Administration > Integrations.
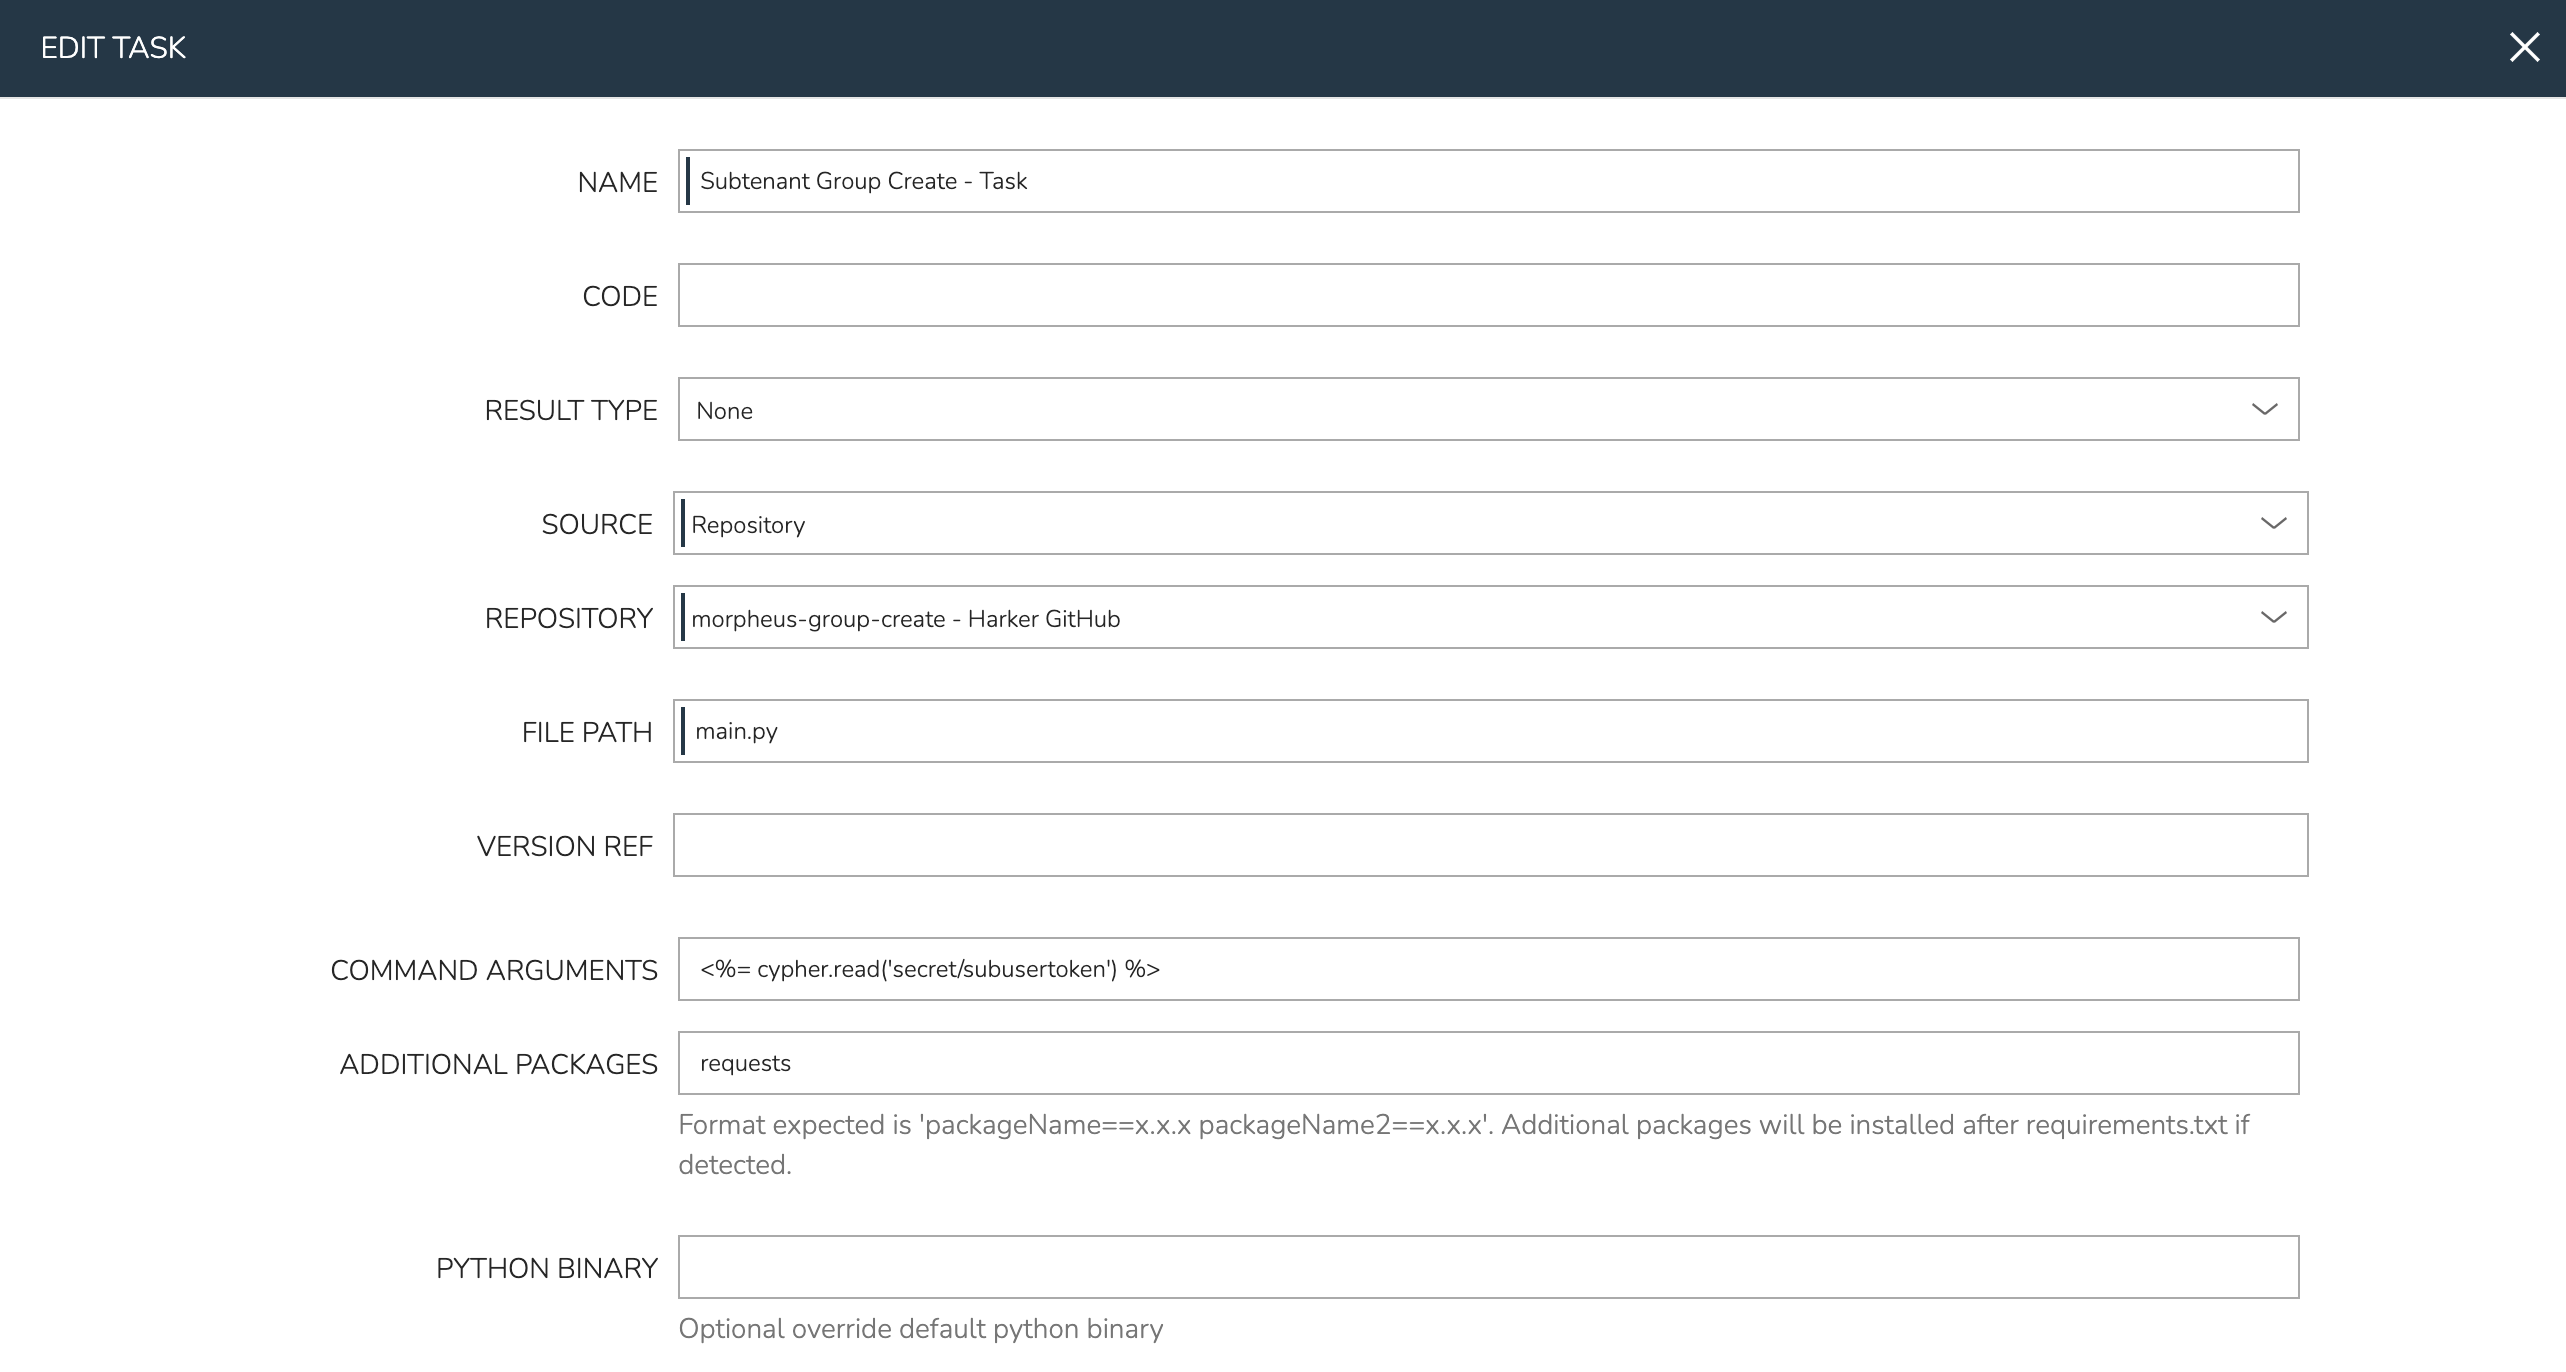
Navigate to Library > Automation > Tasks and click + ADD. Create a new Task with the following configuration:
NAME: Subtenant Group Create - Task
TYPE: Python Script (Once Type is selected, available fields will be updated to those specific to the chosen type)
RESULT TYPE: None
SOURCE: Repository (Select Local to draft or paste code directly into Morpheus)
FILE PATH: main.py (In my case, the script is in the root of the repository so I can simply refer to it by filename)
COMMAND ARGUMENTS: Optional command line arguments for the Python script. In my case, I’m passing the Morpheus API Key from Cypher as a command line argument (as seen in the screenshot) and consuming it in my code using the sys module, which is part of the Python standard library. There are other ways to consume Cypher secrets in Python scripts as well, which are laid out in a Knowledge Base article.
ADDITIONAL PACKAGES: List packages used which are not part of the standard Python library
Once done, click SAVE CHANGES.
Create Operational Workflow
Morpheus Workflows pull multiple Tasks together into a logical group. There are two types of Workflows: Operational and Provisioning. Provisioning Workflows (which aren’t used in this guide) are associated with an Instance at provision time and will automatically run the appropriate Tasks when the Instance reaches certain phases of its lifecycle, such as during provisioning, teardown, startup, or shutdown. In our case, we need an Operational Workflow which are run on-demand when needed or on timed intervals.
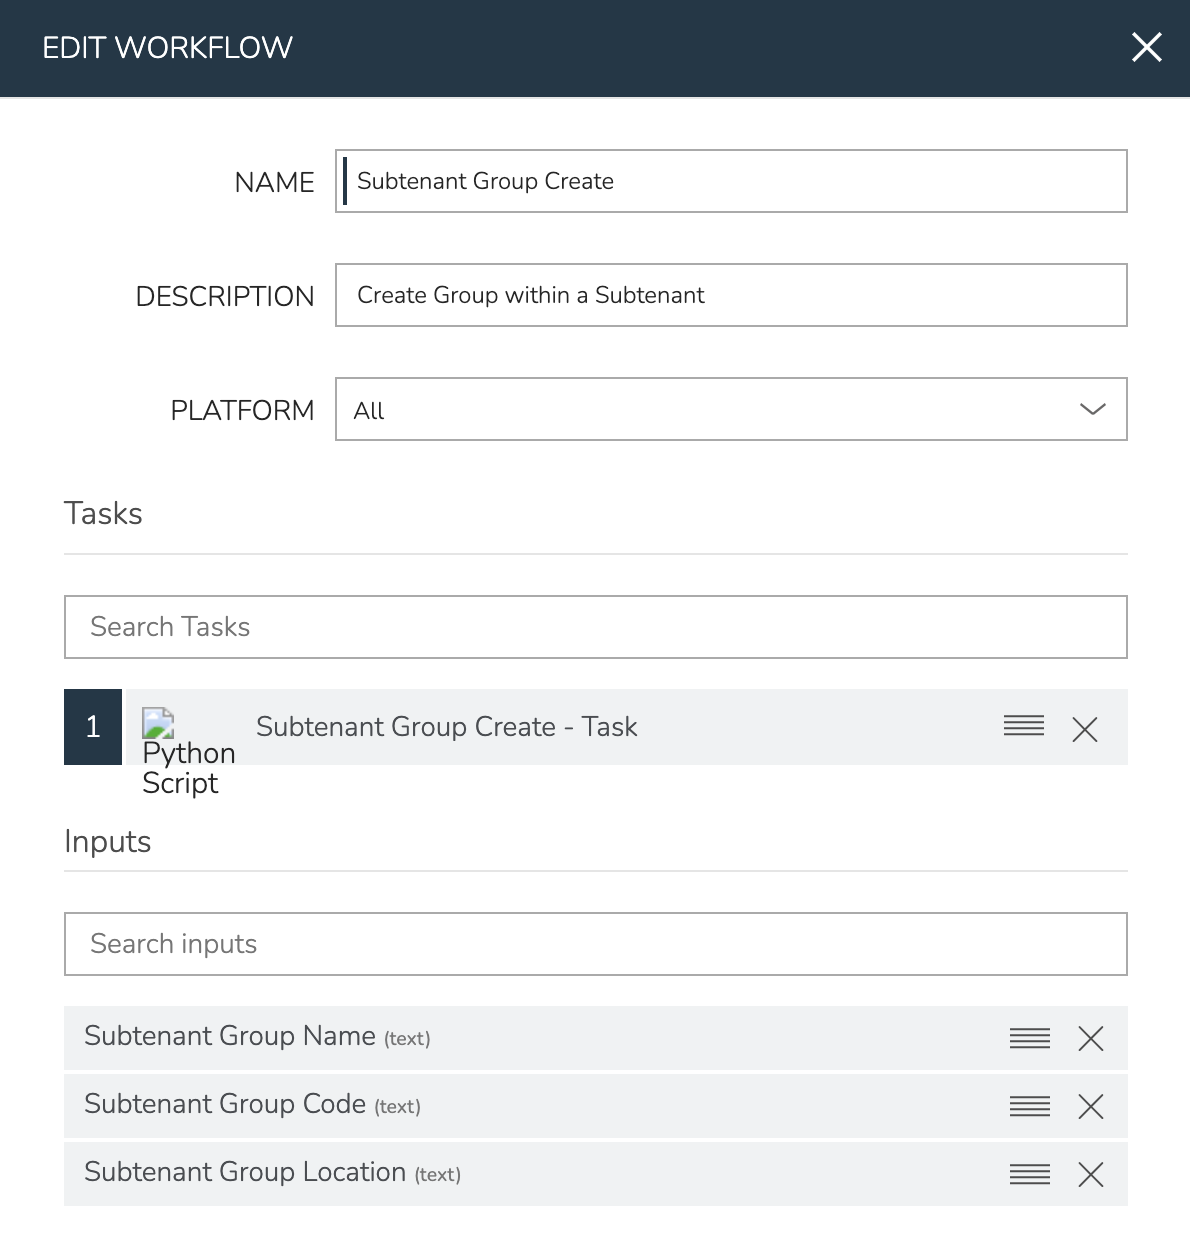
Navigate to Library > Automation > Workflows and click + ADD. Set the following configurations:
NAME: Subtenant Group Create
PLATFORM: All
TASKS: Subtenant Group Create - Task
INPUTS: Find Subtenant Group Name, Subtenant Group Code, and Subtenant Group Location using the typeahead field. I think it makes most sense to order them with Name first but it’s not required
Once done, click SAVE CHANGES
Execute Workflow
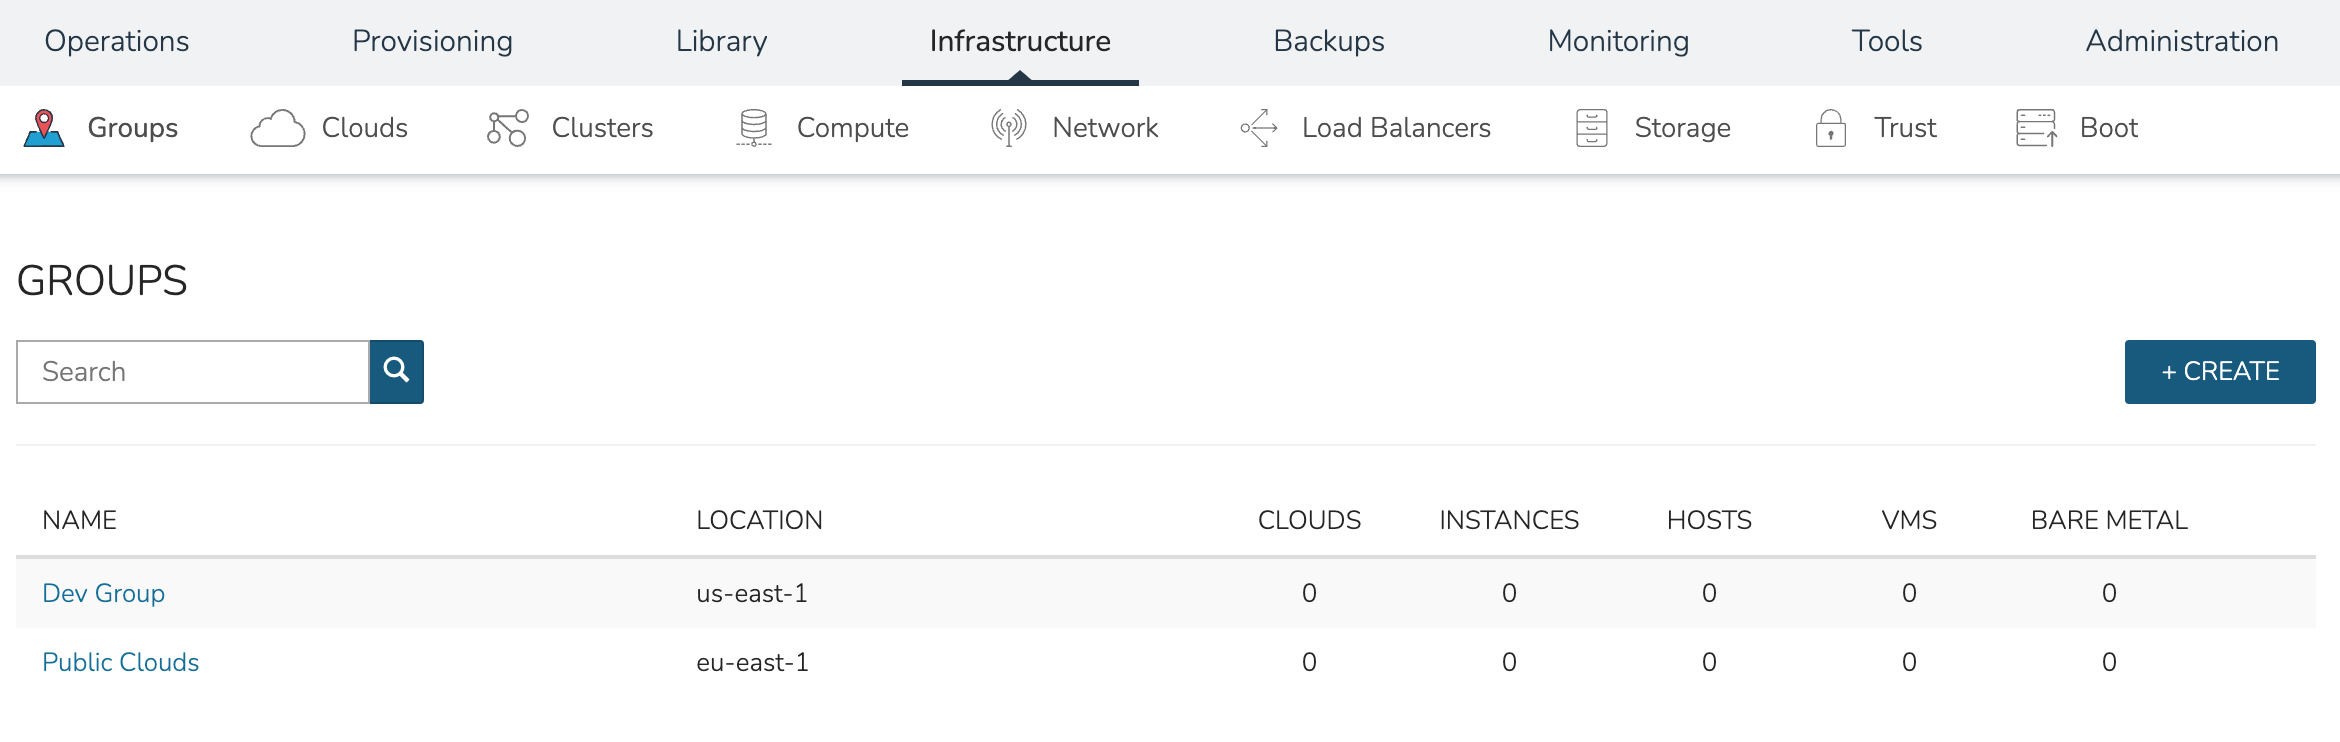
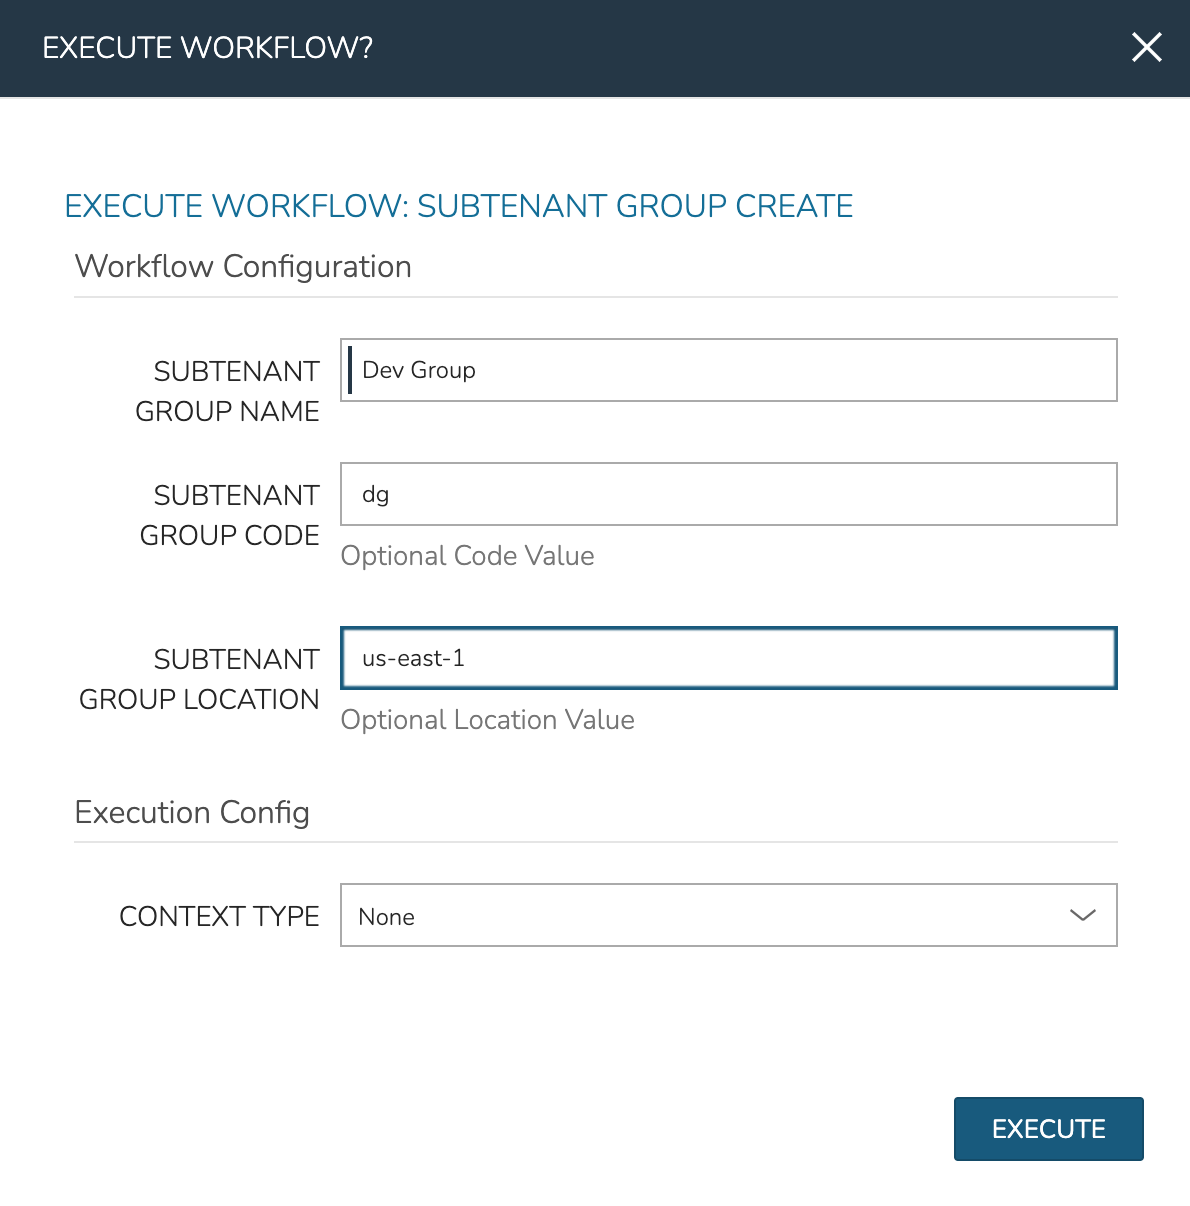
After saving the new Operational Workflow, you’ll be left on the Workflows list page. From here we can try the new Workflow. Click on the gear icon at the far-right part of the row, then click Execute. Our three Inputs should be visible. We can see the Name field is marked as required (as we configured) and our help block text underneath the optional Inputs. Complete each field (Context Type can be left at None) and click EXECUTE.
Once again login in as or impersonate your service account user within the Subtenant. Navigate to Infrastructure > Groups and inspect the list. You should now see that our Group has been created here.