Creating XaaS Instance Types with Morpheus
Morpheus version 5.4.2 and higher includes the ability to build and provision XaaS Instance Types. These are non-VM backed Layouts which allow users to represent anything as an Instance. This includes the ability to utilize Provisioning Workflows to manage all phases of the Instance lifecycles consistently and automatically. XaaS Instance Types can also be tied into service plans to track costs or bill customers.
In this specific example, we will create an XaaS Instance Type to manage the lifecycle of folders within a Dropbox account. Users will be able to visit the Morpheus Catalog and have the folder created by entering a name for the folder and clicking a single button. We’ll see how each folder is then represented as an Instance. With the Instance standing, users will be able to update the folder name by simply editing a custom value on the Instance. Finally, when the Instance is deleted, the folder is deleted from Dropbox as well.
In this guide, we’ll use the following Morpheus constructs:
Clouds
Inputs
Tasks
Workflows
Instance Types
Layouts
Catalog Items
Instances
Note
XaaS Instances are associated with Morpheus-type Clouds. Morpheus Clouds are generic cloud wrappers that can be used to contain manually-managed servers, VMs, and (in this case) non-VM based resources. In this guide we will go through the process of creating a Morpheus-type Cloud which can be used to hold your XaaS resources.
Create Cypher
Cypher is a secure key/value store in Morpheus. Using Cypher, we can securely store passwords and other secret values (such as API keys) which can then be called into automation Tasks and templates. Here we will store the Dropbox API token as a Cypher entry. Creating Dropbox developer accounts and obtaining API keys goes beyond the scope of this guide but Dropbox developer tools are well-documented if you want to try this out for yourself. In the Morpheus UI, go to Tools > Cypher and click + ADD.
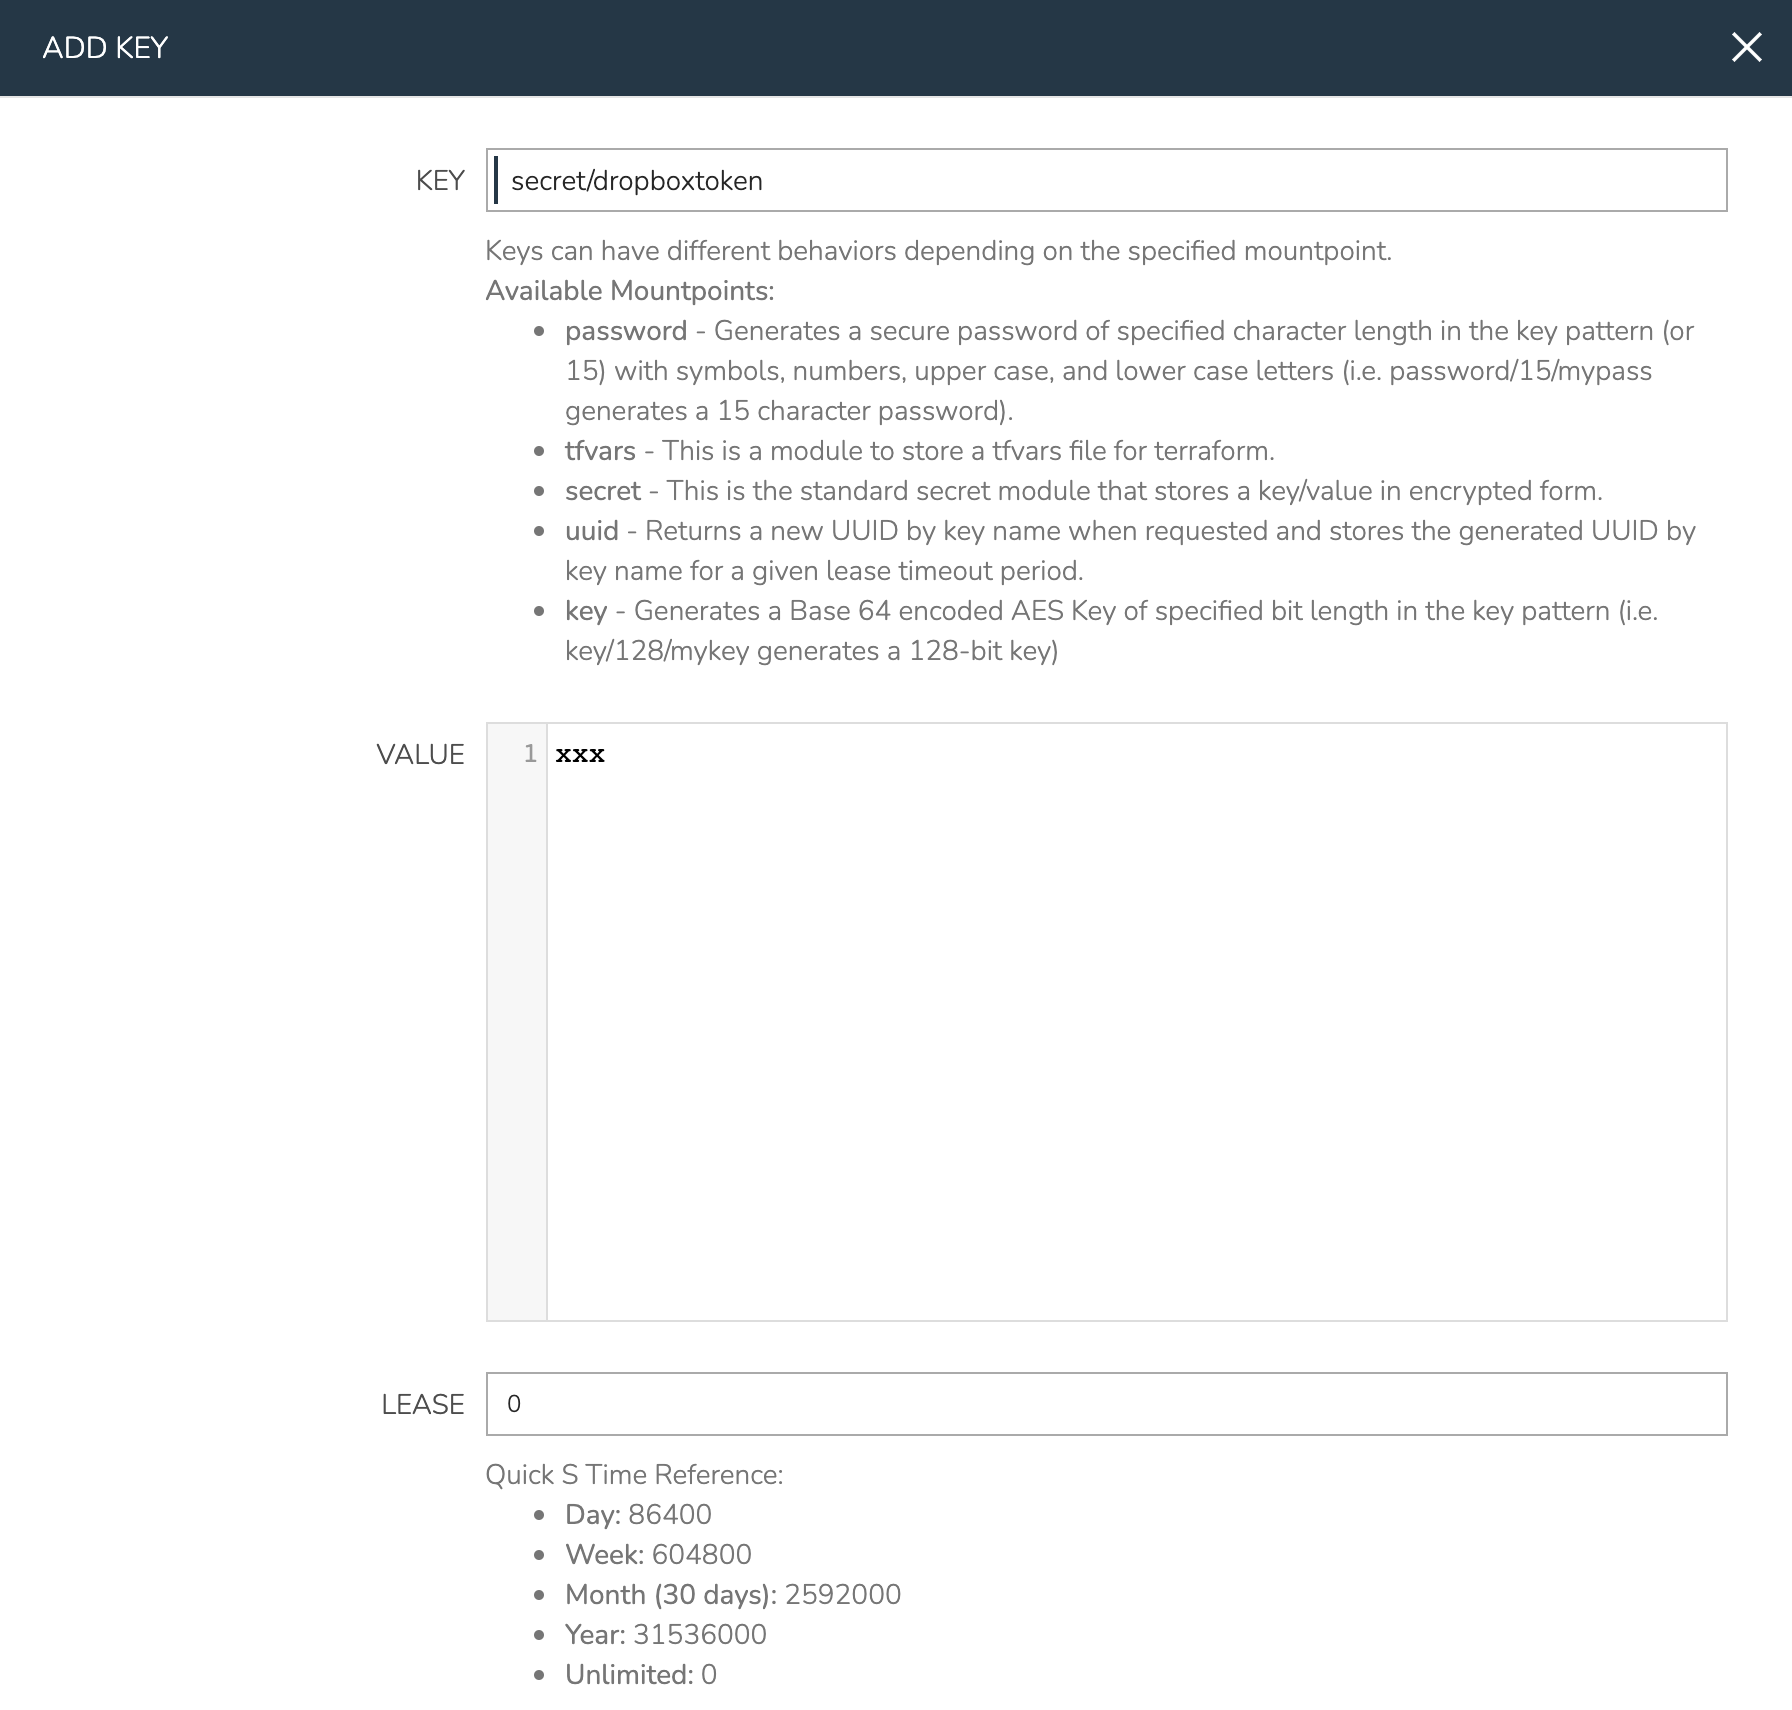
There are a number of different types of Cypher keys, which are useful in different contexts. Here we’ll use the “secret” type which allows us to enter some known value which can be securely accessed later. Enter the following:
KEY: secret/dropboxtoken
VALUE: Enter Dropbox API token here
LEASE: 0 (Lease time is given in seconds, with “0” being unlimited)
Click SAVE CHANGES
One of my Tasks will also send a request to the Morpheus API so I’ll create a second Cypher entry to store a Morpheus API key:
KEY: secret/morphapitoken
VALUE: Enter Dropbox API token here
LEASE: 0 (Lease time is given in seconds, with “0” being unlimited)
Click SAVE CHANGES
Create Cloud
XaaS Instances are associated with Morpheus-type Clouds. Morpheus Clouds are generic cloud wrappers that can be used to contain manually-managed servers, VMs, and (in this case) non-VM based resources. For this example, I’m creating a Cloud just to organize Dropbox folders. Navigate to Infrastructure > Clouds and click + ADD. The only required steps to create the Cloud are to give it a name and associate it with a Group. I’ve given mine a generic name but you could opt to be more targeted with your naming if you will use many Morpheus-type Clouds to manage other types of resources.
NAME: MorphCloud

Create Inputs
Inputs are custom input fields which can be added to Layouts, Instance Types, and other constructs in Morpheus. The input can be consumed as variables within templates and scripts. We’ll create two Inputs in this case, one to allow the user to enter a name for their folder on provisioning and another which will be visible when editing the Instance to allow the user to rename their folder.
In Morpheus UI, navigate to Library > Options > Inputs. Click + ADD. Complete the following fields:
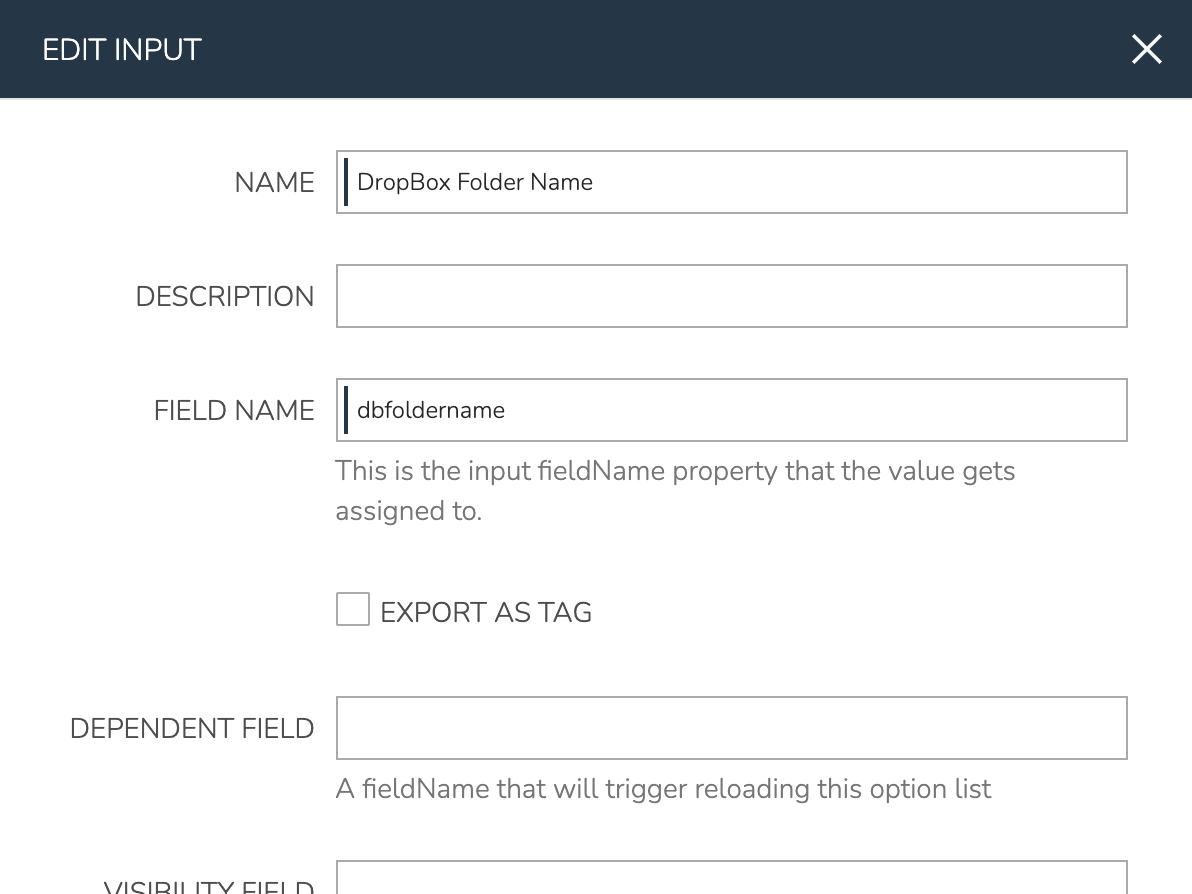
NAME: DropBox Folder Name (The name for the Input object in Morpheus)
FIELD NAME: dbfoldername (The internal property which the input value is assigned to)
TYPE: Text (The input type, in this case an open text field for the user)
SHOW ON EDIT: Checked (When checked, this Option is visible when editing an Instance)
EDITABLE: Checked (When checked, this Option is editable in addition to being visible while editing the Instance)
LABEL: DropBox Folder Name (The label the user sees next to the input field)
Once done, click SAVE CHANGES
Next, configure a second Input with the following attributes:
NAME: DropBox Folder New Name
FIELD NAME: dbfoldernewname
TYPE: Text
SHOW ON EDIT: Checked
EDITABLE: Checked
LABEL:
Click SAVE CHANGES
Create Tasks
Tasks, in Morpheus, are individual automation scripts. They can be pieced together into Workflows (as we’ll see later) to create more comprehensive automation packages. They can be written in a number of different languages (including BASH, Powershell, Python, Javascript, and more) or to accomplish specific functions like restarting a server or sending an email notification. In this case, I’ll write the Task configuration directly into the Morpheus Tasks. However, Tasks can also be sourced directly from integrated version control repositories (like Github) so you never have to copy and paste code or make manual updates when your code changes.
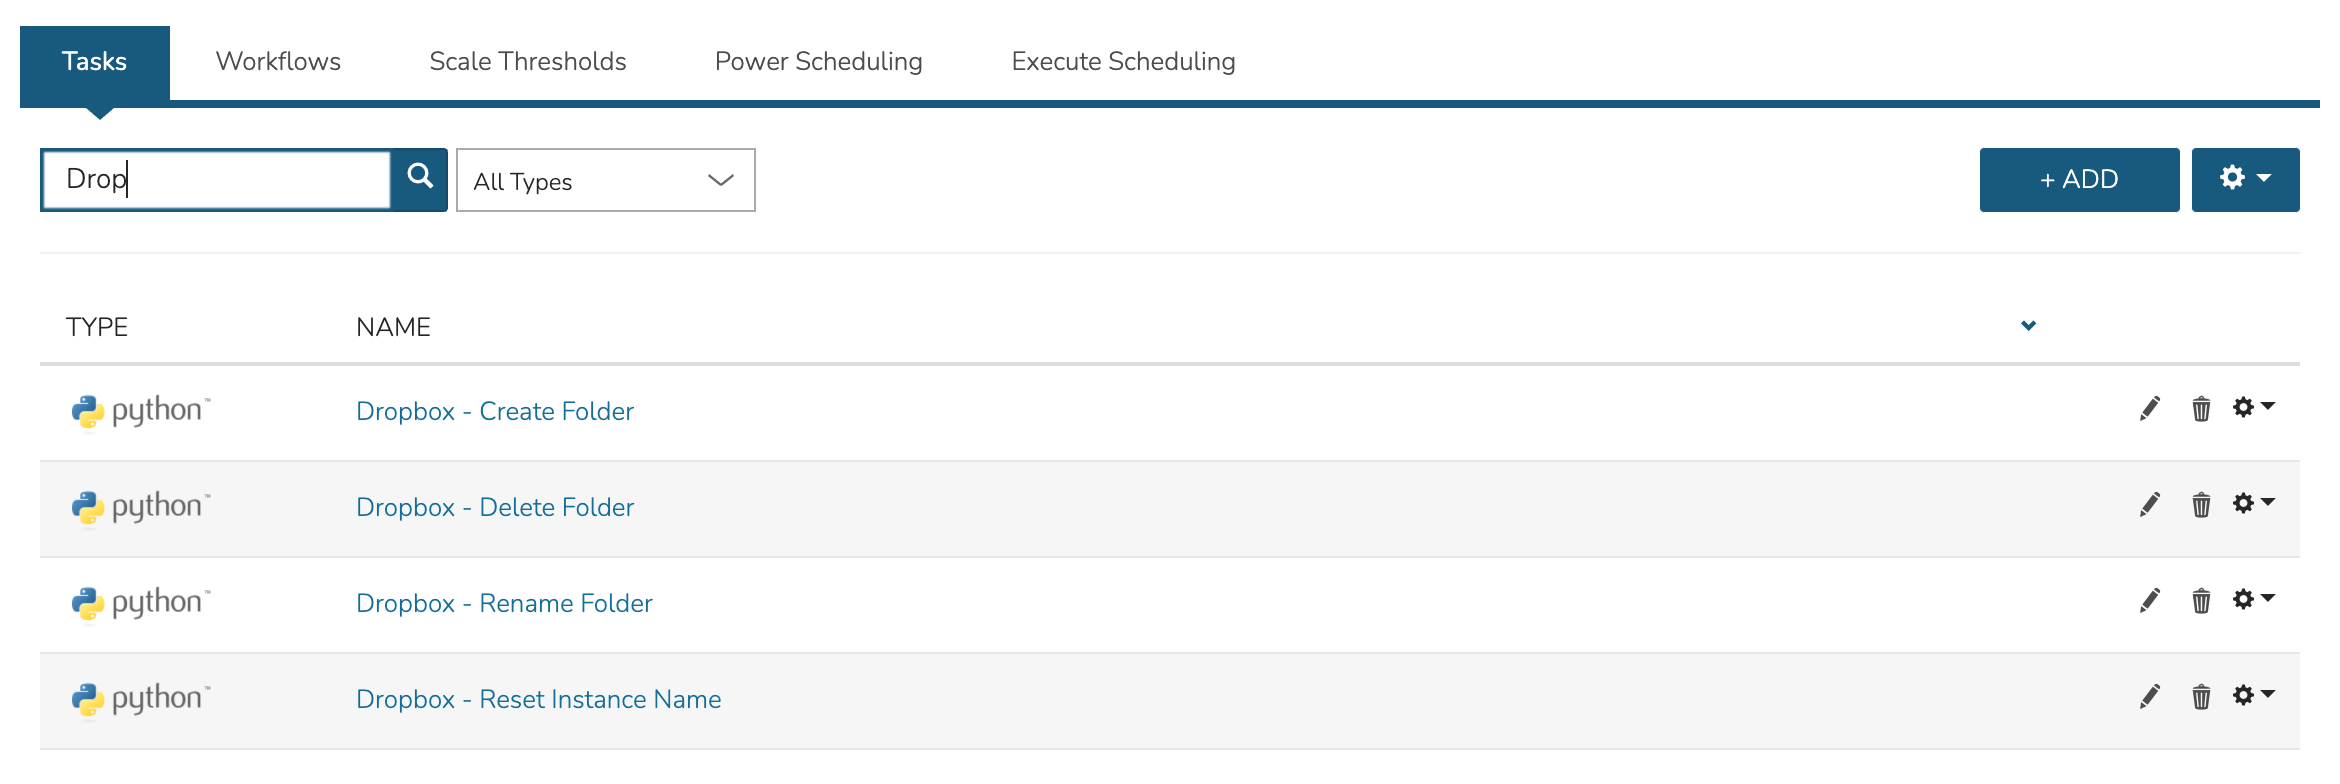
For this example, we need to create four Tasks. One to create the folder, one to rename the folder, one to rename the Morpheus Instance, and one to delete the folder. I’ve used Python Tasks to interact with the Dropbox Python SDK. I won’t go into how to write the individual Tasks here but the Python SDK is well-documented if you want to try things out for yourself. The same functions could be carried out using other Task types as well.
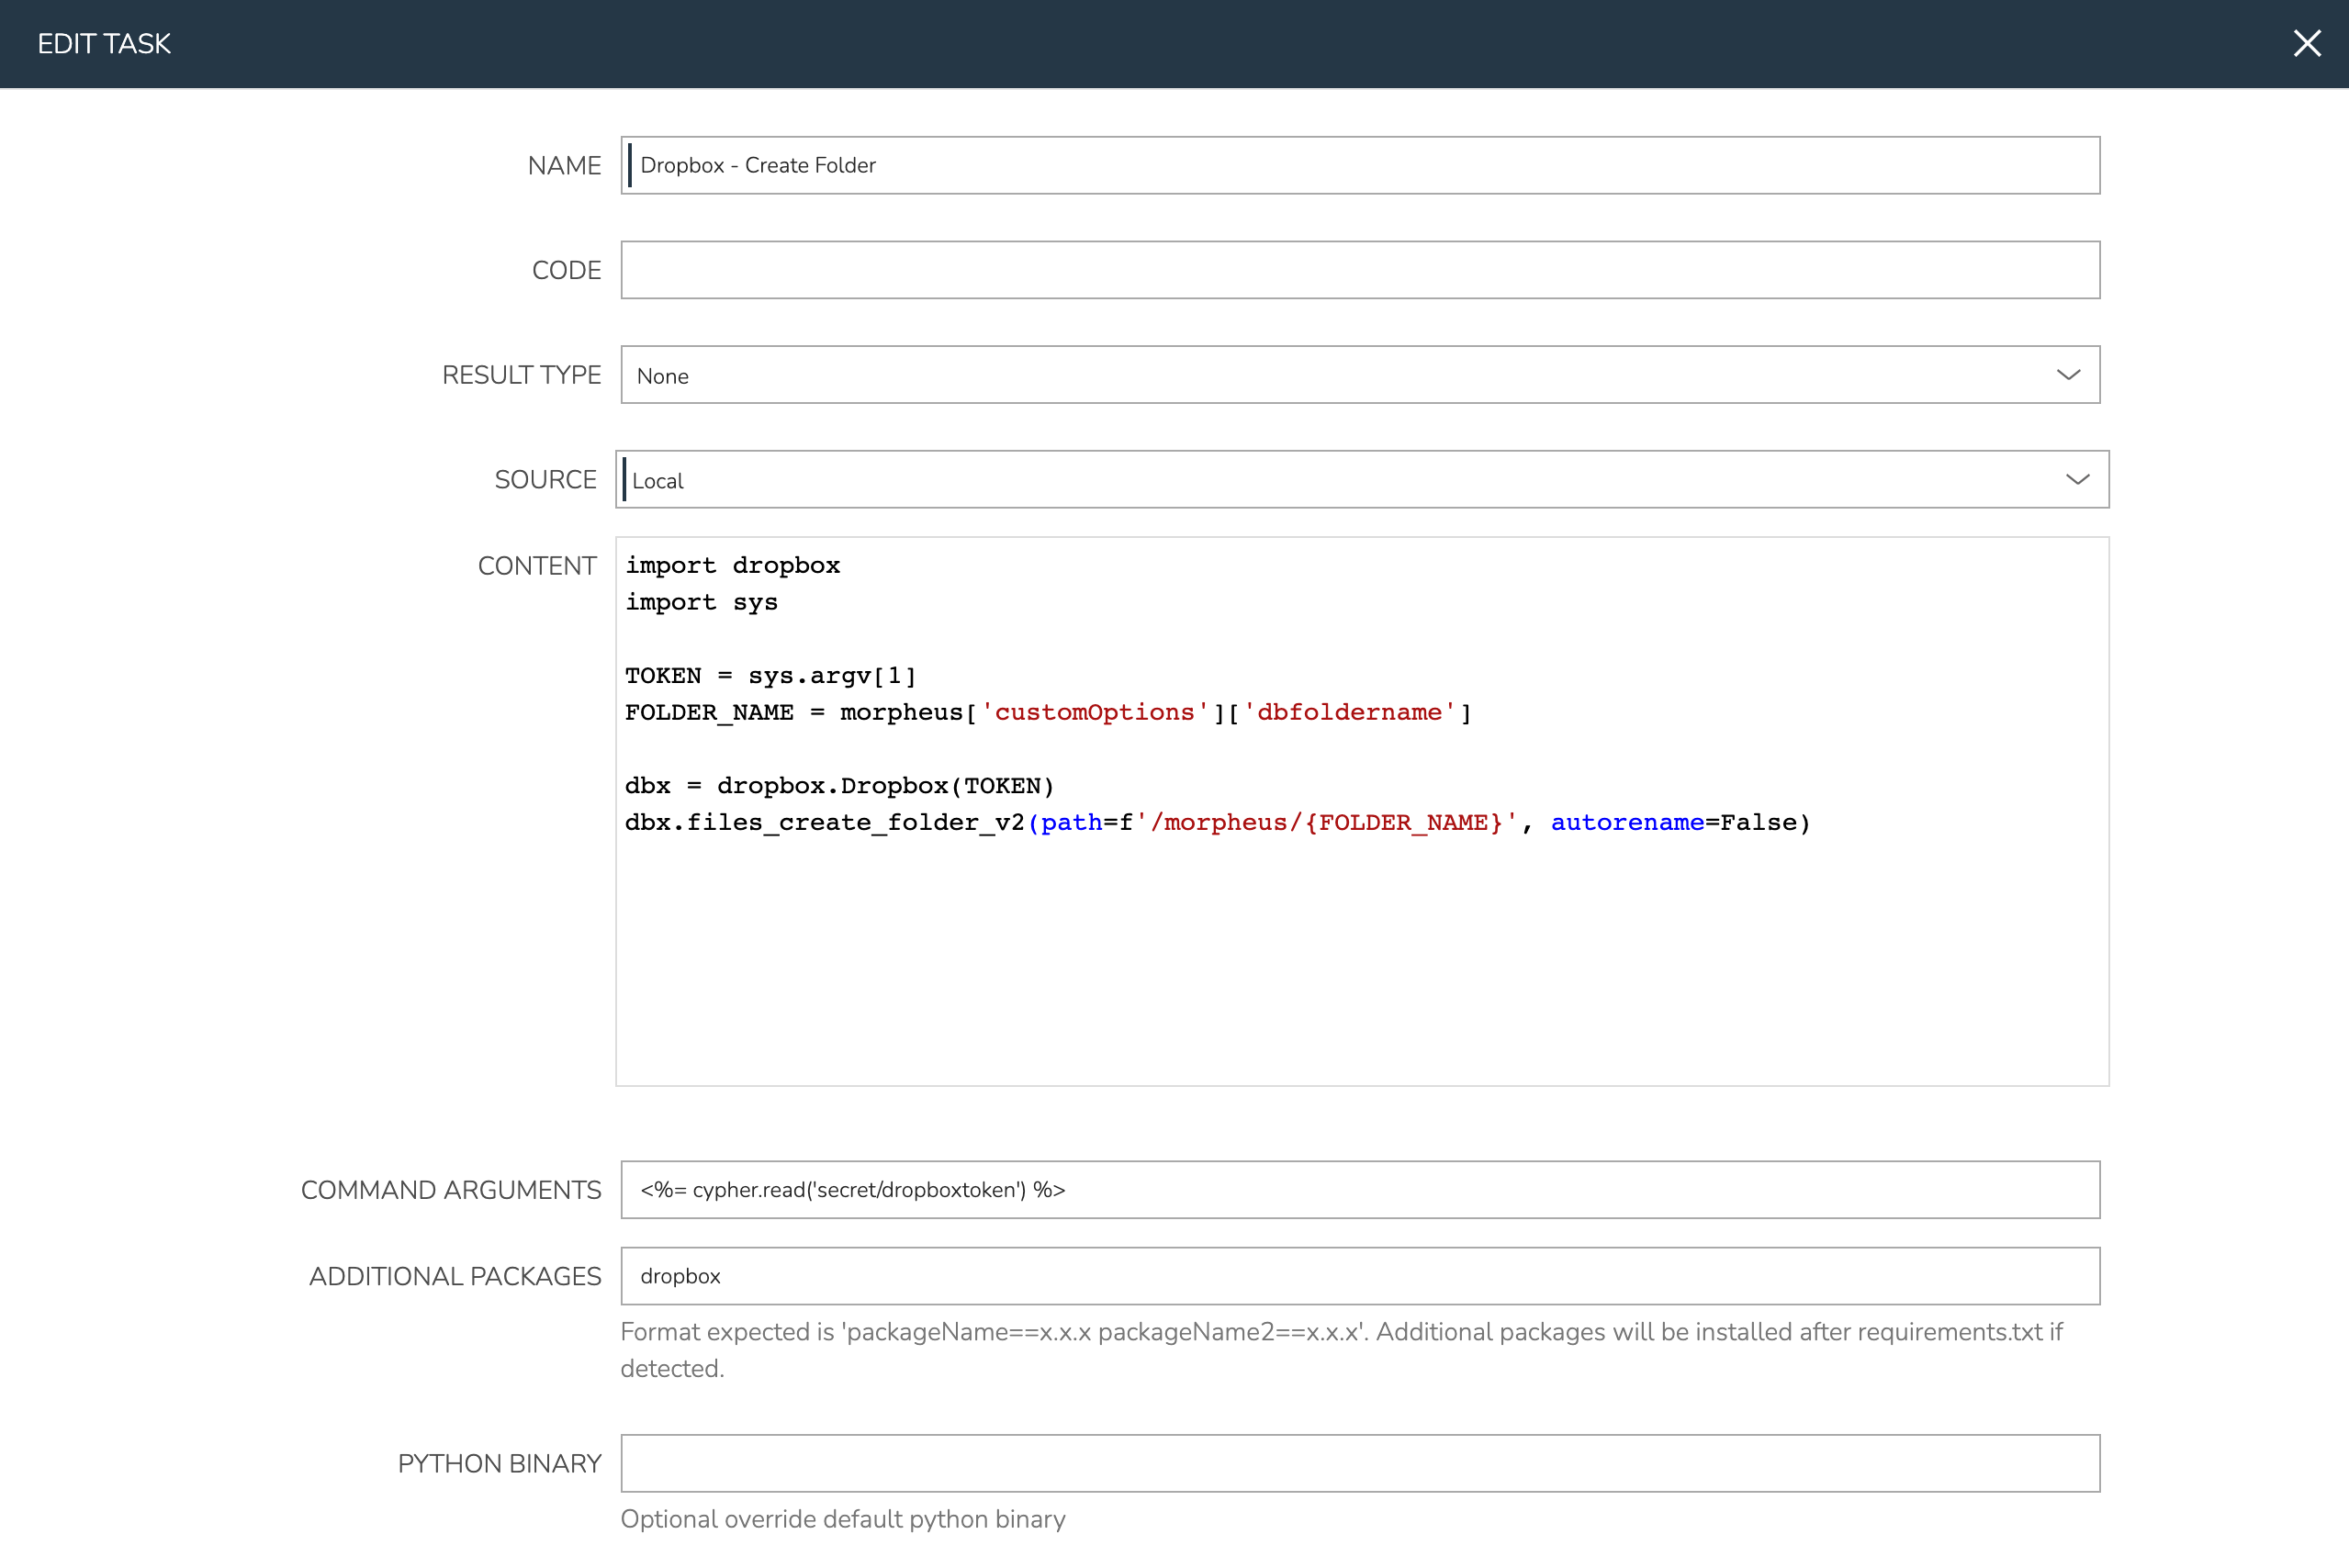
Navigate to Library > Automation > Tasks and click + ADD. Create a new Task with the following configuration:
NAME: Dropbox - Create Folder
TYPE: Python Script (Once Type is selected, available fields will be updated to those specific to the chosen type)
RESULT TYPE: None
SOURCE: Local (Select Repository to source your code from an integrated version control repository)
CONTENT: Enter Task content here
COMMAND ARGUMENTS: Optional command line arguments for the Python script. In my case, I’m passing the Dropbox API token from Cypher as a command line argument (as seen in the screenshot) and consuming it in my code using the sys module, which is part of the Python standard library. There are other ways to consume Cypher secrets in Python scripts as well, which are laid out in a Knowledge Base article
ADDITIONAL PACKAGES: List packages used which are not part of the standard Python library
Once done, click SAVE CHANGES
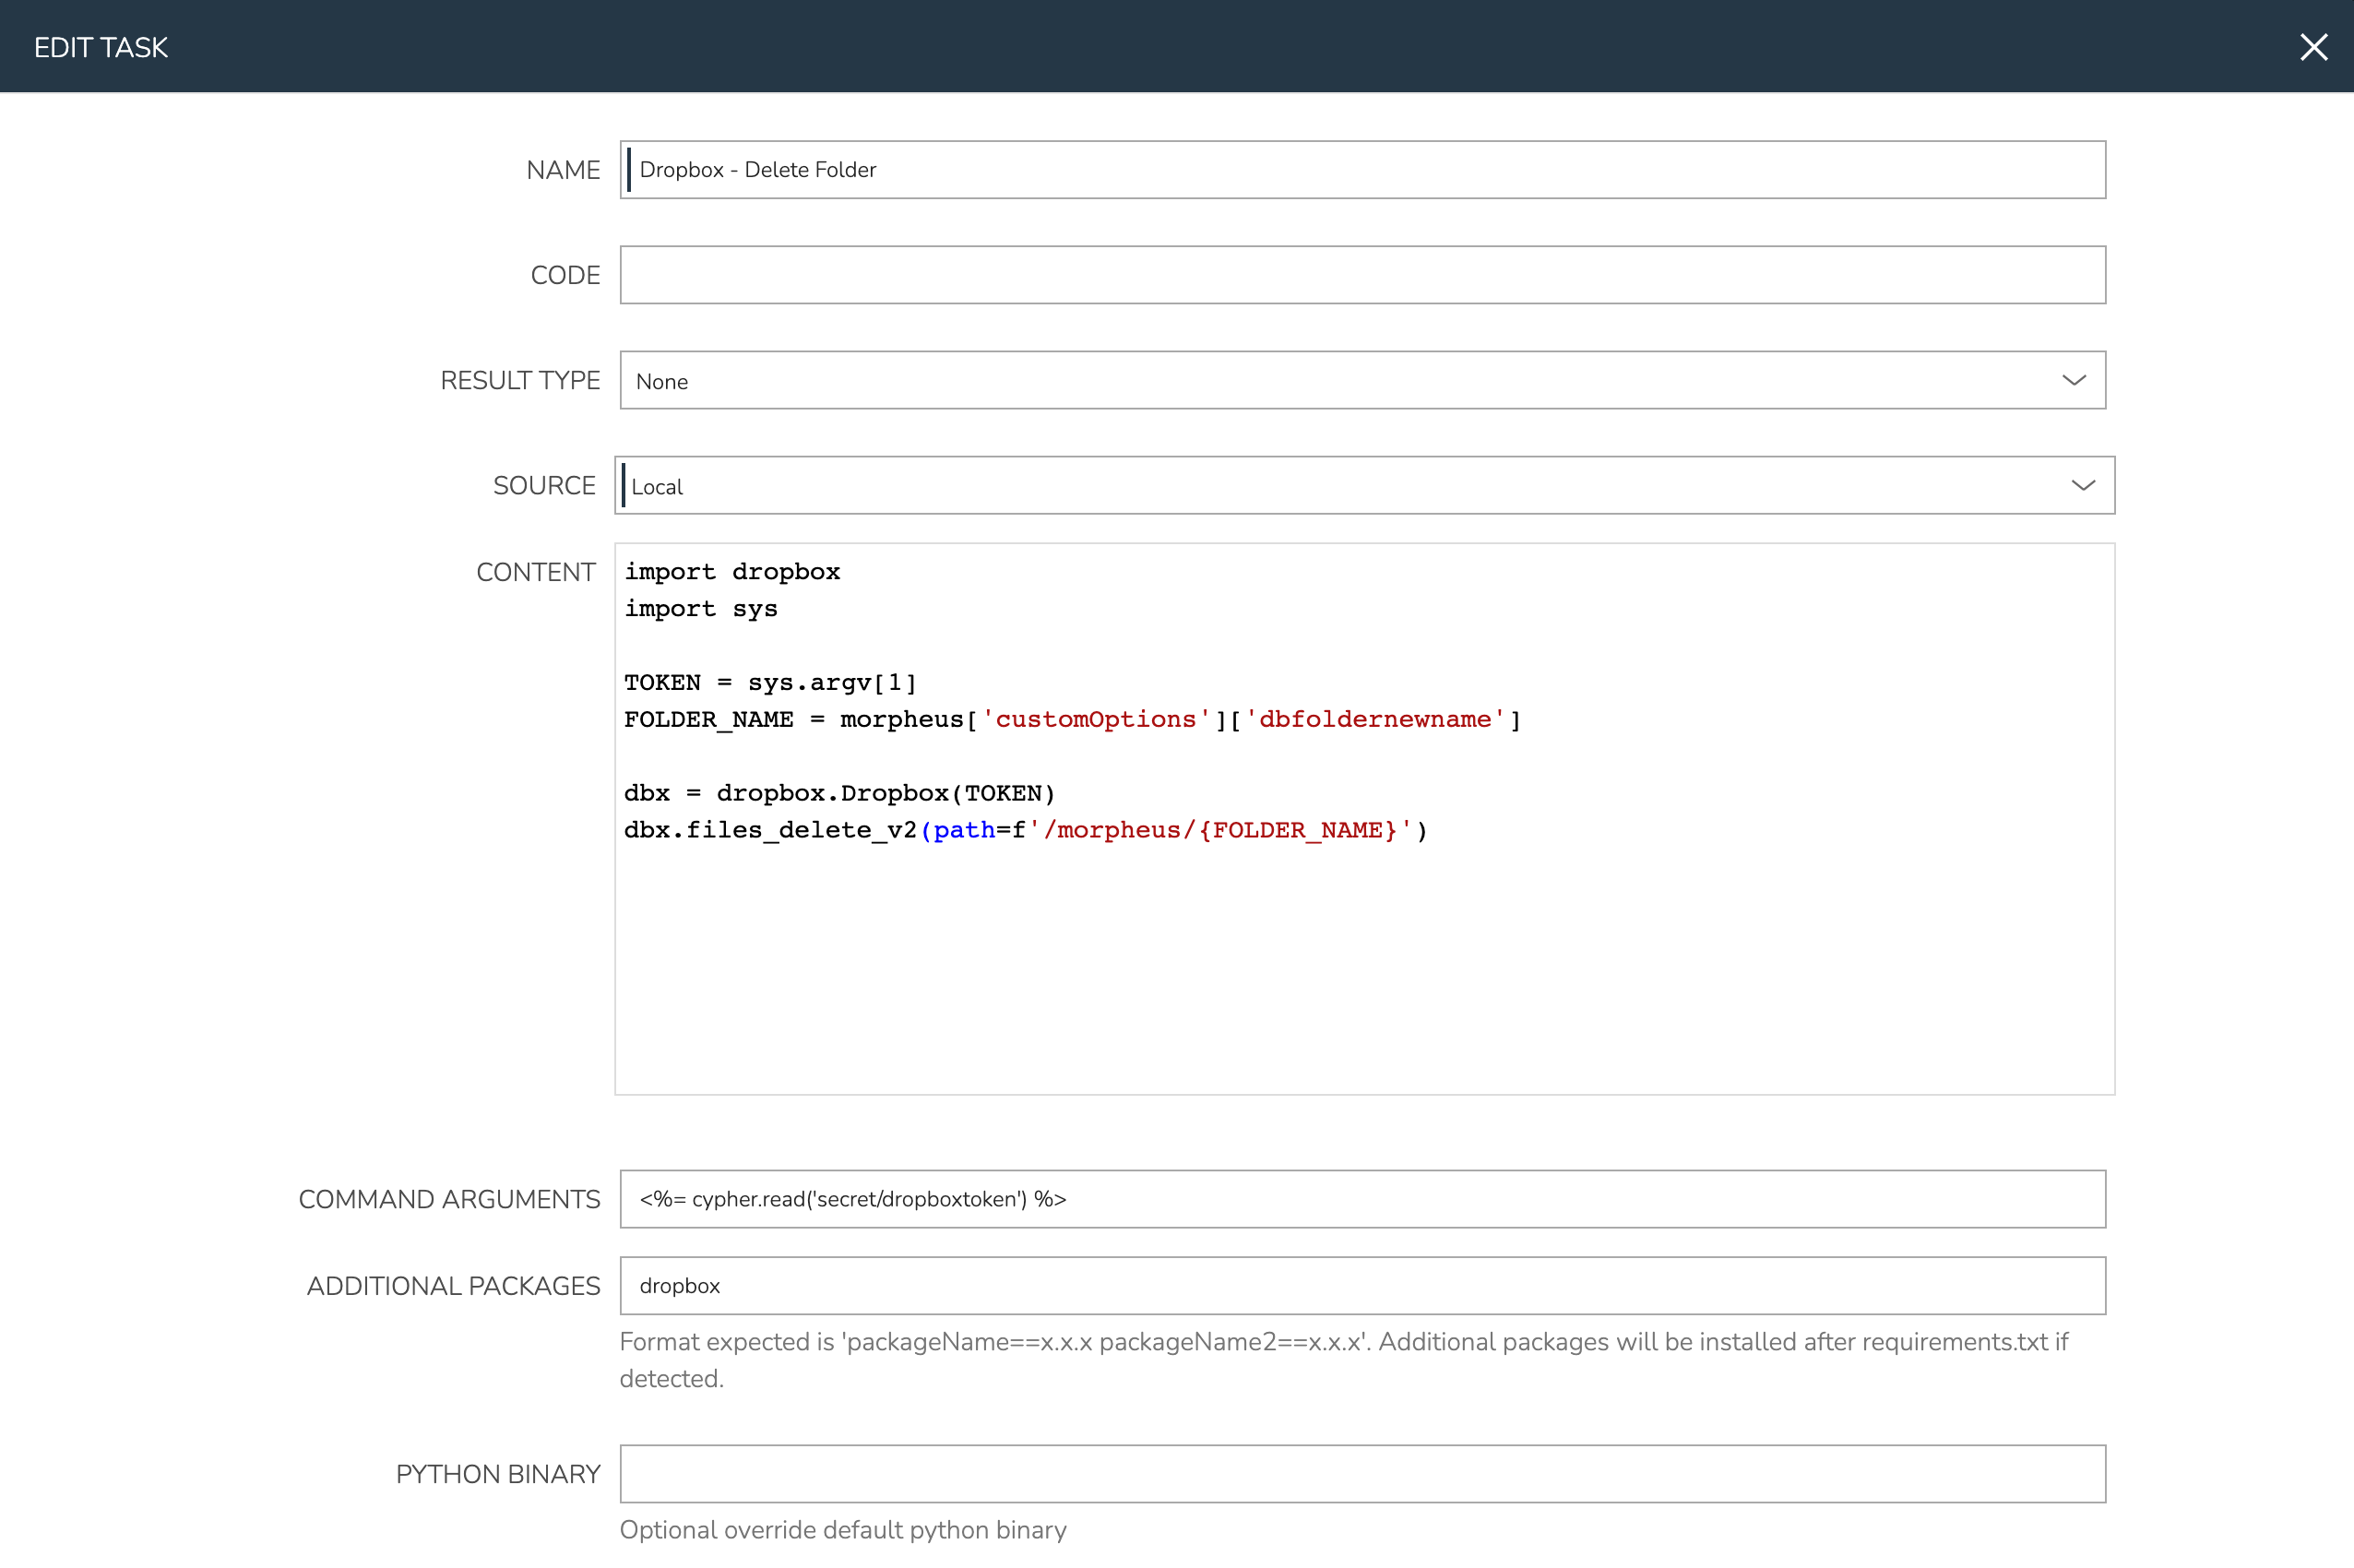
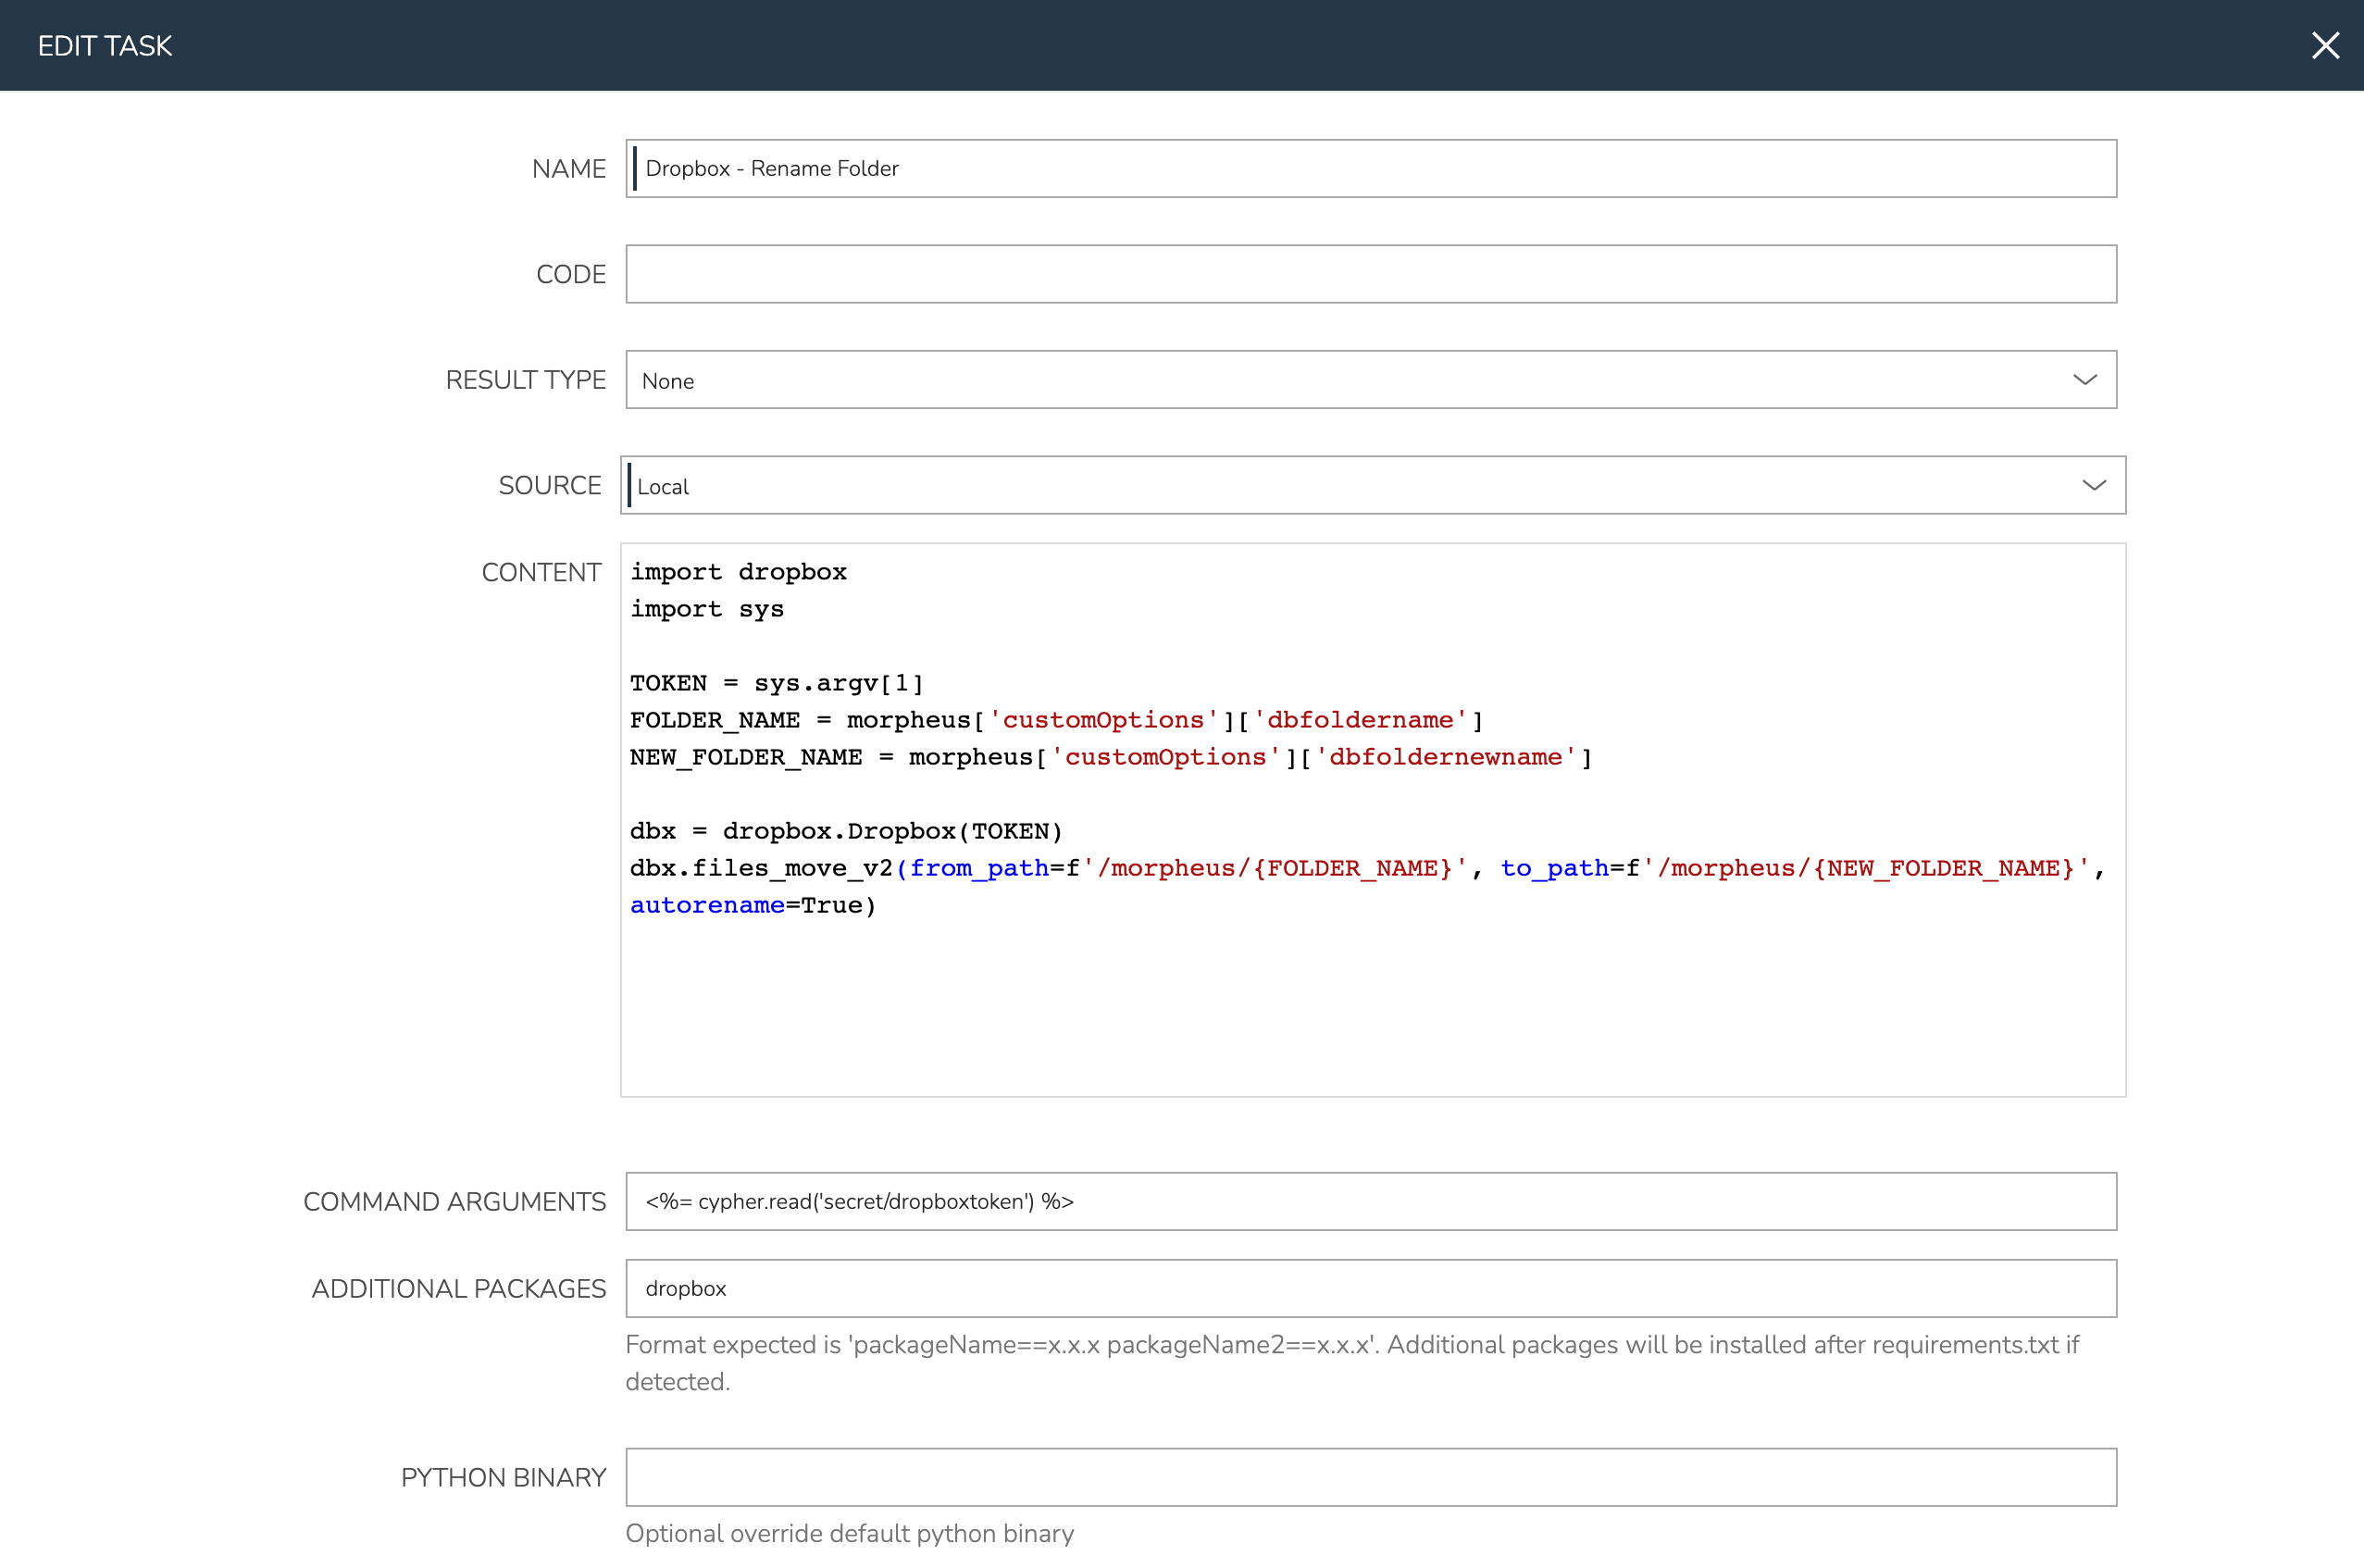
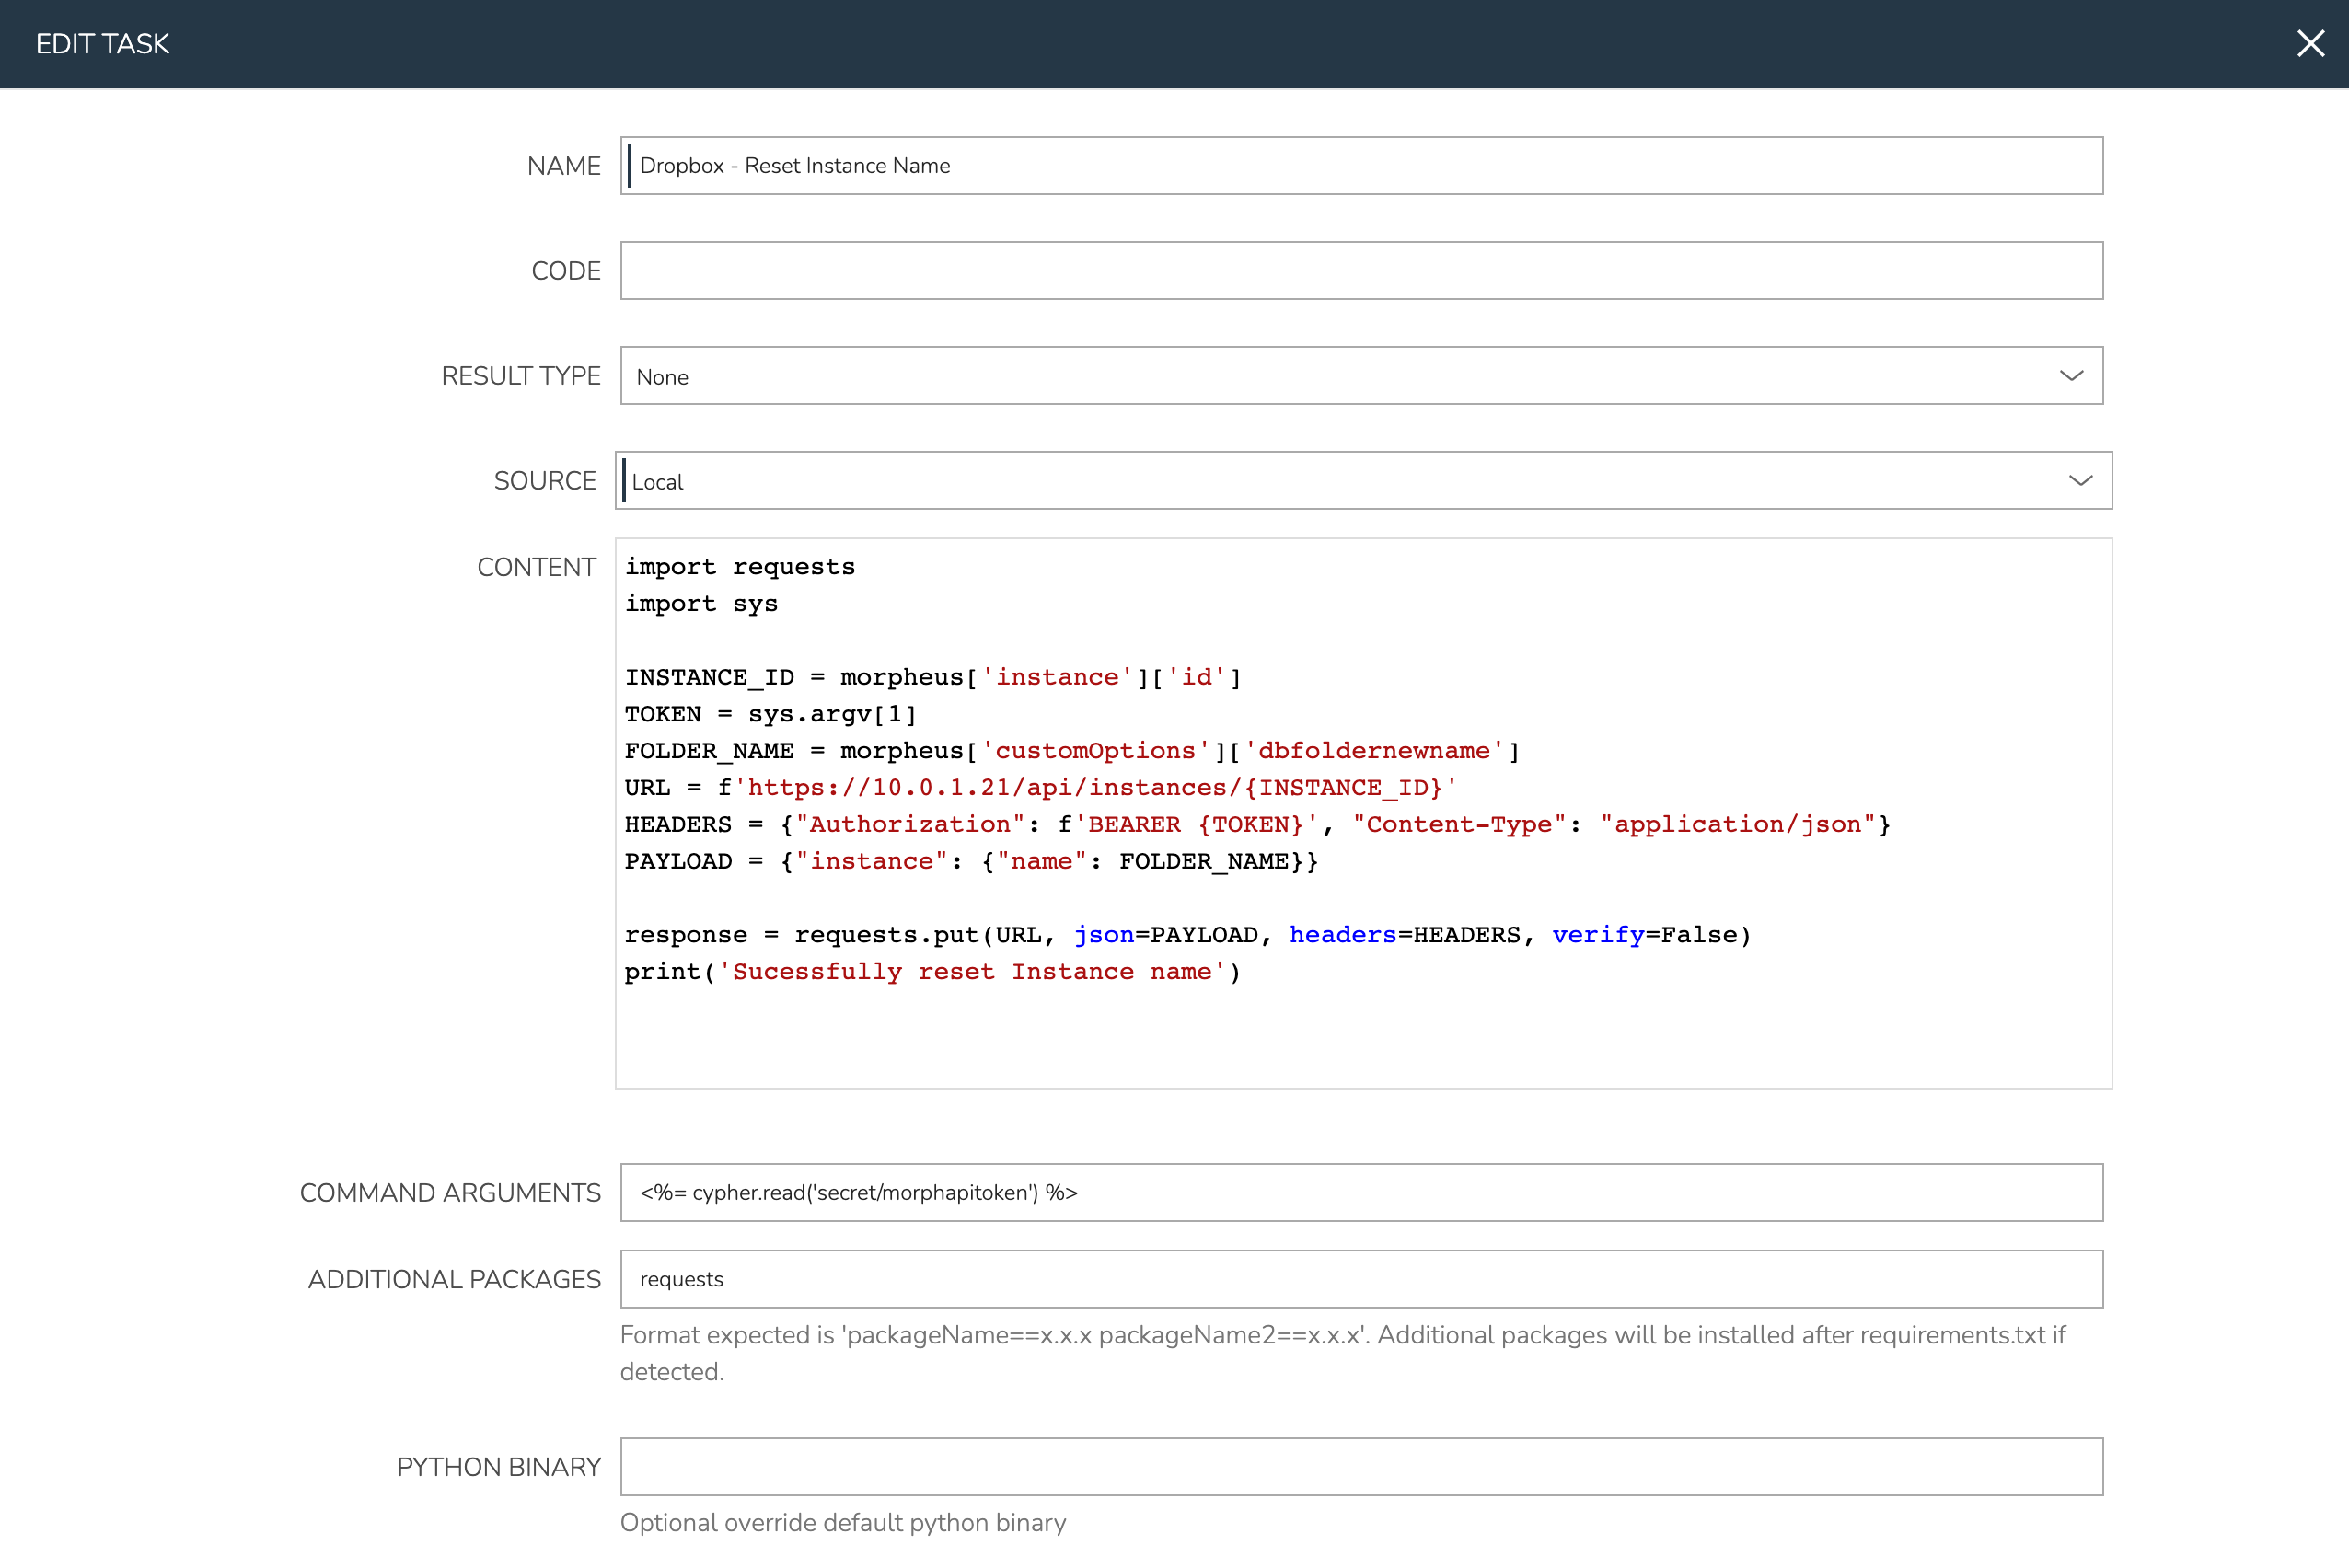
The process for creating the remaining three Tasks is very similar, expand the sections below to see screenshots of the Task config, if desired:
Dropbox - Delete Folder
Dropbox - Rename Folder
Dropbox - Reset Instance Name
Create Provisioning Workflow
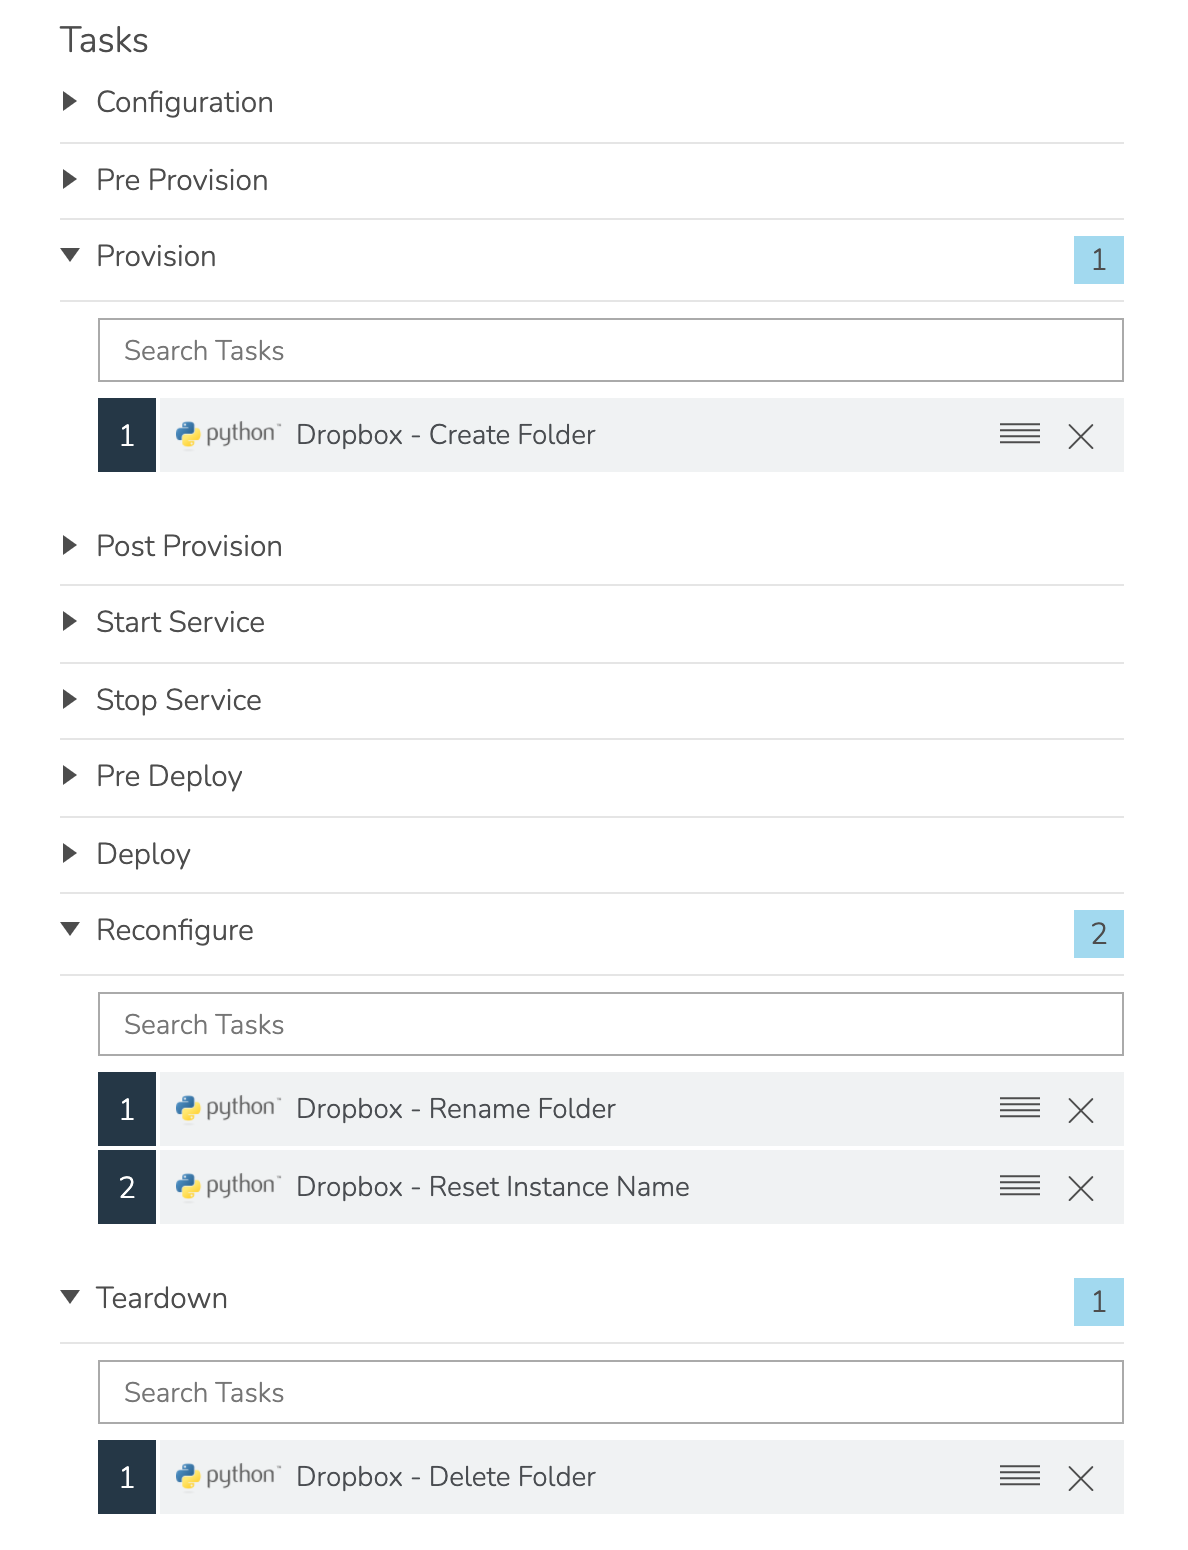
Morpheus Workflows pull multiple Tasks together into a logical group. There are two types of Workflows: Operational and Provisioning. We won’t use any Operational Workflows here but these Workflows can be run on-demand as needed or set to run on a recurring time schedule (like a cronjob). Provisioning Workflows are associated with an Instance at provision time and will automatically run the appropriate Tasks when the Instance reaches certain phases of its lifecycle, such as during provisioning, teardown, startup, or shutdown. In our case, we need the following to occurring during the Instance lifecycle:
At the provisioning phase, we want a folder to be created
At the reconfigure phase (when the Instance is edited), we want the folder to be renamed and the Instance name to be updated
At the teardown phase (when the Instance is deleted), we want the folder to be deleted
Navigate to Library > Automation > Workflows and click + ADD. Set the following configurations:
NAME: XaaS - Dropbox
PLATFORM: All
TASKS - Provision: Dropbox - Create Folder
TASKS - Reconfigure: Dropbox - Rename Folder; Dropbox - Reset Instance Name
TASKS - Teardown: Dropbox - Delete Folder
Once done, click SAVE CHANGES
Create Instance Type
With the Workflow and Inputs complete, we’re ready to put them all together into a custom Instance Type for our Morpheus Library. From this, we’ll create a catalog item that our users can order in a later step.
Navigate to Library > Blueprints > Instance Types and click + ADD. Enter the following configurations:
NAME: XaaS - Dropbox
CODE: xaas
CATEGORY: Utility
ICON: If desired, search the file system on your local computer for a Dropbox logo icon for easier identification of this Instance Type at provision time
ENVIRONMENT PREFIX: XAAS

Click SAVE CHANGES.
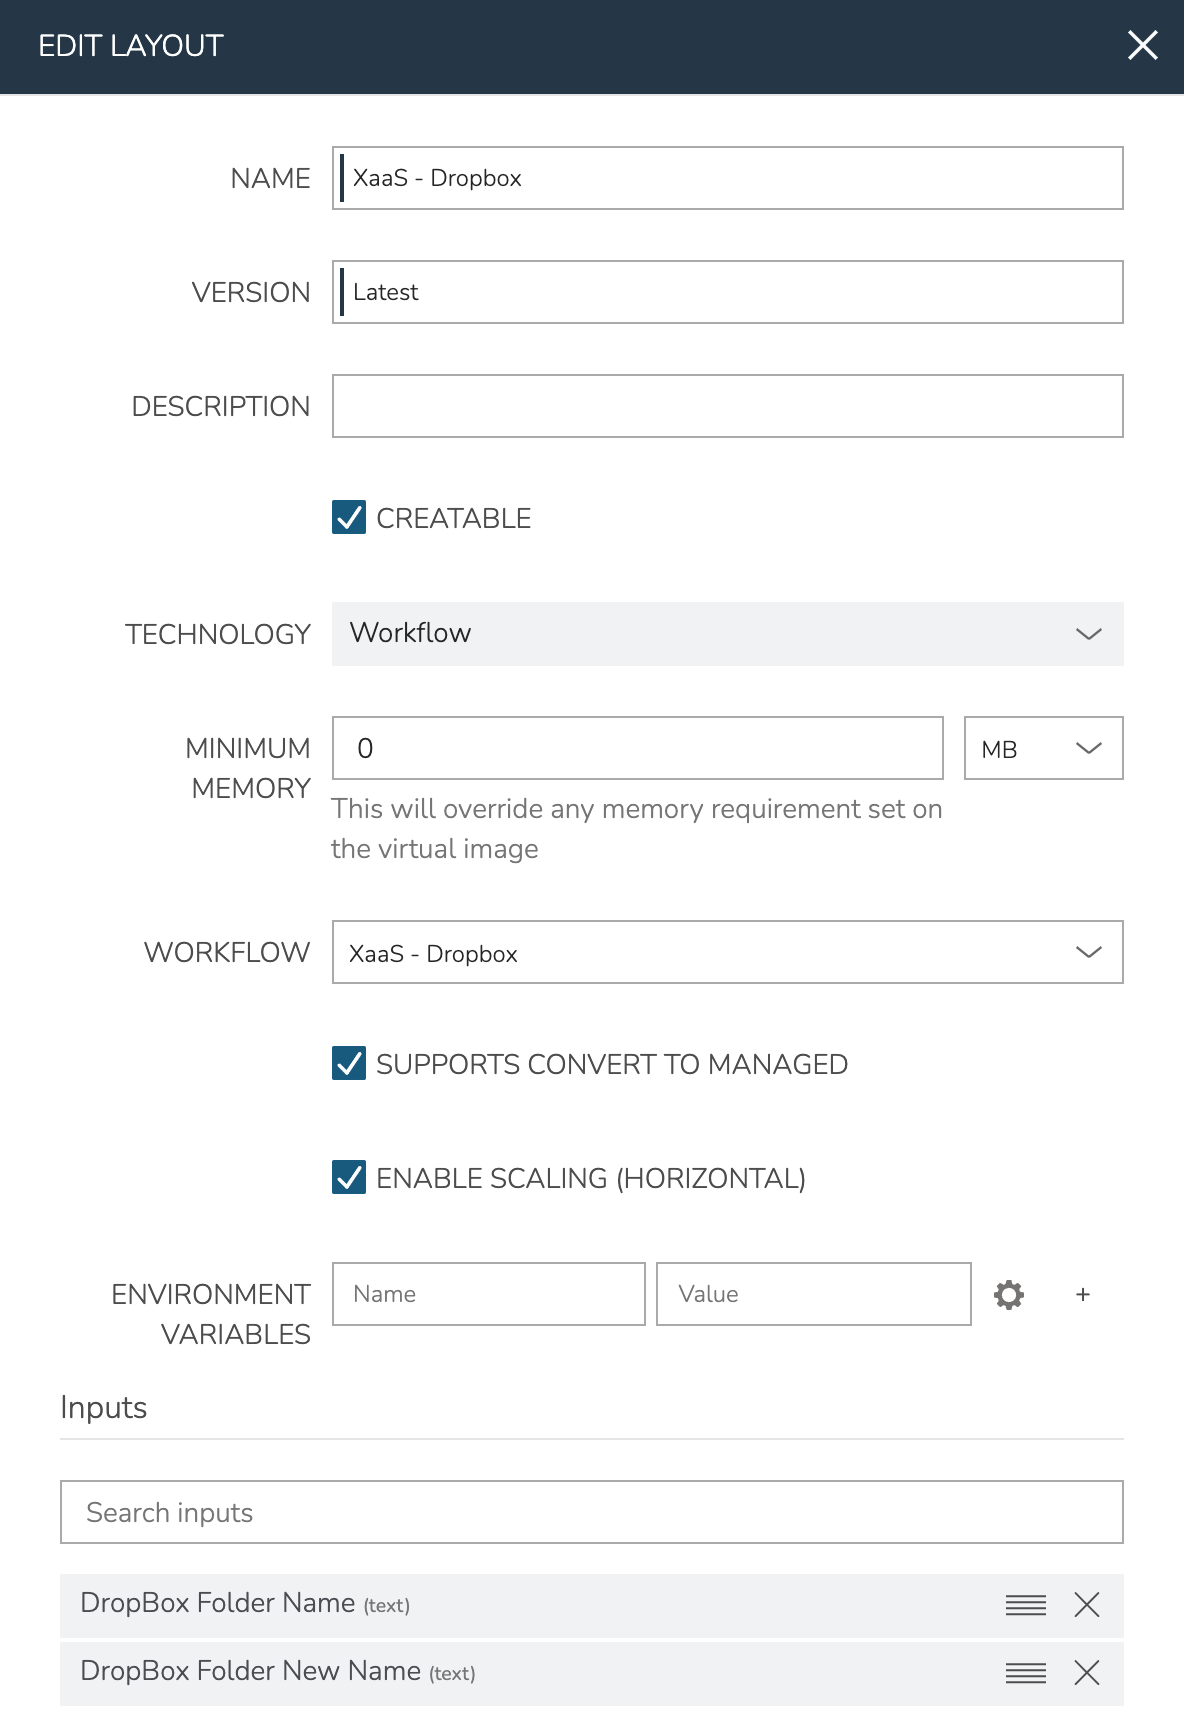
Create Layout
After creating the Instance Type, click into it and then click + ADD LAYOUT from the Instance Type Detail Page. A Layout specifies the technology the Instance will run on, in this case Workflow. It’s possible to have multiple Layouts associated with an Instance Type which can be selected depending on the chosen Cloud the user might be provisioning on (when dealing with VM-based Instance Types). Configure the Layout as follows:
NAME: XaaS - Dropbox
VERSION: Latest
CREATABLE: Checked (If unchecked, this Layout won’t be an available option at provision time)
TECHNOLOGY: Workflow
WORKFLOW: Select the Workflow we’ve just created, “XaaS - Dropbox”. By selecting this, all Instances provisioned with this Layout will automatically have our chosen Tasks run during specific Instance lifecycle phases
INPUTS: Search and find the two custom Inputs we created earlier, “DropBox Folder Name” and “DropBox Folder New Name”
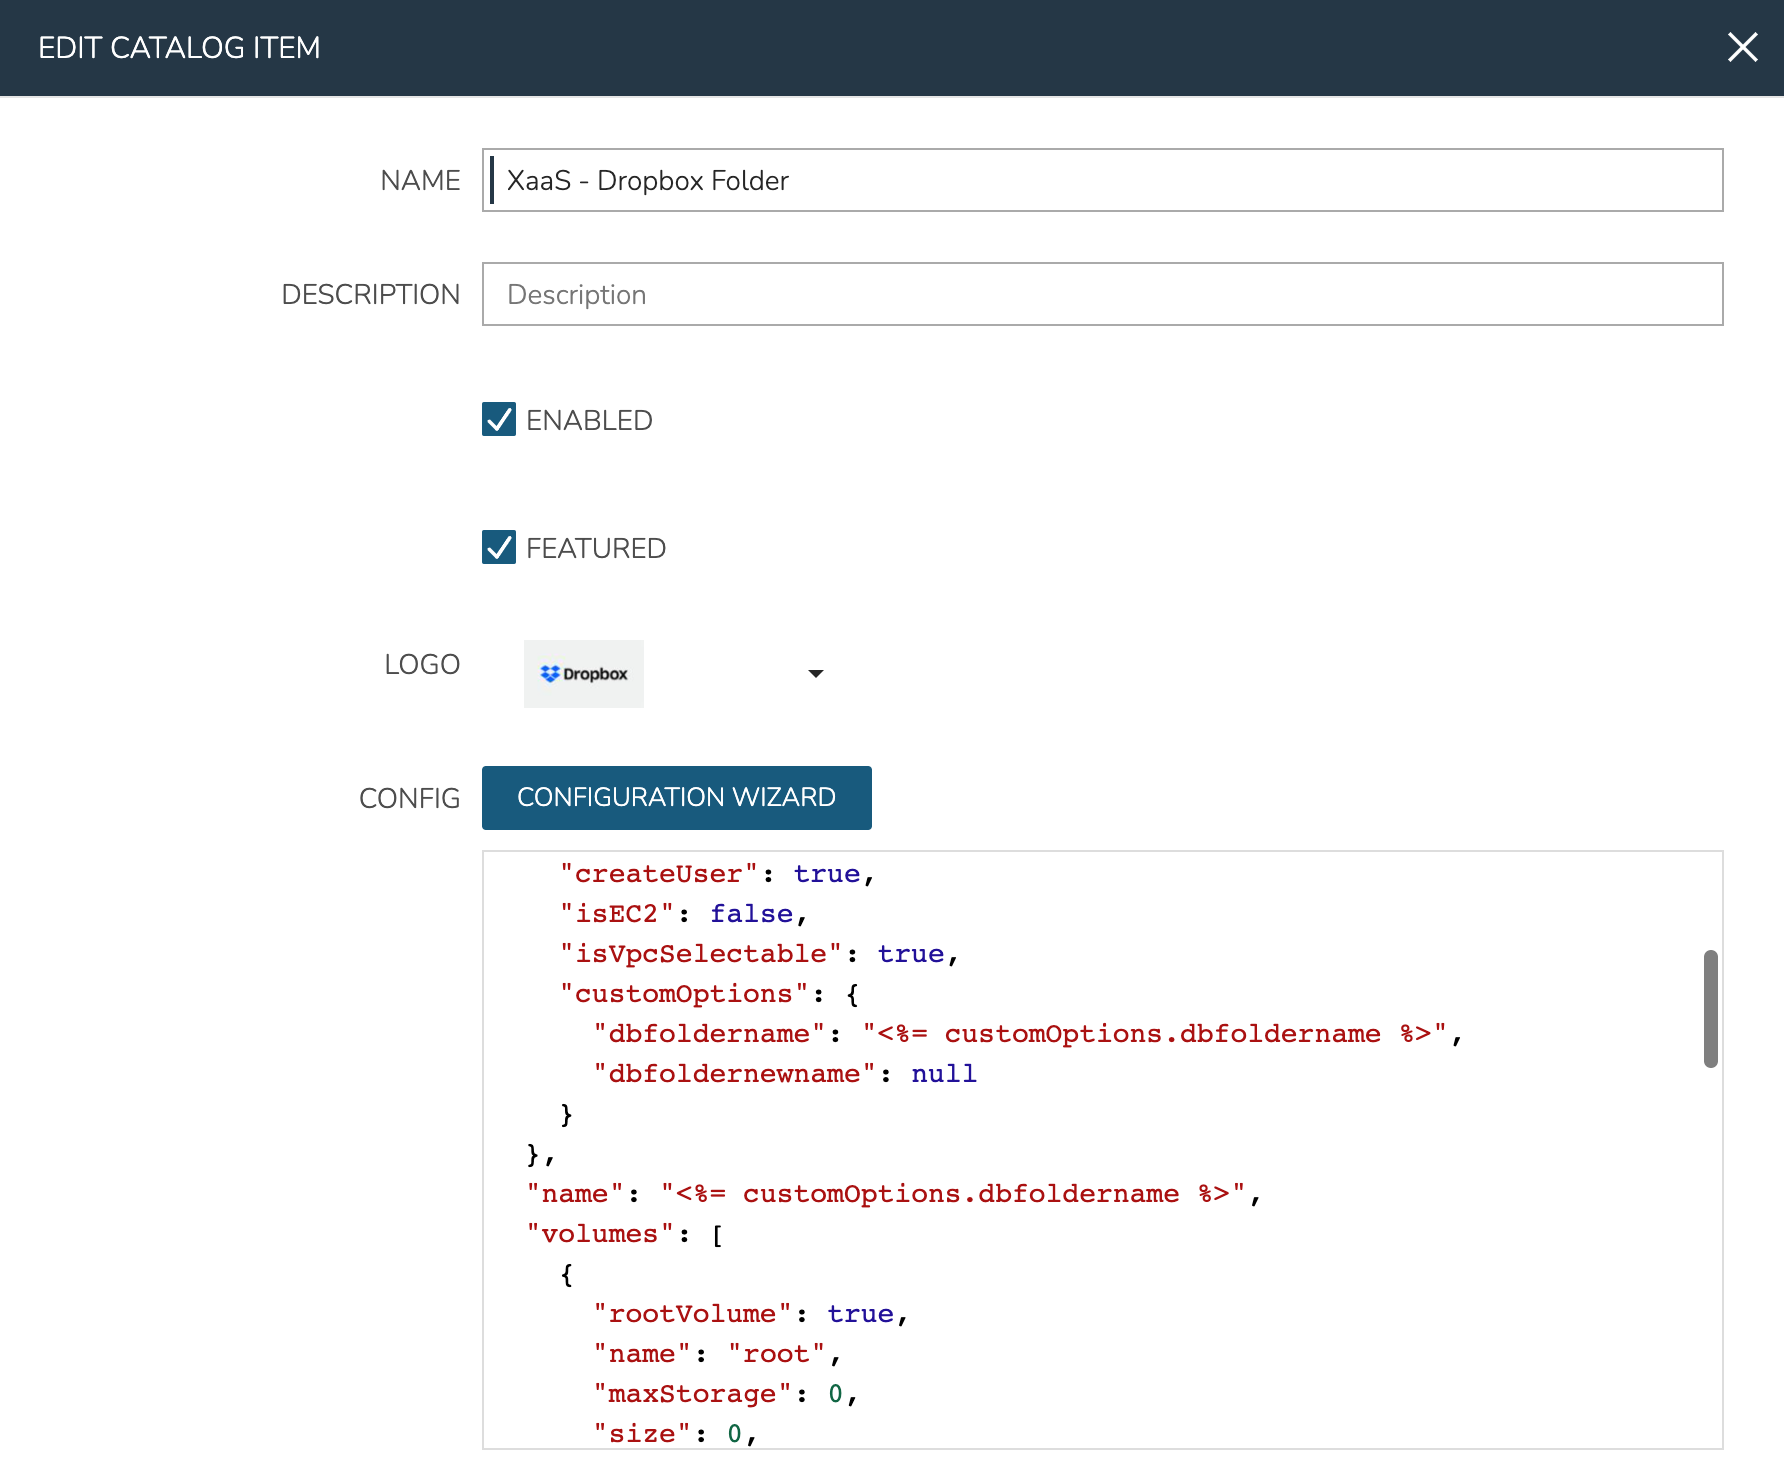
Create Catalog Item
Catalog Items offer a simplified provisioning process. Administrators can create Catalog Items using existing Instance Types, App Blueprints, or Workflows. Most or all of the provisioning options can be pre-selected leaving fewer decisions up to the user and allowing them to easily create what they need. In this case, we’ll create one based on the Instance Type that was made in the previous sections. Navigate to Library > Blueprints > Catalog Items and click + ADD, then Instance. Configure the following:
NAME: XaaS - Dropbox Folder
ENABLED: Checked (If unchecked, this Catalog Item will not be displayed in the provisioning catalog for users)
LOGO: If desired, browse your local disk for a Dropbox logo to make this Catalog Item easily recognizable
Then, click CONFIGURATION WIZARD. On the “TYPE” tab, search for the Instance Type we created and click NEXT. On the “Group” tab, select the Morpheus-type Cloud and enter any name (we’ll override this name value later so it’s dynamic based on user input). Click NEXT. On the “CONFIGURE” tab, the Layout and Plan fields should default to acceptable values. Enter anything for the “Dropbox Folder Name”, we will also update this to be dynamic in the next step. Click through the final two tabs, there’s no need to attach our Workflow on the “AUTOMATION TAB” since we already have it on our Layout. Finally, click COMPLETE.
Once finished, you’ll see the JSON configuration map for the Instance loaded into the “CONFIG” field. Update the “dbfoldername” Input value and the Instance name value to dynamically take on the user-entered value on the “Dropbox Folder Name” field as I’ve done in my screenshot below:
Near the bottom of the modal window, search for and attach the “DropBox Folder Name” Input. This will be the only input our users need to make to order their folder. Then, click SAVE CHANGES
Ordering Catalog Item
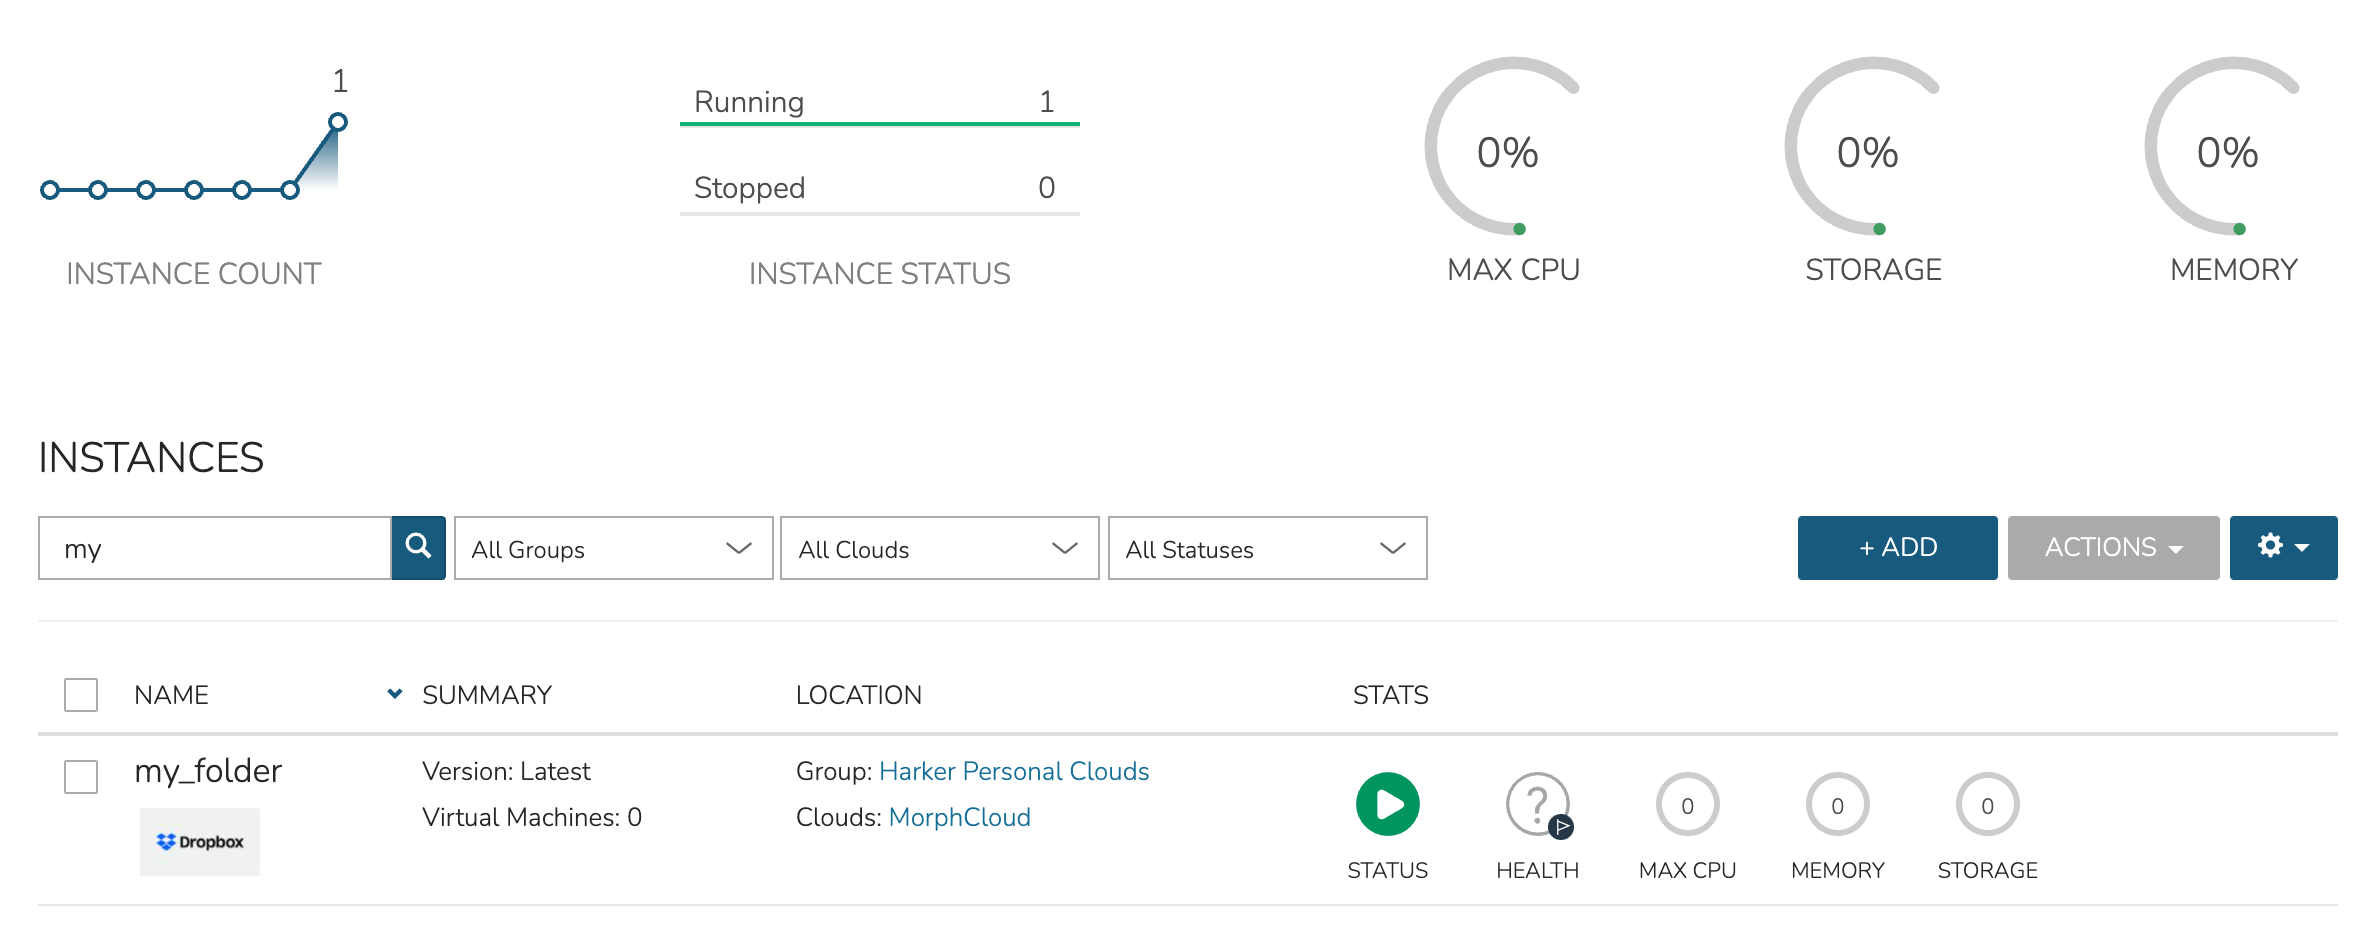
At this point, the configuration steps are completed. As a test, we can order a folder from the provisioning Catalog. Navigate to Provisioning > Catalog and click “Order” on our “XaaS - Dropbox Folder” item. We need only provide a name for our folder and click “Order Now”.

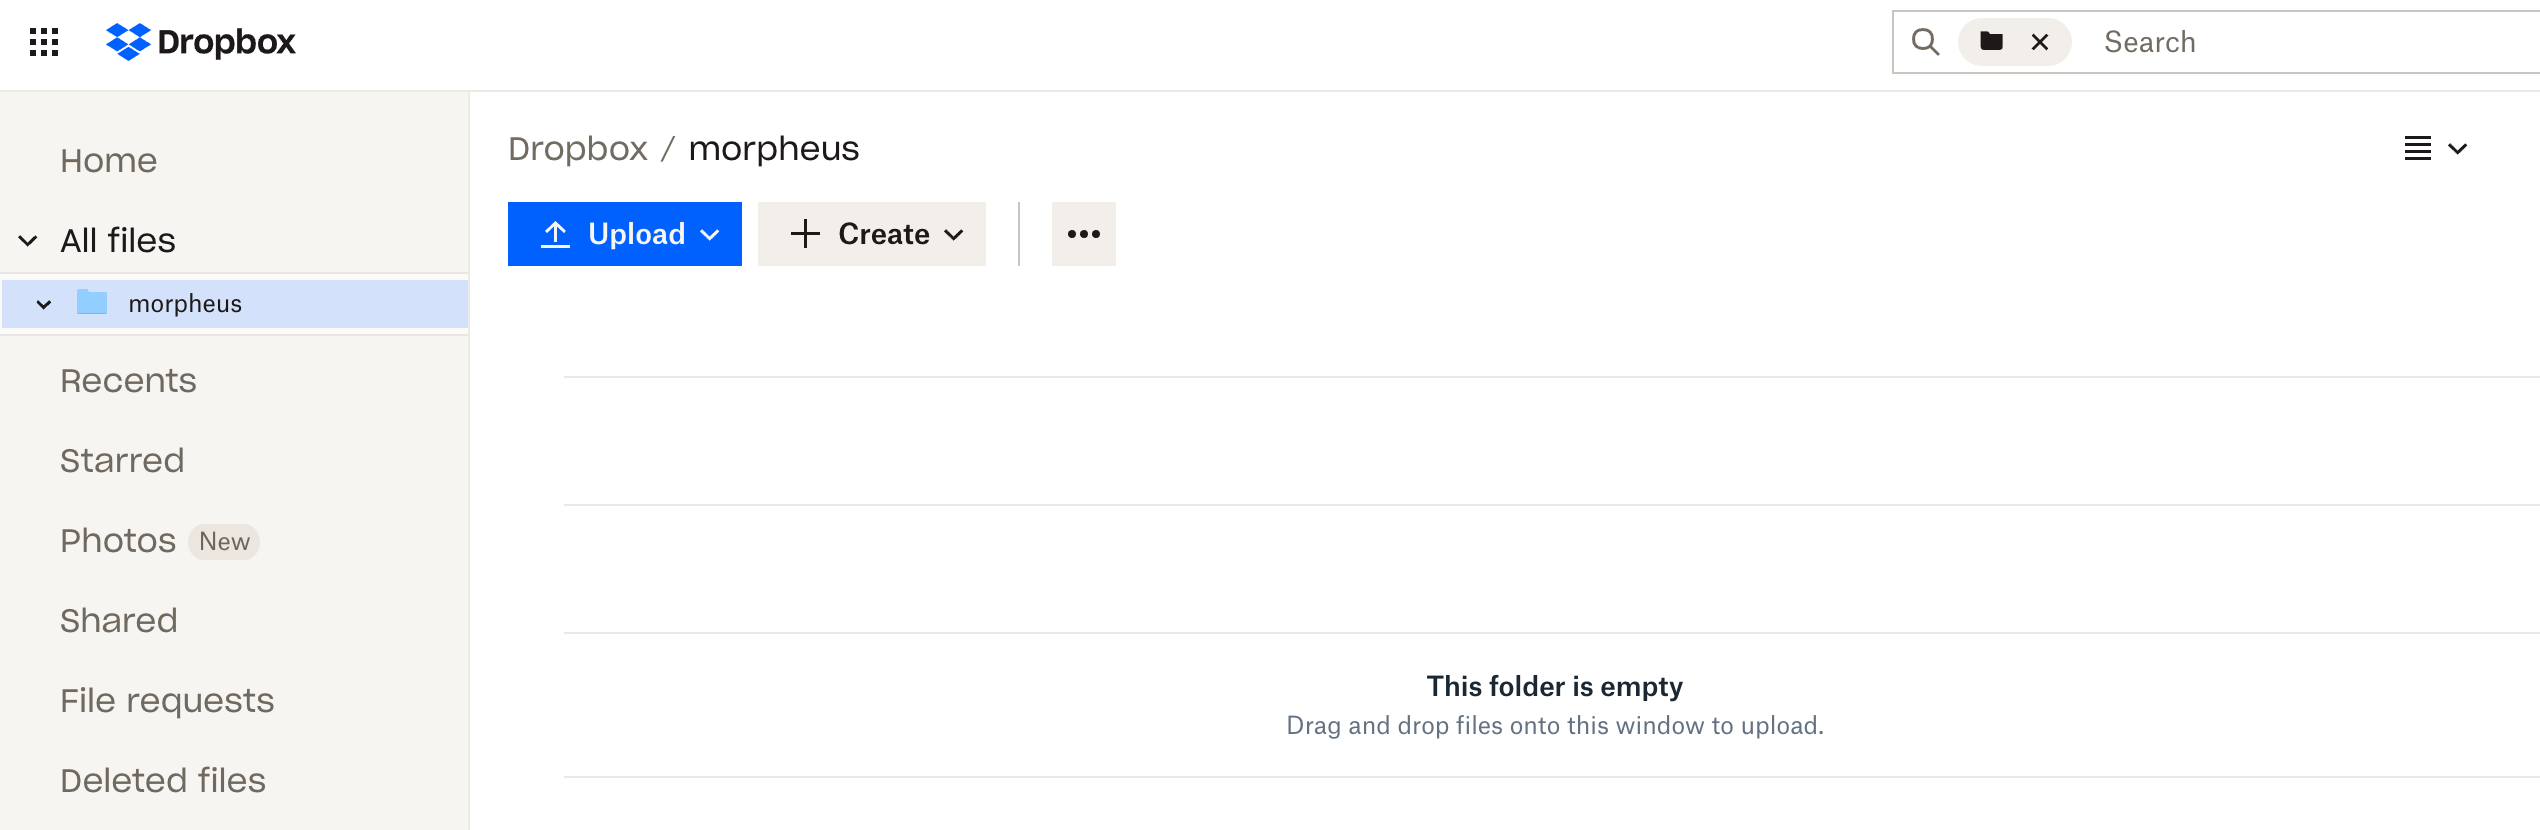
If we now head to Provisioning > Instances, we can see a new Instance entry has been created for our Dropbox folder. Note that the Instance is named for our folder name exactly as we configured earlier.
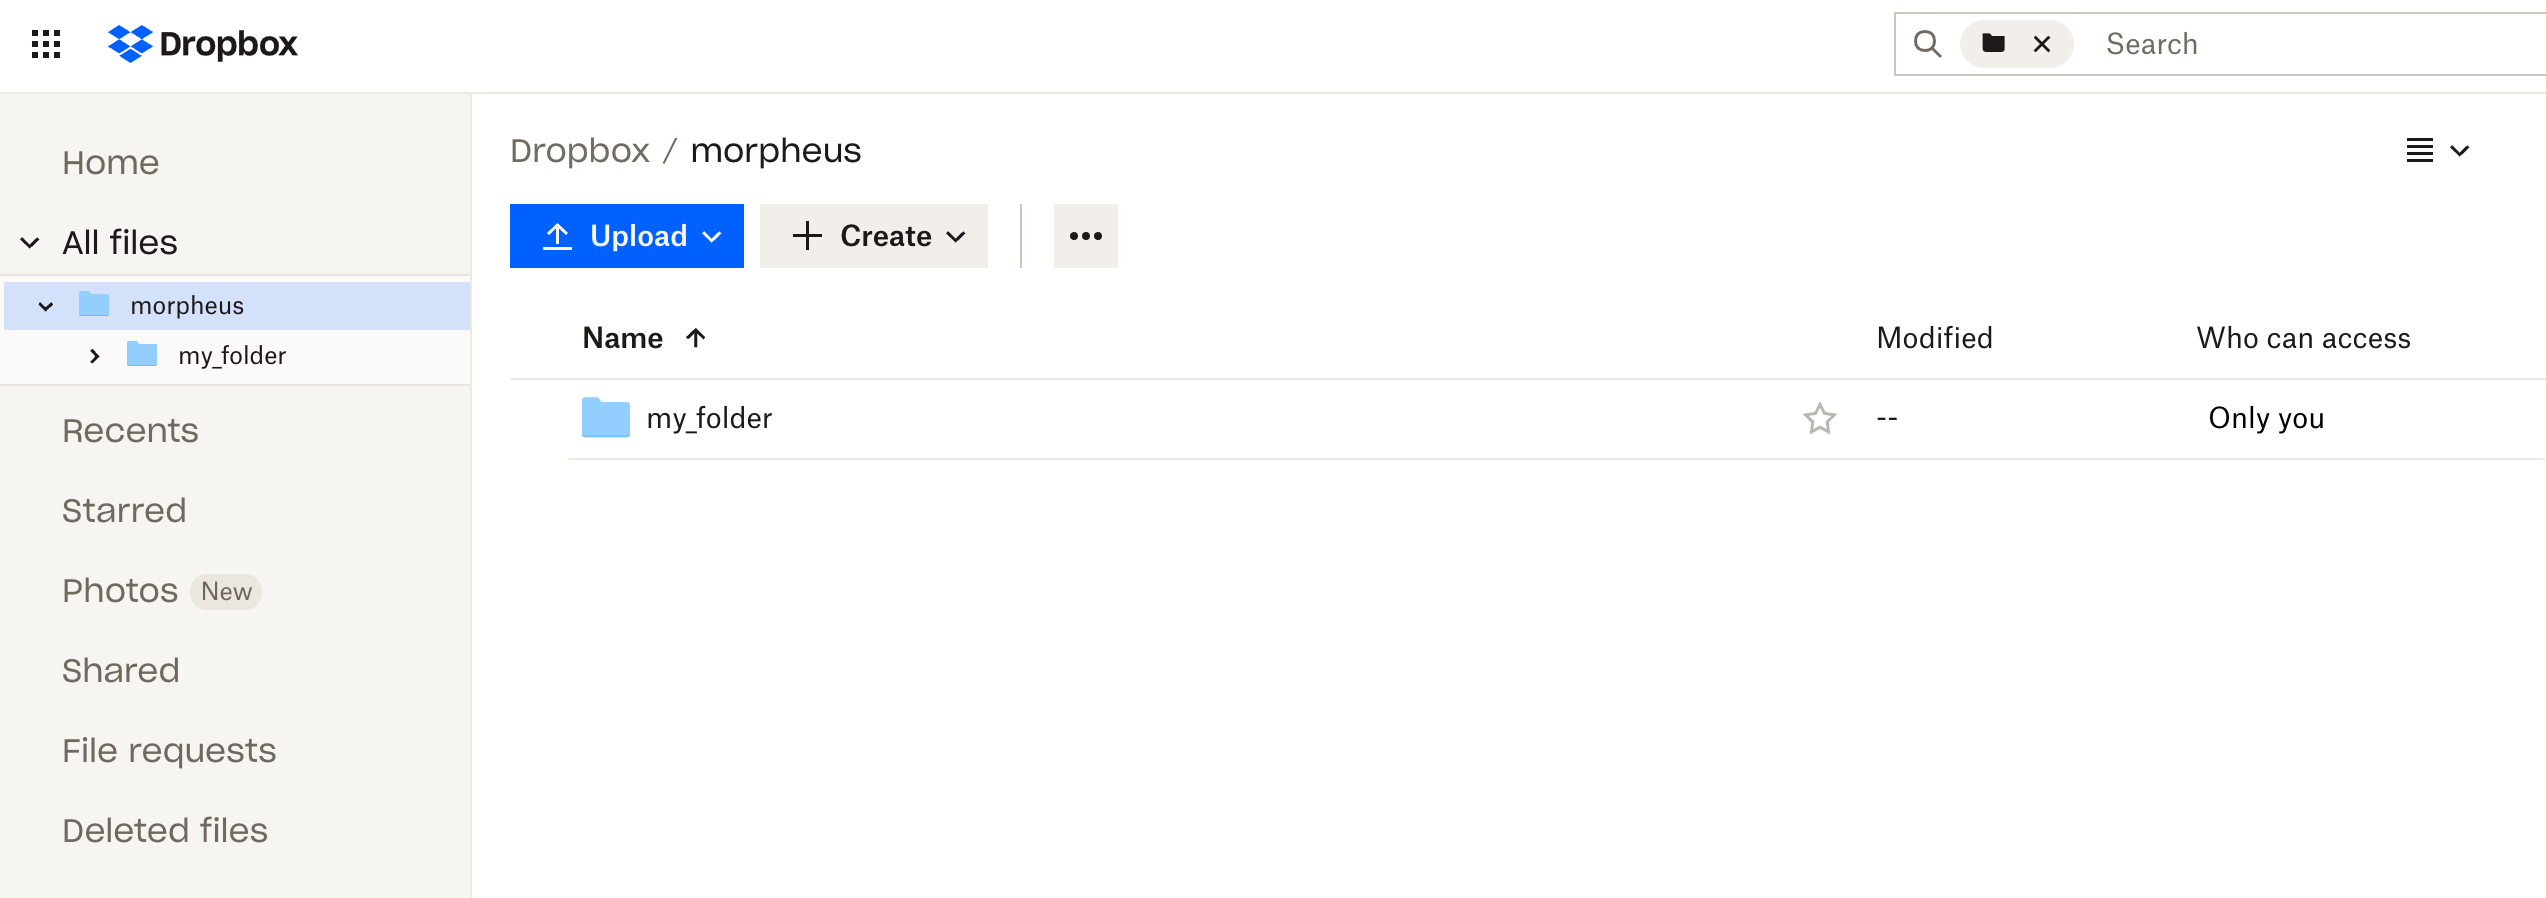
Taking a look in the Dropbox web console, we can also see a folder has been created just as we’d expect.
Managing and Deleting Instances
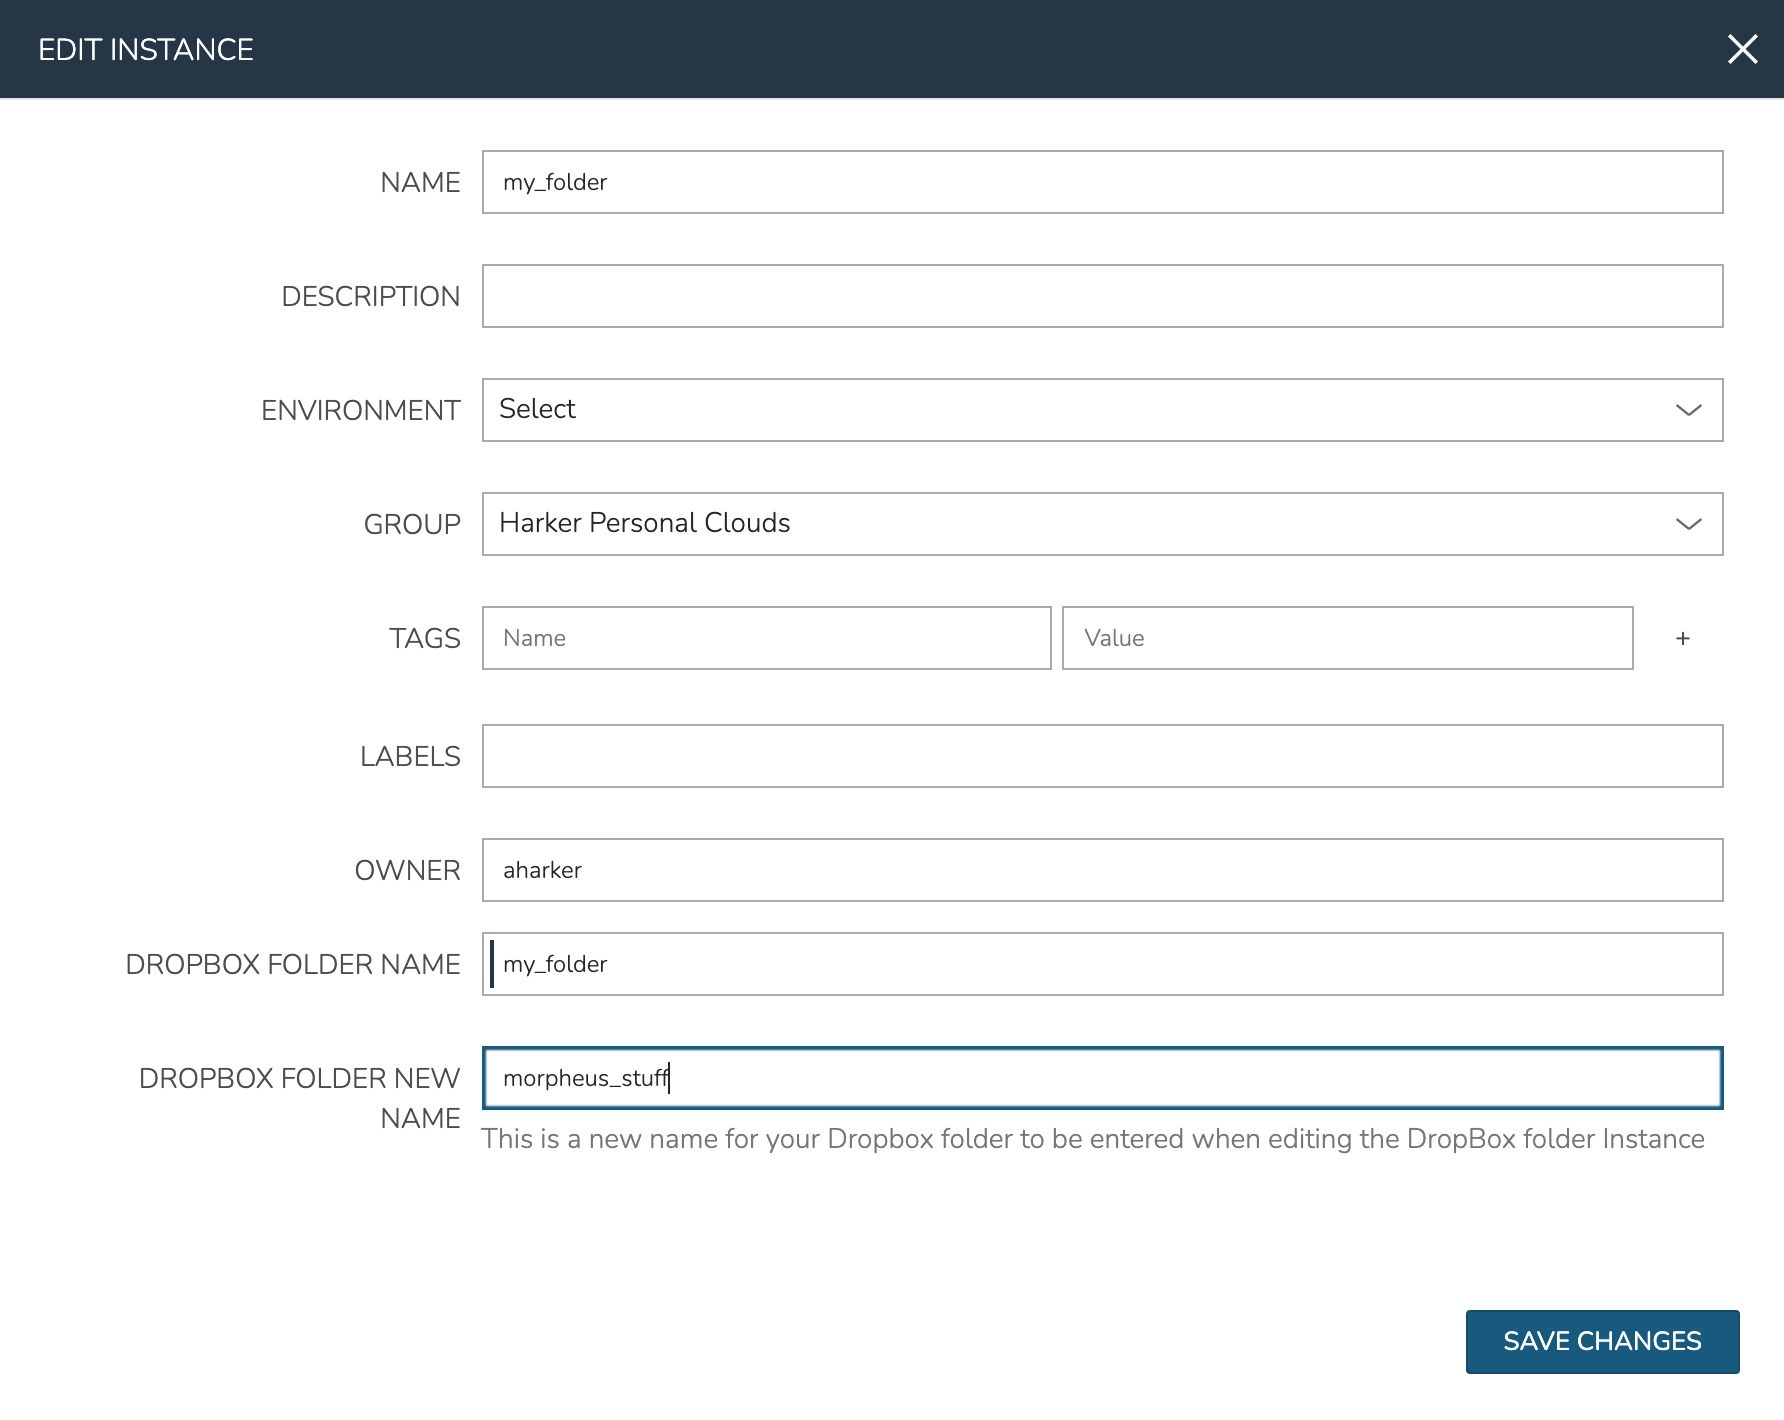
Back in Morpheus, we can take a look at the Instance detail page (Provisioning > Instances > Specific Instance) and perform some Day 2 actions. By clicking EDIT, we can update Instance details. When Input values are updated, Morpheus will automatically trigger reconfigure actions on our Instance. In our case, we’ve configured it to update the folder name in Dropbox and update the Instance name in Morpheus for easier identification. As you can see in the screen shot, I’m providing a new folder name value:
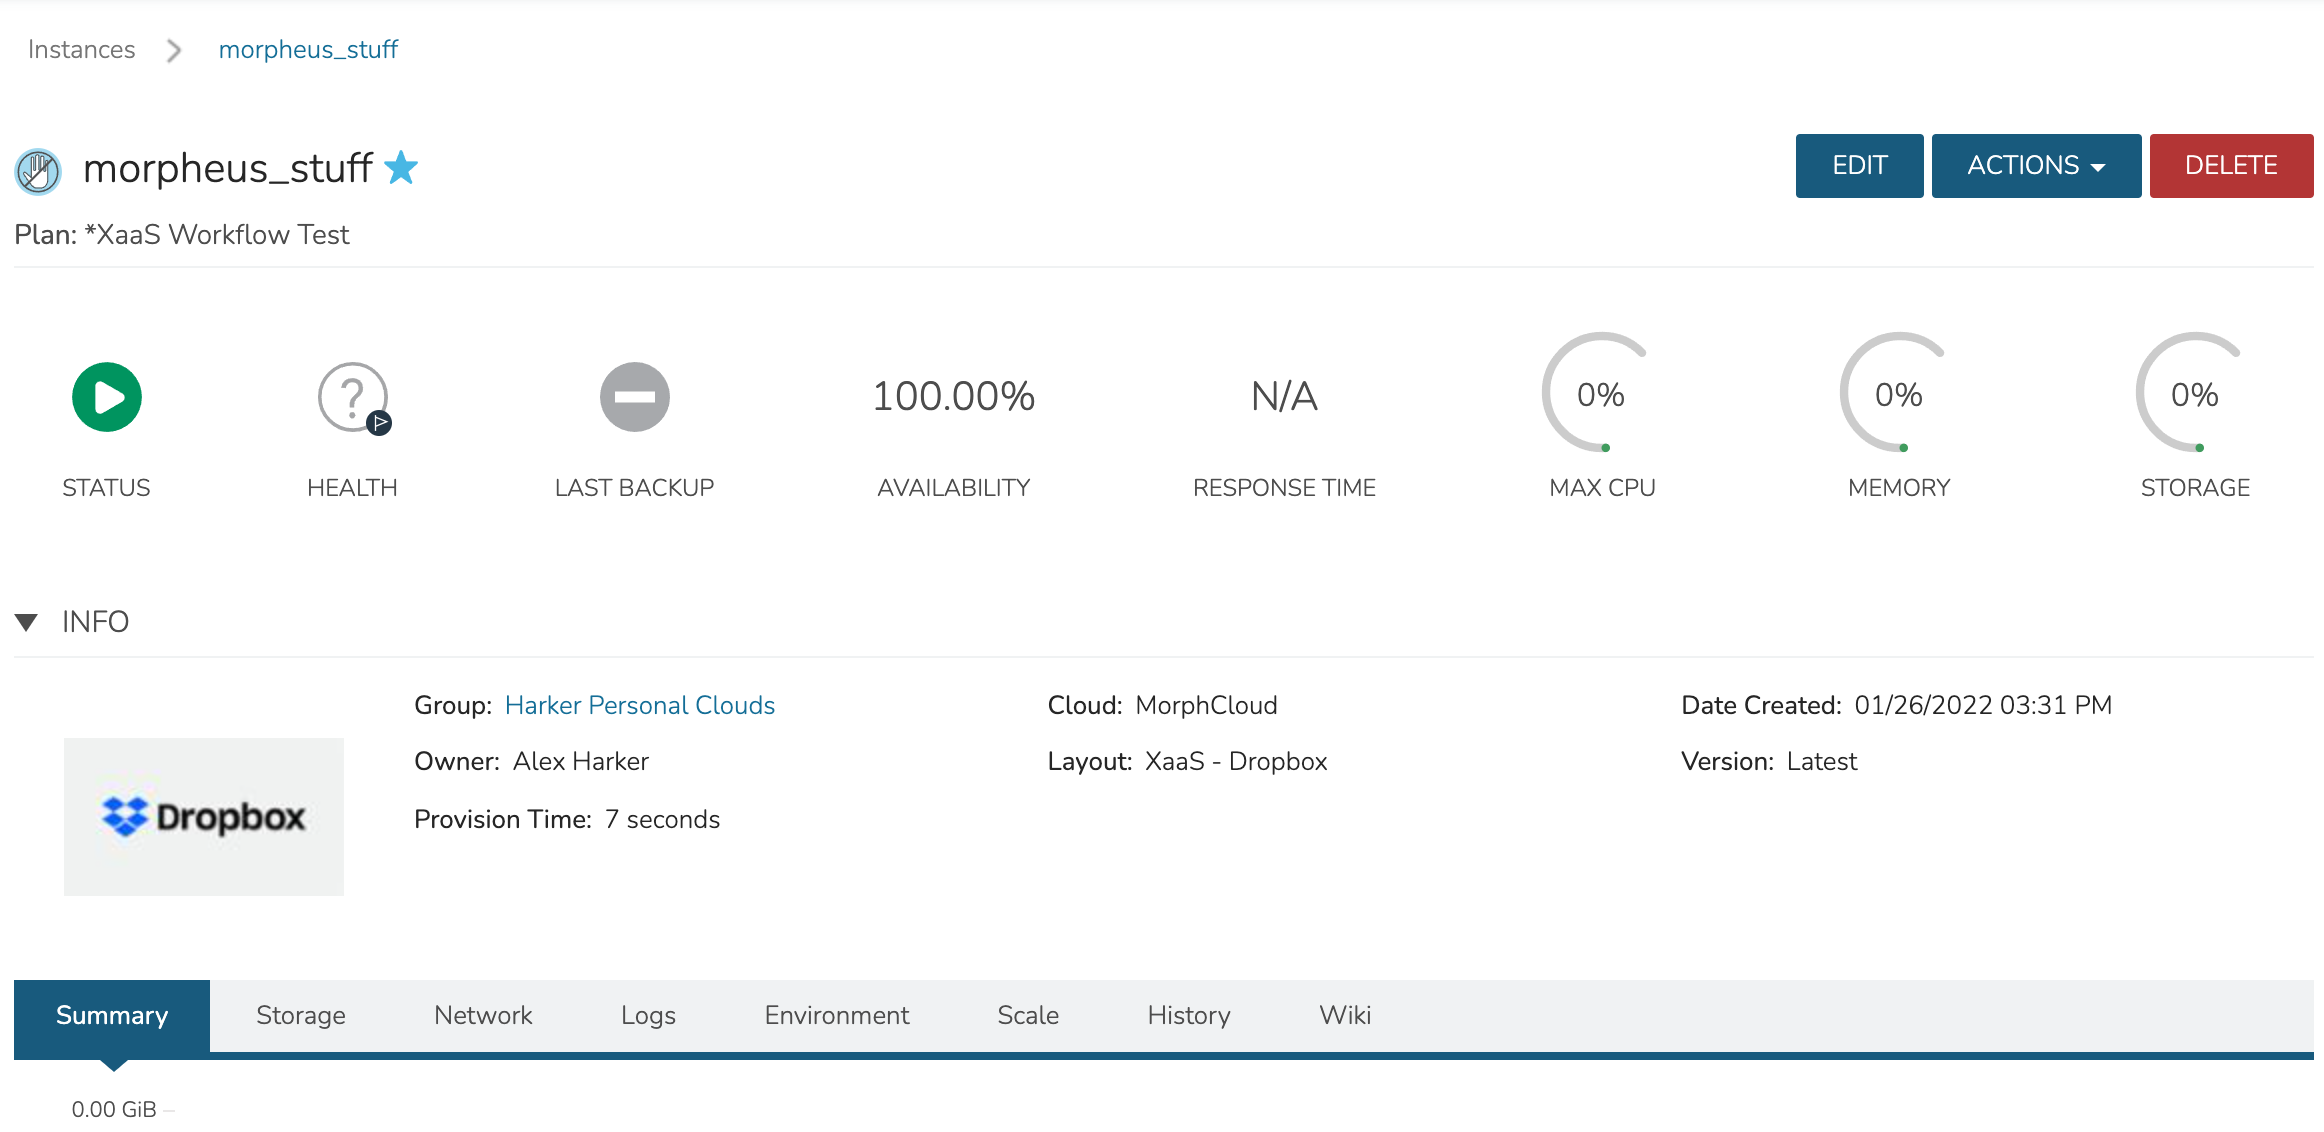
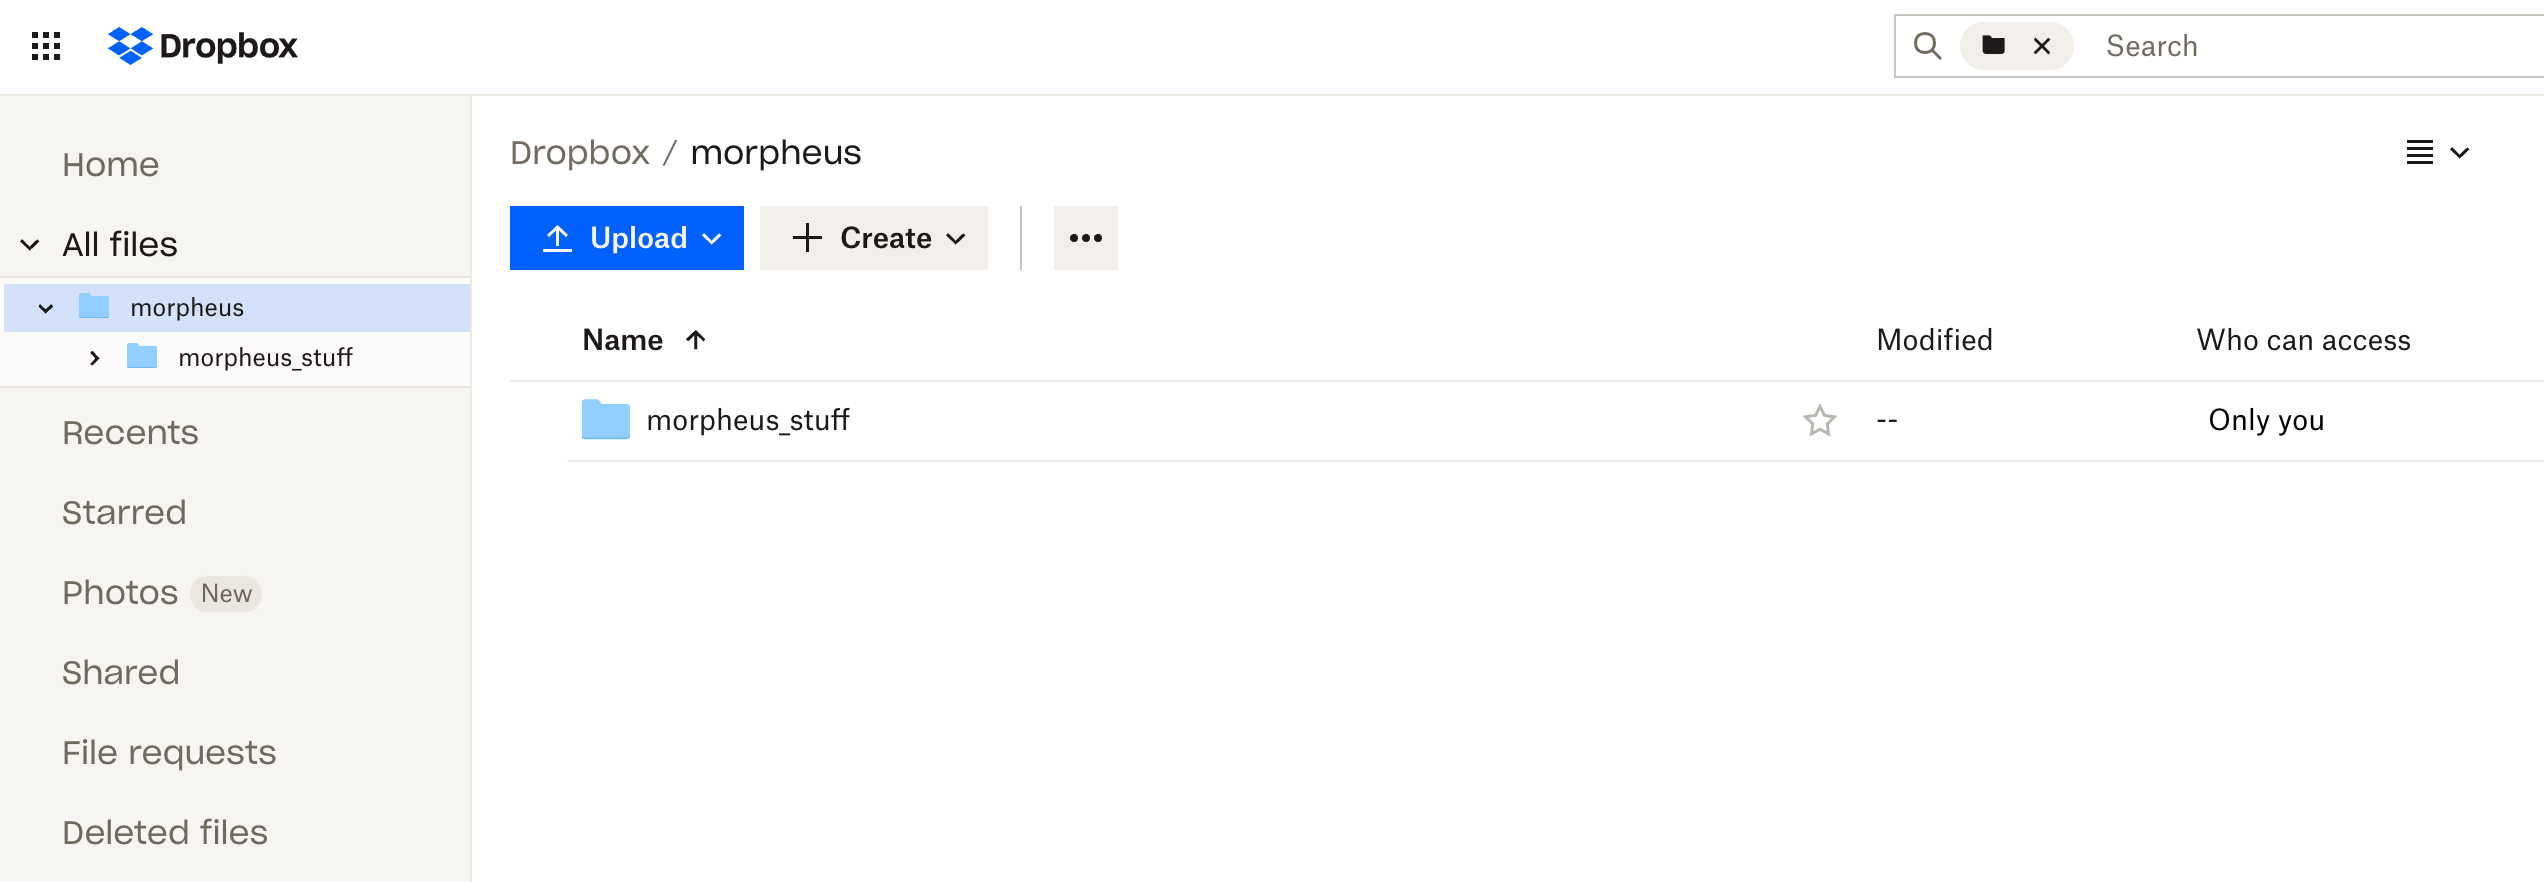
As expected, our Instance name is updated and the folder is renamed on the Dropbox side:
Finally, I’ll delete the Instance. This has the effect of deleting the Instance object out of Morpheus and triggering our Teardown-phase action which deletes the folder from Dropbox: