Getting started with Morpheus and AWS
Introduction
This guide is designed to help you get started and quickly get the most out of Morpheus with AWS. By the end, you will integrate your first cloud, configure networking, prepare and consume images, provision instances, and get started with automation. We will briefly discuss installation and account setup but will provide links to additional resources for those very first steps. For the most part, this guide assumes you are able to get Morpheus installed and are ready to move forward from that point. There is a lot more to see and do in Morpheus that is beyond the scope of this guide. For more, consult the complete Morpheus documentation or take part in our user community forum.
Installation & Setup
In the simplest configuration, Morpheus needs one appliance server which will contain all the components necessary to orchestrate virtual machines and containers. Full requirements, including storage and networking considerations, can be found in Requirements. In order to provision any new instances, hosts, or applications, (or convert any discovered resources to managed resources) you will need a valid license. If you don’t have one, Morpheus will automatically set up a lab license on installation. A lab license is a time-unlimited license for Morpheus that limits you to 25 managed and discovered workloads. If you have a timed trial or a paid license, the license can be applied in Administration > Settings > License.
Groups
Groups in Morpheus define which resources a user has access to. Clouds are added to groups and a user can only access clouds that are in the groups to which their roles give them access. More information on Morpheus groups is available in the Groups section. A deep dive into groups goes beyond the scope of this guide but it’s often useful to create a group that contains all clouds for testing purposes. We will create that group now so that we can add our first cloud into this group in the next section.
Navigate to Infrastructure > Groups. Here we will see a list of all configured groups but, of course, this will be empty immediately after installation. Click “+CREATE”. Give your group a name, such as “All Clouds”. The “CODE” field is used when calling Morpheus through Morpheus API or Morpheus CLI. It’s useful in most cases to have an “All Clouds” group for testing purposes so this will likely help you down the road.
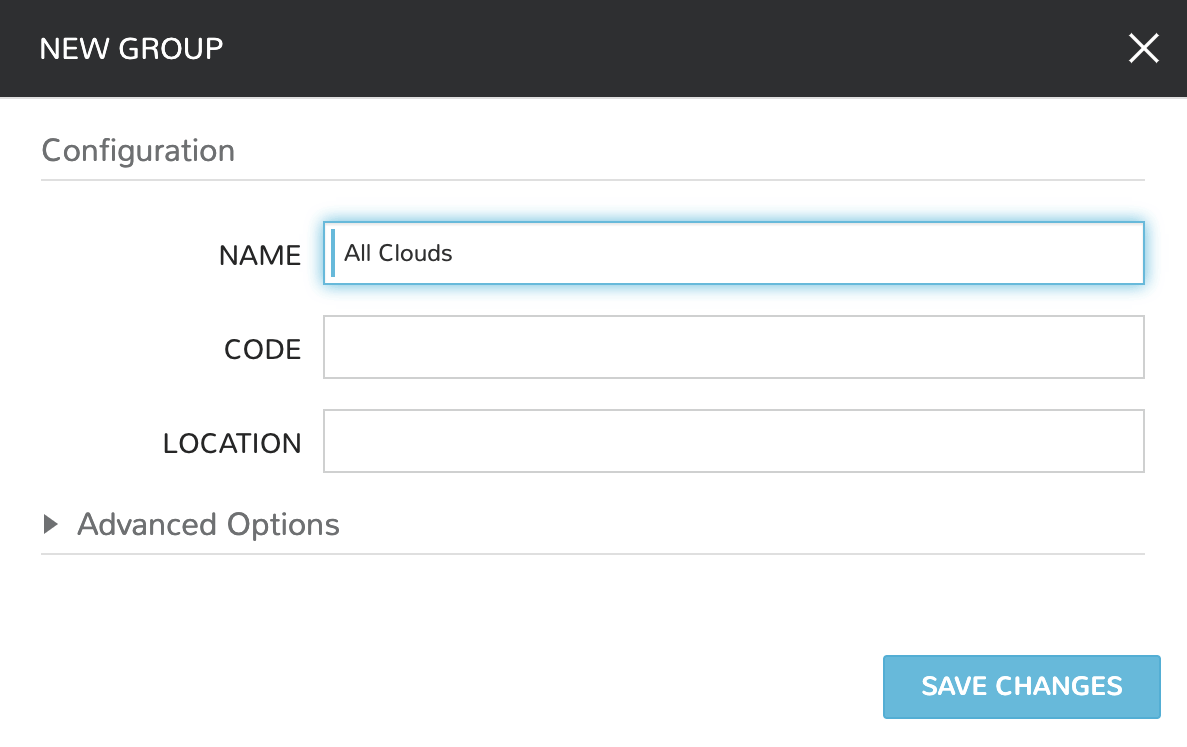
Click “SAVE CHANGES”. Your group is now ready to accept clouds.
Integrating Your First Cloud
Clouds in Morpheus consist of any consumable endpoint whether that be On-Prem, Public clouds, or even bare metal. In this guide, we will focus on integrating and working with AWS.
To get started, we will navigate to Infrastructure > Clouds. This is the cloud detail page which lists all configured clouds. It will be empty if you’ve just completed installation and setup of Morpheus but soon we will see our integrated AWS cloud here.
Click the “+ADD” button to pop the “CREATE CLOUD” wizard. Select “AMAZON” and click the “NEXT” button.
On the “CONFIGURE” tab, give your cloud a “NAME”. Select your Amazon region and enter your credentials in the “ACCESS KEY” and “SECRET KEY” fields. We can also set a number of advanced options here that may be relevant to your AWS use case.
Once you’re satisfied with your selections, click “NEXT”
We have now arrived at the “GROUP” tab. In this case, we will mark the radio button to “USE EXISTING” groups if you wish to use the group we configured earlier.
Once you’ve selected the group, click “NEXT”
On the final tab of the “CREATE CLOUD” wizard, you’ll confirm your selections and click “COMPLETE”. The new cloud is now listed on the cloud detail page. After a short time, Morpheus will provide summary information and statistics on existing virtual machines, networks, and other resources available in the cloud.
Viewing Cloud Inventory
Now that we’ve integrated our first AWS cloud, we can stop for a moment to review what Morpheus gives us from the cloud detail page. We can see that Morpheus gives us estimated costs and cost histories, metrics on used resources, and also lists out resource counts in various categories including container hosts, hypervisors, and virtual machines. We can drill into these categories to see lists of resources in the various categories individual resources within them by clicking on the category tabs. We can link to the detail page for any specific resource by clicking on it from its resource category list.
Configuring Resource Pools
With our AWS cloud configured, Morpheus will automatically sync in available resource pools and data stores.
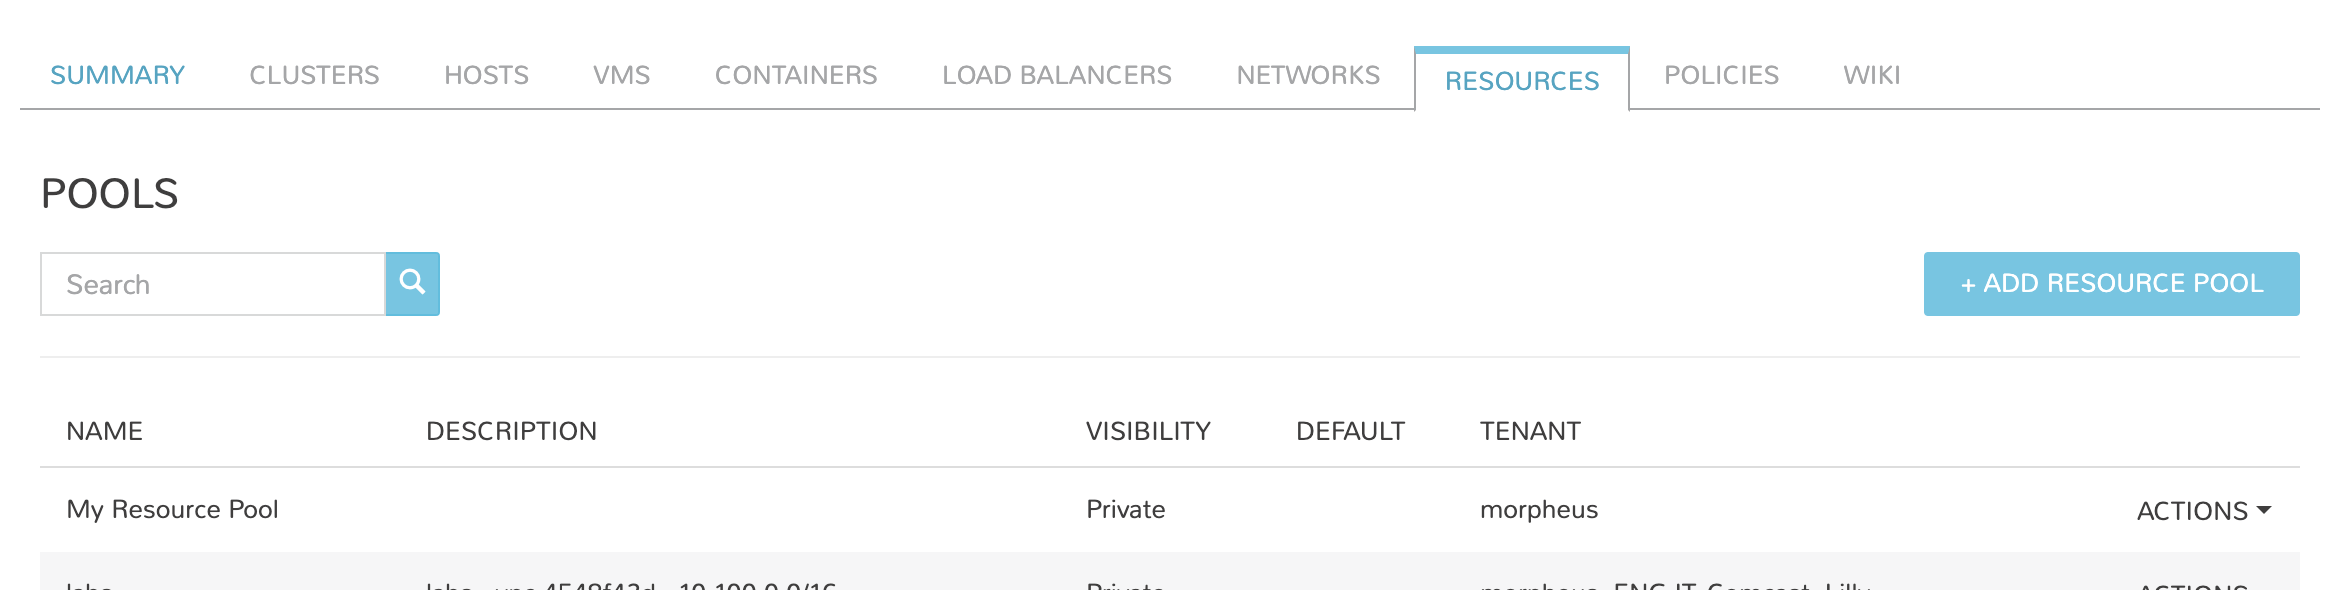
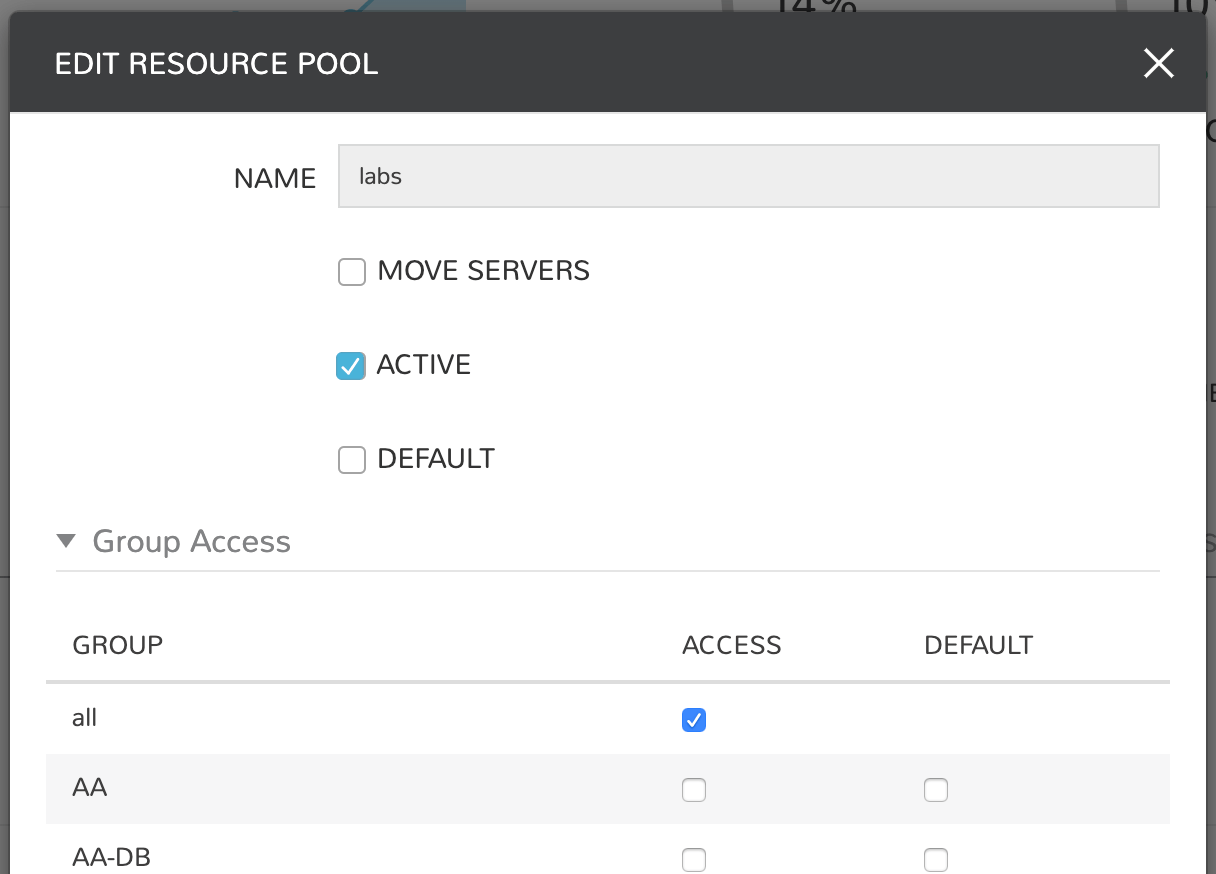
Resource pools, once Morpheus has had time to ingest them, will be visible from the cloud detail page. Navigate to Infrastructure > Clouds > (your AWS cloud) > RESOURCES tab. In here, we are able to see and control access to the various resource pools that have been configured in Amazon. For example, we can restrict access to a specific resource pool within Morpheus completely by clicking on the “ACTIONS” button, then clicking “Edit”. If we unmark the “ACTIVE” button and then click “SAVE CHANGES” we will see that the resource pool is now grayed out in the list. The resources contained in that pool will not be accessible for provisioning within Morpheus.
Often our clients will want to make specific blocks of resources available to certain groups. This can be easily and conveniently controlled through the same “EDIT RESOURCE POOL” dialog box we were just working in. If we expand the “Group Access” drawer, we are able to give or remove access to each pool to any group we’d like. We can also choose to make some or all of our resource pools available to every group. Specific resource pools can also be defined as the default for each group if needed.
Additionally, we may choose to allow only certain service plans to be provisioned into a specific pool of resources. For example, perhaps a specific cluster is my SQL cluster and only specific services plans should be consumable within it. We can control that through this same dialog box.
Configuring Network for Provisioning
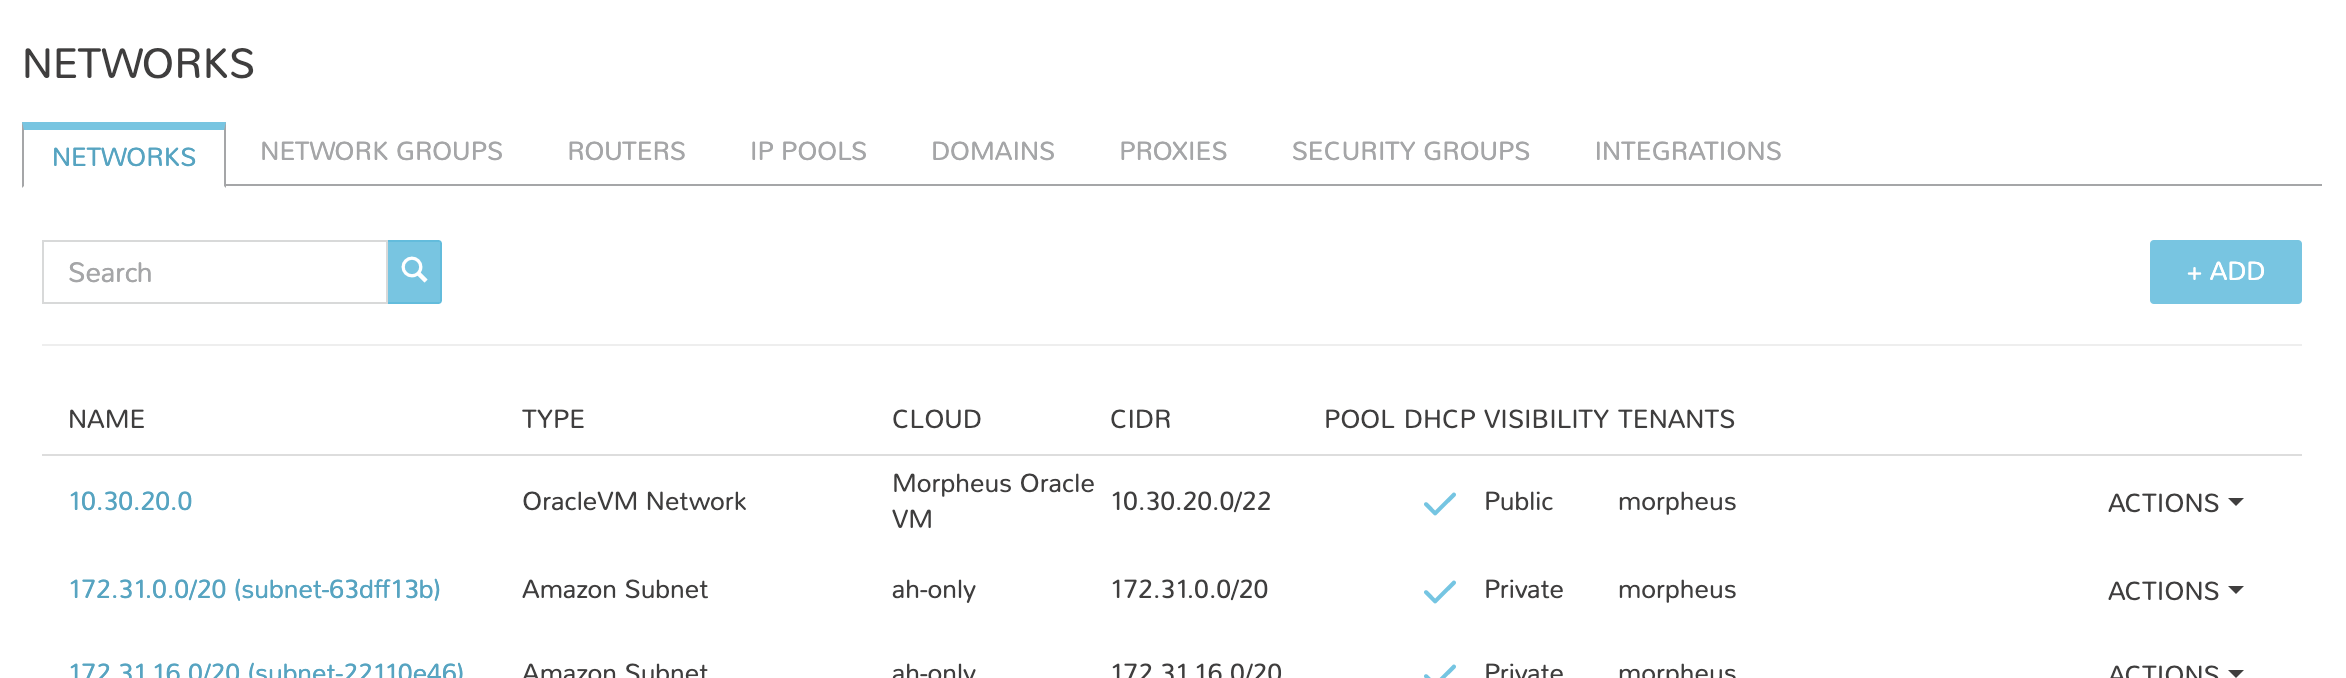
When configuring networking, we can set global defaults by going to Infrastructure > Network > NETWORKS tab. Here we can add or configure networks from all clouds integrated into Morpheus. Depending on the number of clouds Morpheus has ingested, this list may be quite large and may also be paginated across a large number of pages. In such a case, it may be easier to view or configure networks from the specific cloud detail page so that networks from other clouds are not shown.
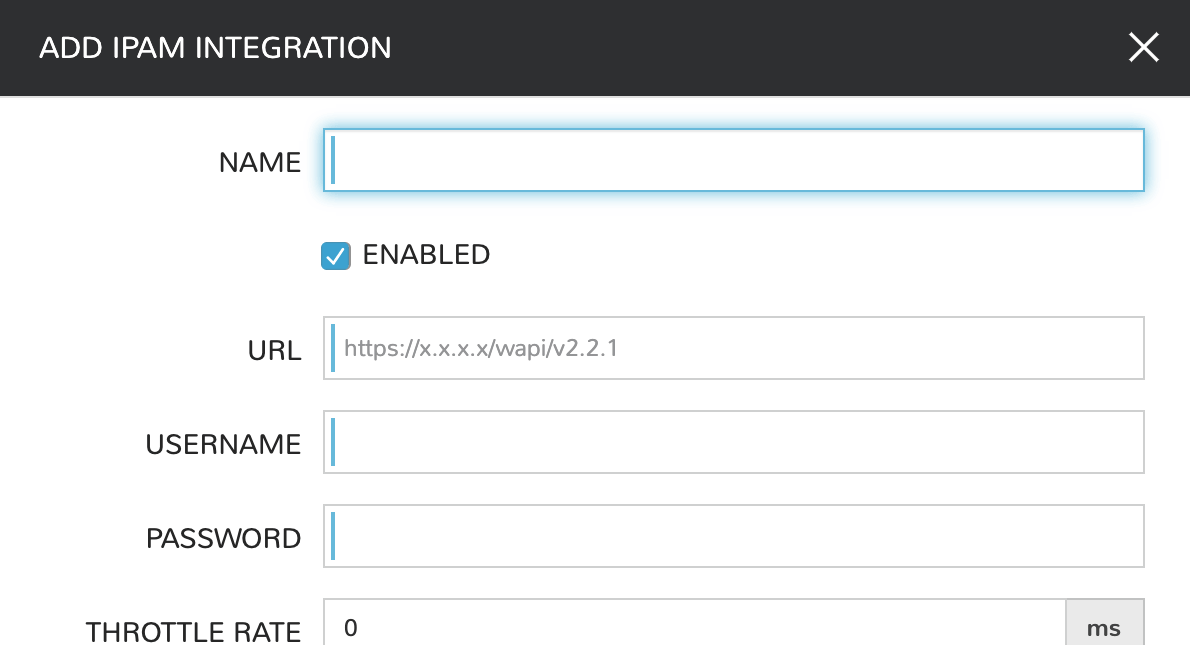
Still in Infrastructure > Network, make note of the “INTEGRATIONS” tab. It’s here that we can set up any integrations that may be relevant, such as IPAM integrations. Generally speaking, when adding IPAM integrations, we simply need to name our new integration, give the API URL, and provide credentials. There’s more information in the Networking Integrations section of Morpheus Docs.
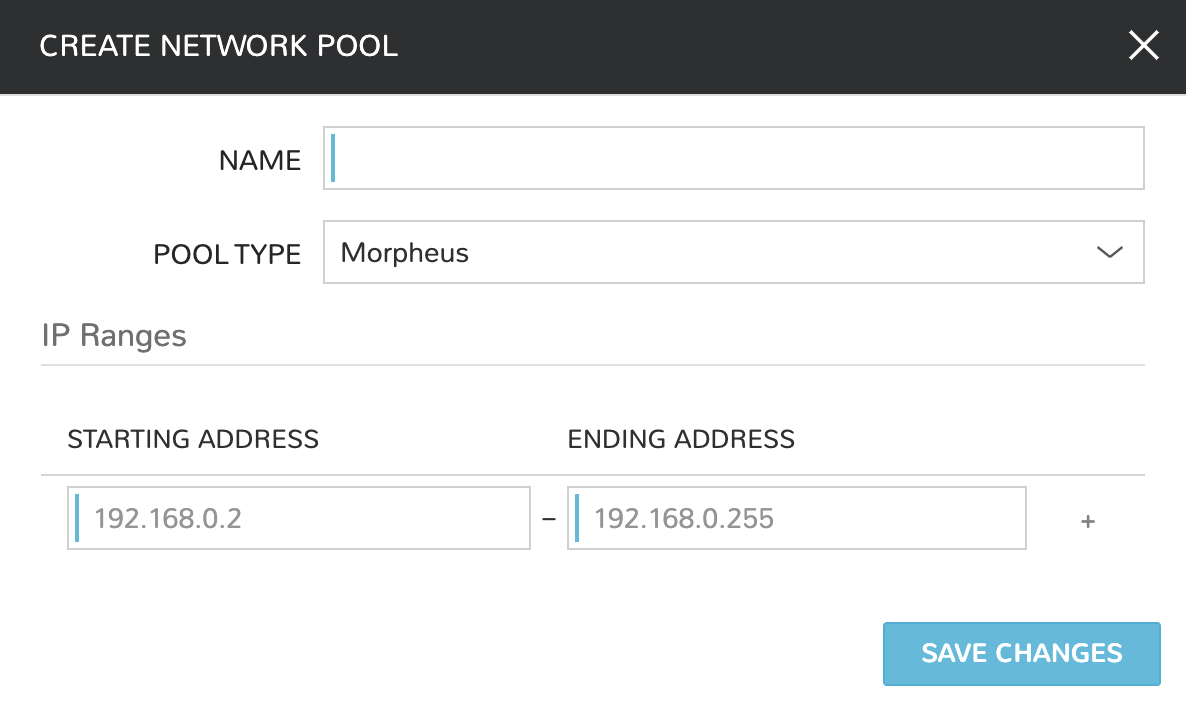
In Infrastructure > Networking we can also set up IP address pools from the IP Pools tab. These pools can be manually defined, known as a Morpheus-type IP pool, or they can come from any IPAM integrations you’ve configured. As instances are provisioned, Morpheus will assign IP addresses from the pool chosen during provisioning. When the instance is later dissolved, Morpheus will automatically release the IP address to be used by another instance when needed. When adding or editing a network, we can opt to scope the network to one of these configured IP address pools. Edit an existing network by clicking the pencil icon on the Networks List Page (Infrastructure > Networks > Networks Tab) and fill in the “Network Pool” field to associate the IP Pool with the network.
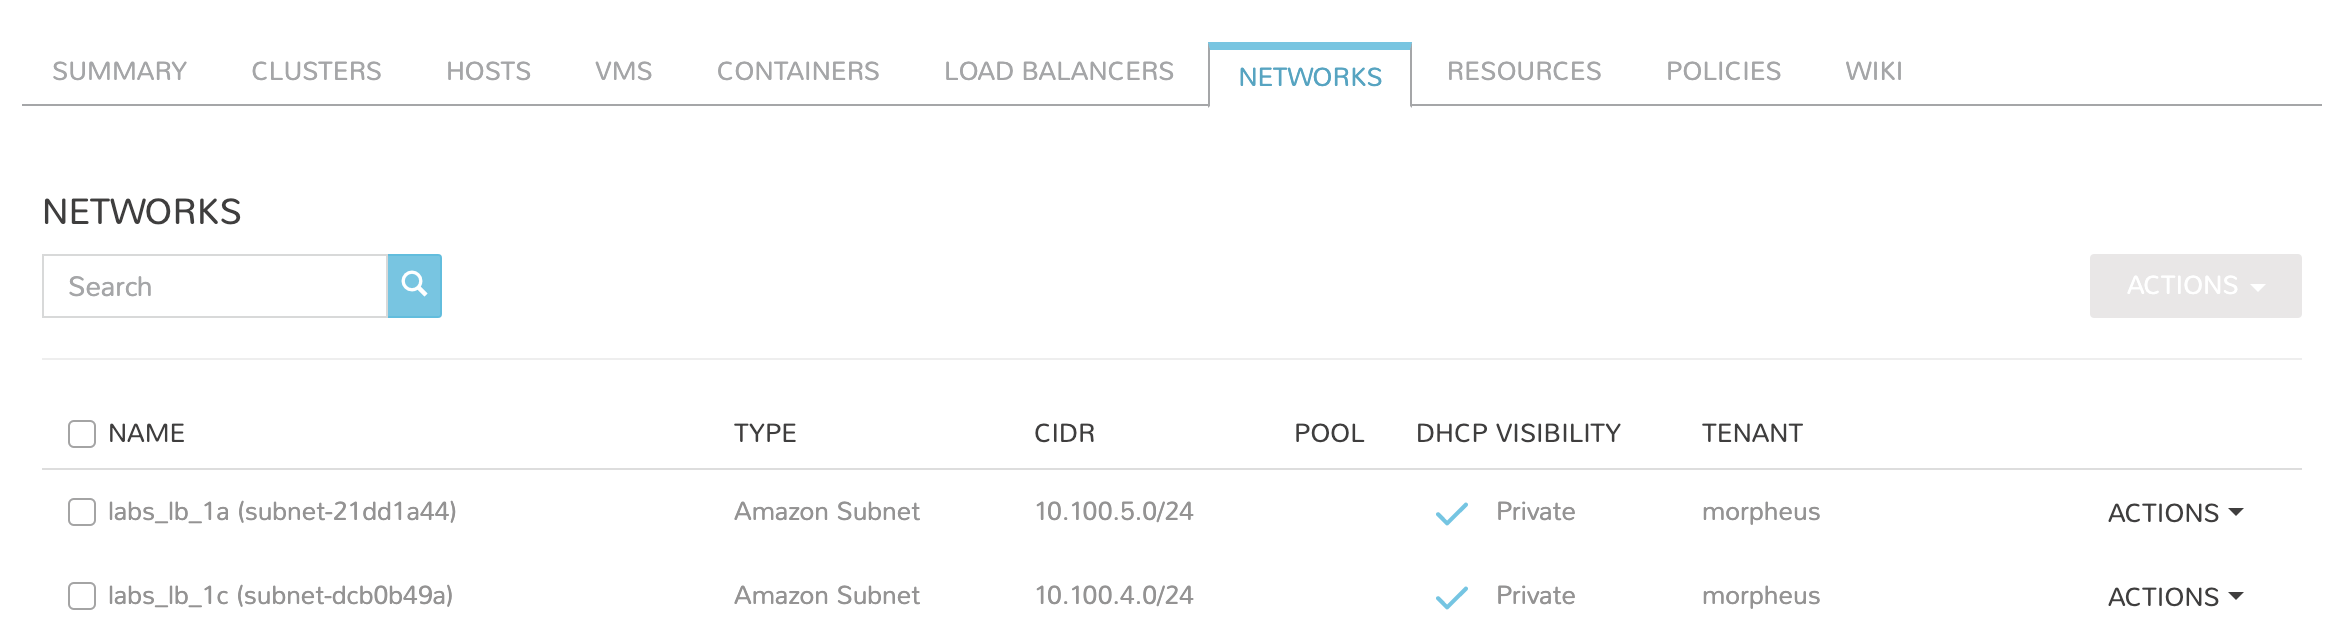
Since this guide is focused on working within the AWS cloud that we integrated at the start, we will take a look at our network configurations on the cloud detail page as well. Navigate to Infrastructure > Clouds > (your AWS cloud) > NETWORKS tab. Just as with resource pools, we have the ability to make certain networks inactive in Morpheus, or scope them to be usable only for certain groups or tenants.
Prepping an Image
As we’ll discuss and try out in the next section, Morpheus comes out of the box with a default set of blueprints that are relevant to many modern deployment scenarios. For the most part, these are base operating system images with a few additional adjustments. However, in many on-premise deployments, there are often custom image and networking requirements. We will work with the images included in Morpheus by default but have guides in Morpheus Docs for Creating a Morpheus VMware Image which are consumable in Morpheus.
Provisioning Your First Instance
At this point, we are ready to provision our first image. As a first instance, we’ll provision an Apache web server to our AWS cloud.
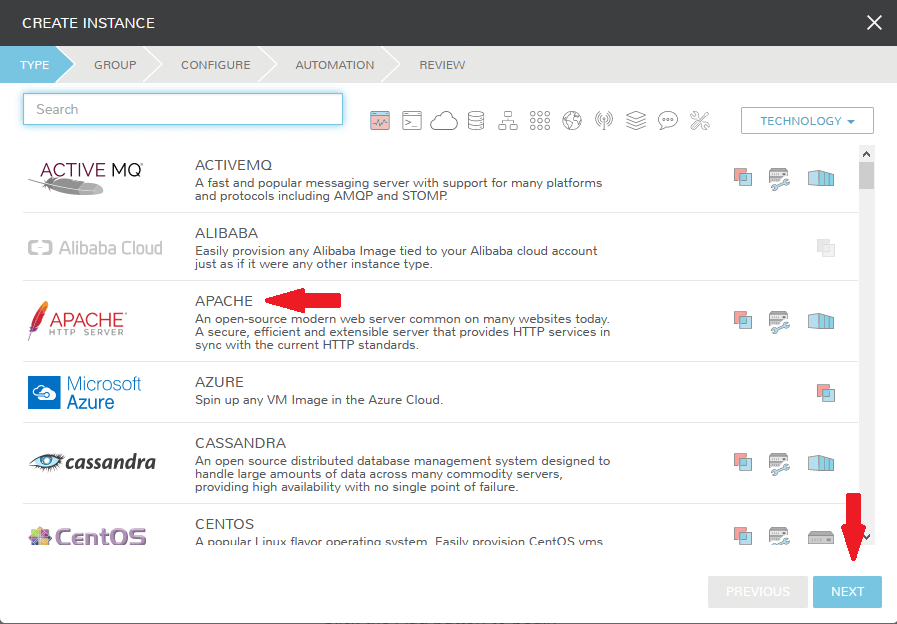
Navigate to |ProIns|. If any instances are currently provisioned, we will see them listed here. To start a new instance we click the “+ADD” button to pop the “CREATE INSTANCE” wizard. We’ll scroll down to and select the Apache instance type and click “NEXT”.
First, we’ll specify the group to provision into which determines the clouds available. If you’ve followed this guide to this point, you should at least have a group that houses all of your clouds which you can select here. This will allow us to select the AWS cloud from the “CLOUD” dropdown menu. Provide a unique name to this instance and then click “NEXT”
From the “CONFIGURE” tab, we’re presented with a number of options. The options are cloud and layout-specific, more generalized information on creating instances and available options is Morpheus Agent. For our purposes, we’ll select the following options:
LAYOUT: Includes options such as the base OS, custom layouts will also be here when available
PLAN: Select the resource plan for your instance. Some plans have minimum resource limits, Morpheus will only show plans at or above these limits. User-defined plans can also be created in |AdmPla|.
VOLUMES: The minimum disk space is set by the plan, this value may be locked if you’ve selected a custom plan that defines the volume size
NETWORKS: Select a network, note that IP pools must be linked with the networks defined in VMware in order to assign static IP addresses
SECURITY GROUPS
Under the “User Config” drawer, mark the box to “CREATE YOUR USER”. Click NEXT.
Note
“CREATE YOUR USER” will seed a user account into the VM with credentials set in your Morpheus user account settings. If you’ve not yet defined these credentials, you can do so by clicking on your username in the upper-right corner of the application window and selecting “USER SETTINGS”.
For now, we’ll simply click “NEXT” to move through the “AUTOMATION” tab but feel free to stop and take a look at the available selections here. There is more information later in this guide on automation and even more beyond that in the rest of Morpheus docs.
Review the settings for your first instance and click COMPLETE.
We are now dropped back onto the instances list page. We can see a new entry in the list at this point with a status indicator that the new machine is being launched (rocket icon in the status field). We can double click on the instance in the list to move to the instance detail page. For now we will see a progress bar indicating that the instance is being created and is starting up. The exact amount of time this process will take depends selections made when provisioning the instance. For more detailed information on the status of various provisioning processes, we can scroll down and select the “HISTORY” tab. The “STATUS” icon will change from the blue rocket to a green play button when the instance is fully ready. Furthermore, we can click on the hyperlinked IP address in the “VMS” section of this page to view a default page in a web browser to confirm success.
Creating Your First Library Item
In the prior section, we manually provisioned our first instance. However, Morpheus allows you to build a catalog of custom provisionable items to simplify and speed provisioning in the future. In this section, we’ll build a catalog item and show how that can translate into quick instance provisioning after configuration.
Note
Before starting this process, it’s important to decide which virtual image you plan to use. If you’re not using a Morpheus-provided image, you’ll want to ensure it’s uploaded. You will not be able to complete this section without selecting an available image. In this example we will use Morpheus Redis 3.0 on Ubuntu 14.04.3 v2.
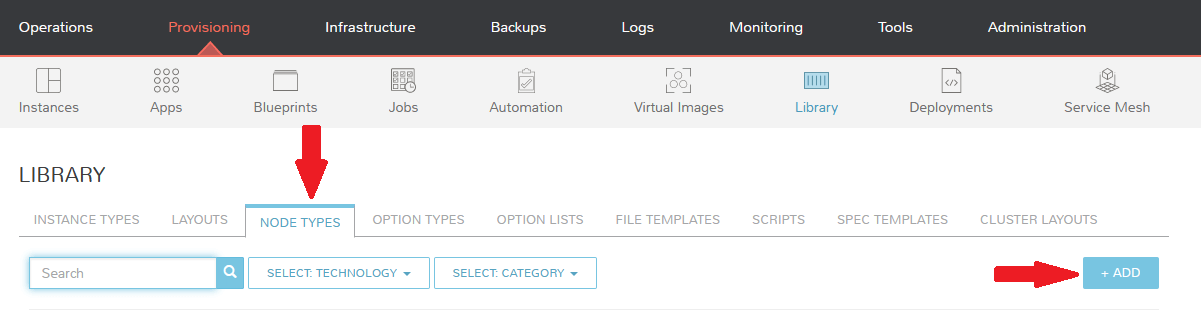
Navigate to Library > Blueprints > Node Types and click +ADD.
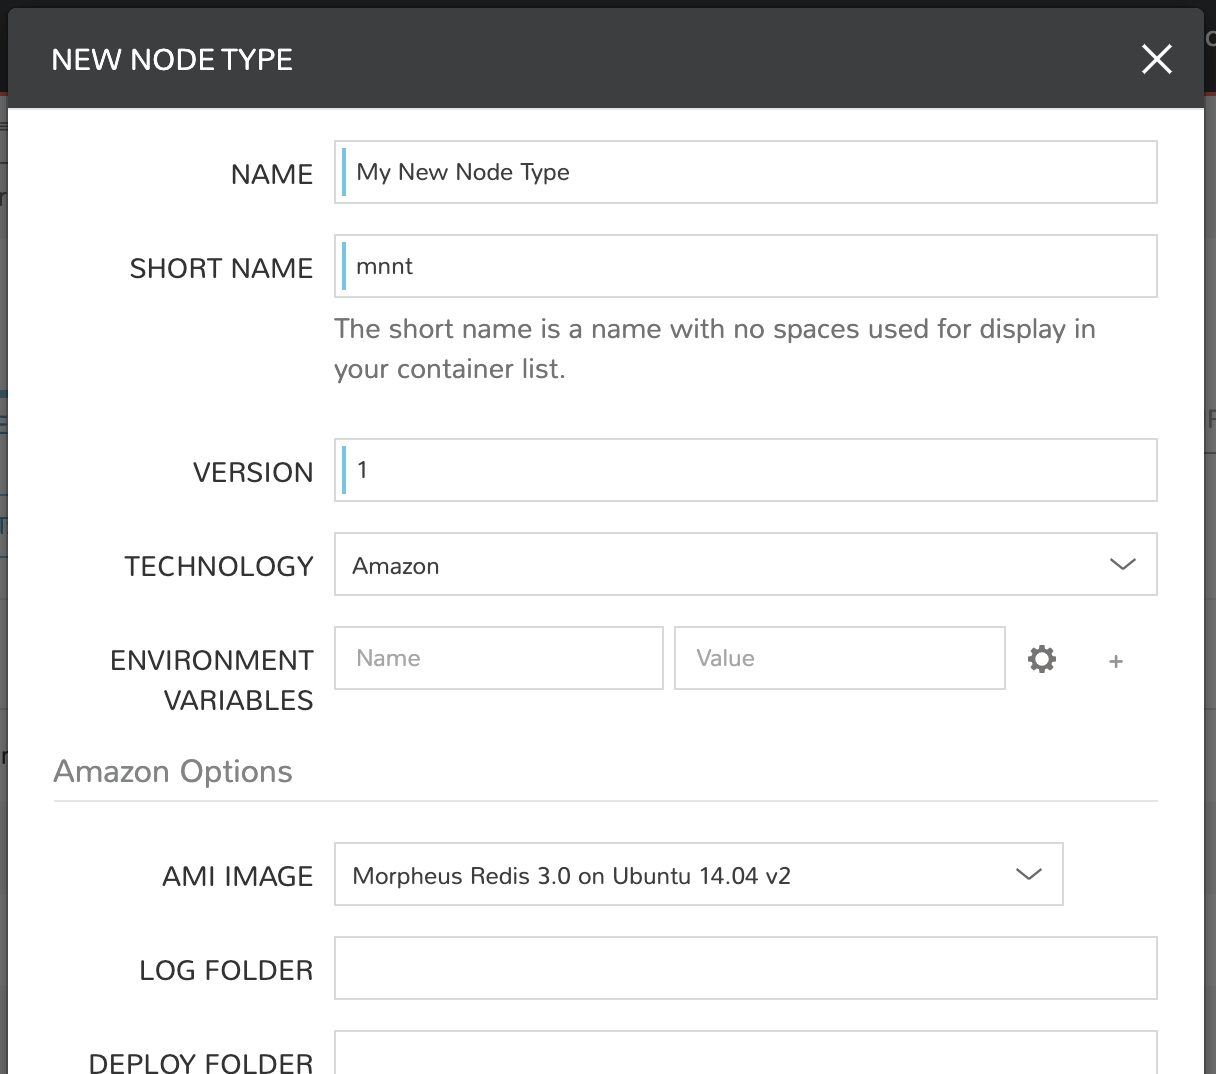
In this example, I am going to set the following options in the “NEW NODE TYPE” wizard:
NAME
SHORT NAME
VERSION: 1 (In this particular case, the version is not important)
TECHNOLOGY: Amazon
AMI IMAGE: Morpheus Redis 3.0 on Ubuntu 14.04.3 v2
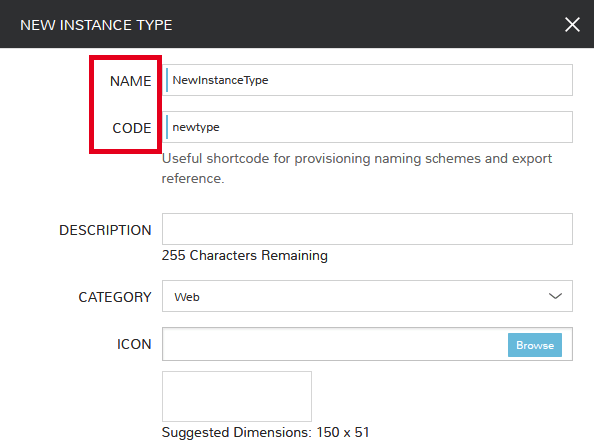
With the new node created, we’ll now add a new instance type which will be accessable from the provisioning wizard once created. Move from the “NODE TYPES” tab to the “INSTANCE TYPES” tab and click “+ADD”.

In the “NEW INSTANCE TYPE” wizard, I’ll simply enter a NAME and CODE value. Click “SAVE CHANGES”.
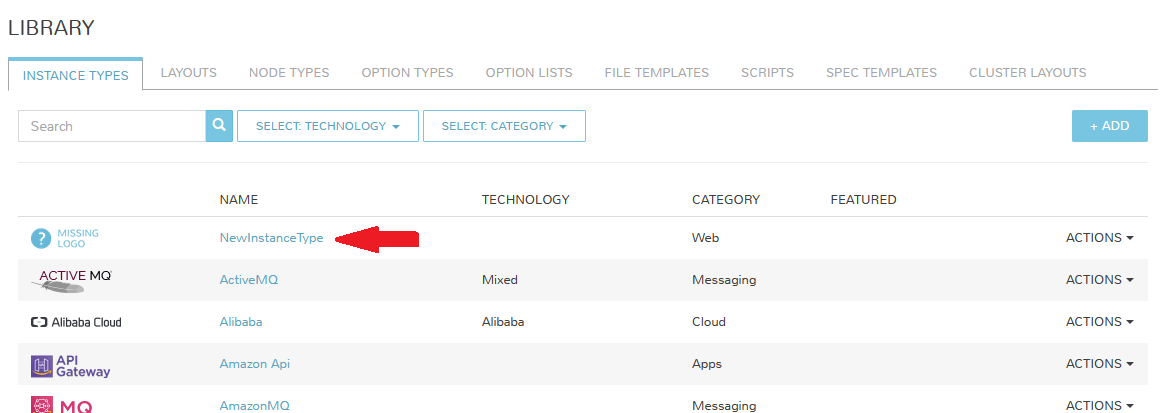
Now that we’ve created a new instance type, access it by clicking on the name in the list of custom instances you’ve created. In my case, I’ve given the name “NewInstanceType”.
Once we’ve opened the new instance type, by default, we should be on the “LAYOUTS” tab. Click “+ADD LAYOUT”.
I’ve set the following fields on my example layout:
NAME
VERSION: This is the version number of the layout itself, which is labeled 1.0 in the example
TECHNOLOGY: Amazon
Nodes: Select the node we created earlier, if desired you can specify multiple nodes
Click “SAVE CHANGES”.
At this point we’ve completed the setup work and can now provision the instance we’ve created to our specifications. Navigate to |ProIns| and click “+ADD”. From the search bar we can search for the new instance type we’ve created. In the example case, we called it “newinstancetype”. Click “NEXT”.
As before, we can select a group and cloud to provision this new instance. Click “NEXT”. On the “CONFIGURE” tab, make note that the layout and plan are already selected because they were configured as part of creating the new instance type. Select a network and click “NEXT”. Once again we will also click “NEXT” through the “AUTOMATION” tab. Finally, click “COMPLETE”.
As before when we manually provisioned an instance, Morpheus will now begin to spin up the new VM. Once the privisioning process has completed, open the instance detail page in Morpheus and click on the “CONSOLE” tab. You’ll be logged in with your user account and are then able to confirm the machine is ready and available.
Automation and Configuration Management
Morpheus automation is composed of Tasks and Workflows. A task could be a script added directly, scripts or blueprints pulled from the Morpheus Library, playbooks, recipes, or a number of other things. The complete list of task types can be found in Automation. Tasks can be executed individually but they are often combined into workflows. We can opt to run a workflow at provision time or they can be executed on existing instances through the Actions menu.
In this guide we will set up an Ansible integration, create a task, add the task to a workflow, and run the workflow against a new and existing instance. If you’ve worked through this guide to this point, you should already have an Apache instance running. If you don’t yet have that, provision one before continuing with this guide and ensure it’s reachable on port 80.
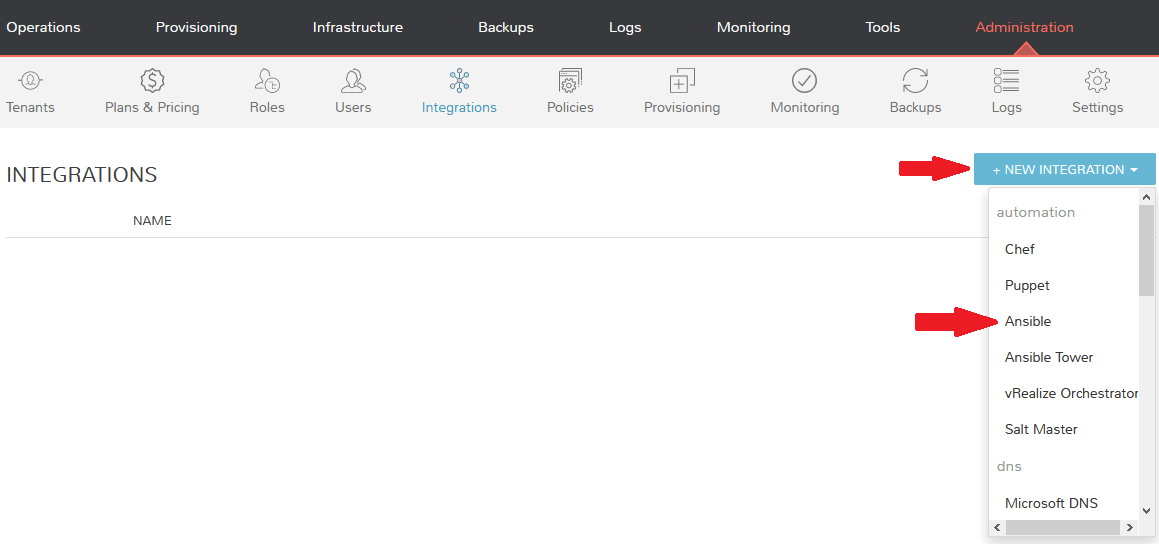
We’ll first set up the Ansible integration, you can integrate with the sample repository referenced here or integrate with your own. Go to ‘Administration > Integrations’. Click “+ NEW INTEGRATION” and select Ansible from the dropdown menu. Fill in the following details:
NAME
ANSIBLE GIT URL: https://github.com/ncelebic/morpheus-ansible-example, or enter the URL for your own Ansible git repository
PLAYBOOKS PATH
ROLES PATH
Mark the box to “USE MORPHEUS AGENT COMMAND BUS”
Note
If your git repository requires authentication, you should create a keypair and use the following URL format: git@github.com:ncelebic/morpheus-ansible-example.git.
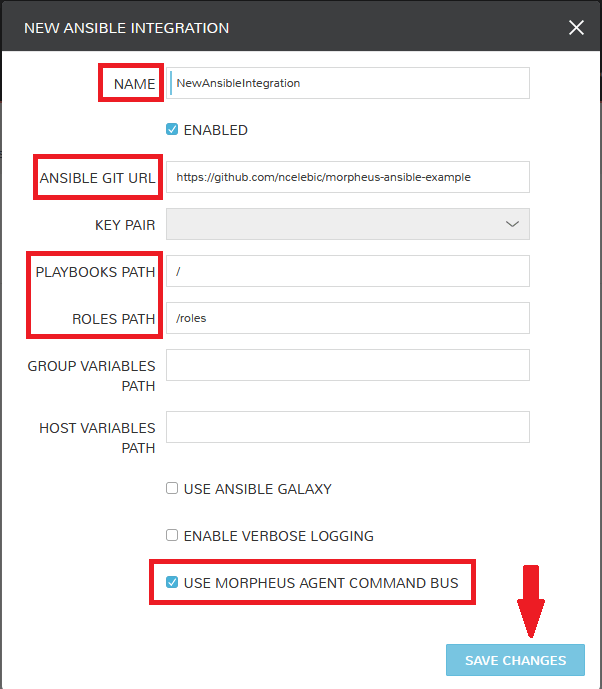
Click “SAVE CHANGES”. You’ll now see our new Ansible integration listed among any other configured inetegrations. If we click on this new integration to view detail, a green checkmark icon indicates the git repository has been fully synced.
With the Ansible integration set up, we can now create a task that includes our playbook. Go to |LibAut|, click “+ADD”. We’ll first set our “TYPE” value to Ansible Playbook so that the correct set of fields appear in the “NEW TASK” wizard. Set the following options:
NAME
ANSIBLE REPO: Here we will choose the Ansible integration that we just created
PLAYBOOK: In our example case, enter ‘playbook.yml’
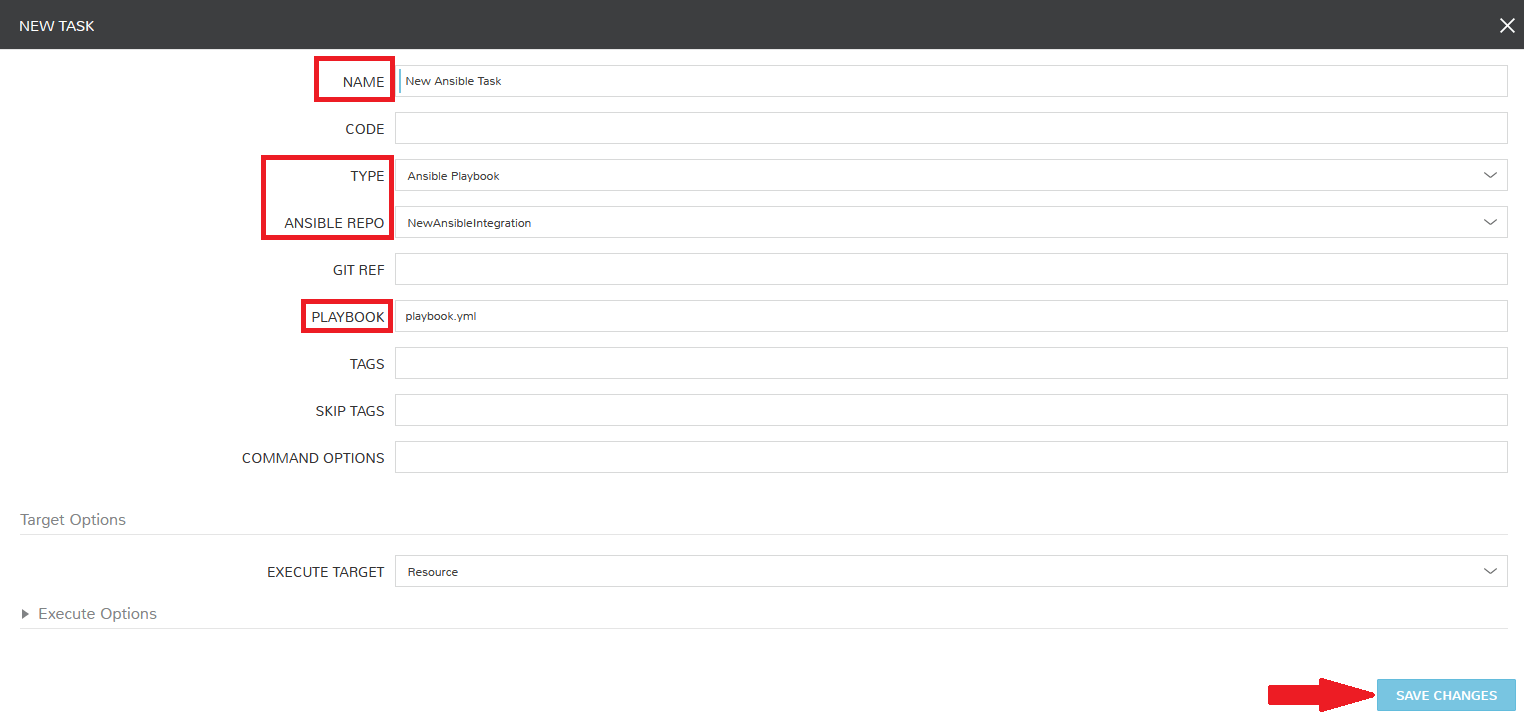
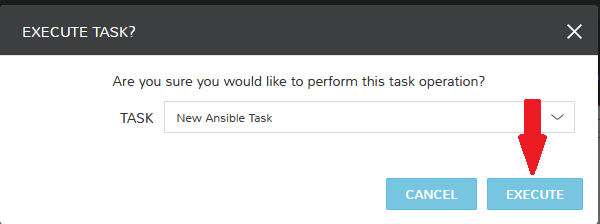
Click “SAVE CHANGES” to save our new task. We can test the new task on our Apache VM now by going to |ProIns| and clicking into our VM. From the “ACTIONS” menu select “Run Task”. From the “TASK” dropdown menu, select the task we just added and click “EXECUTE”.
To see the progress of the task, click on the “HISTORY” tab and click on the (i) button to the right of each entry in the list. In this case, we can also see the results of the task by clicking on the link in the “LOCATION” column of the “VMS” section.
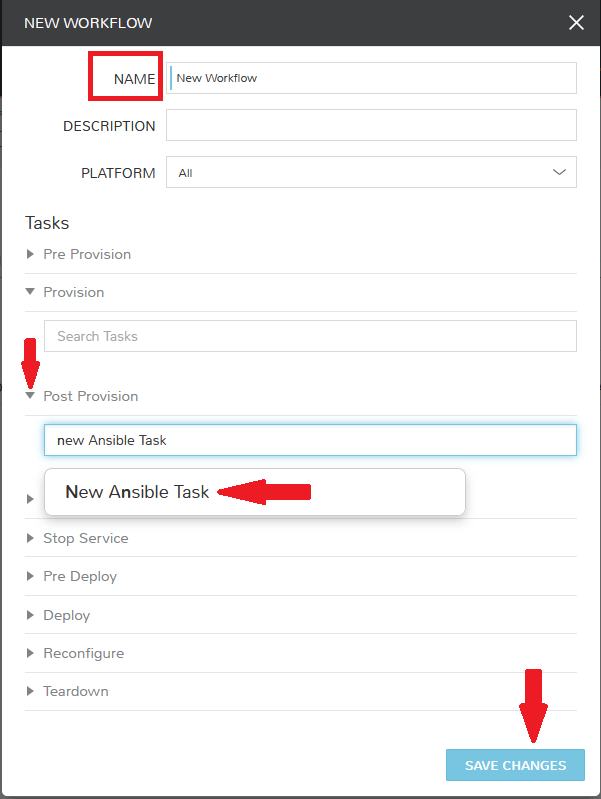
Now that our task is created, we can put it into a workflow. Back in |LibAut| we will click on the “WORKFLOWS” tab. Click “+ADD” and select Provisioning Workflow. We’ll give the new workflow a name and expand the Post Provision section. As we begin to type in the name of the task we’ve created, it should appear as a selection. Click “SAVE CHANGES”.
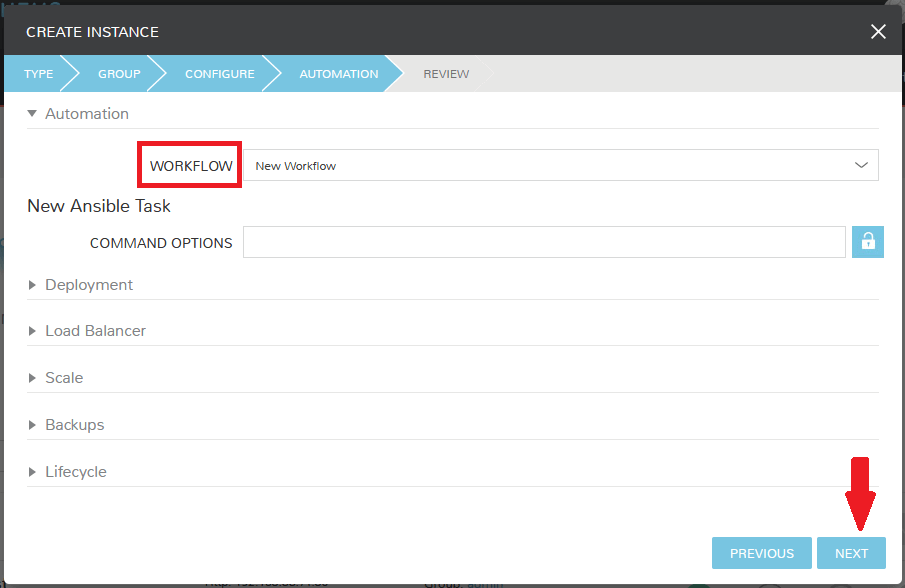
Now that we have a workflow, return to |ProIns| and begin to provision another Apache instance. More detailed instructions on provisioning a new Apache instance are included earlier in this guide if needed. Now, when you reach the “AUTOMATION” section of the “CREATE INSTANCE” wizard, we have a workflow to select. From the “WORKFLOW” dropdown menu, select the workflow we just created and complete provisioning of the new instance.
As the instance is provisioning, we can go to the “HISTORY” tab and see Morpheus executing the tasks that were contained in our workflow.
This is just one example of using Morpheus to automate the process of configuring and instance to your needs. There are a number of other automation types that can be built into your workflows as well. For further information, take a look at the Automation Integrations guide in Morpheus docs.
Conclusion
At this point you should be up and running in Morpheus, ready to consume AWS. This guide only scratches the surface, there is a lot more to see and do in Morpheus. Take a look at the rest of Morpheus Docs for more information on supported integrations and other things possible.